

| Basic | Advanced |
Firewall and Network Port Requirement
Configure the CommServe Cache Directory
Verify Installation on Clients
Agents and package distribution can now be installed - both scheduled and on-demand - from the CommCell Console. With the CommCell Console-based install capability, software can now be quickly and efficiently rolled out in large data centers and distributed WAN environments.
Computers inside a domain, outside a domain or in multiple domains that are not yet part of the CommCell, can be selected for installation.
To see which agents are supported for Install Software from the CommCell Console, see Installation - Support.
Note that following agents are supported along with the list of agents listed in the Installation - Support.
When you try to install software from the CommCell Console on 64-bit UNIX clients, only 32-bit binaries will be installed.
The total amount of space can be estimated by adding the size of each of the Software Installation Discs and the latest Service Pack that you plan to host.
Prior to installing software from CommCell Console, make sure to configure your Calypso firewall environment. For information on all available firewall scenarios, see Firewall.
To install software from CommCell Console, the following ports need to be opened:
When Calypso proxy is in use, you can use Save As Script (.xml) file generated during the push install to configure firewall settings while performing remote installation on a new client. For more information, see Install Software on Client Using Save As Script.
In addition, if you have Solaris 11 client computers, make sure to do the following:
svcadm disable ssh
Ciphers 3des-cbc
If you already have other ciphers declared, add 3des-cbc at the end of the list after a comma (',').svcadm enable ssh
If you are using legacy Windows computers (Windows NT and below), you may also need to open port 139.
If you chose not to open port 22, 445, 135, 139 and WMI port on your network, you can setup and use a remote cache that is located in the same network in which the client computer resides. Port 8400 must be opened temporarily in order to allow the client computer to communicate with the CommServe and download Calypso firewall configuration.
For the CommCell, if Authentication for Agent Installs is enabled, users must belong to a user group with Installation capabilities for the CommCell. The users can also belong to a user group with Administrative Management capabilities for the CommCell or an existing client computer. However, it is not recommended to add non-administrators to this user group.
Install from CommCell Console is configured in the following sequences:
The following sections provide step-by-step instructions for configuring Install from CommCell Console.
| 1. | Verify that you have adequate space in the CommServe cache directory for the latest service pack. | |
| 2. | From the CommCell Browser, click Control Panel and then click the Add/Remove Software Configuration. |
|
| 3. | Select the CommServe Software Cache tab and select Use Local Drive to specify the local drive to use as a cache directory to store software packages in the Cache Directory field. |
|
| 4. | Click OK. | |
| 1. | Verify that you have adequate space for the packages. | |
| 2. | From the CommCell Browser, right-click on the CommServe computer node, and click All Tasks -> Add/Remove Software -> Download Software. |
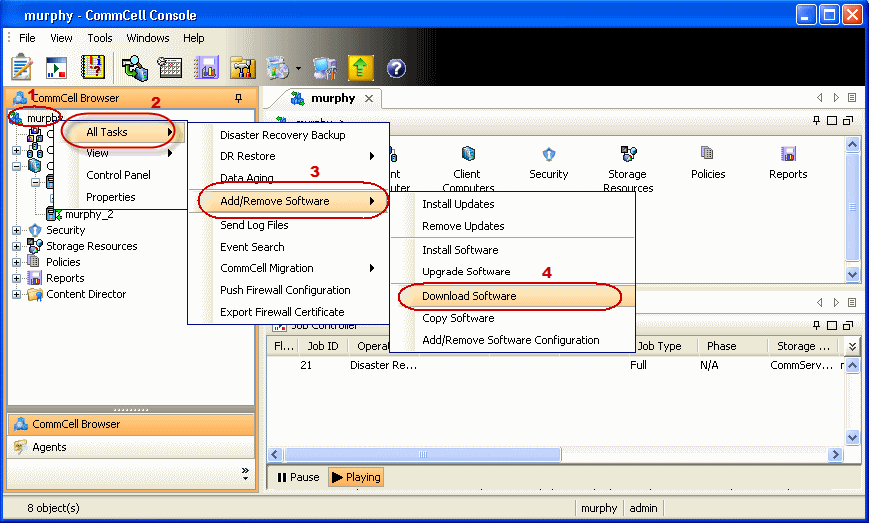 |
| 3. |
|
 |
| 4. |
|
 |
| 5. | Once initiated, you can track the progress of the job from the Job Controller window. |
 |
Use the following steps to install software on Windows Clients:
| 1. | Verify that your client computer cache directories have adequate space for the software packages. | |||
| 2. | From the CommCell Browser, click Tools, point to Add/Remove Software and then click Install Software. |
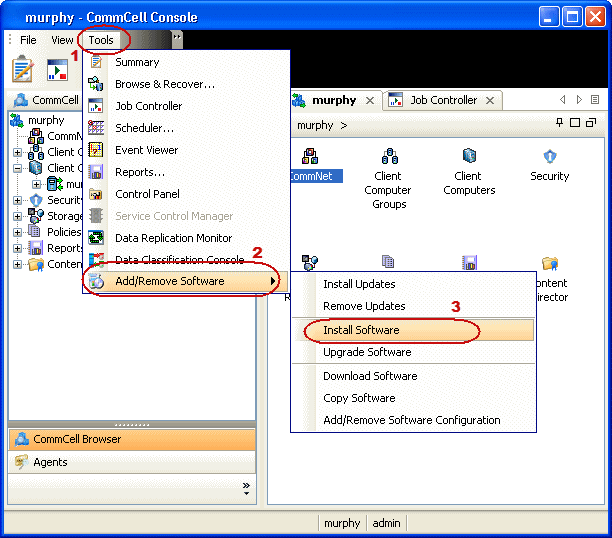 |
||
| 3. | Install Wizard Welcome screen is launched. Click Next. |
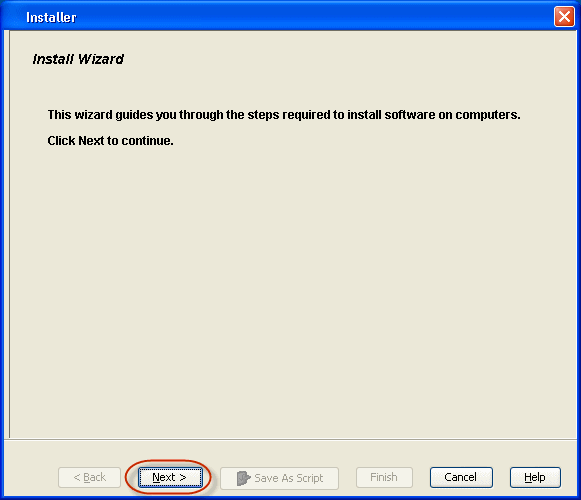 |
||
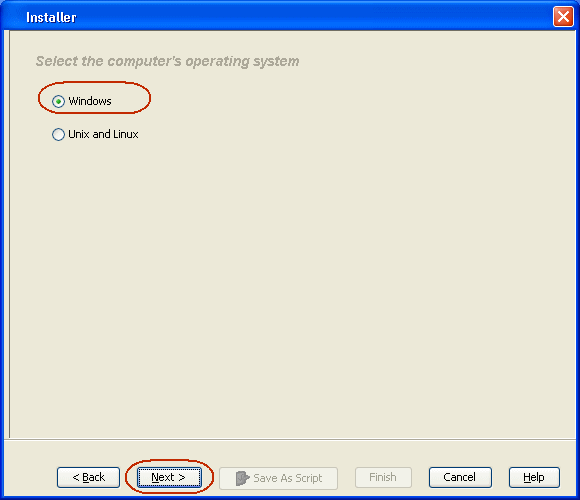
| 4. | Select Windows and then click Next. |
 |
||
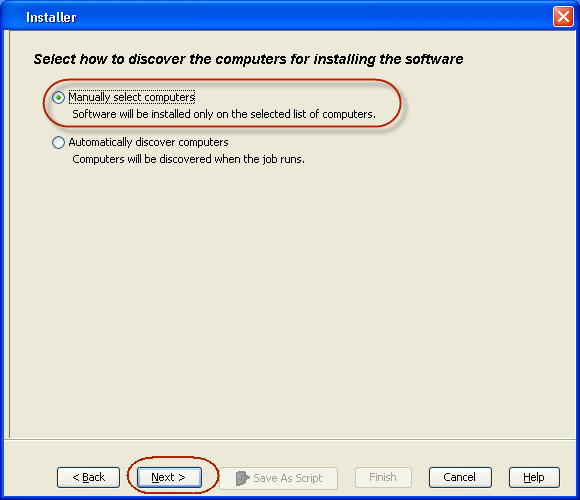
| 5. | Select Manually Select Computers and then click Next. |
 |
||
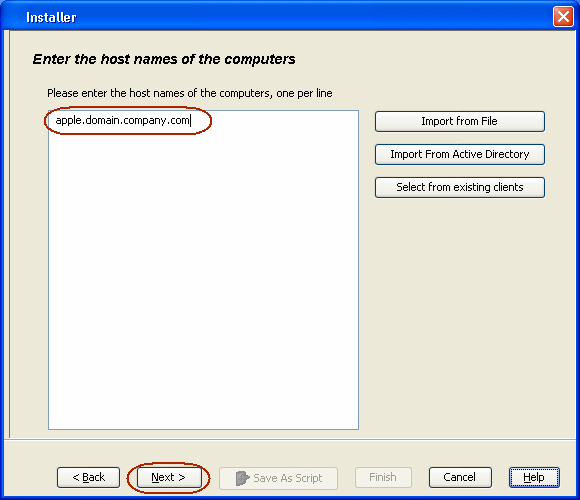
| 6. | Type the host names of the computers in the window pane
manually to which you want to install the software. Computer names must
be entered in the following format:
<computer.domain.company.com> Click Next. |
 |
||
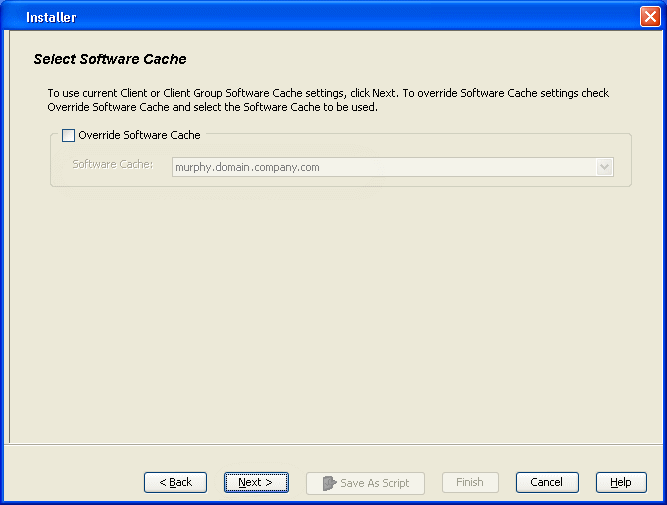
| 7. | In the Select Software Cache dialog box, Software
Cache field displays the default software cache directory in which the
software packages are downloaded. This Software Cache is the cache directory from which the software packages will be obtained for the client computers selected for install. If you wish to use the default, then do not select any options, and click Next. |
 |
||
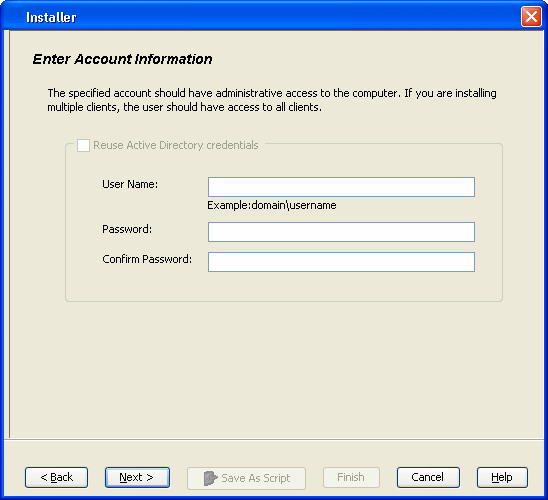
| 8. | In the User Name and Password box, specify
the user account information and then click Next.
Click Next. |
 |
||
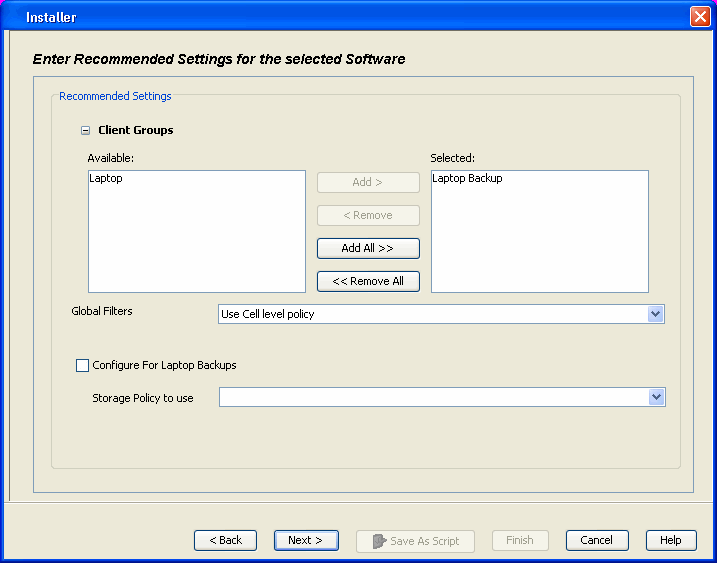
| 9. | Select the software Package(s) to Install on the selected
computers and then click Next.
|
 |
||
| 10. |
|
 |
||
| 11. | Select and configure the Additional Install Options associated with the software packages that will be installed or leave the Additional Install Options at their default values and click Next. |
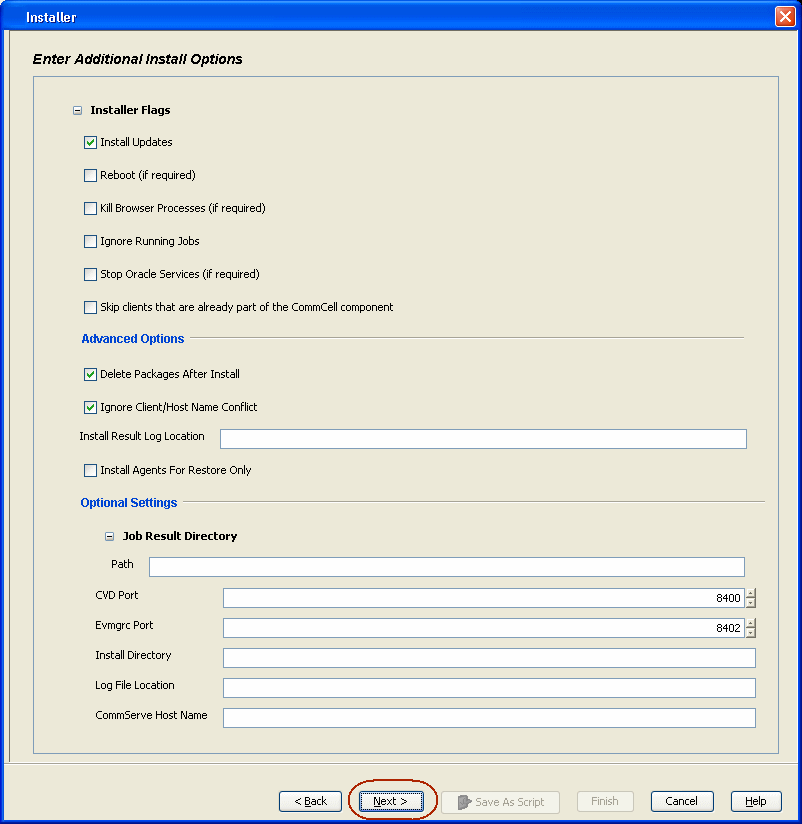 |
||
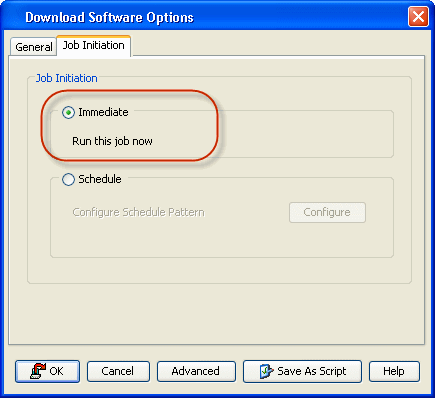
| 12. | Select Immediate to run the job now and then click OK. |
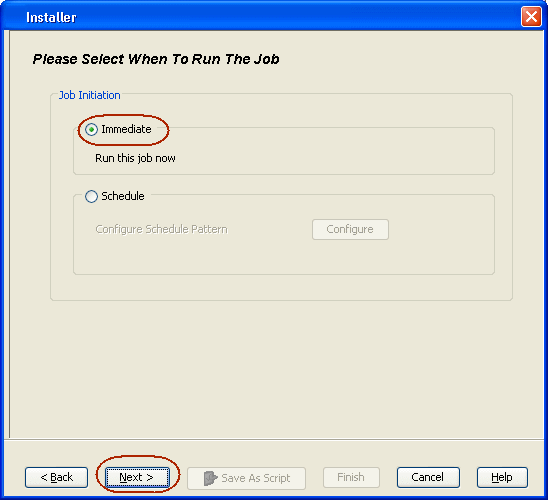 |
||
| 13. | The summary of install operation will be displayed. Click Finish.
|
 |
To view the job details:
| 1. | From the CommCell Console, from the Tools menu select the Job Controller icon. The Job Controller window appears. |
 |
||
| 2. | Right-click the job and then click Detail from the shortcut menu. The details of the job you selected are displayed in the Install Software Job Details For Job ID dialog. |
 |
||
| 3. | Click OK.
|
| 1. | From the CommCell Browser, right-click the icon of a client computer, and click View --> Installed Software. |
 |
| 2. | View the installed software packages from the
Installed Software
window. Click OK. |
 |