Getting Started - DASH Copy

Getting Started Advanced  

DASH copy provides a fast method of copying data by transferring only the changed data to a secondary copy. This is extremely useful for creating secondary copies of deduplicated data.

Setting up DASH Copy

Create A Storage Policy

1.
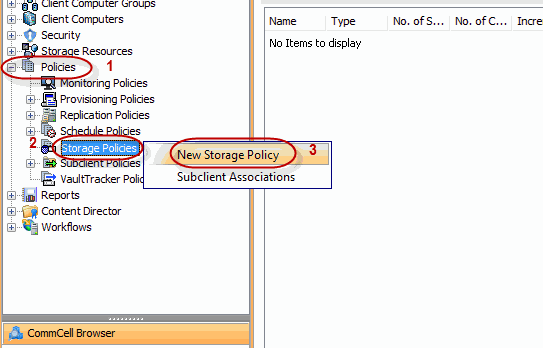
  • From the CommCell Browser, navigate to and expand Policies.
  • Right-click Storage Policies, and then click New Storage Policy.
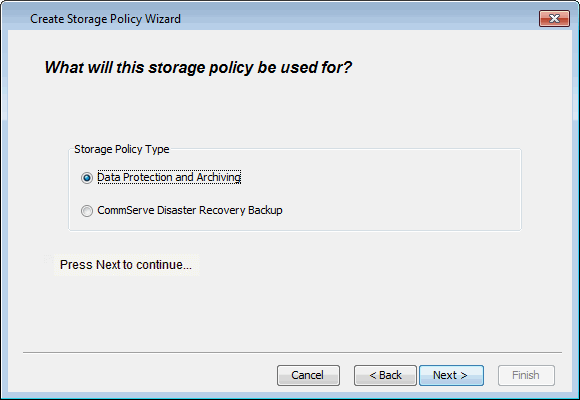
2. Click Next.
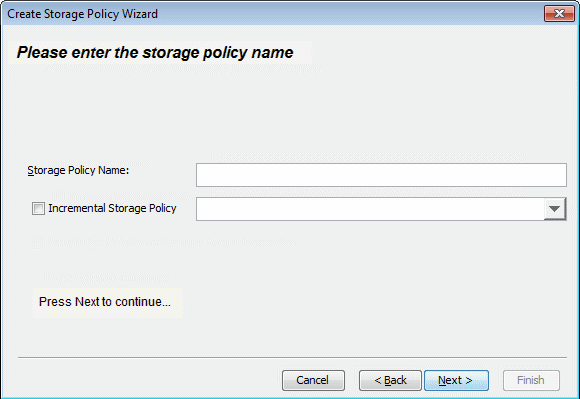
3. Enter the name in the Storage Policy Name box and click Next.
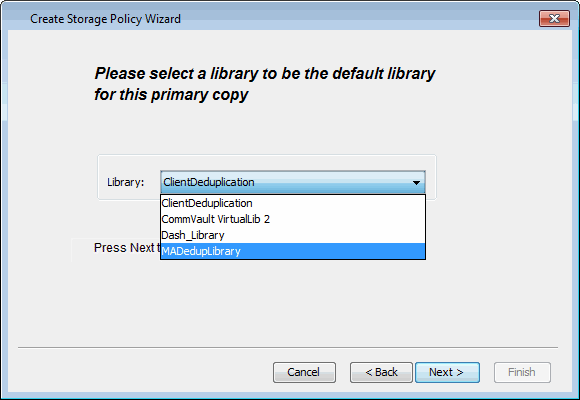
4. From the Library list, click the name of a disk library and click Next.
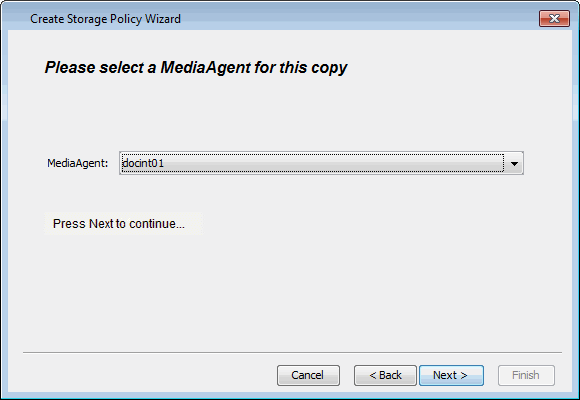
5. From the MediaAgent list, click the name of a MediaAgent that will be used to create the primary copy.

Click Next.

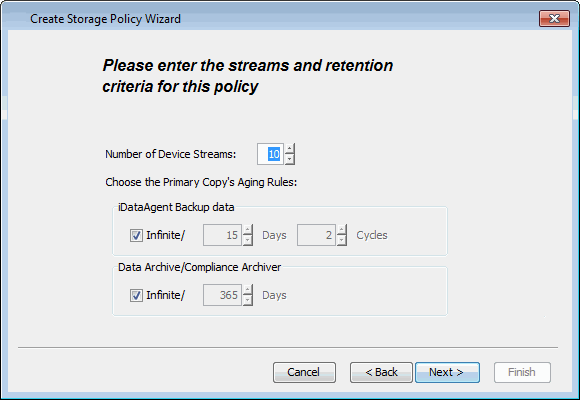
6. Click Next to accept default values.

If necessary these values can be modified later.
7.
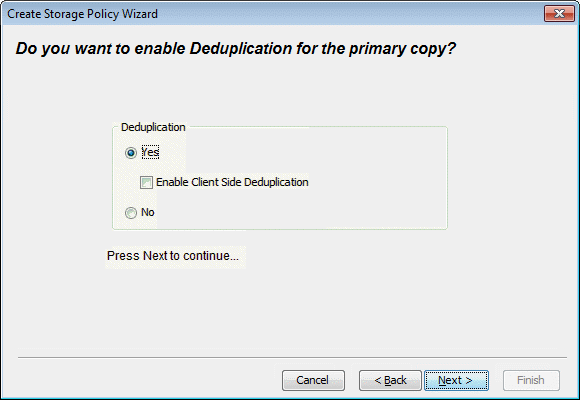
  • Under Deduplication, select Yes.
  • Clear Enable Client Side Deduplication check box and click Next.
8.
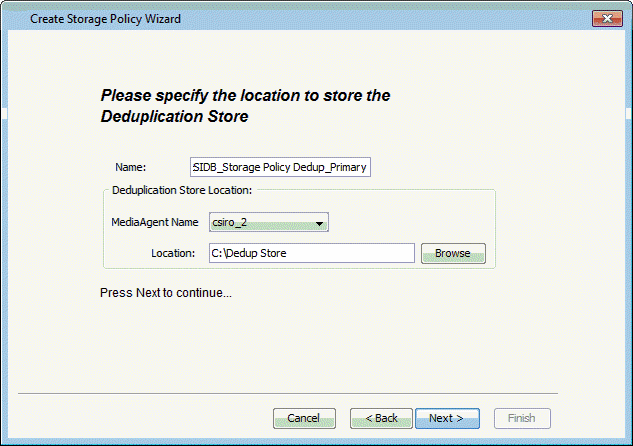
  • From the MediaAgent list, click the name of the MediaAgent that will be used to store the Deduplication store.
      It can be any MediaAgent which has enough space to store the deduplication store.
  • Type the name of the folder in which the deduplication database must be located in the Deduplication Store Location or click the Browse button to select the folder.
  • Click Next.
  The deduplication database must be located in a folder and not directly under the root of a disk volume.
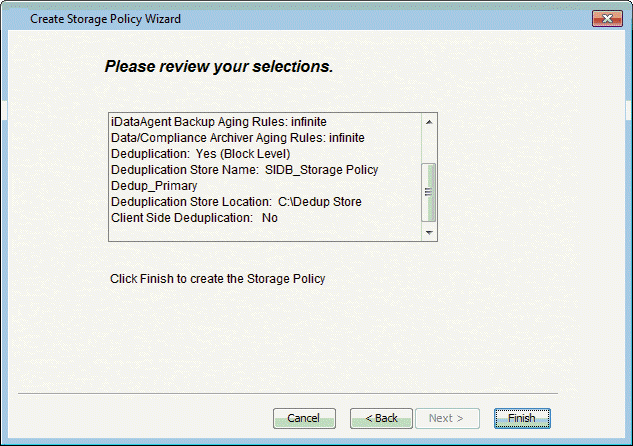
9. Click Finish.

Create a Secondary Copy with Deduplication Enabled

10.
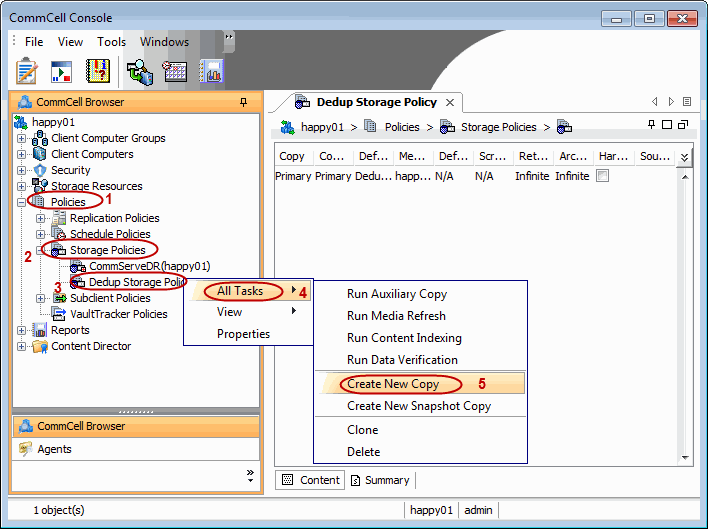
    • From the CommCell Browser, navigate to Policies | Storage Policies | <Storage_Policy>.
    • Right-click <storage_policy>, point to All Tasks and then click Create New Copy.
11.
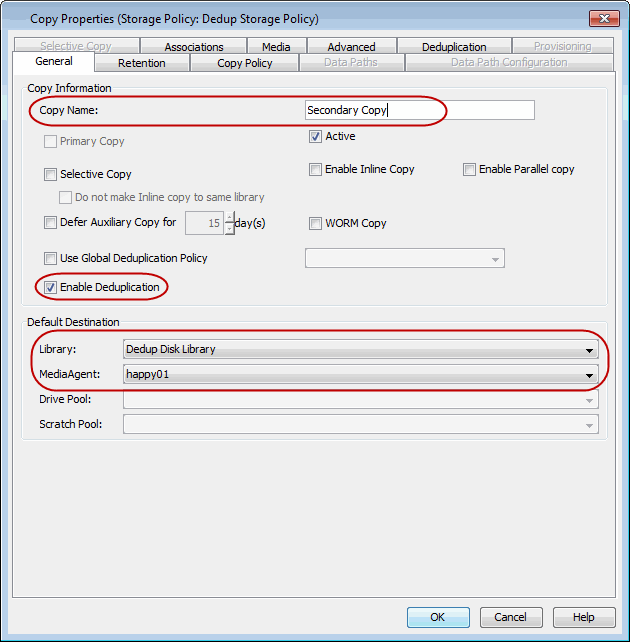
  • Specify name in Copy Name.
  • From the Library list, click the name of a disk library.
  • From the MediaAgent list, click the name of a MediaAgent.
  • Select Enable Deduplication box. The Deduplication tab is enabled.
  • Click Deduplication tab.

Deduplication can only be enabled for storage policy copies associated with a disk library.

12.
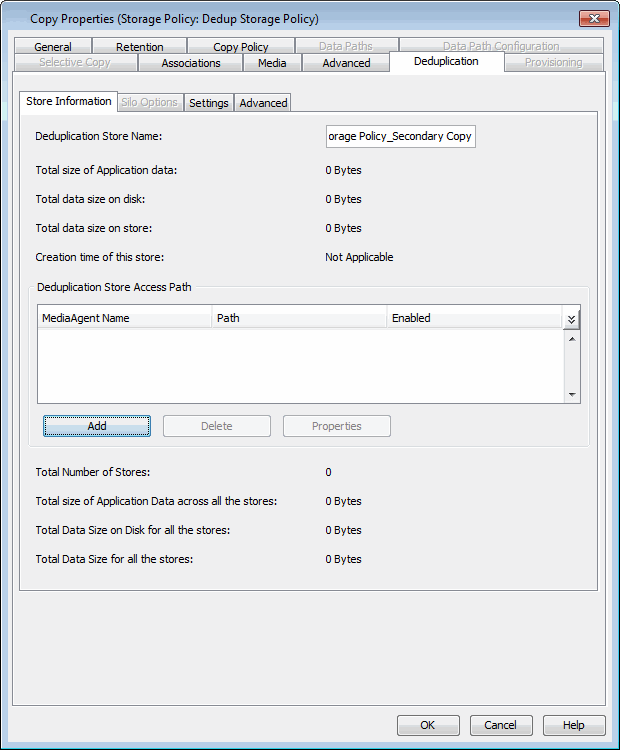
  • The default name of the deduplication store is displayed in Deduplication Store Name box.
  • In the Deduplication Store Access Path area, click Add.
13.
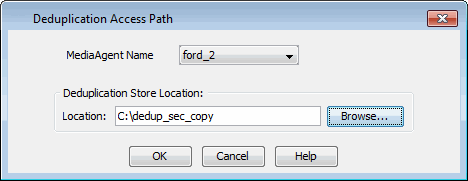
  • From the MediaAgent list, click the name of a MediaAgent.
  • Type the name of the folder in which the deduplication database must be located in the Deduplication Store Location or click the Browse button to select the folder.
  • Click OK.
14.
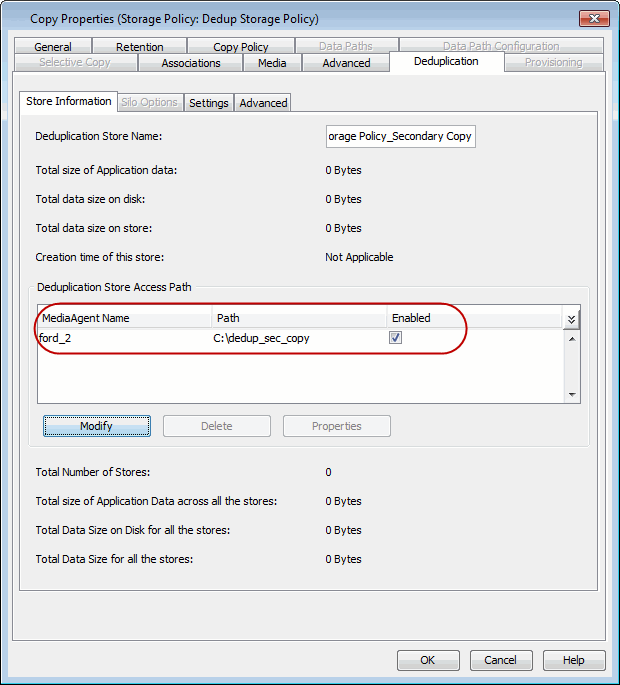
  • The store information is displayed in the Deduplication Store Access Path area.
  • Click OK.
15.

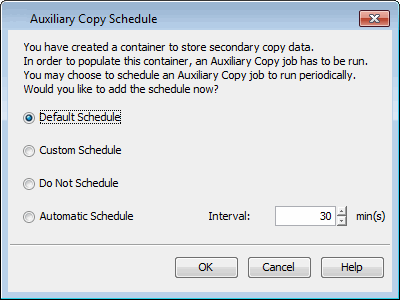
Click OK to accept the default schedule.

16.

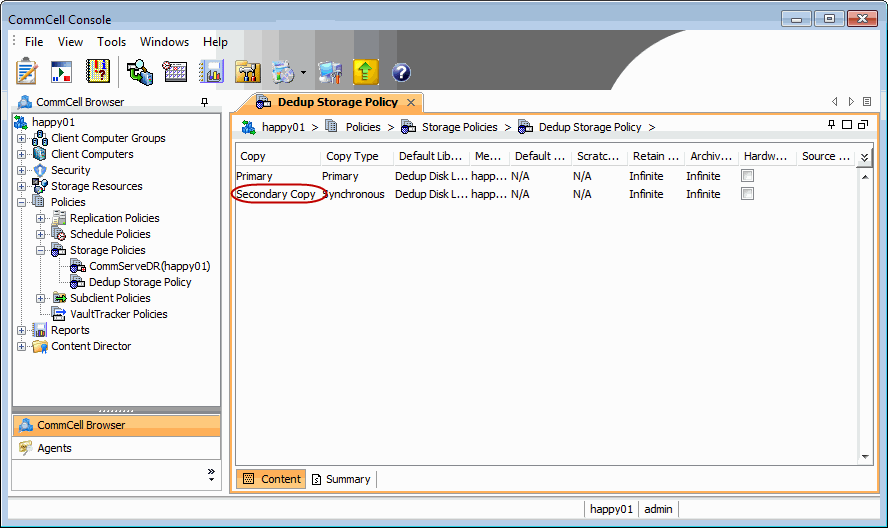
Secondary Copy is displayed in the Storage Policy pane.

Enable DASH Copy

17. Right-click the secondary storage policy copy created above and then click Properties.
18.
  • Click the Deduplication tab and then click Advanced tab.
  • Select Enable DASH Copy (Transfer only unique data segments to target) box.
  • By default Network Optimized Copy is selected.
  • Click OK.

The saved secondary copy is the DASH copy.

Associate the Storage Policy to the Subclient   

19.
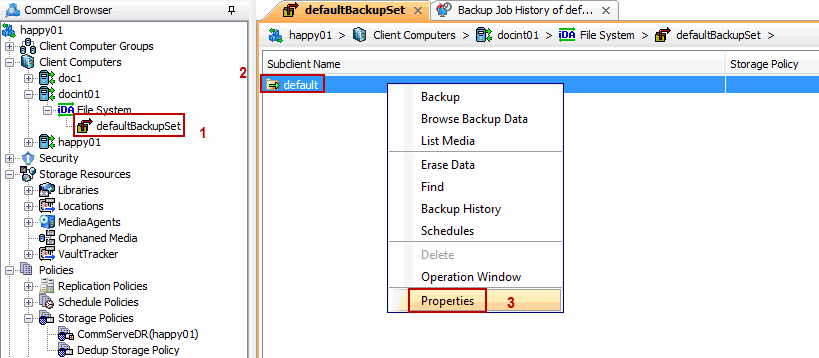
  • From the CommCell Browser, navigate to Client Computers | <Client> | File System | defaultBackupSet.
  • Right-click the subclient in the right pane and click Properties.
20.
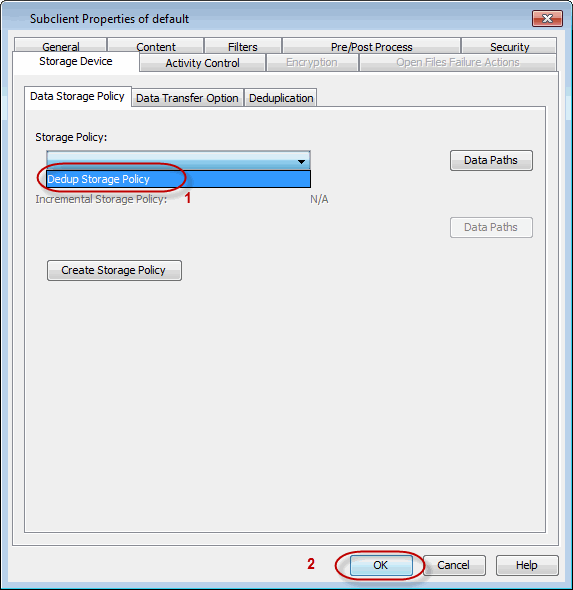
  • Click the Storage Device tab.
  • In the Storage Policy list, click the storage policy where the DASH Copy was enabled.
  • Click OK.
21. Repeat step 19 - 20 for all subclient in which you wish to associate this storage policy.  

Start a Full Backup

22.
  • From the CommCell Browser, navigate to Client Computers | <Client> | File System | defaultBackupSet.
  • Right click the default subclient and click Backup.
23.
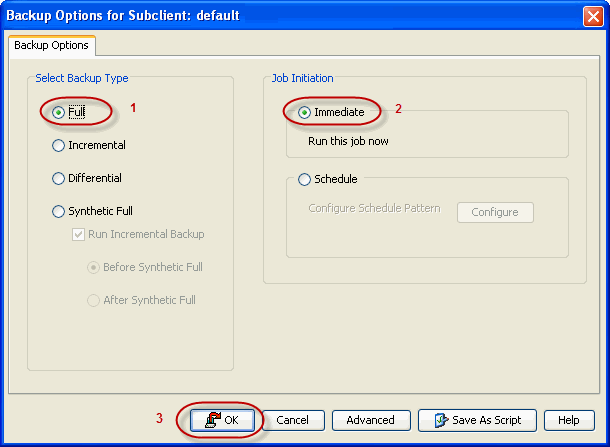
  • Under Select Backup Type, click Full.
  • Under Job Initiation, click Immediate.
  • Click OK.
24. You can track the progress of the backup job from the Job Controller window. Ensure that the job completes successfully.

Run the DASH Copy

Run the DASH Copy when you want to accelerate the data transfer from the source media agent to destination media agent. The following procedure provided step-by step instructions to run the DASH Copy:

25.
  • From the CommCell Browser, navigate to Policies | Storage Policies | <Storage_Policy>.
  • Right-click <storage_policy>, point to All Tasks and then click Run Auxiliary Copy.
26.
  • Under Copy Selection, click Select A Copy.
  • From the Select A Copy list, click the DASH Copy you created in step 18 above.
  • Click OK.
27. You can track the progress of the backup job from the Job Controller window.

Ensure that the job completes successfully.