Silo Storage enables you to store deduplicated backups on secondary storage
devices. The ability to store deduplicated data on secondary storage reduces the
storage requirements and facilitates longer retention periods. The efficient use
of storage space enables storing large volumes of backup data, which reduces the
cost of backup storage and long term data retention.
Silo Storage also enables effective use of the primary disk storage
by managing the disk space and periodically moving the data to the Silo Storage.
This efficient disk management reduces the cost of storage.
| 10. |
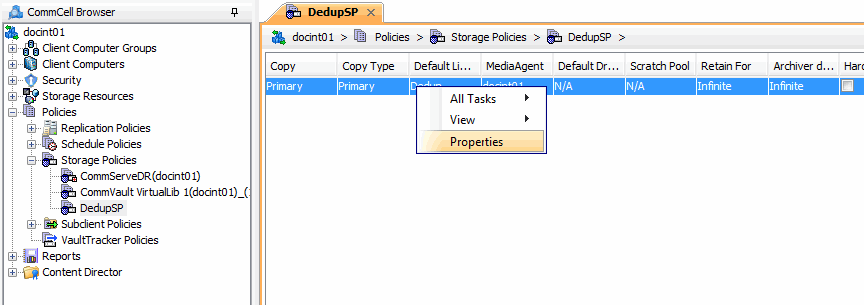
- From the CommCell Browser, navigate to Policies | Storage
Policies | <Storage_Policy>.
- Right-click the primary storage policy copy displayed in
the right pane and click Properties.
|
 |
| 11. |
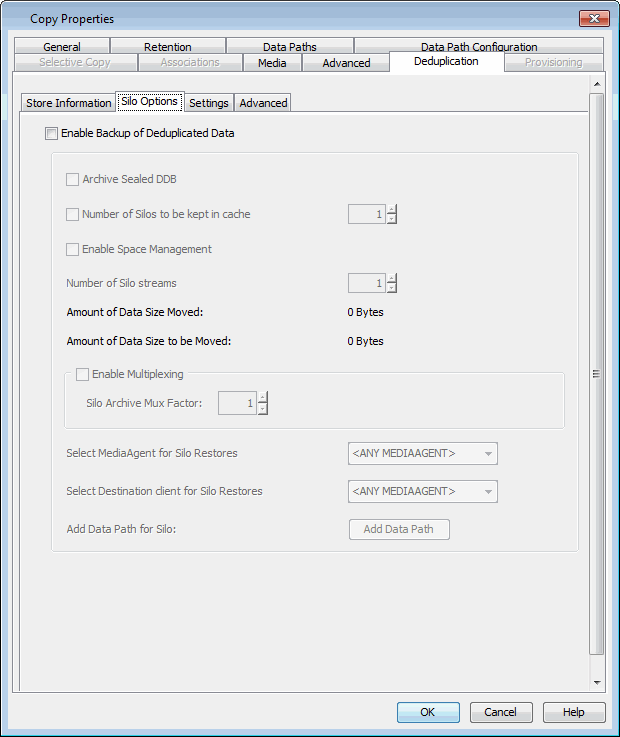
Click the Deduplication tab and then click Silo Option tab. |
 |
| 12. |
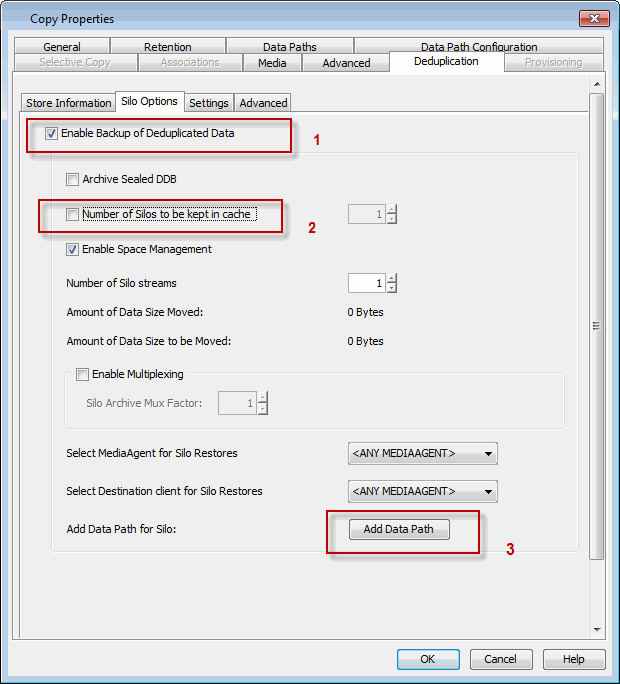
- Select the Enable Backup of Deduplicated Data
check box.
- Clear Number of Silos to be kept in cache check box.
- Click Add Data Path button.
|
 |
| 13. |
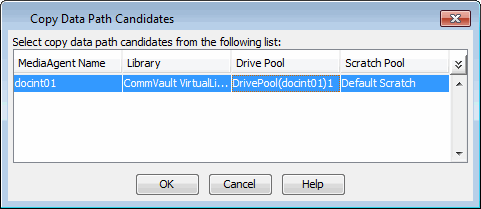
Click the Tape Library and click OK. |
 |
| 14. |
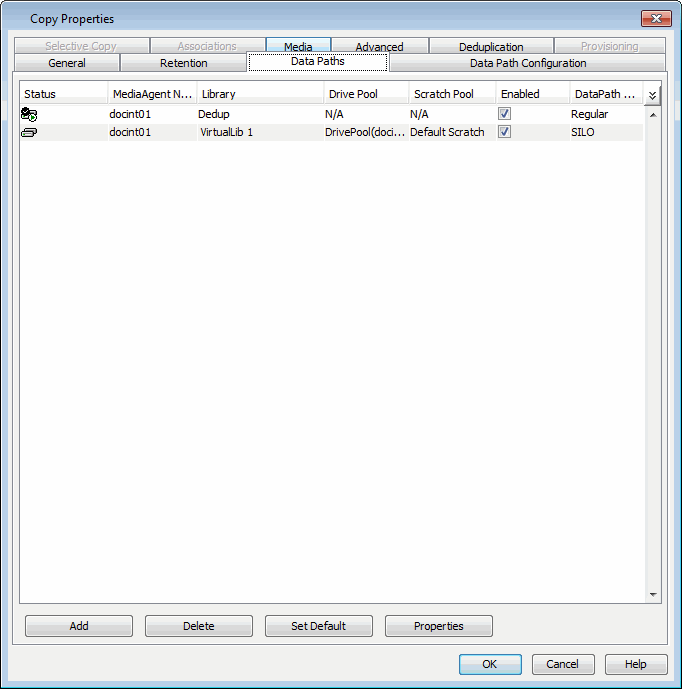
The list of data paths will be displayed. Click OK. |
 |
| 15. |
Click OK to enable the Silo Storage. |
 |
| 16. |
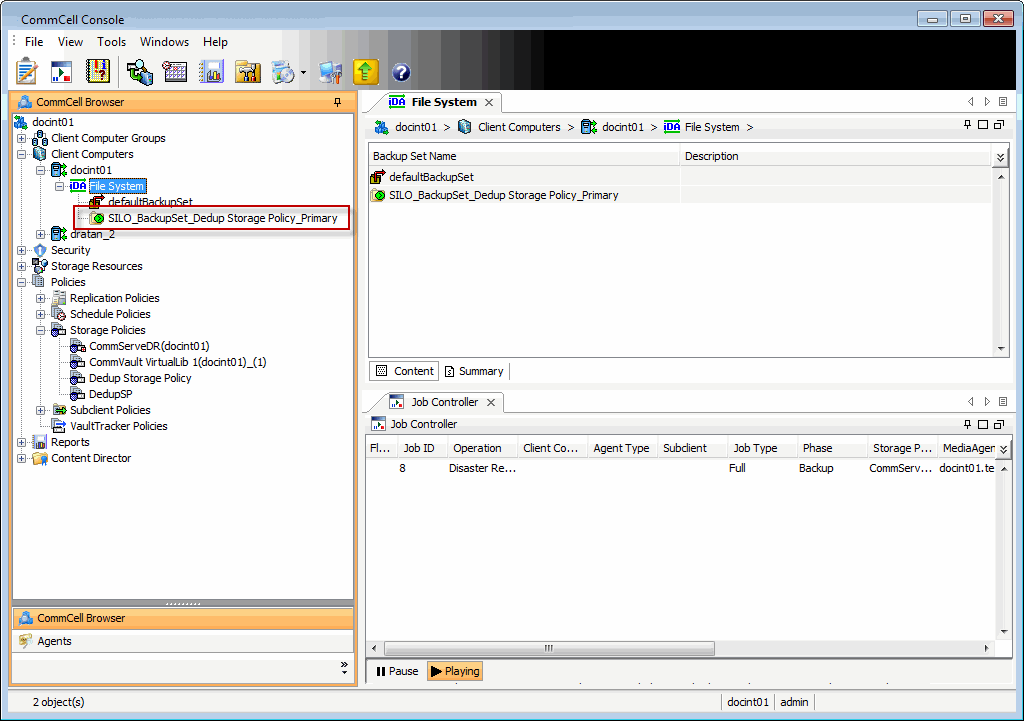
- From the CommCell Browser,
navigate to Client Computers | <CommServe_Client> | File
System.
- A Silo Storage Set with SILO_BackupSet_<Storage
Policy name>_<Storage Policy Copy name> naming
convention is displayed.
| |
A Silo Storage Set is a special type of On
Demand Backup Set containing Silo Storage data. This set must
not be modified for any type of operation. |
|
 |
| 17. |
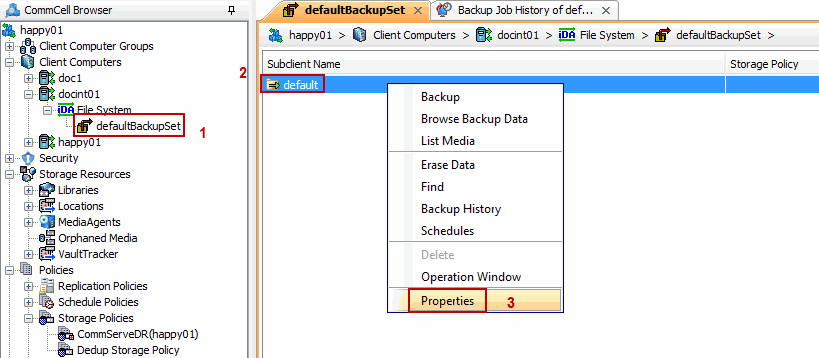
- From the CommCell Browser, navigate to Client Computers
| <Client> | File System | defaultBackupSet.
- Right-click the subclient in the right pane and click Properties.
|
 |
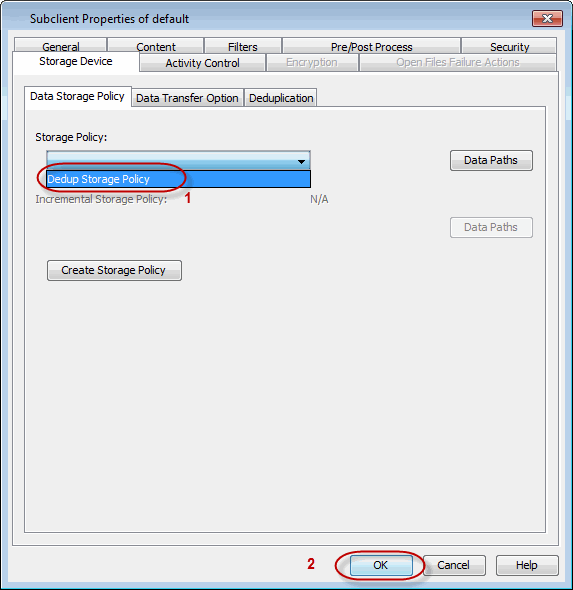
| 18. |
- Click the Storage Device tab.
- In the Storage Policy list, click the storage policy
where the Silo Storage was enabled.
- Click OK.
| |
Repeat steps 16-18, in all the subclients
that you wish to include this Silo. |
|
 |
| 19. |
- From the CommCell Browser, navigate to Client Computers | <Client>
| File System | defaultBackupSet.
- Right-click the subclient in the right pane and click Backup.
|
 |
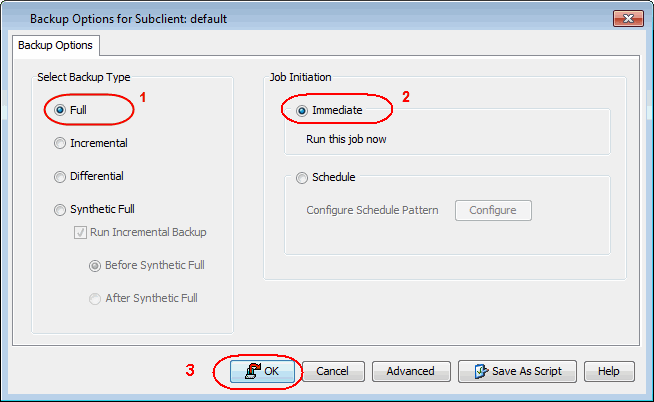
| 20. |
- Under Select Backup Type, click Full.
- Under Job Initiation, click Immediate.
- Click
OK.
| |
Repeat steps 19-20, to perform a backup of
all subclients included in the Silo. |
|
 |
| 21. |
You can track the progress of the backup job from the Job Controller
window. Ensure that the job completes successfully. |
 |
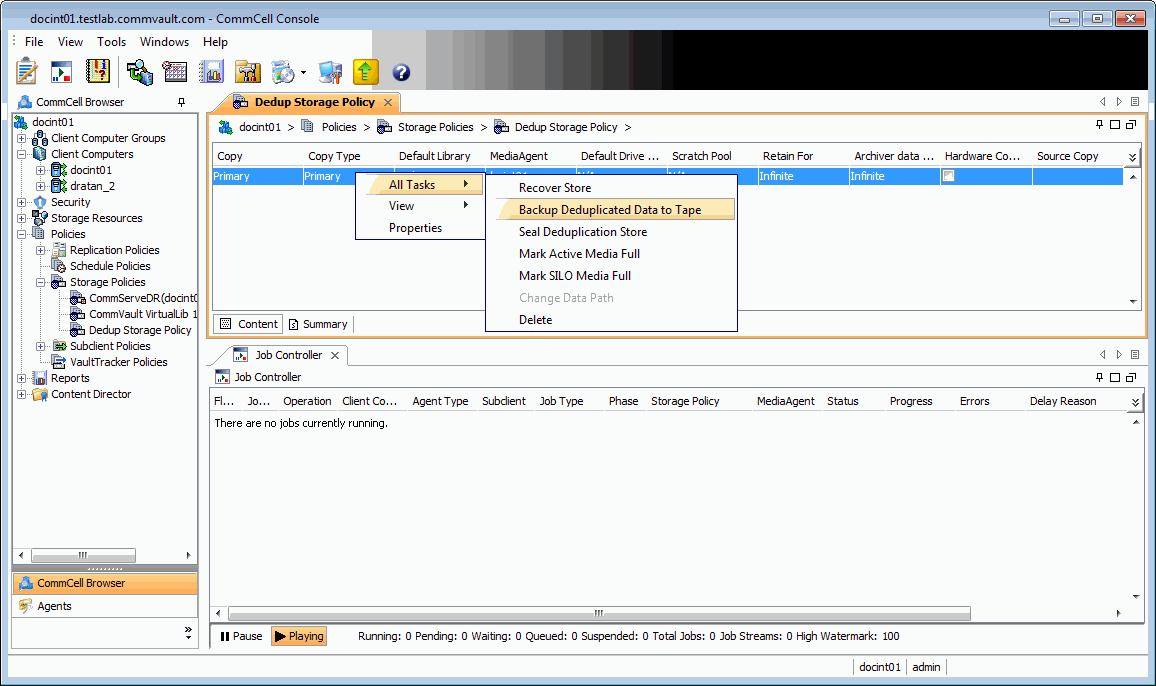
| 22. |
- From the CommCell Browser, navigate to Policies | Storage
Policies | <Storage_Policy>.
- Right-click the primary storage policy copy,
point to All Tasks and then click Backup Deduplicated Data to Tape.
|
 |
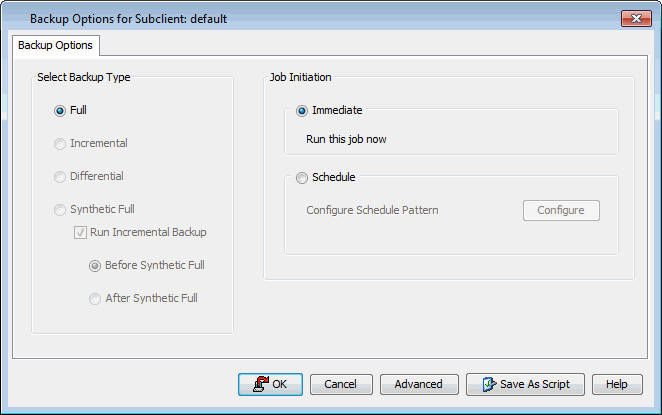
| 23. |
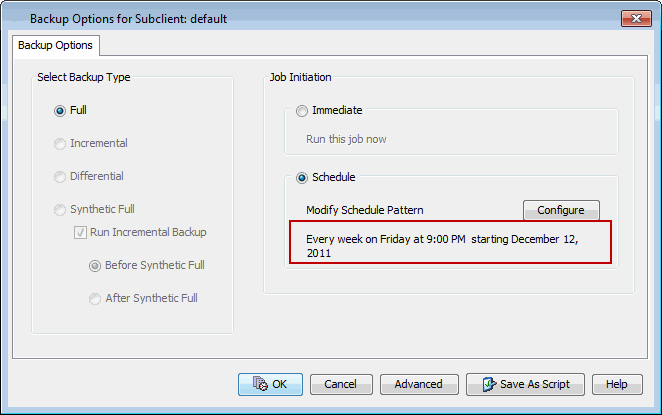
- Click Schedule to schedule the backup for a specific
time.
- Click Configure button to set the schedule for the backup
job.
|
 |
| 24. |
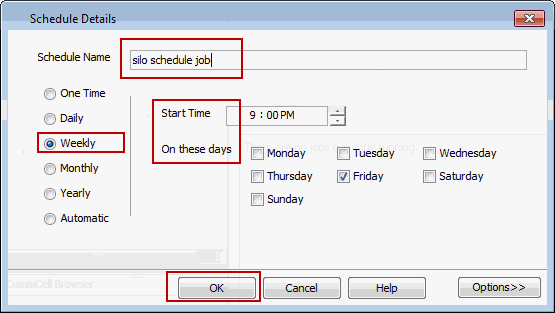
- In the Schedule Name box, type the name for schedule
job.
- Select the appropriate scheduling options. For example:
- Click
Weekly.
- In the Start Time box, type or select the time you want to
change.
- Check the days you want the run the job.
- Click OK.
|
 |
| 25. |
Click OK. The Silo backup job will execute as per the schedule. |
 |
| 26. |
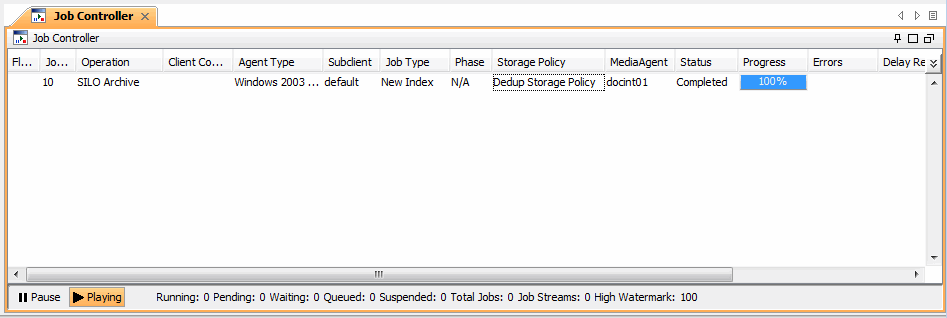
When the schedule is run, the Job Controller
window in the CommCell Console will display the job as shown in the
sample image. |
 |
