Follow the steps
given below to create and configure the NAS client for a first SnapProtect
backup. If the data you want to backup resides on a vFiler, configure the vFiler
as the NAS client.
| 1.
|
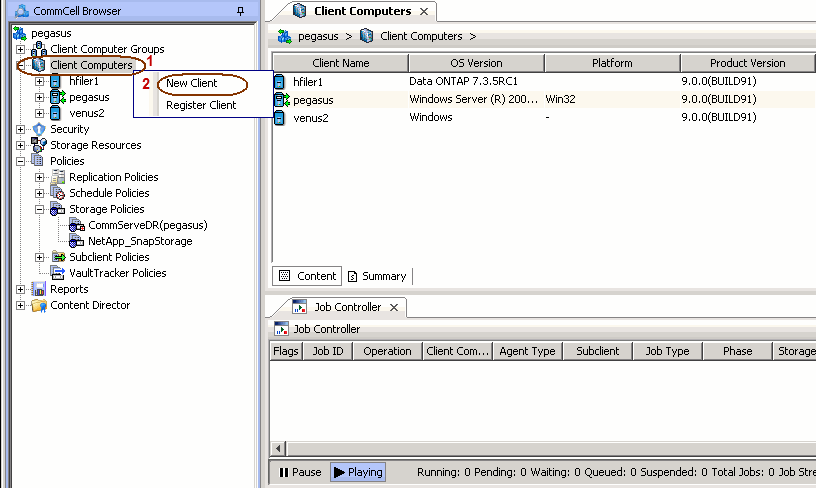
From the CommCell Browser, right-click the Client Computers node
and click New Client. |
|
| 2. |
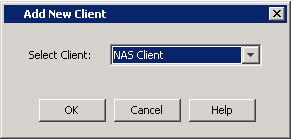
- Select NAS Client from the drop-down list.
- Click OK.
|
 |
| 3. |
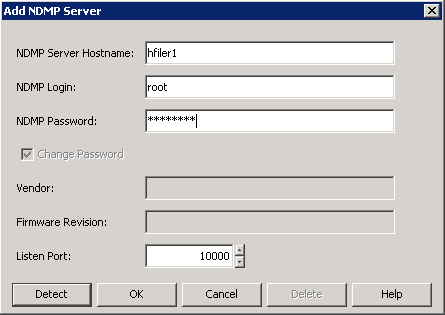
- Provide the File Server details to add the NDMP Server.
For any ONTAP version, do not provide the host name or IP address of
the management port (e.g., e0M). Use
the host name or IP address of a data port (e.g.,
e0A, e0B).
- Click Detect.
- Click OK.
A new client is created and listed under the
Client Computers node. The default subclient is created
automatically.
| |
Any NAS storage device that will be used for backing up secondary
storage data (Vault, Mirror or backup copy) must be configured as a
NAS Client in the CommCell with the same name that is used by the
DFM server to communicate to the secondary NAS file server. |
|
 |
| 4. |
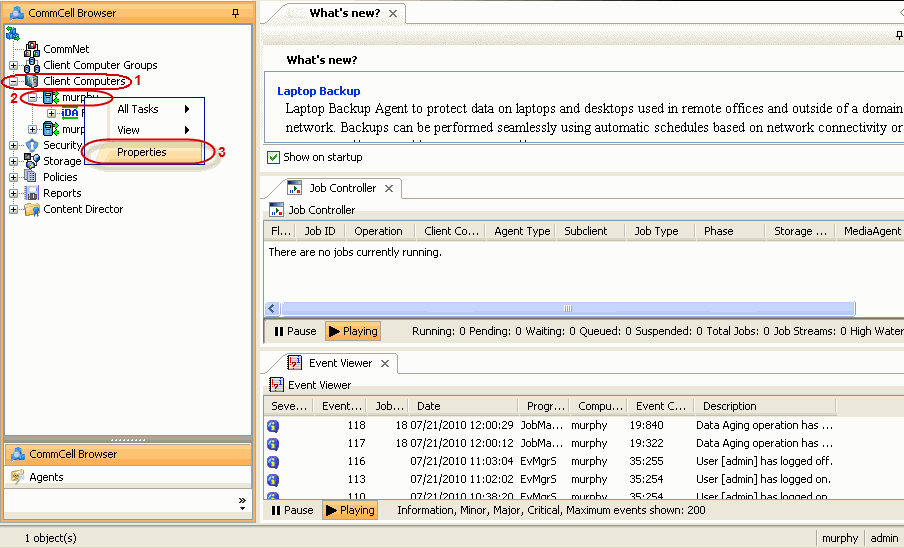
From the CommCell Browser, right-click the NAS client just created and select
Properties.
|
 |
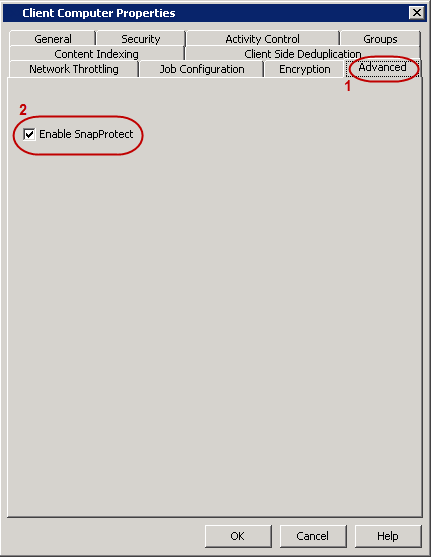
| 5. |
- Click on the Advanced tab.
- Select the Enable SnapProtect option
to enable SnapProtect backup for the client.
- Click OK.
|
 |
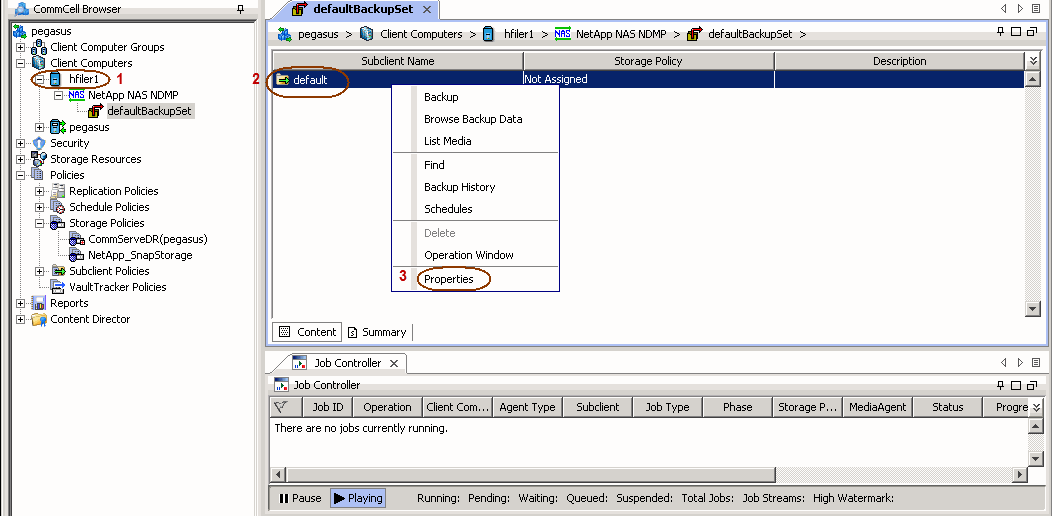
| 6. |
- From the CommCell Browser, right-click the subclient.
- Click Properties.
|
 |
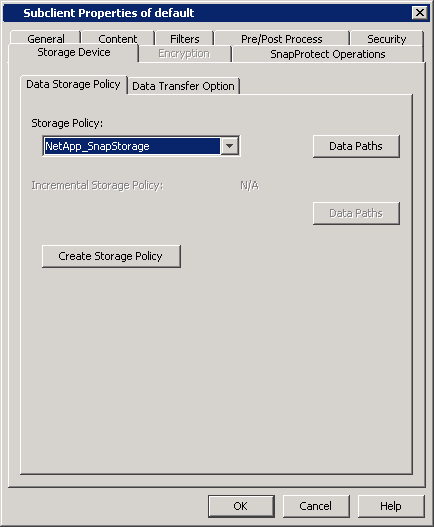
| 7. |
- Click the Storage Device tab.
- In the Storage Policy box, select the storage policy
name.
|
 |
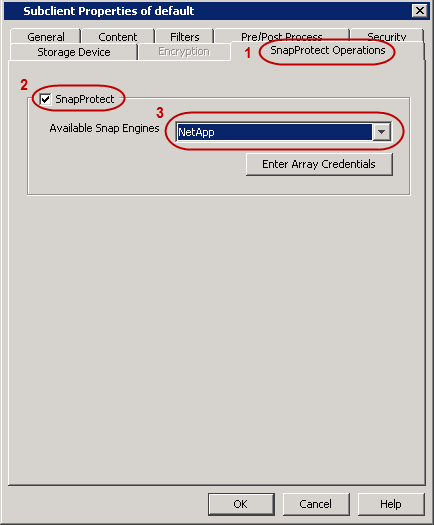
| 8. |
- Click the
SnapProtect Operations tab.
- Click SnapProtect option to enable SnapProtect backup for the selected subclient.
- Select NetApp from the Available Snap Engine
drop-down list.
|
 |
| 9. |
| |
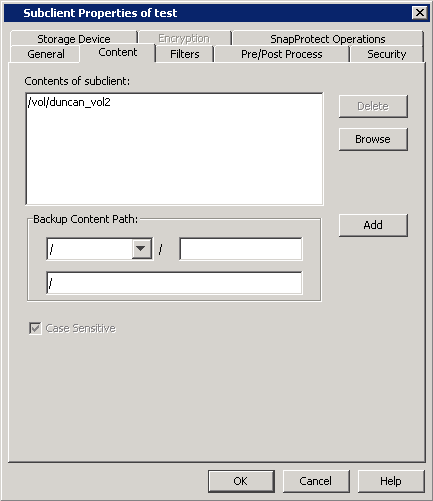
The subclient content must contain
data that resides on the storage device volume; do not include local
drives as subclient content. If you added a vFiler as a
client, do not include the root volume. |
|
 |
Skip this section if you already created a snapshot
copy.
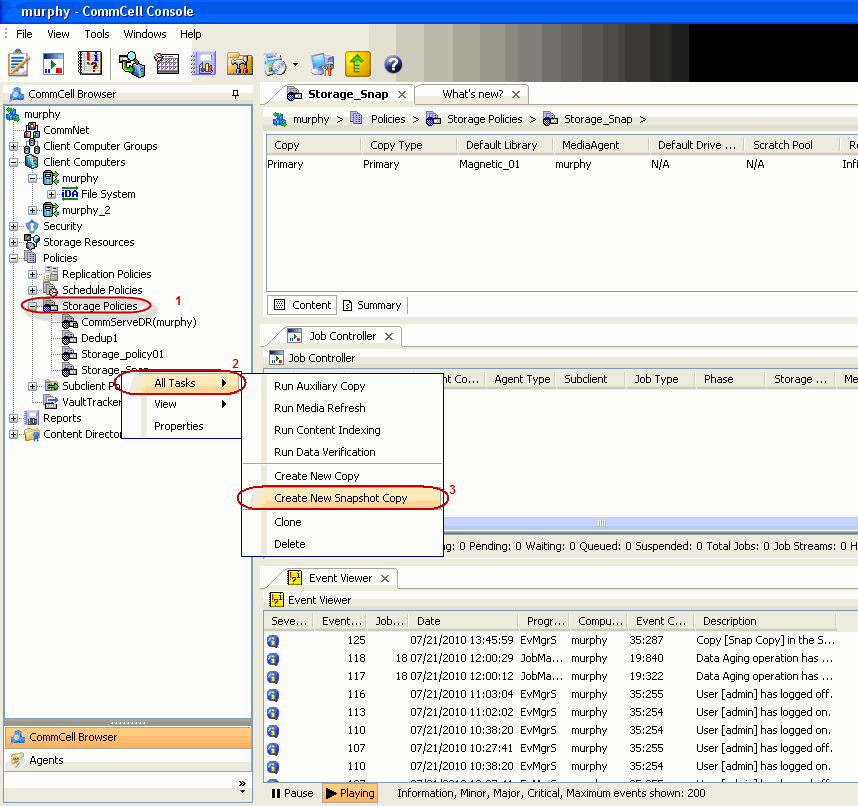
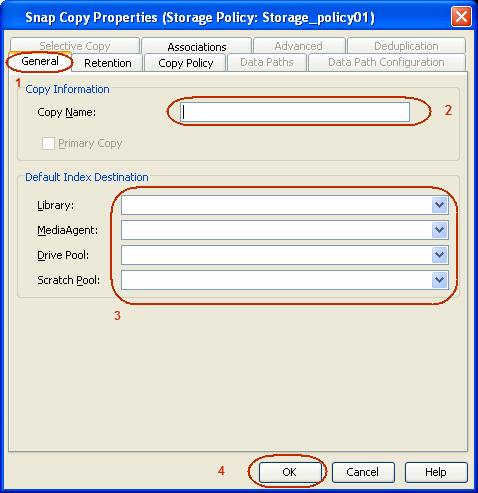
Click Create a snapshot copy for the Storage Policy. The following section provides
step-by-step instructions for creating a Snapshot Copy.
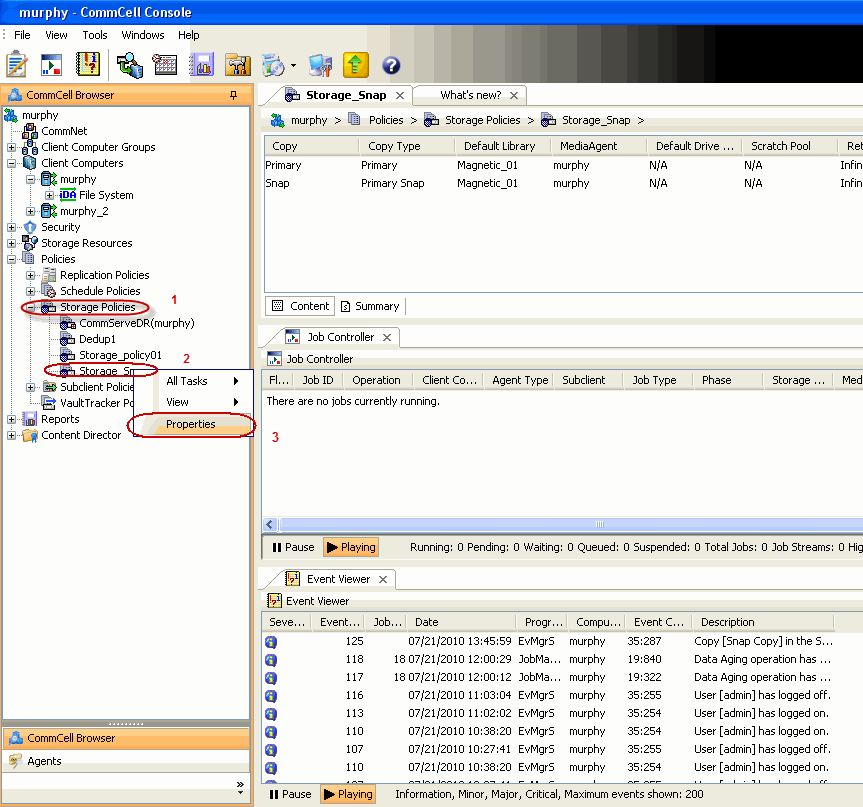
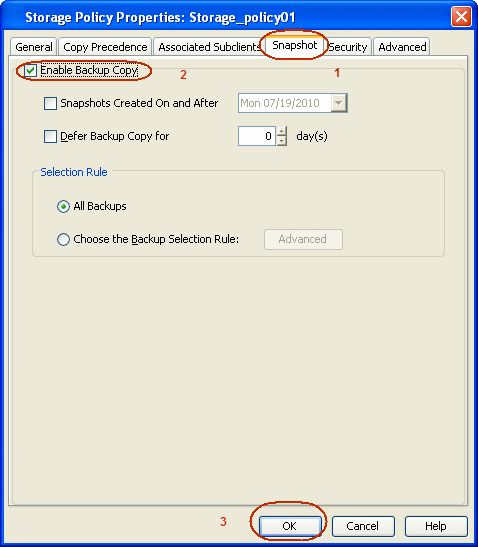
Follow the steps given below to configure Backup Copy for moving snapshots to
media.


 to Continue.

