- Select the CommServe Software Cache tab.
- Verify
Cache Directory.
Click ... button to modify the default location of the Cache Directory.
- Click OK.
| Verify that you have adequate space in the CommServe cache directory for the latest updates. |

| Getting Started | Advanced |
Updates and Service Packs are used to address specific problems in the product and improve the overall performance of the product. While updates are patches that address a specific problem in the product, service packs are a collection of updates that are released on a periodic basis to address a wide variety of problems in the product.
You can setup CommCell components to automatically receive updates. Follow the steps below to setup automatic updates:
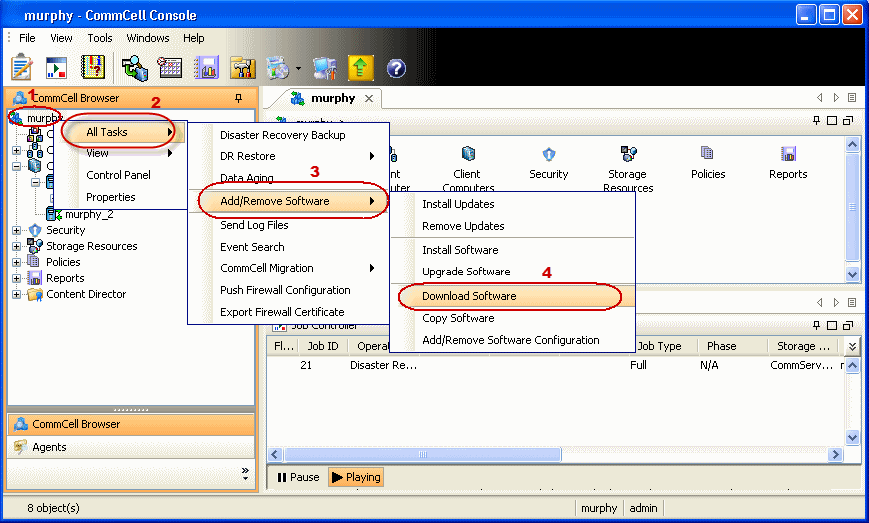
| 3. | From the CommCell Browser, right-click on the CommServe computer node, and click All Tasks -> Add/Remove Software -> Download Software. |
 |
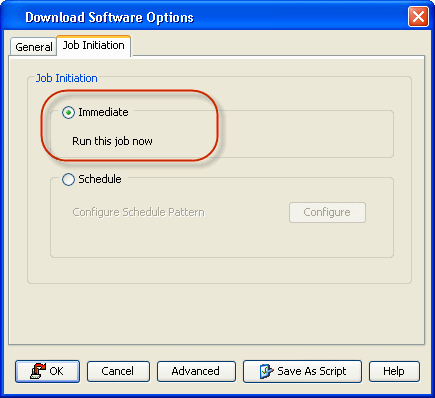
| 4. | Click OK. |
 |
| 5. |
|
 |
| You can track the progress of the job from the Job Controller window. |
 |
| 6. | From the CommCell Browser, right-click the CommServe icon, click All Tasks | Add/Remove Software | Install Updates. |
 ` ` |
||
| 7. | Select Client Computers. |
 |
||
| 8. | Select Reboot Client to have the system automatically
reboot the client and/or MediaAgent computers if a reboot is required.
|
 |
||
| 9. |
|
 |
||
| 10. | You can track the progress of the job from the Job Controller window. |
 |
Automatic Updates - Support - Provides extensive information on supported Agents.