Within a CommCell, depending on the environment, the MediaAgents can be configured to access the ADIC library controlled by SDLC using one of the following configurations:
- Direct-attached library configuration
- Dynamic Drive Sharing (DDS) configuration in the SAN environment
The following procedure describes the steps involved in configuring the ADIC library attached to SDLC as a direct attached library using the Library and Drive Configuration window.
Before You Begin
Pre-configuration tasks in the SDLC computer
- Ensure that the hardware is configured according to the guidelines provided in ADIC Libraries Attached to Scalar Distributed Library Controller (SDLC) Configuration.
- Verify that the SDLC is online and the ADIC library is functioning. See the SDLC documentation for instructions on verifying the status of the SDLC/ADIC library.
- If the library is shared between multiple CommCells or applications, define the necessary Volume Range for the exclusive use of the CommCell to which the MediaAgent(s) you wish to configure are attached. See the SDLC documentation for instructions on creating the volume ranges.
Pre-configuration tasks in the MediaAgent computer
- Ensure that the hardware is configured according to the guidelines provided in ADIC Libraries Attached to Scalar Distributed.
- Install the DAS Client software on the MediaAgent computer. See the DAS Client documentation for more information.
-
This feature requires a Feature License to be available in the CommServe® Server.
Review general license requirements included in License Administration. Also, View All Licenses provides step-by-step instructions on how to view the license information.
Required Capability: See Capabilities and Permitted Actions
To configure a ADIC libraries attached to SDLC
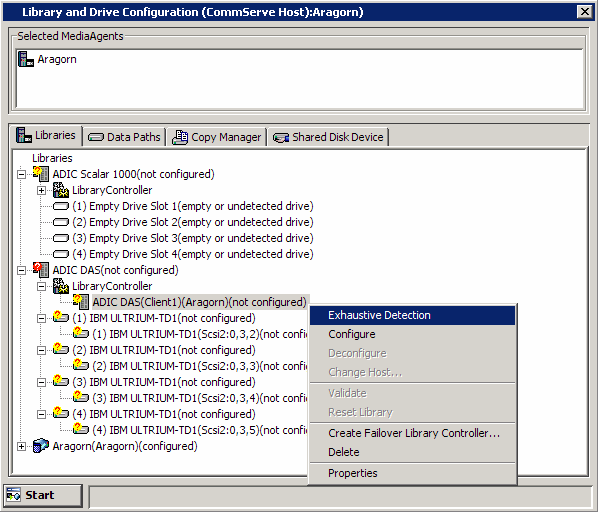
Do not perform an Exhaustive Detection now.
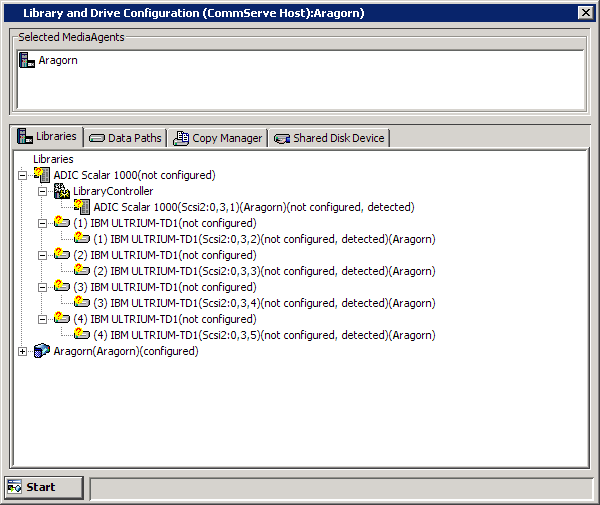
If the library supports Drive Serialization, then the drives would be detected as ADIC Scalar library. The sample image shows the drives detected as ADIC Scalar library.
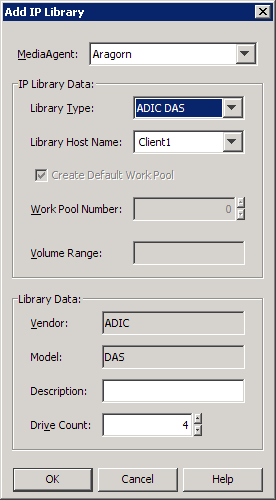
MediaAgent: The name of the MediaAgent.
Library Type: The IP library type. (ADIC)Library Host Name: The name of the MediaAgent where the drives are currently configured. (This is also the DAS Client.)
Vendor: The manufacturer of the library.
Model: The library model.Description: An optional field into which you can enter a description for the library
Drive Count: The number of drives in the library.When you are finished, click OK.
From the Library Properties dialog box, you can change the following properties:
Alias: The user-defined name for the library. This name is displayed in the CommCell Console for the library. We recommend that you give each library a descriptive name as its Alias, for easier system administration.
When you are satisfied with your changes, click OK.
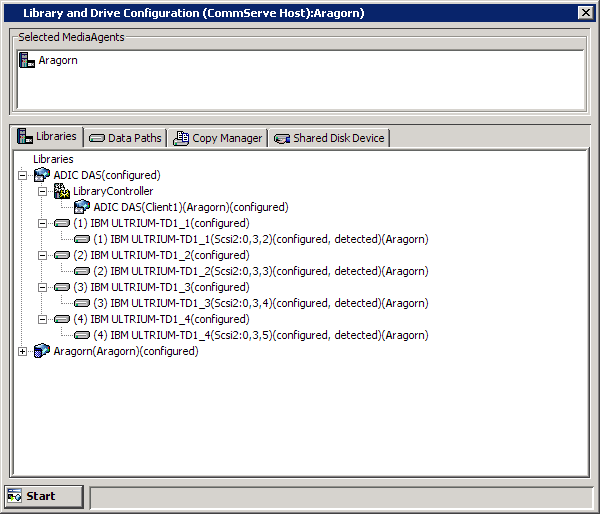
The devices are displayed in the library tree with detection status not configured, detect success in the Library and Drive Configuration window.

In the Drive Properties dialog box, select the correct drive associated with the drive ID.
Verify the drive name from the Scalar DLC Management GUI, before selecting the drive ID in this dialog box.
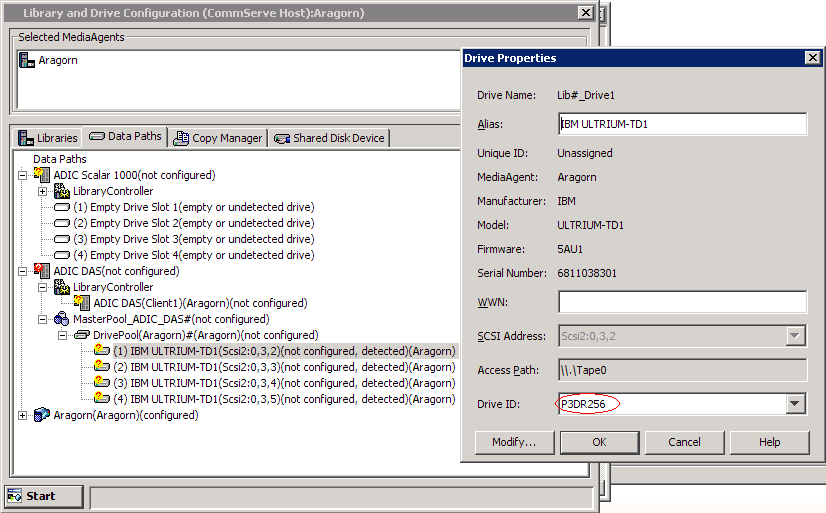
This will ensure that the drives are mapped to the appropriate serial number.
NOTES
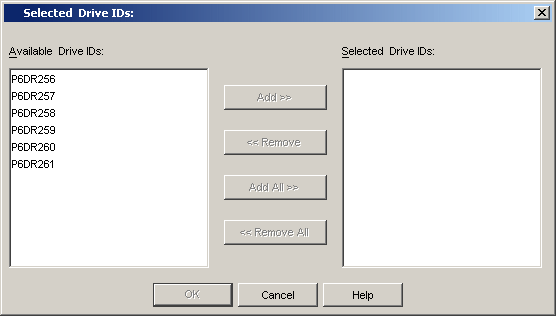
As this process attempts to mount a media in each of the selected drives to determine the drive numbers to its correct serial number, depending on the number of drives selected, this operation may take several minutes to complete.
The devices are displayed as configured, detect success.
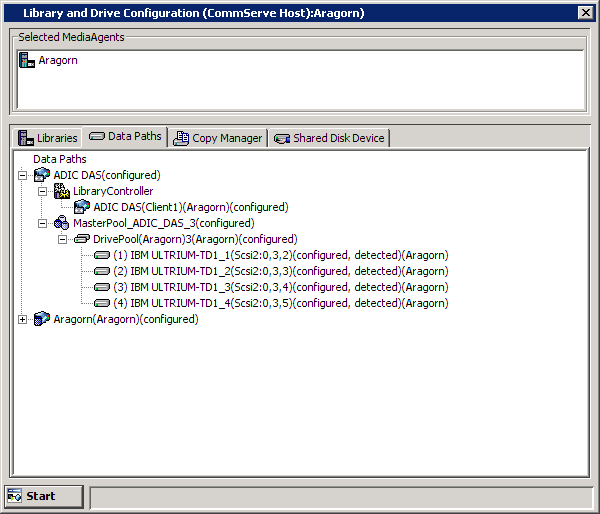
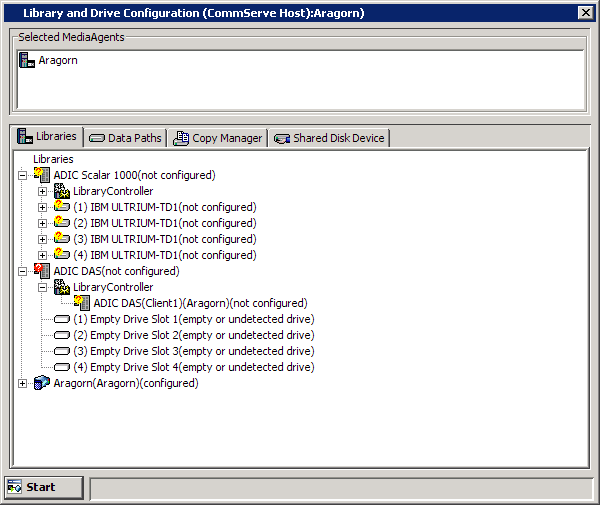
The Library tab provides the physical view of the devices (library and drives).