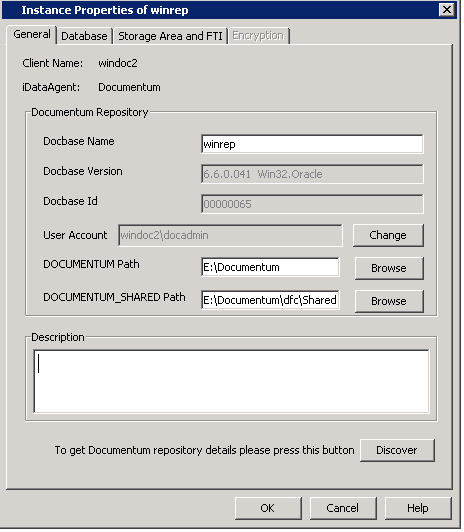
Right-click the agent node for which you want the new instance created, click All Tasks, and then click Create New Instance.
- Enter the name (up to 32 characters) for the instance in Docbase Name.
- Click Configure Password and specify the Documentum Install Owner User Name and Password in User Account. Confirm the Password and click OK.
- Type the Repository installation path in the DOCUMENTUM Path box or use Browse to locate the path.
- Type the Repository shared path in the DOCUMENTUM_SHARED Path box or use Browse to locate the path.
- Click Discover. The Docbase name and User Name and Password will be validated. If successful, the instance is created and the Docbase Version and Docbase Id are automatically populated.
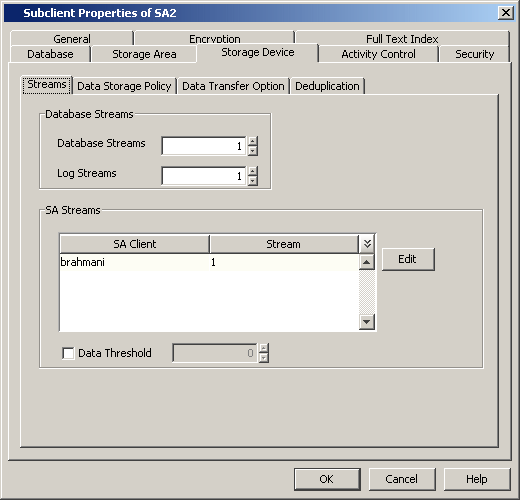
Docbase User Account
To perform data protection and recovery operations, the Documentum iDataAgent requires a user account to log on to the related Documentum docbase to access the data. The user account is the Documentum Install owner account that was used to install the Documentum software.
The account must already be set up on the client.
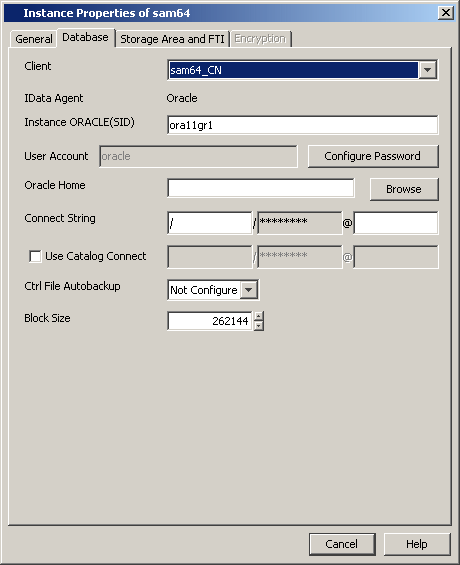
- From the Client pulldown menu, select the client computer on which the Oracle database resides.
- Type the Oracle instance name in Instance ORACLE(SID) box.
- Click Configure Password to specify the the Oracle
User account used by the system to perform all Data Protection and
Recovery operations for this instance. Click OK.
You can use a database user account to verify the rights to access Oracle databases. You can use an account for the standard database, and you can use an account for the Recovery Catalog database. The account information is included within one or more of the following database connect strings:
- Database user ID
- Password for the user ID
- Oracle service name.
The standard database user account must have the following privileges:
- Administrator privileges (default) or Oracle database administrator privileges
- SYSDBA and ALTER SYSTEM system privileges
Alternatively, instead of the SELECT ANY TABLE privilege, you can create less powerful user IDs with the following object privileges:
- SELECT ON "SYS"."V_$DATABASE"
- SELECT ON "SYS"."V_$DATAFILE"
- SELECT ON "SYS"."DBA_TABLESPACES"
- GRANT SELECT ON "SYS"."V_$ARCHIVE_DEST" TO "USER_NAME"
The Recovery Catalog database user account must have recovery catalog owner privileges.
The above mentioned accounts must already be set up on the client. Additional accounts (except Impersonate User) should be established by Oracle database administrator. To establish additional accounts on your own, consult the appropriate Oracle application documentation.
- Type the installation home path in the Oracle Home box or use Browse to locate the path.
- Type the target database connect string in the Connect String box.
- Click Use Catalog Connect if you want to establish a connection between the target database and the Recovery Catalog database using the specified connect string.
- From the Ctrl File Autobackup pulldown menu, specify if you want to disable or enable the autobackup of the control file.
- Type the Block Size or use the spin buttons to specify the block size for backup and restore operations.
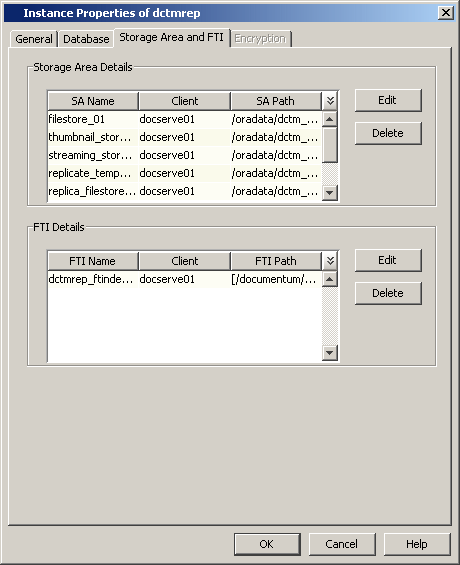
- In Storage Area Details, select a file store that was discovered and click Edit. In the Edit Operation dialog box, select the Client name from the pulldown menu.
- If a Full-text Index component is present, in FTI Details, select the full-text index name that was discovered and click Edit. In the Edit Operation dialog box, select the Client name from the pulldown menu and type the FTI Path.