A Microsoft SQL Server 2008 database instance (Enterprise Edition) with
the appropriate service pack will be automatically installed while installing the
software.
| 5. |
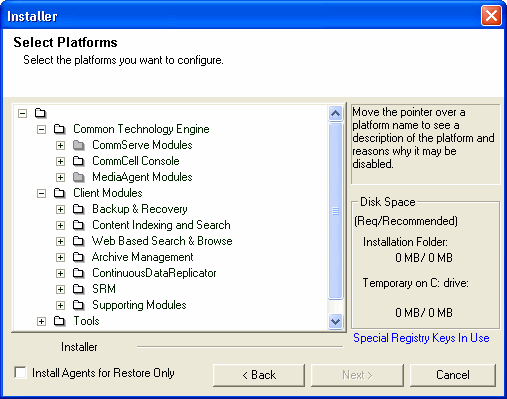
Select the component(s) to install. NOTES
- Your screen may look different from the example shown.
- Components that either have already been installed, or which cannot be installed, will be dimmed.
Hover over the component for additional details.
- If you wish to install the agent software for restore only, select
Install Agents for Restore Only checkbox. See
Installing Restore Only Agents for
more information.
- The Special Registry Keys In Use field will be highlighted when GalaxyInstallerFlags
registry key is enabled. Move the mouse pointer over this field to
see a list of registry keys that have been created in this computer.
Click Next to continue.
To install the Web Server, expand the Client
Modules folder, and the
Web Based Search & Browse folder, then select
the following:
When you select this component for install, the appropriate Windows File
System iDataAgent is automatically
selected for install.
|
 |
| 6. |
Click Yes to set up the required privileges for the local administrators group.
NOTES
- This option will only appear if the Windows user account used to install
the software does not have the required administrator rights (e.g., if the
operating system was newly installed).
- If you choose to click Yes, the install program will automatically assign the
required rights to your account. You may be prompted to log off and log
back on to continue the installation.
- If you choose to click No, the installation will be aborted.
- You will be prompted at the end of the
installation to decide if you want these privileges to be revoked.
|
 |
|
|
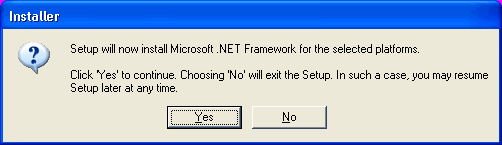
| 7. |
Click YES to install Microsoft .NET Framework
package. NOTES
- Follow the on-screen prompts for installing the Microsoft .NET
Framework package.
- If you are prompted to install the Service Pack for the
Microsoft .NET Framework, click Yes.
- This prompt is displayed only when Microsoft .NET Framework is
not installed.
- Once the Microsoft .NET Framework is installed, the software
automatically installs the Microsoft Visual J# 2.0 package.
|
 |
|
|
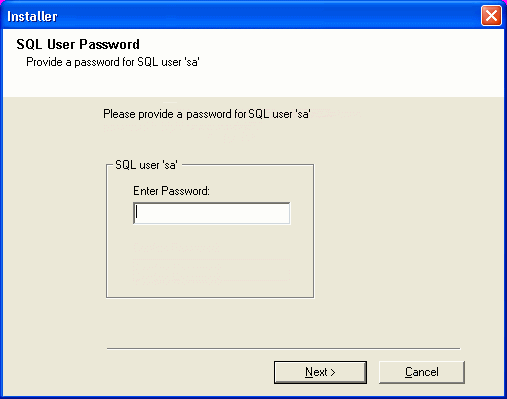
| 8. |
Specify the SQL Server System Administrator password. NOTES
- This is the password for the administrator's account created by SQL
during the installation.
Click Next to continue.
|
 |
 |
The install program checks
your Windows user account for the following necessary operating system
rights:
- Right to increase quotas (this is referred to as adjust memory
quotas for a process on Windows Server 2003).
- Right to act as a part of the operating system.
- Right to replace a process level token.
|
| 9. |
Click Yes to set up a dedicated instance of Microsoft
SQL Server for the Web Server. NOTES
- This prompt will only be displayed if SQL Server instance is not
installed on this computer.
- Clicking No will exit the install program.
|
 |
| 10. |
Enter the Installation Path for the Database Engine.
NOTES
- This is the location where you want to set up the Microsoft SQL
Server System databases.
Click Browse to change directories.
Click Next to continue.
The install program installs the SQL database instance.
|
 |
|
|
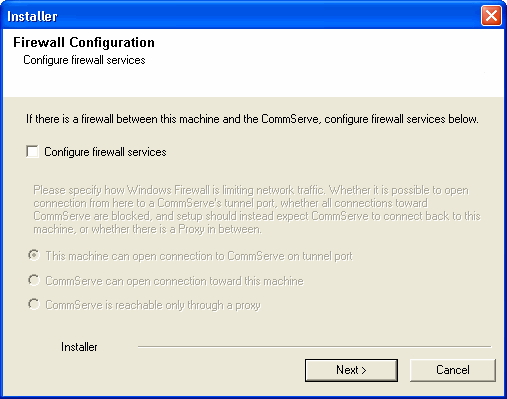
| 11. |
If this computer and the CommServe is separated by a firewall, select
the Configure firewall services option and then click Next to
continue.
For firewall options and
configuration instructions, see
Firewall Configuration
and continue with the installation.
If firewall configuration is not required, click Next to continue.
|
 |
| 12. |
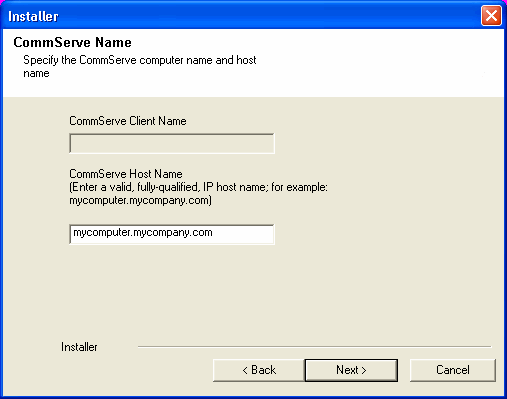
Enter the fully qualified domain name of the CommServe Host Name. This should be
TCP/IP network name. e.g., computer.company.com. NOTES
Click Next to continue.
|
 |
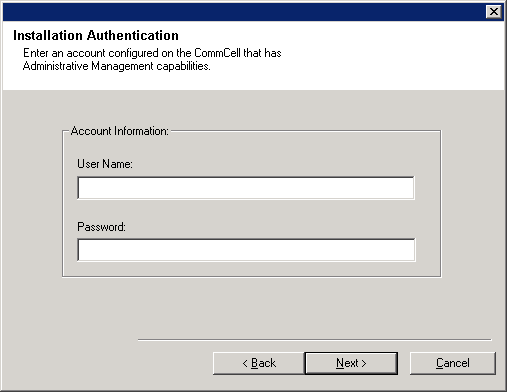
| 13. |
Enter the username and password associated with an external
domain user account or a CommCell user account to authorize the installation
of this agent. NOTES
- This window will be displayed when the Require Authentication for Agent
Installation option is selected in the CommCell Properties. For more
information, see
Authentication for Agent Installs.
Click Next to continue.
|
 |
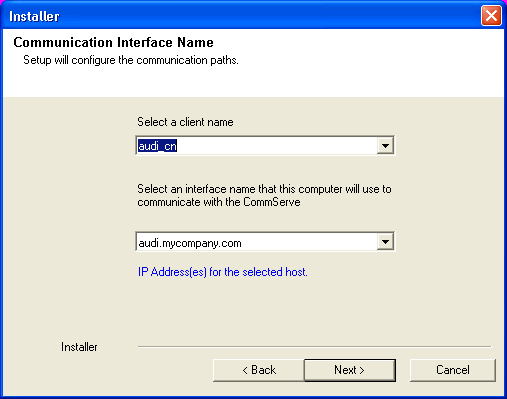
| 14. |
Enter the following:
- The local (NetBIOS) name of the client computer.
- The TCP/IP IP host name of the NIC that the client computer must use to communicate with the CommServe
Server.
NOTES
-
Do not use spaces when specifying a new name for the Client.
- The default network interface name of the client computer
is displayed if the computer has only one network interface. If the
computer has multiple network interfaces, enter the interface name that
is preferred for communication with the CommServe Server.
- If a component
has already been installed, this screen will not be displayed; instead, the
install program will use the same name as previously specified.
Click Next to continue.
|
 |
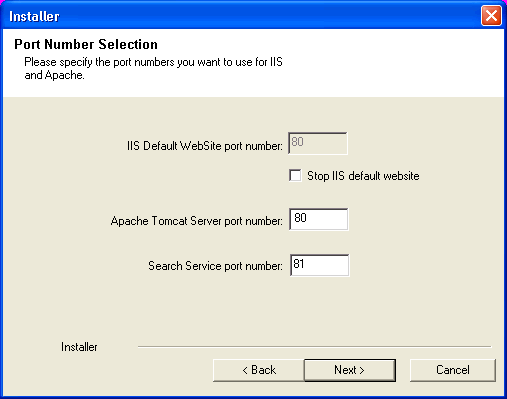
| 15. |
Specify the port numbers to be used by IIS Default Website
port number and Search Service port number. By default,
Apache Tomcat Server port number is 80. NOTES:
Click Next to continue.
|
 |
| 16. |
Specify the location where you want to install the software. NOTES
- Do not install the software to a mapped network drive.
- Do not use the following characters when specifying the destination path:
/ : * ? " < > | #
It is recommended that you use alphanumeric characters only.
- If you intend to install other components on this computer, the selected installation directory will be automatically used for that software as well.
- If a component is already installed in this computer, this screen may not be displayed.
The software will be automatically installed in the same location that was
previously specified.
Click Browse to change directories.
Click Next to continue.
|
 |
|
|
| 17. |
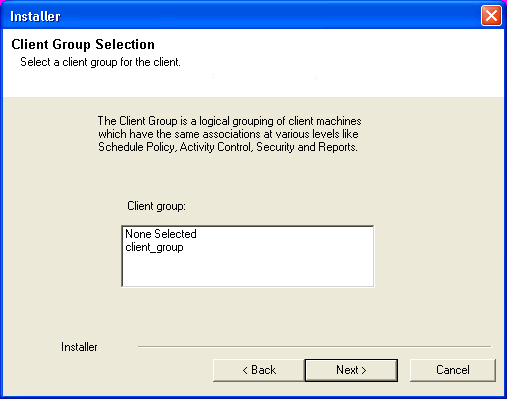
Select a Client Group from the list. Click Next to continue.
NOTES
- This screen will be displayed if Client Groups are configured in
the CommCell Console. For more information, see
Client
Computer Groups.
|
 |
|
|
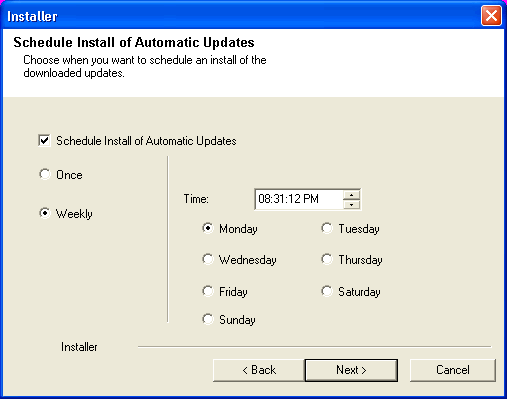
| 18. |
If necessary, select this option to schedule an automatic installation of software
updates.
NOTES
Click Next to continue.
|
 |
|
|
| 19. |
Select the necessary Global Filter option for the default subclient and Click
Next to continue.
NOTES
- Select Use Cell level Policy to inherit the global filter policy
configuration set for the CommCell, i.e., if the Use Global Filters on
All Subclients option is selected in the Global Filters
dialog box (from the CommCell Console’s Control Panel), then this policy
will be applied to the default subclient as well. If is not selected, then
the global filters will not be applied to the default subclient.
- Select Always use Global filters to apply the global
filters policy to the default subclient regardless of the policy set for the
CommCell.
- Select Do not use Global filters to disregard applying the global
filters to the default subclient regardless of the policy set for the
CommCell.
Click Next to continue.
|
 |
|
|
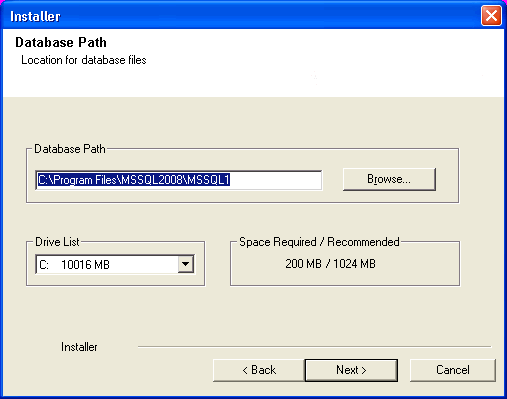
| 20. |
Enter the Web Server database installation path.
NOTES
This is the location where you want to install the database for the
Web Server.
Click Browse to change directories.
Click Next to continue.
|
 |
| 21. |
Enter the port number for Web Search Service and then click
Next to continue. NOTES
- Ensure that this port number is not already used by any other service
or application.
|
 |
|
|
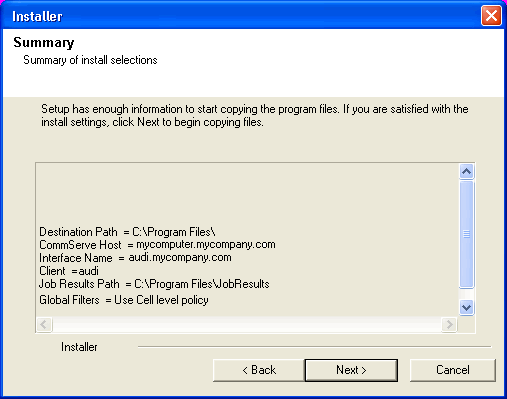
| 22. |
Verify the summary of selected options.
NOTES
- The Summary on your screen should
reflect the components you selected for install, and may look different from
the example shown.
Click Next to continue or
Back to change any of the options.
The install program now starts copying the software to the computer.
This step may take several minutes to complete.
|
 |
|
|
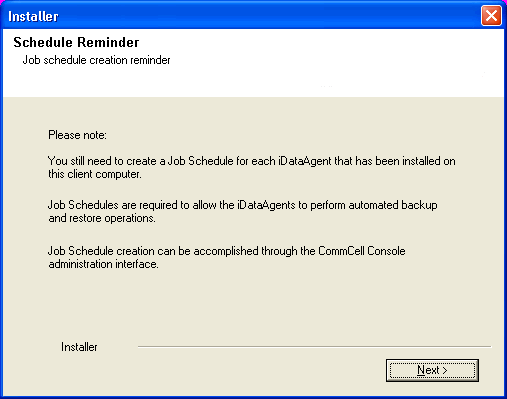
| 23. |
Click Next to continue.
NOTES
- Schedules help ensure that the data protection operations for the
Agent are automatically performed on a regular basis without user intervention.
For more information, see Scheduling.
|
 |
| 24. |
Click Yes to remove the privileges that were assigned earlier by the
install program. If you do not wish to remove them, click No.
NOTES
- This option will only be displayed if you were prompted to assign the
privileges earlier in the installation.
|
 |
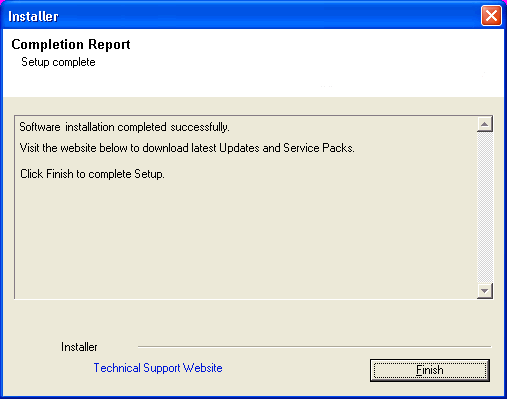
| 25. |
Setup displays the successfully installed components.
NOTES
- The Setup Complete message displayed on
your screen will reflect the components you installed, and may look different
from the example shown.
- If you install an Agent with the CommCell Console open, you need to
refresh the CommCell Console (F5) to see the new Agents.
- If Reboot Now button is displayed make sure to reboot the
computer before performing any other operations from the computer.
Click Finish to close the install program.
The installation is now complete.
|
 |
|
|
If the Web Server and Web Client is installed on 64 bit machine, then
installation of 32-bit File system iDataAgent is required for restoring
the data from the search console. |
General
-
Review Install Considerations
after installing the software.
-
Install post-release updates or Service Packs that may have been released
after the release of the software. When you are installing a Service Pack,
ensure that it is the same version as the one installed in the CommServe Server.
Alternatively, you can enable
Automatic Updates for quick and easy installation
of updates in the CommCell component.


