The CommCell Console is the graphical user
interface (GUI) that you use to control the operation of the CommCell.
Setup allows you to install the CommCell Console on any one or more of
the following:
By installing the CommCell Console on another computer, you can
remotely administer the CommCell.
If the CommServe is on the opposite side of the firewall from the CommCell
Console, ensure that port 8401 is open.
| 1. |
Place the Software
Installation Disc for the Windows platform into the disc drive. After a
few seconds, the installation program is launched.
If the installation program does not launch automatically:
- Click the Start button on the Windows task bar, and then click Run.
- Browse to the installation disc drive, select Setup.exe, click Open, then click OK.
NOTES
- If you are installing on Windows Server Core editions, mount to Software
Installation Disc through command line, go to the AMD64 folder and run
Setup.exe.
|
|
| 2. |
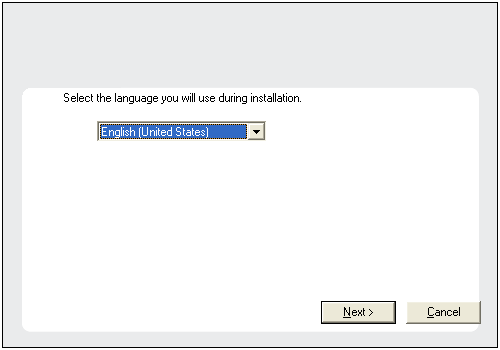
Choose the language you want to use during installation.
Click the down arrow and select the desired language from the drop-down list, and click Next to continue.
|
 |
| 3. |
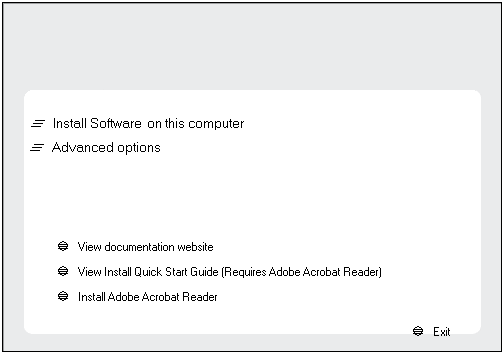
Select the option to install software on this computer. NOTES
- The options that appear on this screen depend on the computer in which
the software is being installed.
|
 |
| 4. |
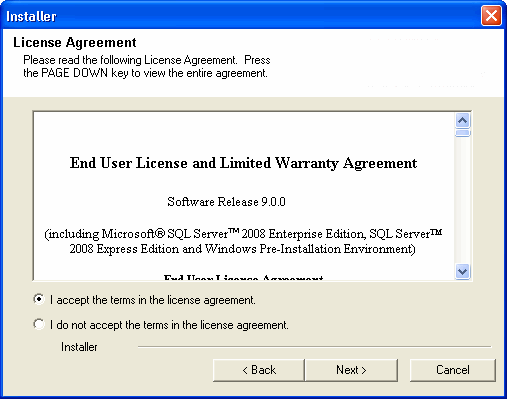
Read the license agreement, then select I accept the terms
in the license agreement. Click Next to continue.
|
 |
|
If you are installing in clustered environment, follow the steps below. For non-clustered
environment, skip to Select Components
for Installation. |
| 5. |
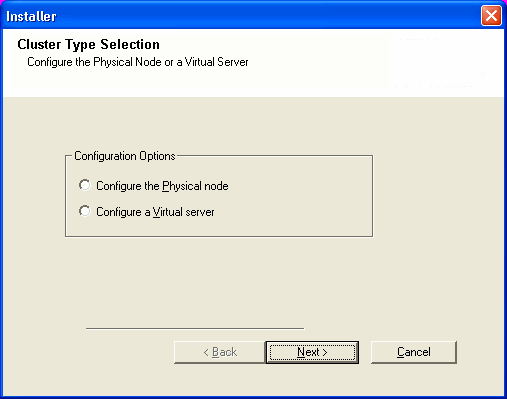
Select Configure a Virtual Server. Click Next to continue.
|
 |
| 6. |
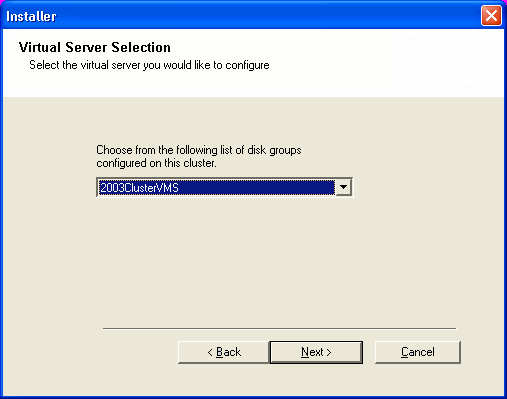
Select the disk group in which the cluster group resides. Click Next to
continue.
|
 |
|
|
| 7. |
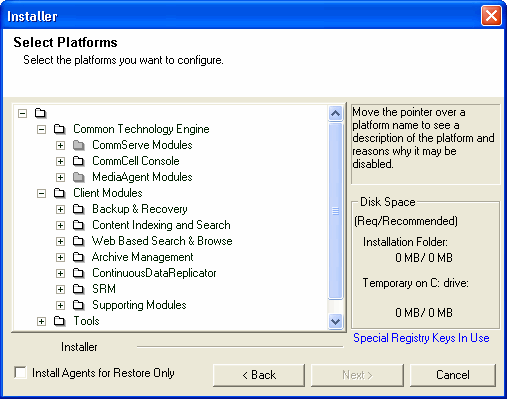
Select the component(s) to install. NOTES
- Your screen may look different from the example shown.
- Components that either have already been installed, or which cannot be installed, will be dimmed.
Hover over the component for additional details.
- If you wish to install the agent software for restore only, select
Install Agents for Restore Only checkbox. See
Installing Restore Only Agents for
more information.
- The Special Registry Keys In Use field will be highlighted when GalaxyInstallerFlags
registry key is enabled. Move the mouse pointer over this field to
see a list of registry keys that have been created in this computer.
Click Next to continue.
To install the CommCell Console, from the Common
Technology Engine folder expand the CommCell Console
folder, and then select the following:
When you select this option, the Java Runtime Environment is
automatically selected for install. |
 |
| 8. |
Click Yes to install the Java Runtime Environment (JRE) or click No
if you would like to use the JRE Version already available in your computer.
NOTES
- This prompt will be displayed only if the computer is running a JRE
version prior to the one supplied in this installation program or no JRE version is available at all.
See
System Requirements
- CommServe for more information on JRE versions.
|
 |
| 9. |
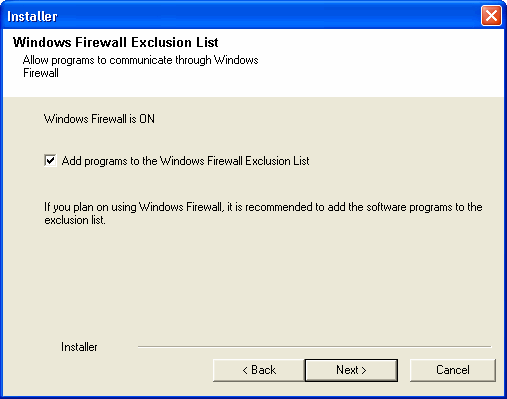
Select Add programs to the Windows Firewall Exclusion List, if
you wish to add CommCell programs and services to the Windows Firewall
Exclusion List.
NOTES:
Click Next to continue.
|
 |
| 10. |
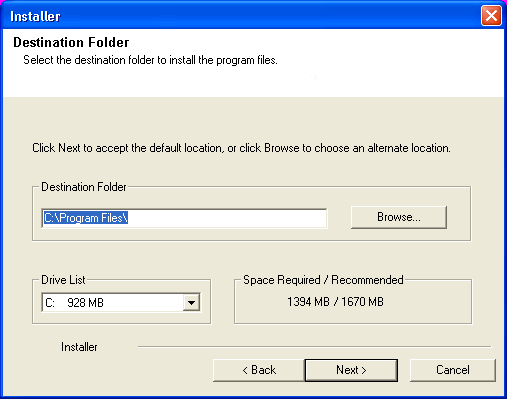
Specify the location where you want to install the software. NOTES
- Do not install the software to a mapped network drive.
- Do not use the following characters when specifying the destination path:
/ : * ? " < > | #
It is recommended that you use alphanumeric characters only.
- If you intend to install other components on this computer, the selected installation directory will be automatically used for that software as well.
- If a component is already installed in this computer, this screen may not be displayed.
The software will be automatically installed in the same location that was
previously specified.
Click Browse to change directories.
Click Next to continue.
|
 |
|
|
| 11. |
Click Yes to configure the CommCell Console for web administration, or
Click No to continue without configuring the CommCell Console for web
administration. NOTES
- The Internet Information Server (IIS) must be installed on this computer
in order to configure for web administration.
- Configuring this computer for web administration allows you to:
- Access the CommCell Console and Books Online from a remote computer
using a Web browser.
- View CommCell reports via a Web browser.
- Access Books Online by clicking the Help button (the icon with a ?)
in the CommCell Console.
|
 |
|
|
| 12. |
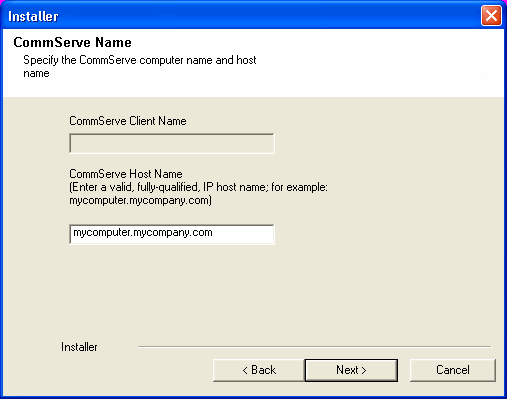
Enter the fully qualified domain name of the CommServe Host Name. This should be
TCP/IP network name. e.g., computer.company.com. NOTES
- The CommServe client name is the name of the computer. This field
is automatically populated.
- Do not use space and the following characters when specifying a new
name for the CommServe Host Name:
\|`~!@#$%^&*()+=<>/?,[]{}:;'"
- If a computer has already been installed, this screen will not be
displayed; instead the installer will use the same Server Name as previously
specified.
- If this computer and the CommServe is separated by a firewall, select
the Configure firewall services option. For firewall options and
configuration instructions, see
Firewall Configuration
and continue with the installation.
If the CommServe is located behind a
port-forwarding gateway, provide the hostname of the gateway in place of the
CommServe Host Name.
Click Next to continue.
|
 |
|
|
| 13. |
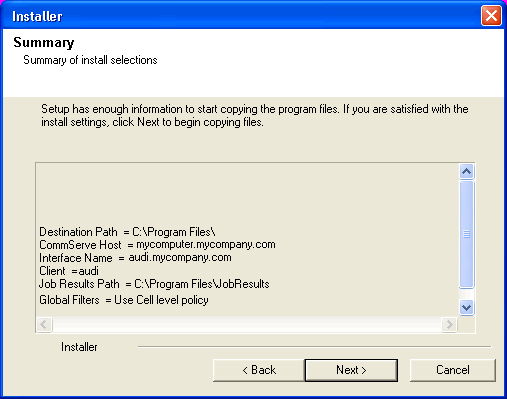
Verify the summary of selected options.
NOTES
- The Summary on your screen should
reflect the components you selected for install, and may look different from
the example shown.
Click Next to continue or
Back to change any of the options.
The install program now starts copying the software to the computer.
This step may take several minutes to complete.
|
 |
|
|
| 14. |
If you are installing/upgrading the software on the physical node in a clustered environment,
use this option to install/upgrade the software on the remaining physical nodes of
the cluster.
- To install/upgrade the software on the remaining nodes of the cluster, click
Yes.
- To complete the install/upgrade for this node only, click No.
See
Install/Upgrade Remaining Cluster
Nodes for step-by-step instructions.
|
 |
|
|
| 15. |
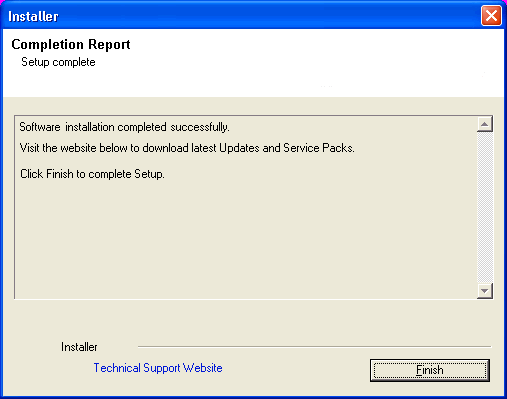
Setup displays the successfully installed components.
NOTES
- The Setup Complete message displayed on
your screen will reflect the components you installed, and may look different
from the example shown.
- If you install an Agent with the CommCell Console open, you need to
refresh the CommCell Console (F5) to see the new Agents.
- If Reboot Now button is displayed make sure to reboot the
computer before performing any other operations from the computer.
Click Finish to close the install program.
The installation is now complete.
|
 |
General
-
Review Install Considerations
after installing the software.
-
Install post-release updates or Service Packs that may have been released
after the release of the software. When you are installing a Service Pack,
ensure that it is the same version as the one installed in the CommServe Server.
Alternatively, you can enable
Automatic Updates for quick and easy installation
of updates in the CommCell component.
|


