Topics | Configure | How To | Tools | Support | Related Topics
Configure a Cloud Storage Library
Add a New MediaAgent to an existing Cloud Device
![]() To add a new
Cloud Storage device:
To add a new
Cloud Storage device:
Before You Begin
To add a Cloud Storage device |
||||
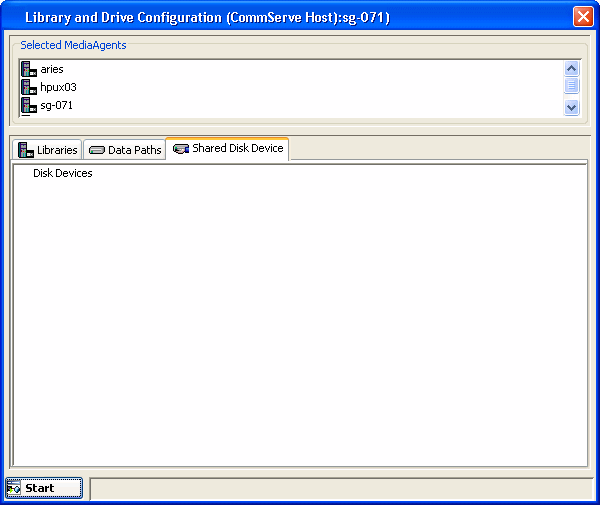
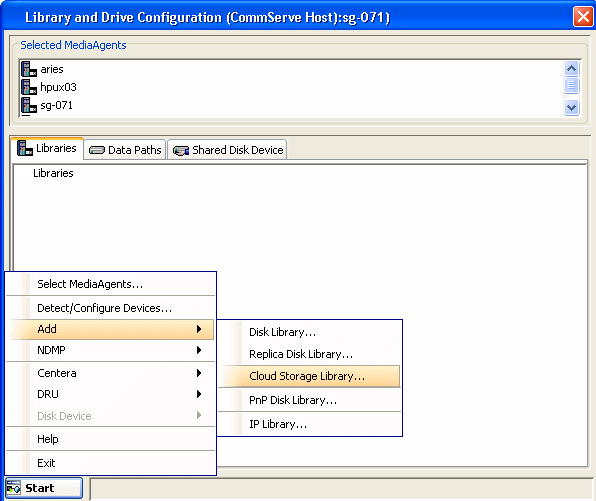
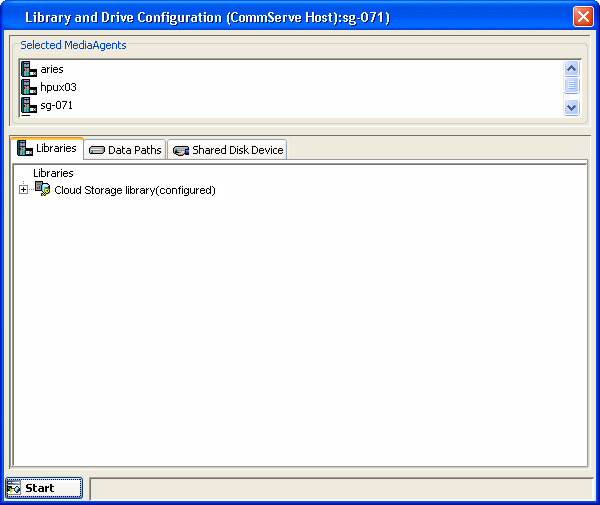
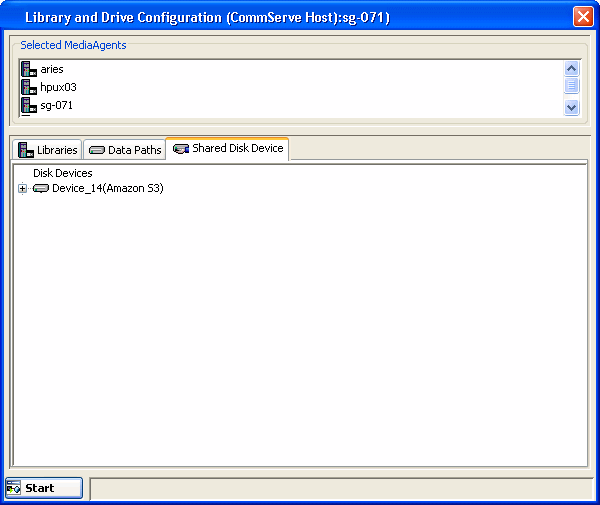
| 1. | Display the Library and Drive Configuration window. | |||
| 2. | Click the Shared Disk Device tab. |
 |
||
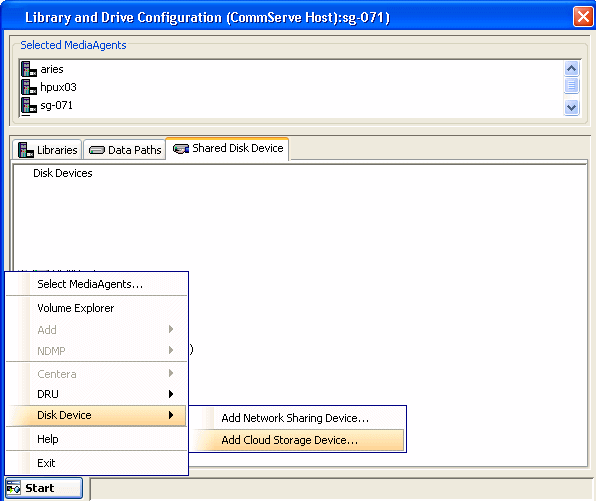
| 3. | Click the Start menu, select Disk Device, then choose Add Cloud Storage Device. |
 |
||
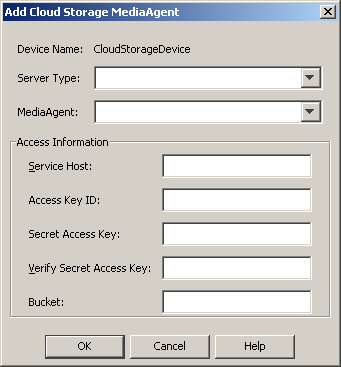
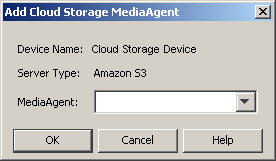
| 4. | In the Add a Cloud Storage MediaAgent dialog box,
enter or select the following information: Device Name: System generated Cloud Storage device name. Server Type: The type of Cloud Storage server. MediaAgent: The name of the MediaAgent controlling the library. Access Information Access information consists of the credentials to access the Cloud Storage library. Acquire the access credentials from your Cloud Storage vendor and provide the necessary information. Note that the access information for Cloud Storage devices varies for each server type, and your screen might be different from the one displayed here. See Add Cloud Storage MediaAgent for a list of server types and their access information.
|
 |
||
| 5. | Click OK to create the device. | |||
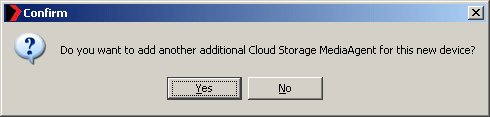
| 6. | If you wish to associate another MediaAgent to the device, click Yes in the confirmation dialog box. |
 |
||
| 7. | In the MediaAgent field, select the MediaAgent
you wish to associate with the device. Click OK to save. If you wish to add more MediaAgents repeat steps 6 and 7 as required. |
 |
||
![]() To add a new
Cloud Storage library:
To add a new
Cloud Storage library:
Before You Begin
Required Capability: See Capabilities and Permitted Actions
To add a Cloud Storage library |
||||
| 1. | Display the Library and Drive Configuration window. | |||
| 2. | Click the Shared Disk Device tab. |
|
||
| 3. | Click the Start menu, select Add, then choose click Cloud Storage Disk Library. |
 |
||
| 4. |
In the Add Disk Library dialog box provide
the following information: Alias: A descriptive name for the library. Automatically create storage policy for new data paths: Select this option to automatically create a new storage policy when the mount path is added to this library. Click OK. |
 |
||
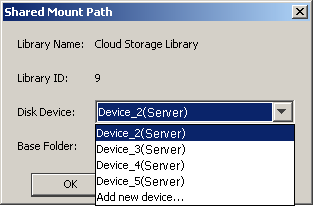
| 5. | In the Shared Mount Path dialog box provide the
following information:
|
 |
||
| 6. | The mount path is added and the Cloud Storage library appears in the Library and Drive Configuration window with a status of configured. |
 |
||
![]() To add a new
MediaAgent:
To add a new
MediaAgent:
Before You Begin
To add a Cloud Storage device |
||
| 1. | Display the Library and Drive Configuration window. | |
| 2. | Click the Shared Disk Device tab.
|
|
| 3. | Right-click the device for which you wish to add a new MediaAgent and select Add Cloud Storage MediaAgent. |
 |
| 4. | In the Add a Cloud Storage MediaAgent dialog box,
select the following information: Device Name: System generated Cloud Storage device name. Server Type: The type of Cloud Storage server. MediaAgent: The name of the MediaAgent controlling the library. Click OK to add the MediaAgent. |
|
| 5. | If you wish to associate another MediaAgent to the device, click Yes in the confirmation dialog box. |
|
| 6. | In the MediaAgent field, select the MediaAgent
you wish to associate with the device and click OK to save. Repeat steps 5 and 6 as required. |
|