The Import Wizard Tool allows you to perform the following operations in
order to manage all SnapProtect operations of the DataFabric Manager from the
Simpana CommCell Console:
Import the configuration details of a DataFabric Manager server into the Simpana software.
Import the external relationships of storage devices into the DataFabric
Manager server.
This tool is designed for a one-time import of configurations and schedules
of the DataFabric Manager. Once imported, data protection policies are fully
managed by client policies and schedules of the Simpana software.
The following table displays the configurations that are supported for import
as well as the configuration that are not.
What Gets Imported
What Does Not Get Imported
All non-application datasets
All relationships listed in the External Relationship section of
the DataFabric Manager
Datasets with the following SnapProtect protection policies:
PM (Mirror)
PV (Back up)
PMV (Mirror, then Back up)
PVM (Back up, then Mirror)
PMM (Chain of two mirrors)
P<MM (Mirror to two destinations)
P<MV (Mirror and Back up)
For external relationships, all the above are supported except
P<MM and P<MV.
SnapProtect schedules
Jobs and snapshots on the primary node of a dataset
Datasets with disaster recovery (DR) protection policies
Application datasets that were not created through SnapProtect
Datasets with primary members that are part of existing
subclients
Snapshots on the secondary and tertiary nodes of a dataset
Datasets with a file server or aggregate as primary or secondary
node member
Throttling settings on the protection policies
OSSV (Open System SnapVault) relations
Pre-existing schedules, jobs and snapshots on external
relationships
External relationships not imported:
Qtree level SnapMirror relationships
Volume level SnapVault relationships
More than one relationship coming from the same source
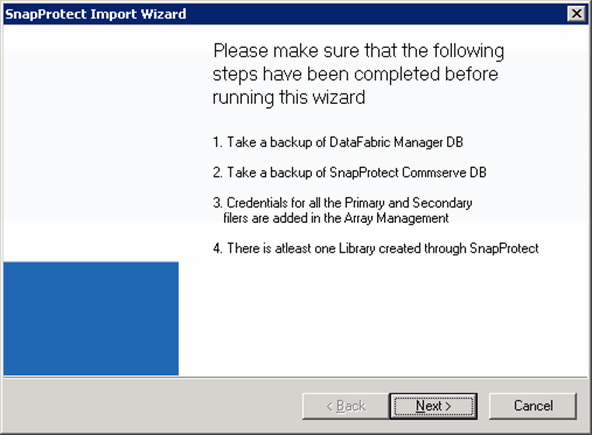
Ensure array credentials for the primary and secondary storage
devices are specified in the CommServe. The array names should match the
hostname of the primary and secondary devices as displayed in the DataFabric
Manager.
A backup of the DataFabric Manager server and CommServe database should be performed for recovery
purposes.
Install Service Pack 3B or higher on the CommServe computer.
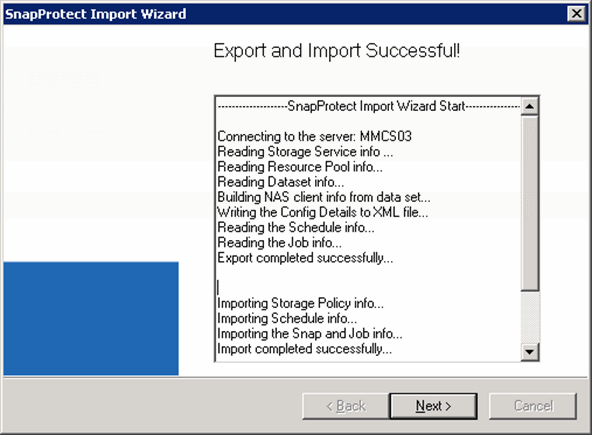
During the import operation, the tool exports all the information from the DataFabric
Manager server into XML files. Then, the tool imports the configuration details
of the DataFabric Manager from the XML files to the CommServe. The XML files can be
used later for debugging purposes.
You can run the Import Wizard tool in an interactive mode or manually from
the command line (using debugging arguments). While using one of the following
methods, you should not make changes to the DataFabric Manager server.
On the CommServe computer, navigate to the <software
installation path>\Base folder and double-click
SnapProtectImport.exe.
2.
Click Next.
3.
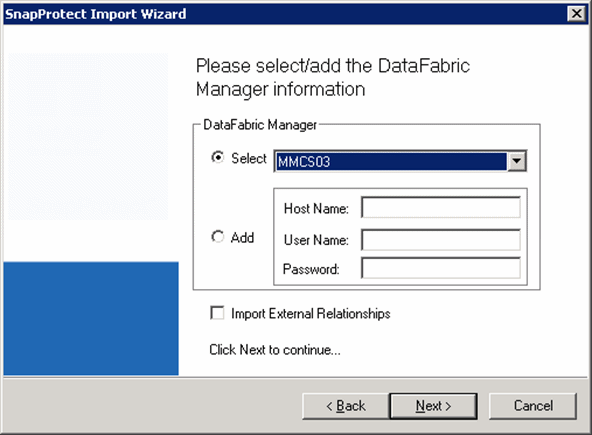
Select the DataFabric Manager server from the drop-down list.
If the DataFabric
Manager server you want to select is not available, click
Add and provide the DataFabric Manager details.
Select Import External Relationships to import the
pre-existing external relationships of the storage devices.
Click Next.
4.
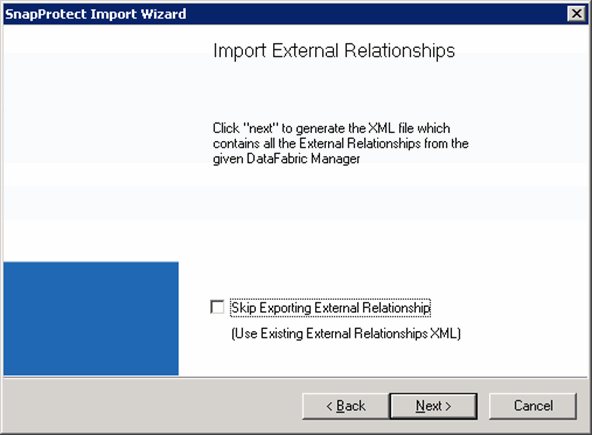
Skip this step if you did not choose to import external relationships.
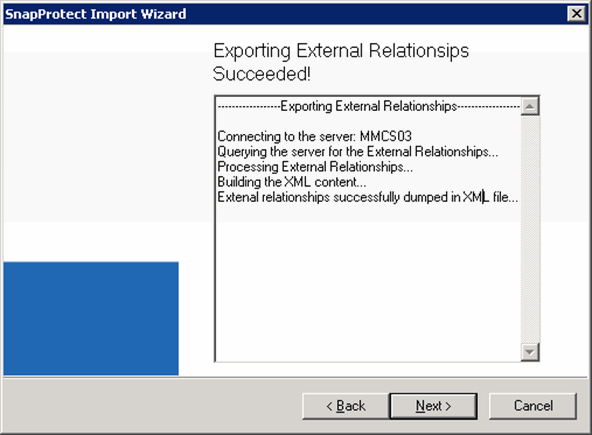
Click Next to retrieve all the external relationships and store
it in an XML file.
If you want to use an existing XML file, select Skip Exporting External
Relationship . The XML file will not be regenerated.
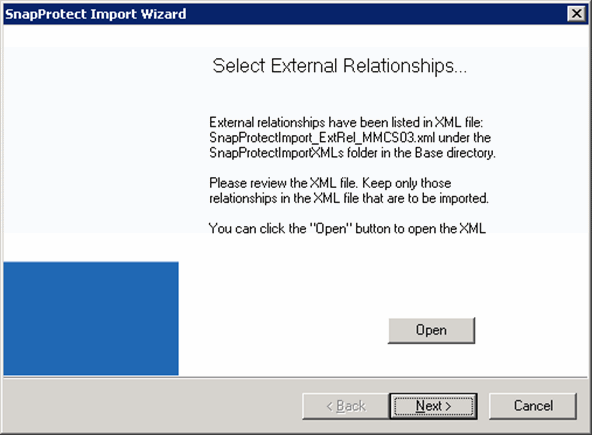
Click Next.
Click Open to review the XML file. The following changes
on the XML are allowed:
Edit the name of a Dataset.
Delete a Dataset tag.
Delete a relationship tag of a Dataset.
Move a relationship tag from one Dataset to another of same
topology.
For Fan-In external relationships, ensure the source volumes are in the same
dataset.
Click Next.
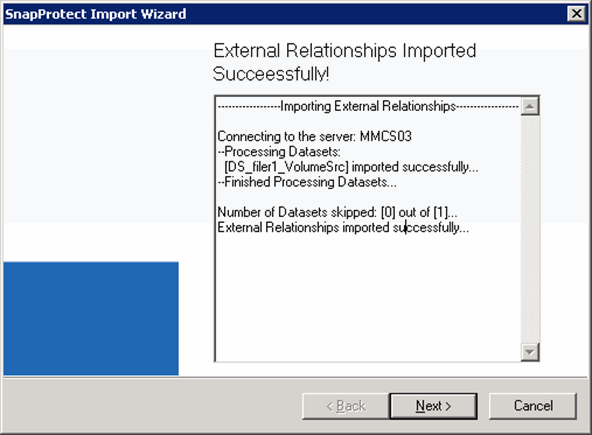
Click Next.
The external relationships are imported to the
DataFabric Manager.
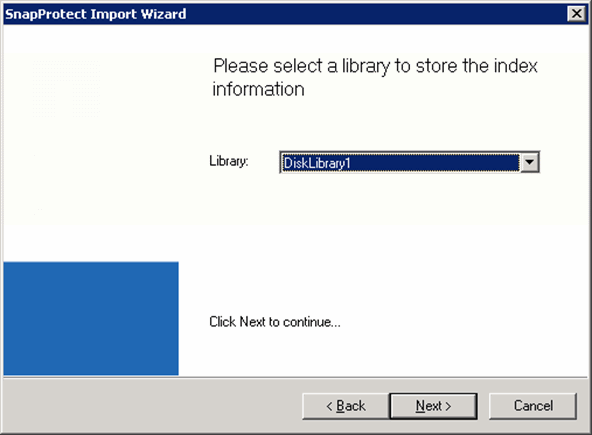
5.
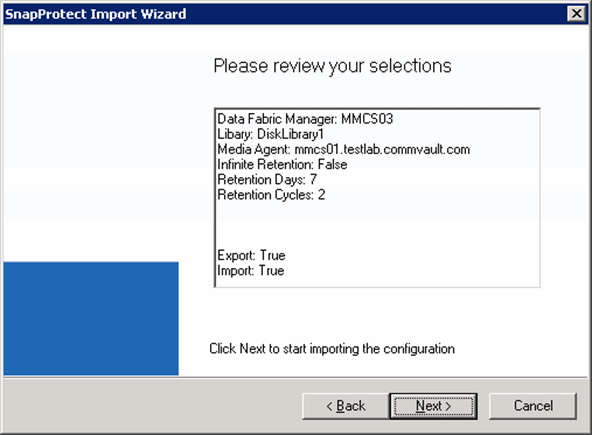
Select a library to store the index information.
New storage
policies will use the selected library.
Click Next.
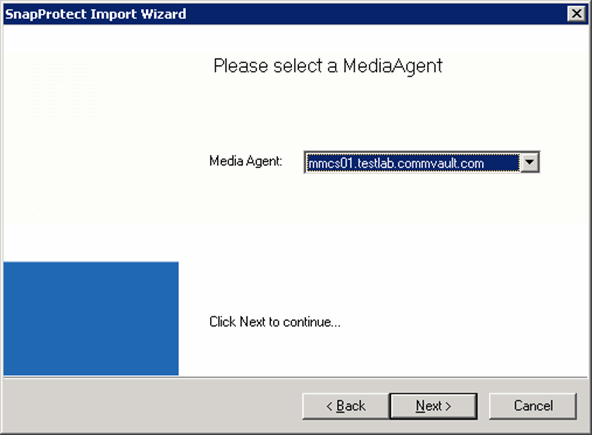
6.
Select a MediaAgent.
Click Next.
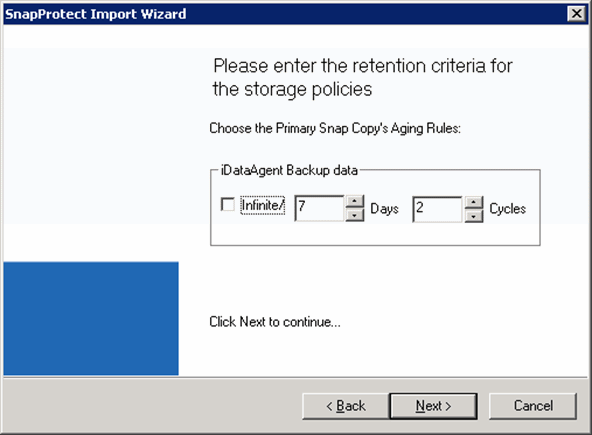
7.
Enter the number of retention days and cycles for all the storage policy
copies that are created.
Click Next.
8.
Click Next to start importing the configuration of the DataFabric
Manager
server.
9.
Click Next.
Once the import operation is completed, review the
following file under the <software
installation path>\Base\SnapProtectImportXMLs folder
to see the list of entities that were skipped or not imported:
After successfully importing the configuration details of the DataFabric
Manager server to
the CommServe, consider the following before performing any SnapProtect
operation:
Provide the NDMP credentials for the storage device.
From the CommCell Console, navigate to the NAS client.
Right-click the Agent node and click Properties.
Click NDMP Properties.
Review and update the SnapProtect schedules imported from the DataFabric
Manager
server. These schedules import the retention rules from the DataFabric
Manager protection
policy properties.
Review and update the basic retention rules on the Storage Policy
copies. If needed, set the extended retention rules.
From the CommCell Console, navigate to Policies |
Storage Policies.
Click the <storage policy>, right-click the copy and
click Properties.