The following sections provide the necessary steps required to create and
configure the components for a first SnapProtect backup of an Oracle database.
| 3. |
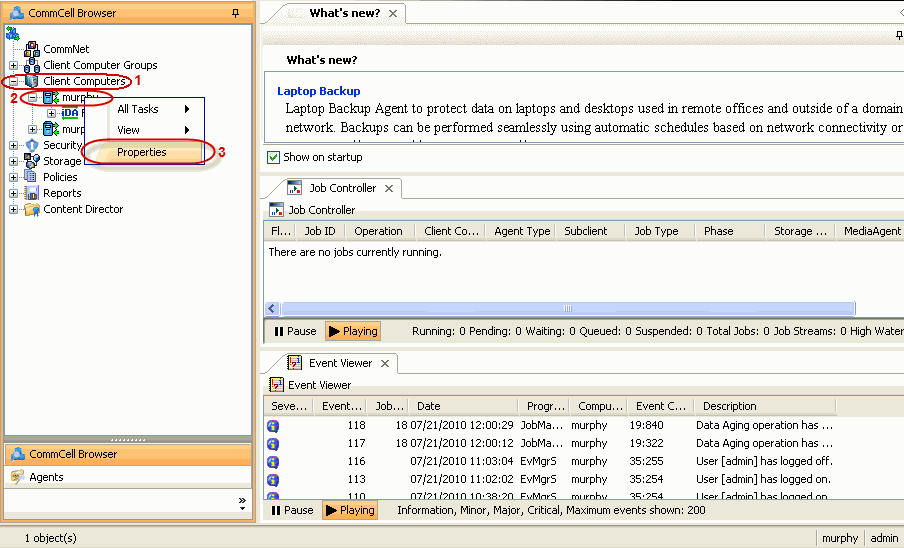
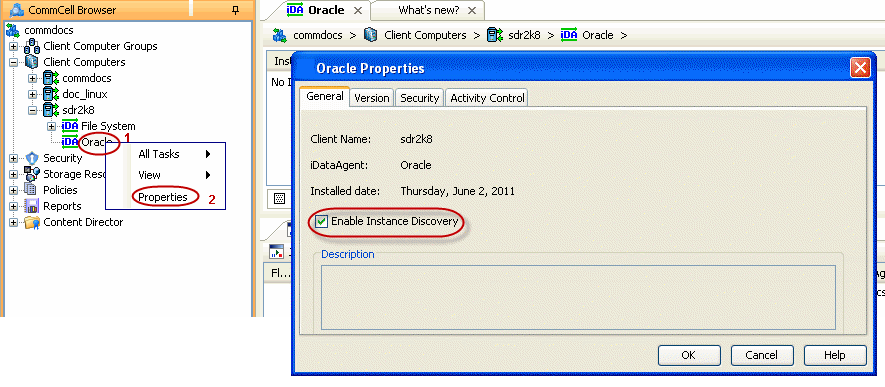
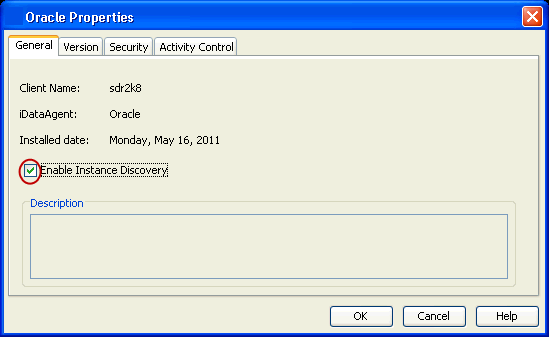
- From the CommCell Browser, navigate to Client Computers | <Client>.
- Right-click Oracle and then
click Properties.
|
 |
| 4. |
- Select the Enable Instance Discovery checkbox.
- Click OK.
If the instances are discovered automatically, go to step
7.
If the instances are not discovered automatically, follow the step
given below to manually discover the instances. |
 |
| 5. |
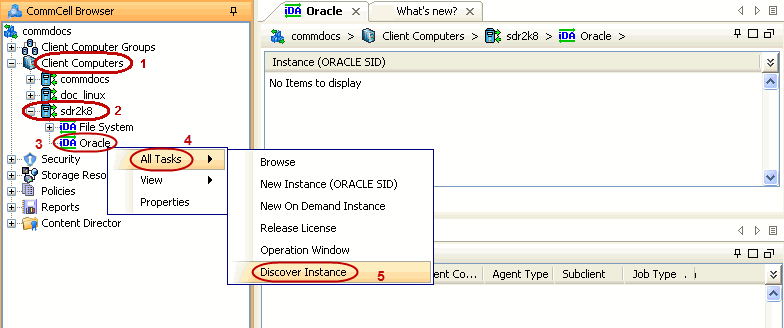
- From the CommCell Browser, navigate to Client Computers | <Client>.
- Right-click Oracle, point to All Tasks and then
click Discover Instance.
|
 |
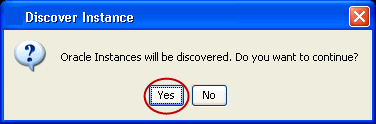
| 6. |
Click Yes. If your Oracle database uses an ASM instance and the
instance is in a different Oracle Home, you may have to manually add the
instance as the discovery operation may not find it. When configuring
the instance, verify the database status shows as STARTED. |
 |
| 7. |
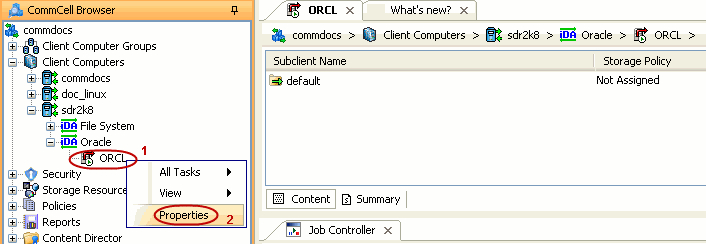
- From the CommCell Browser, navigate to Client Computers | <Client>|Oracle.
- Right-click the <Instance> and then click Properties.
|
 |
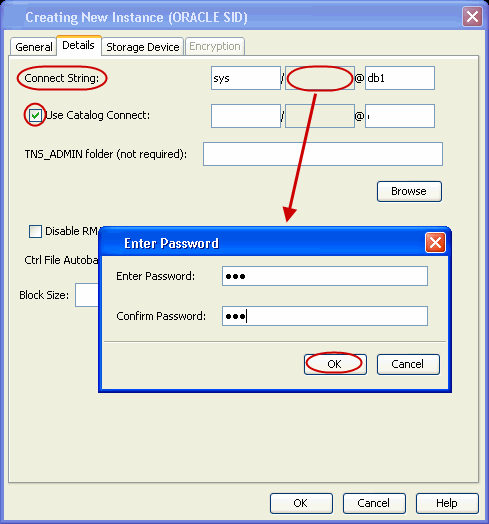
| 8. |
Skip this step if you are not using a proxy computer.
- Click the Details tab.
- In the Use Catalog Connect field, type the user name to
connect to the Recovery Catalog database.
- Click the grayed box in Use Catalog Connect.
- In the Password field, type the password for the user to
connect to the Recovery Catalog database.
- In the Confirm Password box, re-type the password for the
user.
- Click OK.
|
 |
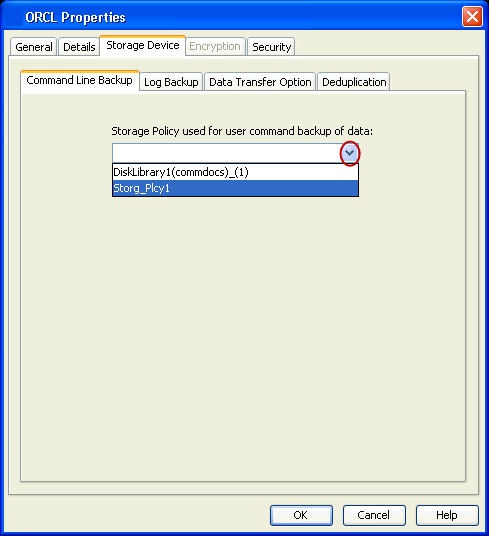
| 9. |
- Click the Storage Device tab.
- In the Storage Policy used for user command backup of data
box, select a storage policy name.
|
 |
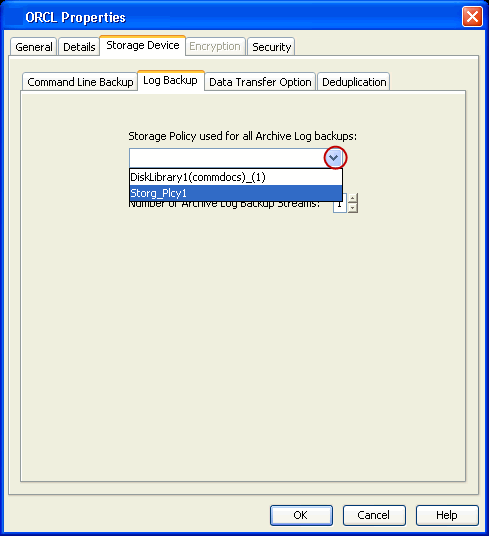
| 10. |
- Click the Logs Backup tab.
- In the Storage Policy
used for all Archive Log backups box, select a storage policy name.
- Click OK.
|
 |
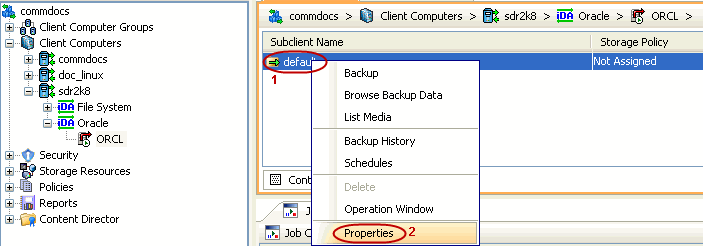
| 11. |
- From the CommCell Browser, navigate to Client Computers | <Client> |
Oracle | <Instance>.
- Right-click the default subclient and
then click Properties.
|
 |
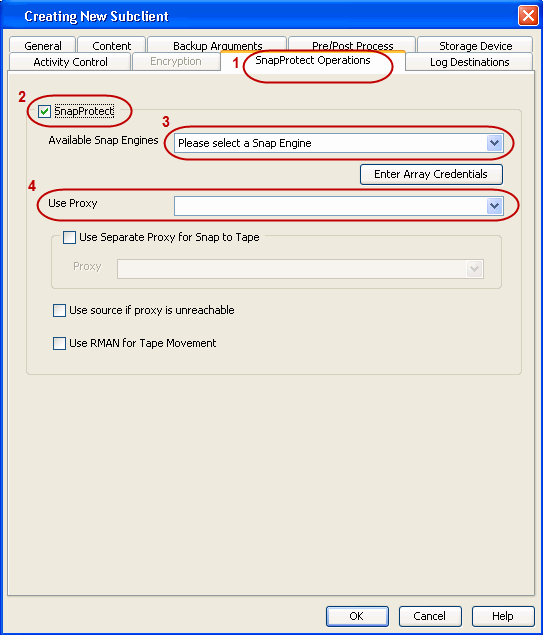
| 12. |
- Click the
SnapProtect Operations tab.
- Click SnapProtect option to enable SnapProtect backup for the selected subclient.
- Select the storage array from the Available Snap Engine
drop-down list.
- From the Use Proxy list, select the MediaAgent where
backup copy operations will be performed.
| |
- When performing SnapProtect backup using
proxy, ensure that the operating system of the proxy server is
either same or higher version than the client computer.
- For clustered environments, ensure the proxy you want to
select is not part of a cluster setup.
|
|
 |
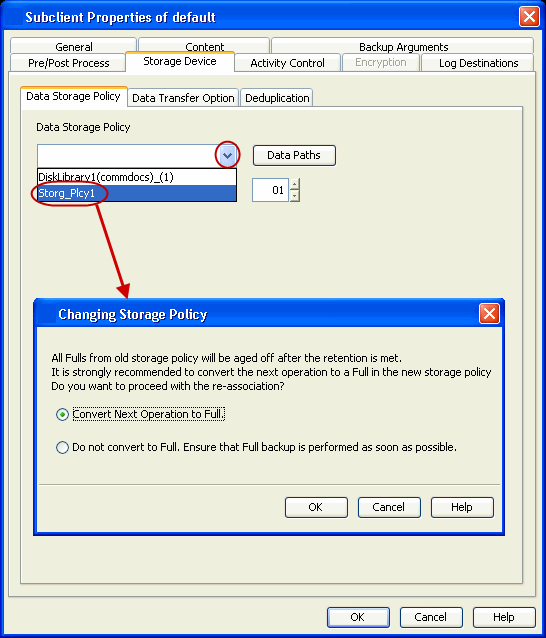
| 13. |
- Click the Storage Device tab.
- In the Data Storage Policy list, select a Storage Policy name.
- Click OK to convert the next backup as a full backup.
- Click OK.
Click
 to continue. If you do not
have Storage Policy created, follow the step given below to create a
storage policy. to continue. If you do not
have Storage Policy created, follow the step given below to create a
storage policy. |
 |
| 14. |
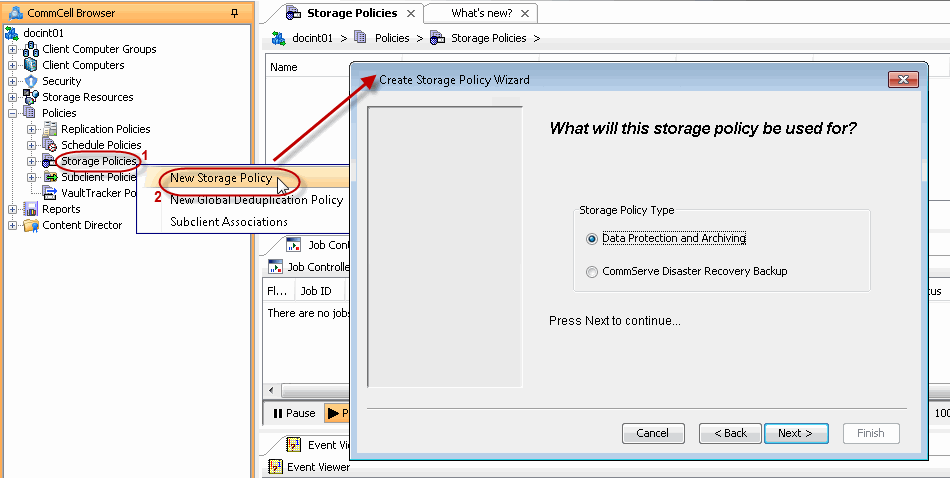
Create a Storage Policy:
- Click Create Storage Policy.
- Follow the prompts displayed in the Storage Policy Wizard. The required
options are mentioned below:
- Select the Storage Policy type as
Data Protection and Archiving and click Next.
- Enter the name in the Storage Policy Name box and click
Next.
- From the Library list, click the name of a disk library
to which the primary copy should be associated and then click
Next.
Ensure that you select a library attached to a
MediaAgent operating in the current release.
- From the MediaAgent list, click the name of a MediaAgent
that will be used to create the primary copy and then click Next.
- For the device streams and the retention criteria information,
click Next to accept default values.
- Select Yes to enable deduplication for the primary copy.
- From the MediaAgent list, click the name of the
MediaAgent that will be used to store the Deduplication store.
Type the name of the folder in which the deduplication database must
be located in the Deduplication Store Location or click the Browse
button to select the folder and then click Next.
- Review the details and click
Finish to create the Storage Policy.
|
 |
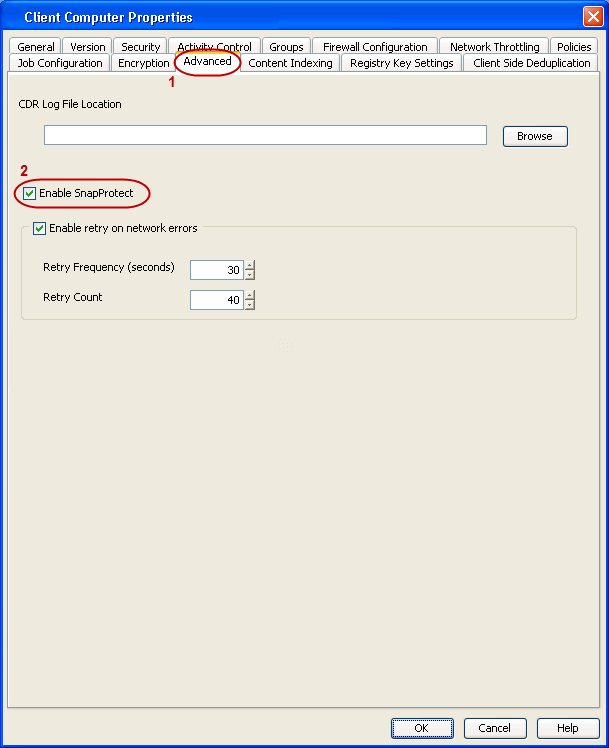
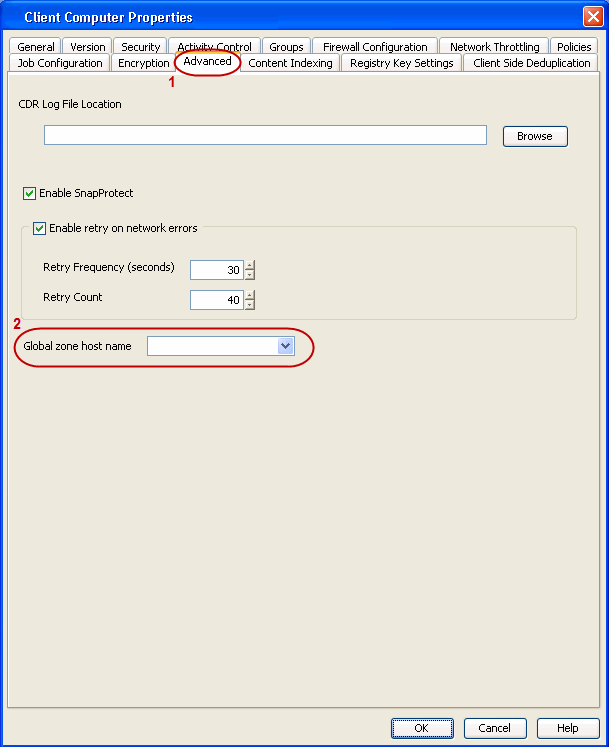
Skip this section if not using Solaris.
Click Follow the steps given below to enable SnapProtect backups on each of the
non-global zone clients containing the application data.
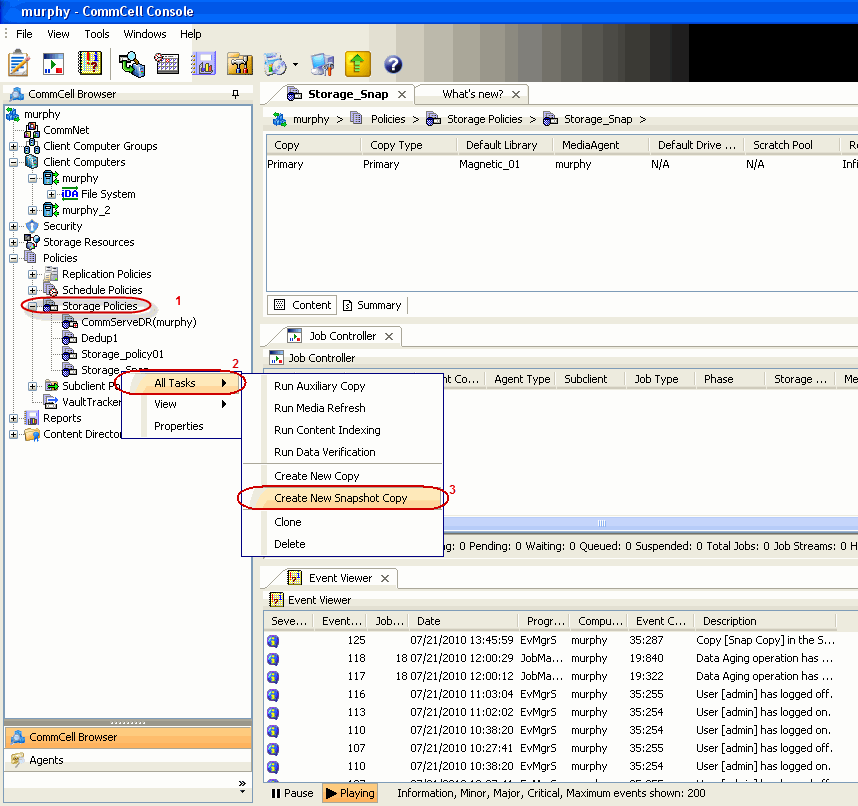
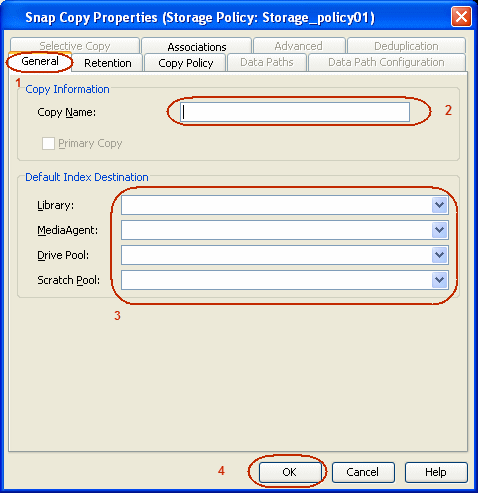
Skip this section if you already created a snapshot
copy.
Click Create a snapshot copy for the Storage Policy. The following section provides
step-by-step instructions for creating a Snapshot Copy.
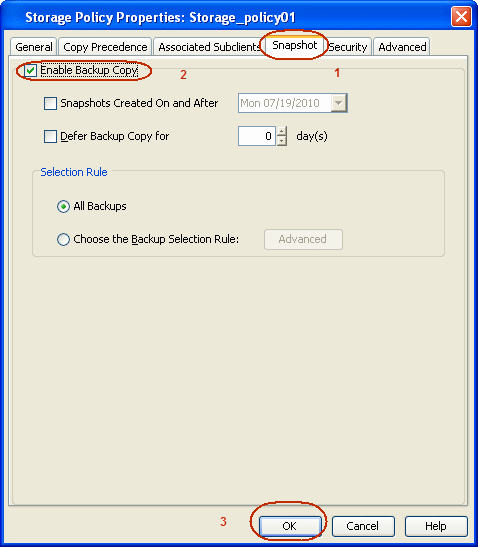
Follow the steps given below to configure Backup Copy for moving snapshots to
media.