

|
|
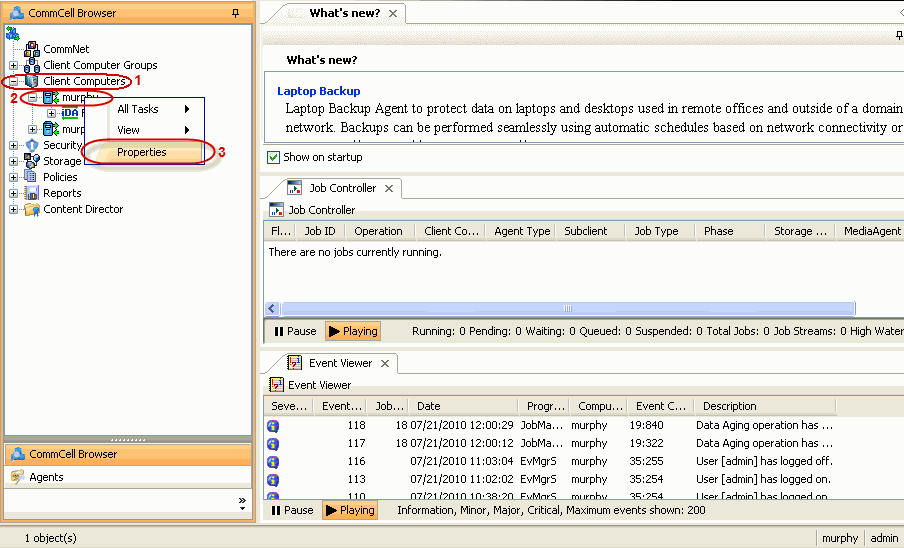
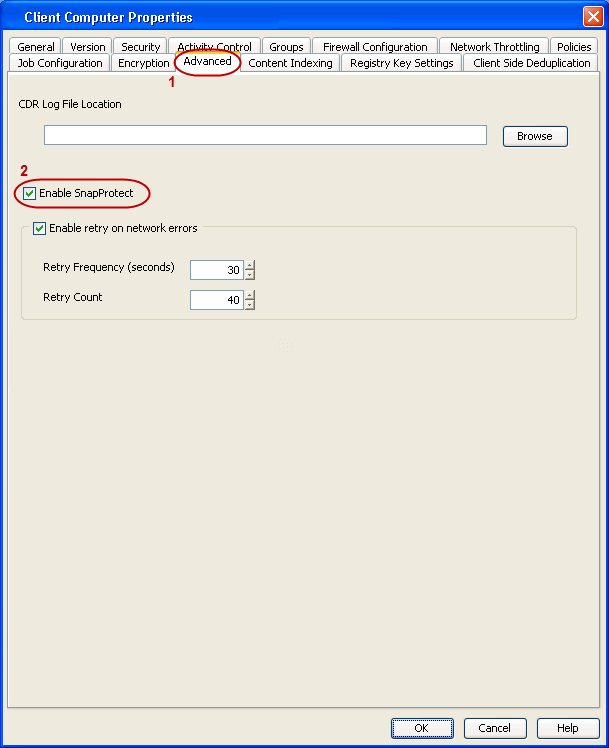
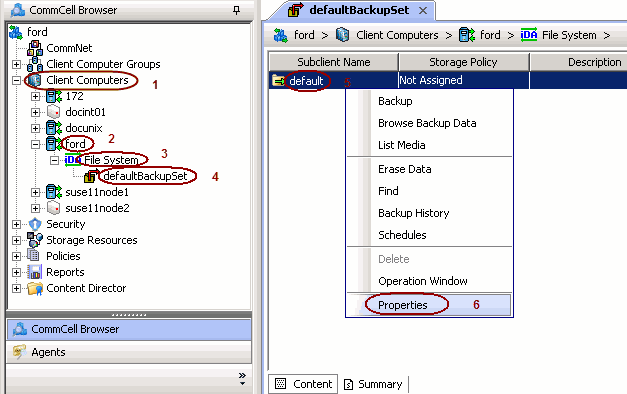
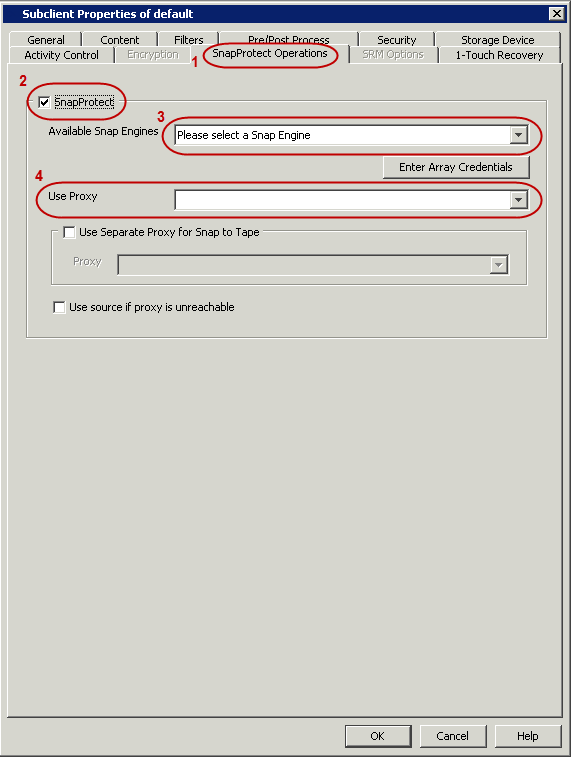
Once installed, the Linux File System iDataAgent requires some additional configuration before running your first SnapProtect backup. Follow the steps given below to complete the configuration for this Agent.
| 1. |
|
 |
| 2. |
|
 |
| 3. |
|
 |
||
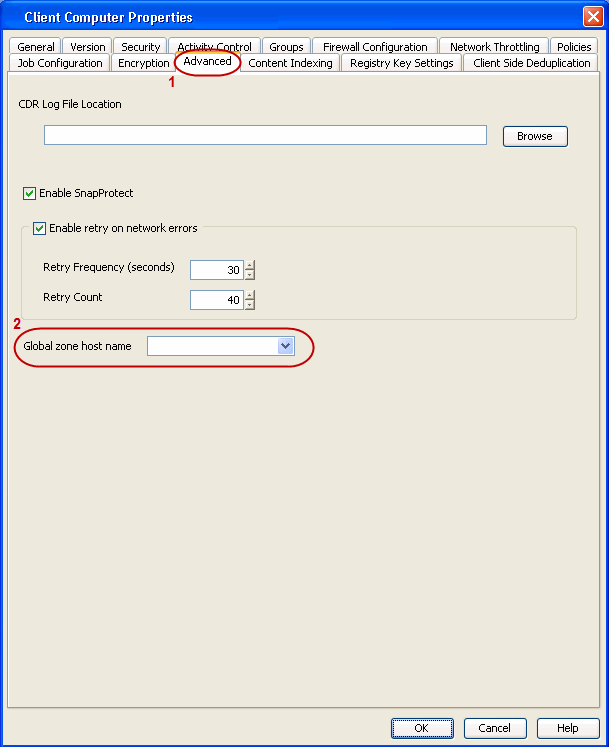
| 4. |
|
 |
||
| 5. |
|
 |
||
| 6. |
|
 |
Skip this section if not using Solaris.
Click to Continue.
Enable SnapProtect Backups on Solaris Zone |
|
Follow the steps given below to enable SnapProtect backups on each of the non-global zone clients containing the application data.
| 1. |
|
|
||
| 2. |
|
 |
||
| 3. | Repeat the above steps on all the non-global zone clients containing the application data. |
Skip this section if you already created a snapshot copy.
Click to Continue.
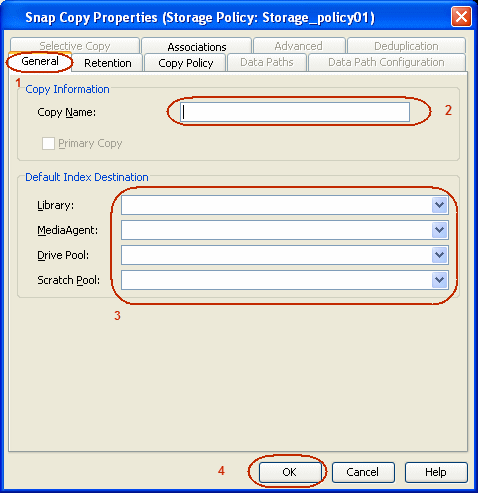
Create a Snapshot Copy |
|
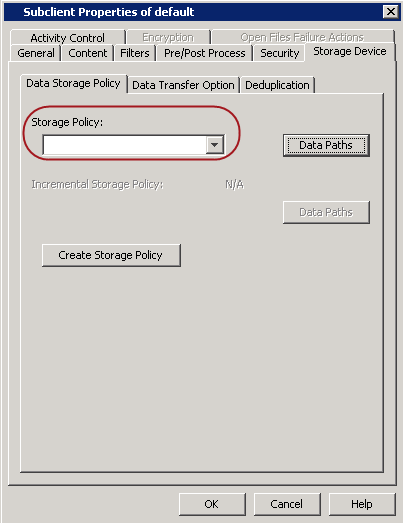
Create a snapshot copy for the Storage Policy. The following section provides step-by-step instructions for creating a Snapshot Copy.
| 1. |
|
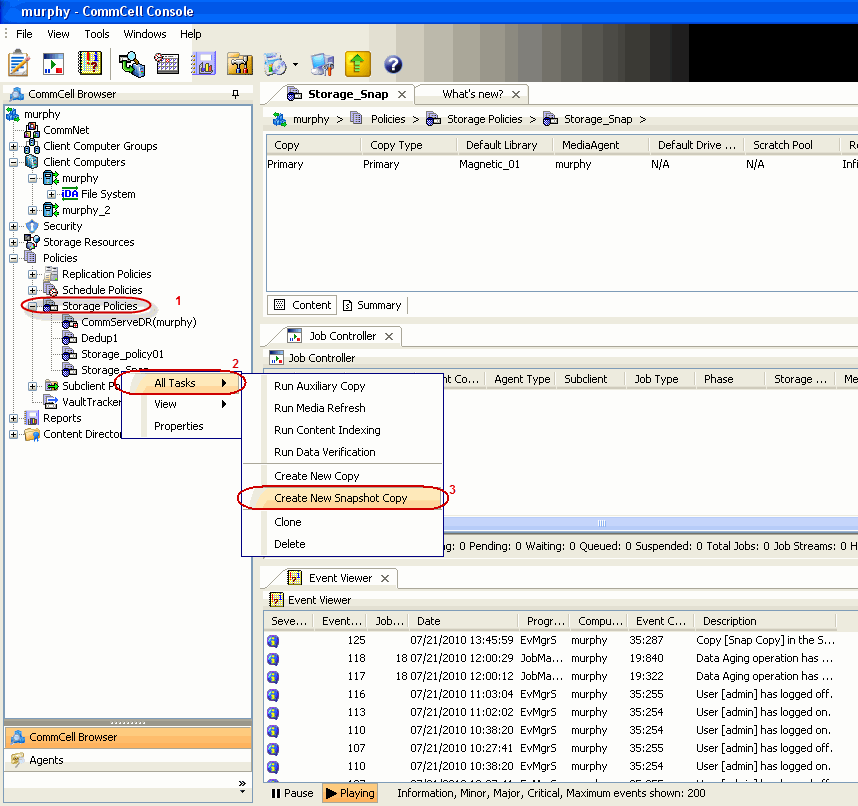 |
| 2. |
|
 |
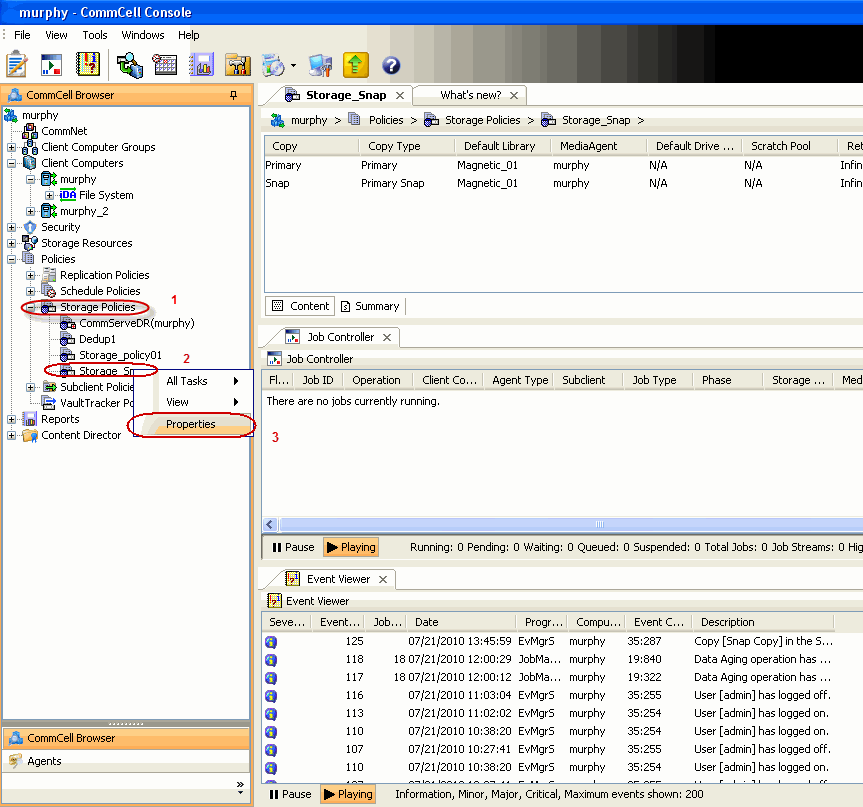
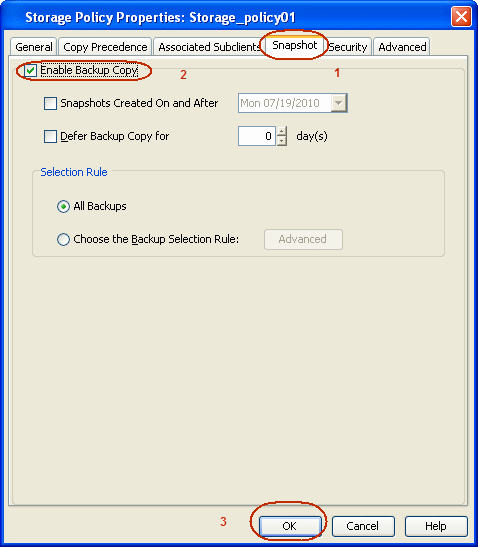
Follow the steps given below to configure Backup Copy for moving snapshots to media.
| 1. |
|
 |
| 2. |
|
 |
|
|