Getting Started - Windows File System Configuration
Pre-Requisites
- Prior to performing a SnapProtect backup, ensure that all the available
hotfixes for Virtual Disk Service (VDS) and VSS are applied.
- When performing SnapProtect backup for a Windows Cluster, a proxy server
must be used for performing backup and restore operations.
- SnapProtect backup on Windows supports basic disks.
Configuration
Once installed, the Windows
File System iDataAgent requires some
additional configuration before running your first SnapProtect backup. Follow the steps
given below to complete the configuration for this Agent.
| 1. |
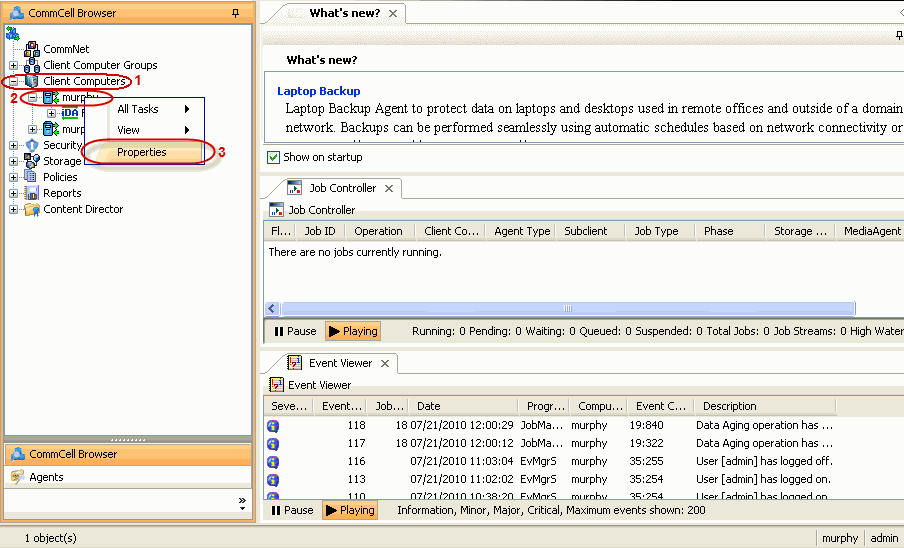
- From the CommCell Browser, navigate to Client Computers | <Client>.
- Right-click the client and select Properties.
|
 |
| 2. |
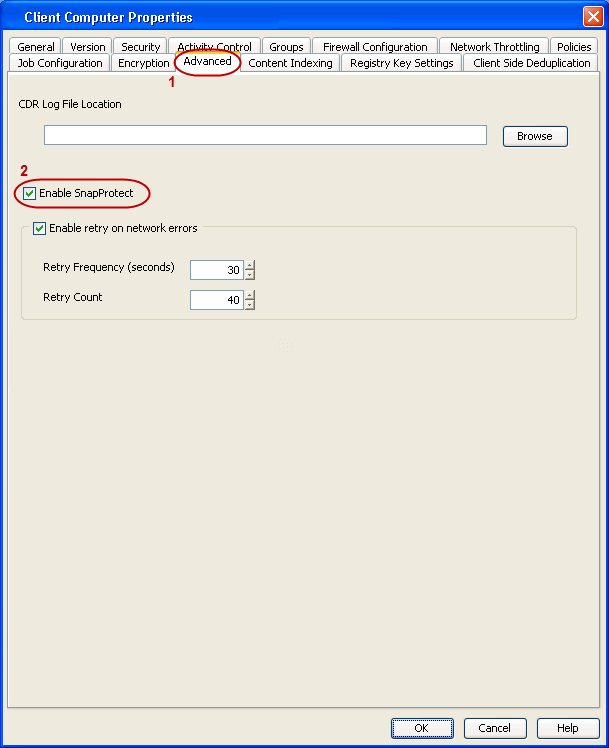
- Click on the Advanced tab.
- Select the Enable SnapProtect option to enable
SnapProtect backup for the client.
- Click OK.
|
 |
| 3.
|
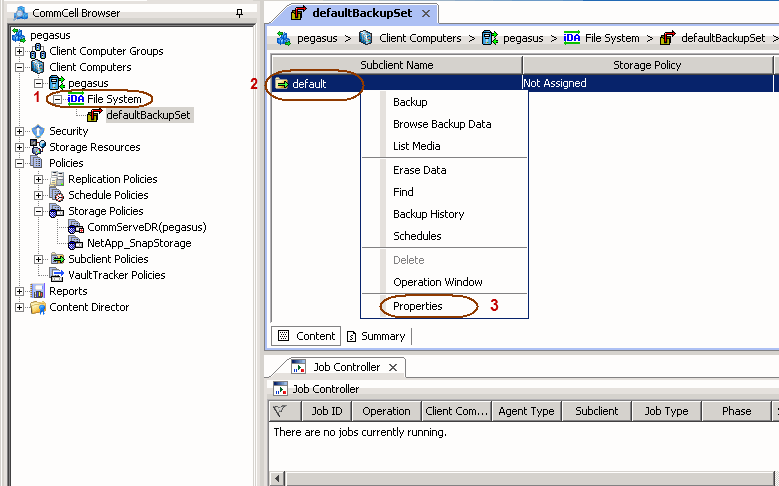
- From the CommCell Console, navigate to <Client> |
File System.
- Right-click the subclient and click Properties.
|
 |
| 4. |
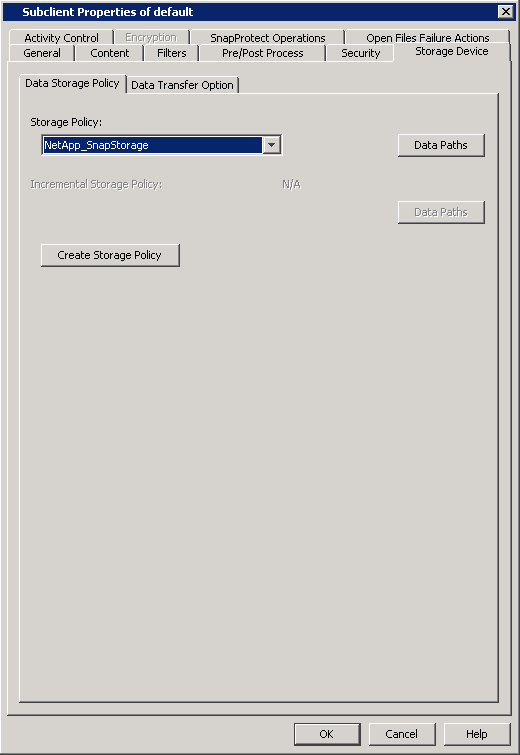
- Click the Storage Device tab.
- In the Storage Policy box, select the storage policy
name.
|
 |
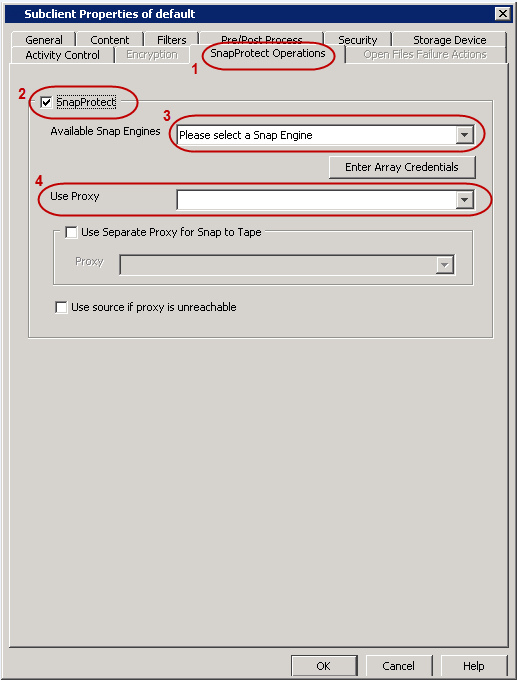
| 5. |
- Click the
SnapProtect Operations tab.
- Click SnapProtect option to enable SnapProtect backup for the selected subclient.
- Select the storage array from the Available Snap Engine
drop-down list.
-
From the Use Proxy list, select the MediaAgent where SnapProtect and backup copy operations will be performed.
|
When performing SnapProtect backup using proxy, ensure that the operating
system of the proxy server is either same or higher version than the client
computer. |
-
Click Use Separate Proxy for Snap to Tape if you want to
perform backup copy operations in a different MediaAgent.
Select
the MediaAgent from the Proxy list.
|
 |
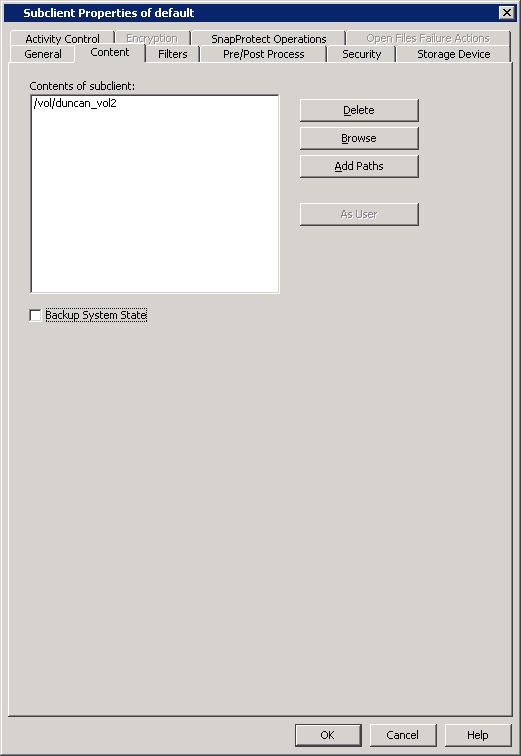
| 6. |
- Click the Content tab.
- Click Browse and specify the content for the subclient.
- Click OK.
| |
The subclient content must contain
data that resides on the storage device volume; do not include local
drives or UNC paths as subclient content. |
|
 |
Skip this section if you already created a snapshot
copy.
Click  to Continue.
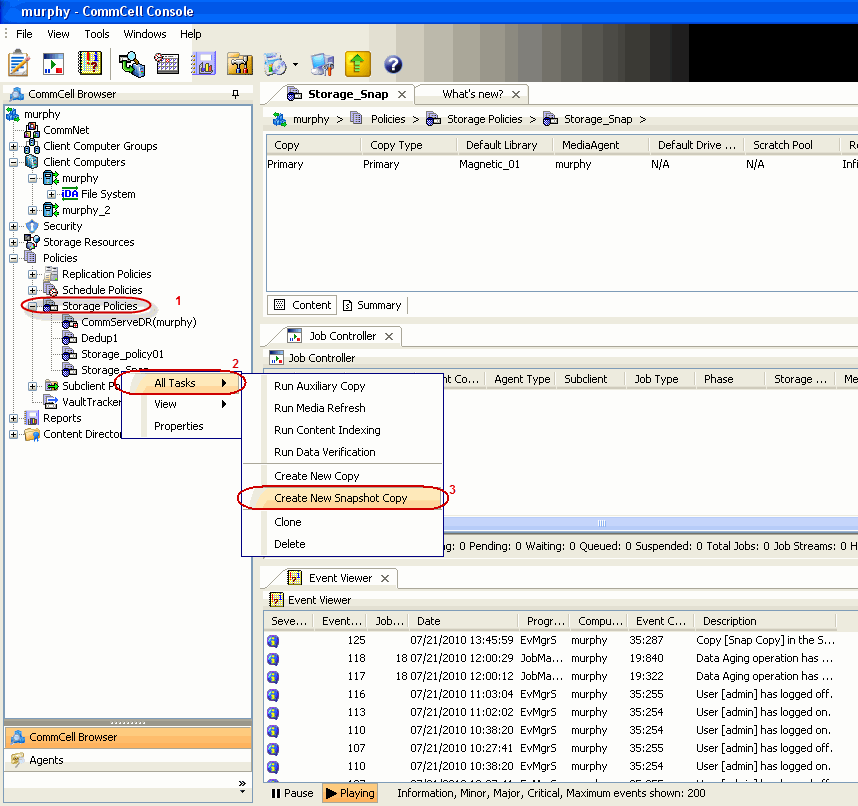
Create a snapshot copy for the Storage Policy. The following section provides
step-by-step instructions for creating a Snapshot Copy.
| 1. |
- From the CommCell Console, navigate to Policies | Storage Policies.
- Right-click the
<storage policy> and click All Tasks
| Create New Snapshot Copy.
|
 |
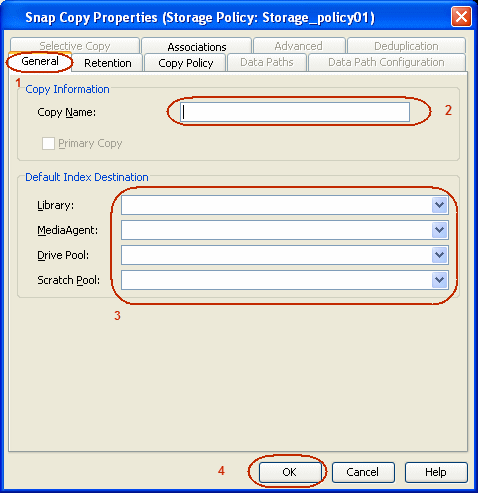
| 2. |
- Enter the copy name in the Copy Name field.
- Select the Library, MediaAgent, master Drive Pool and
Scratch Pool
from the lists (not applicable for disk libraries).
- Click OK.
|
 |
Follow the steps given below to configure Backup Copy for moving snapshots to
media.
| 1. |
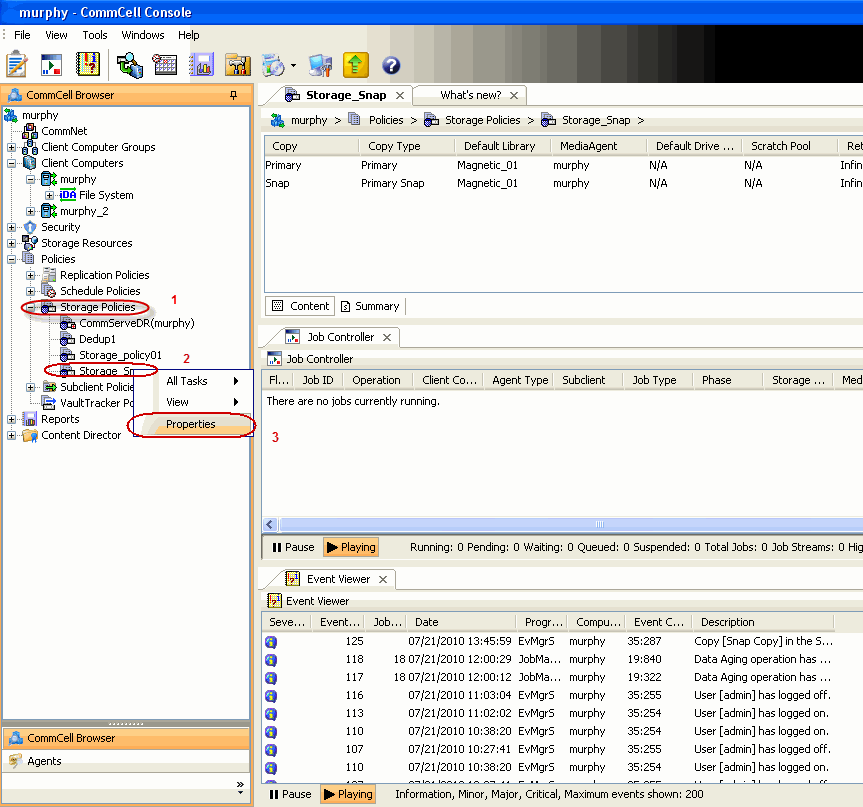
- From the CommCell Browser, navigate to Policies | Storage Policies.
- Right-click the
<storage policy> and click Properties.
|
 |
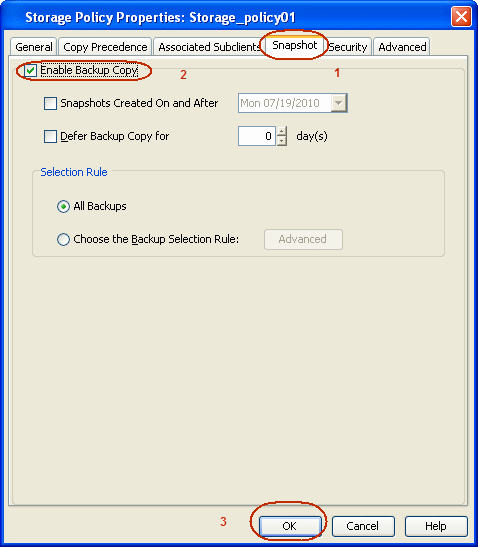
| 2. |
- Click the Snapshot tab.
- Select Enable Backup Copy option to enable movement of snapshots to media.
- Click OK.
|
 |

