

|
|
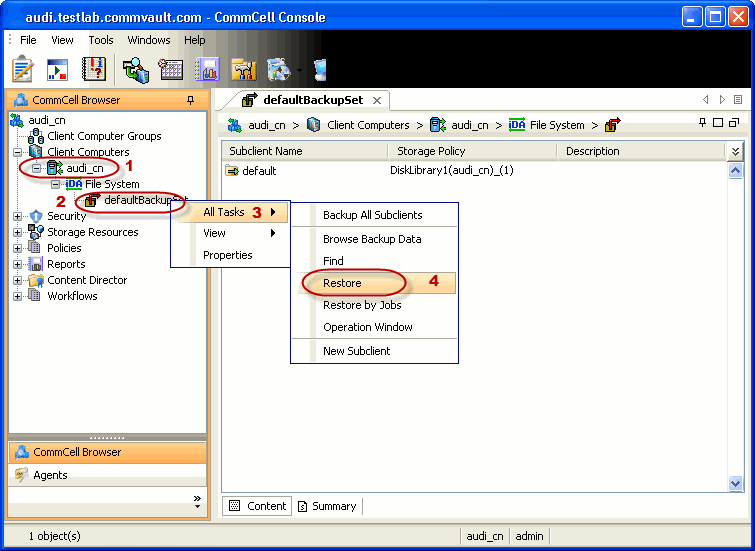
As restoring your backup data is very crucial, it is recommended that you perform a restore operation immediately after your first full backup to understand the process.
The following sections explain the steps for restoring the backup data to a new location.
| 1. |
|
|
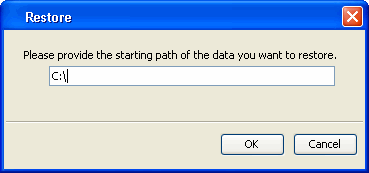
| 2. | Provide the path of the backup folder that you want to
restore.
For your first restore you can restore the entire backup. For example, c:\. |
 |
| 3. |
|
 |
| 4. |
|
 |
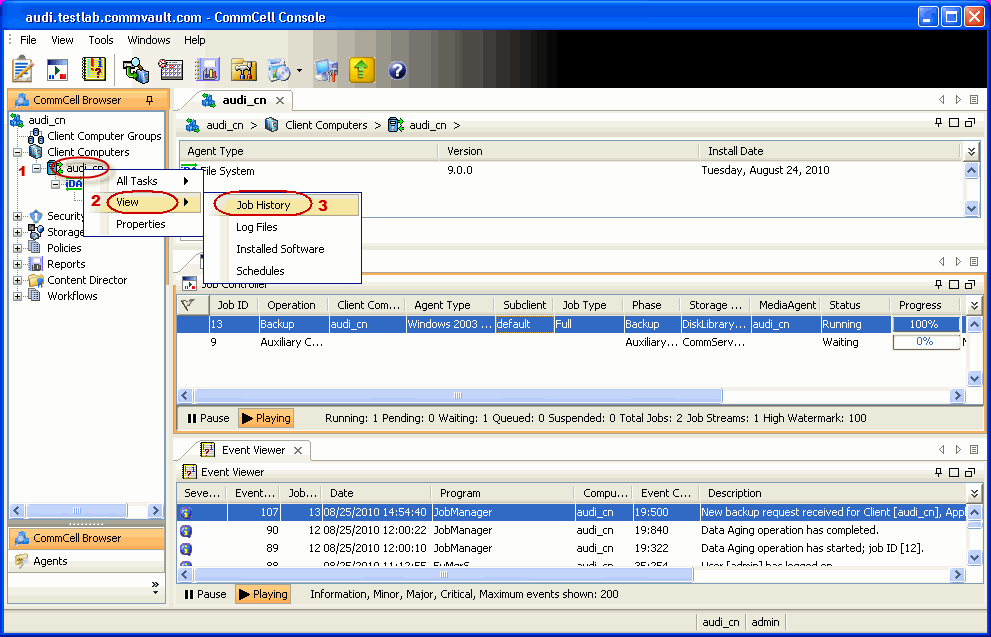
| 5. | You can track the progress of the job from the Job Controller or Event Viewer window. |
 |
| 6. | Once the job is complete, view the details of job from the
Job History. Right-click the client computer, click View and then click View Job History. |
 |
| 7. |
|
 |
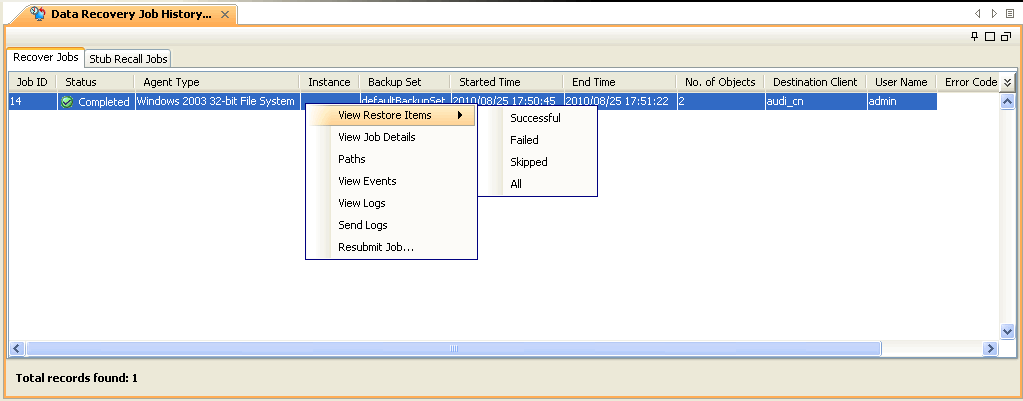
| 8. | You can view the following details about the job by
right-clicking the job:
|
 |
| 9. | Once the File System is restored, verify that the restored files/folders are available in the restore destination provided during step 3. |
 |
|
|