

|
|
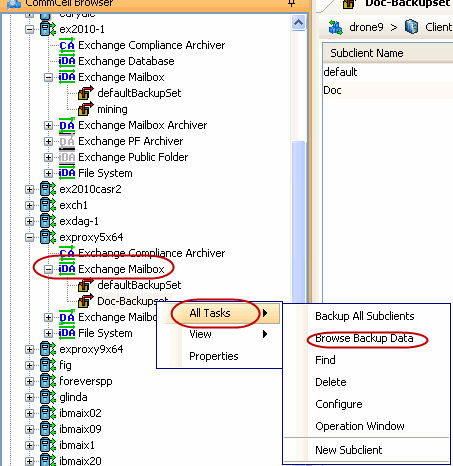
It is recommended that you perform a restore operation immediately after your first full backup to understand the process. The following section explains how to restore a single mailbox to a Personal Storage (PST) file that can be imported into Outlook.
| 1. |
|
 |
||
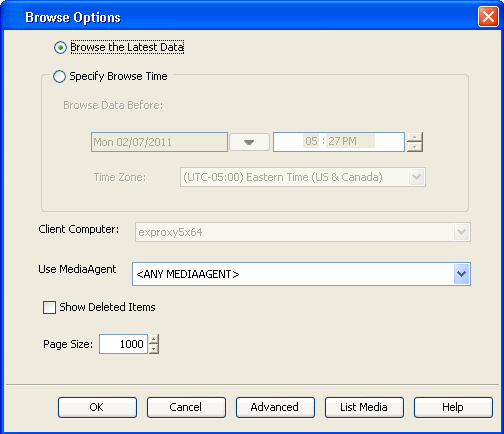
| 2. | Click OK. |
 |
||
| 3. |
|
 |
||
| 4. |
|
 |
||
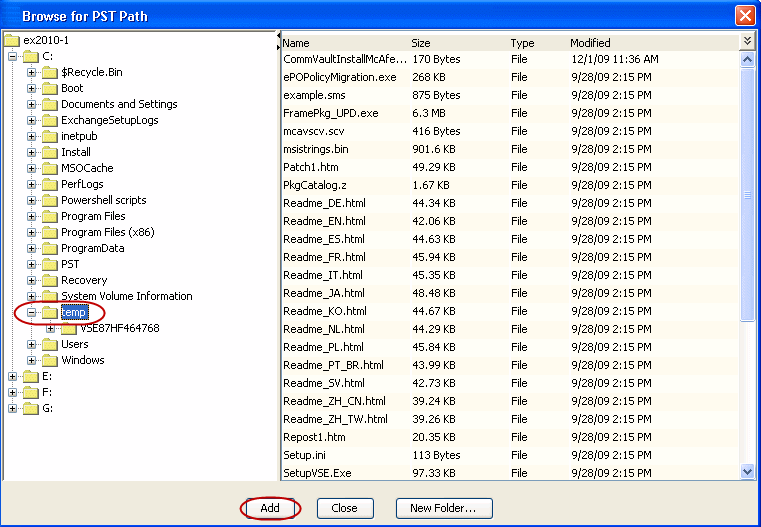
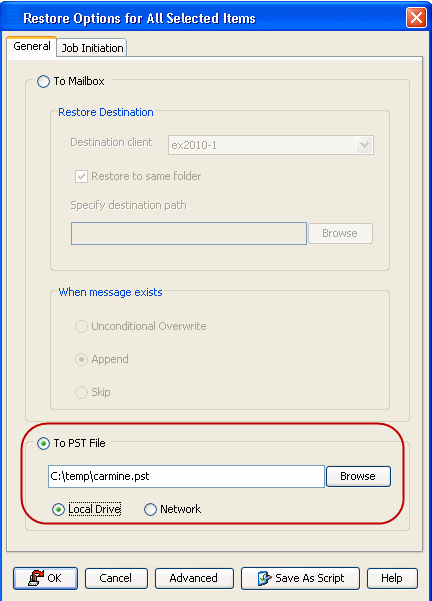
| 5. |
|
 |
||
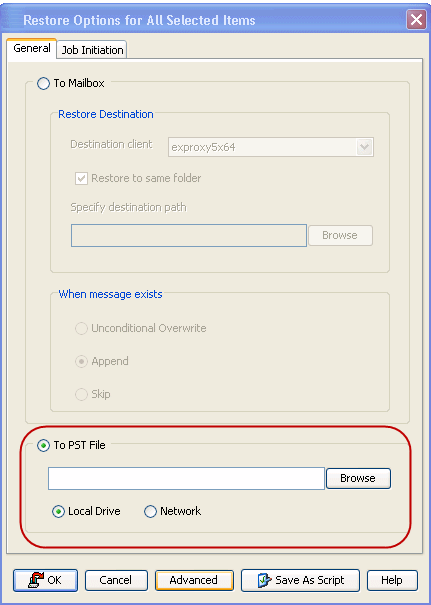
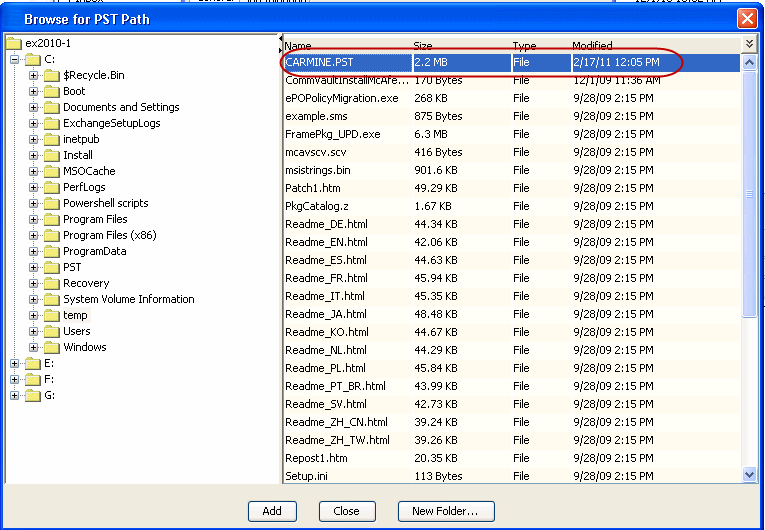
| 6. | Append the path with the PST file name. Ensure to include the .pst file extension. |
 |
||
| 7. |
|
 |
||
| 8. | You can monitor the progress of the restore job from the Job Controller. |
|
||
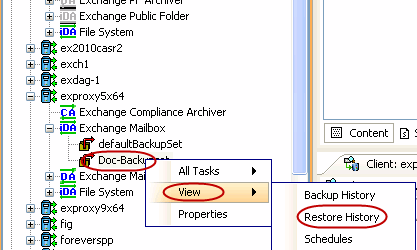
| 9. | Once the restore job has completed, right-click the agent and click View | Restore History. |
 |
||
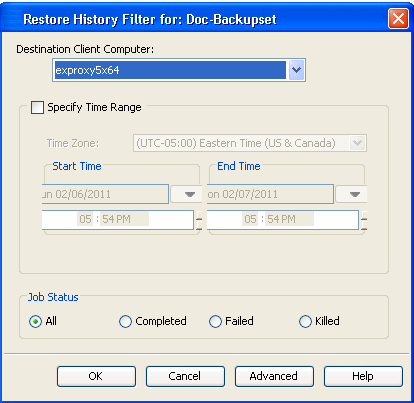
| 10. | Click OK. |
 |
||
| 11. | Right-click the job and do one of the following:
|
 |
||
| 12. | In Windows Explorer, confirm the PST file was created. |
 |
||
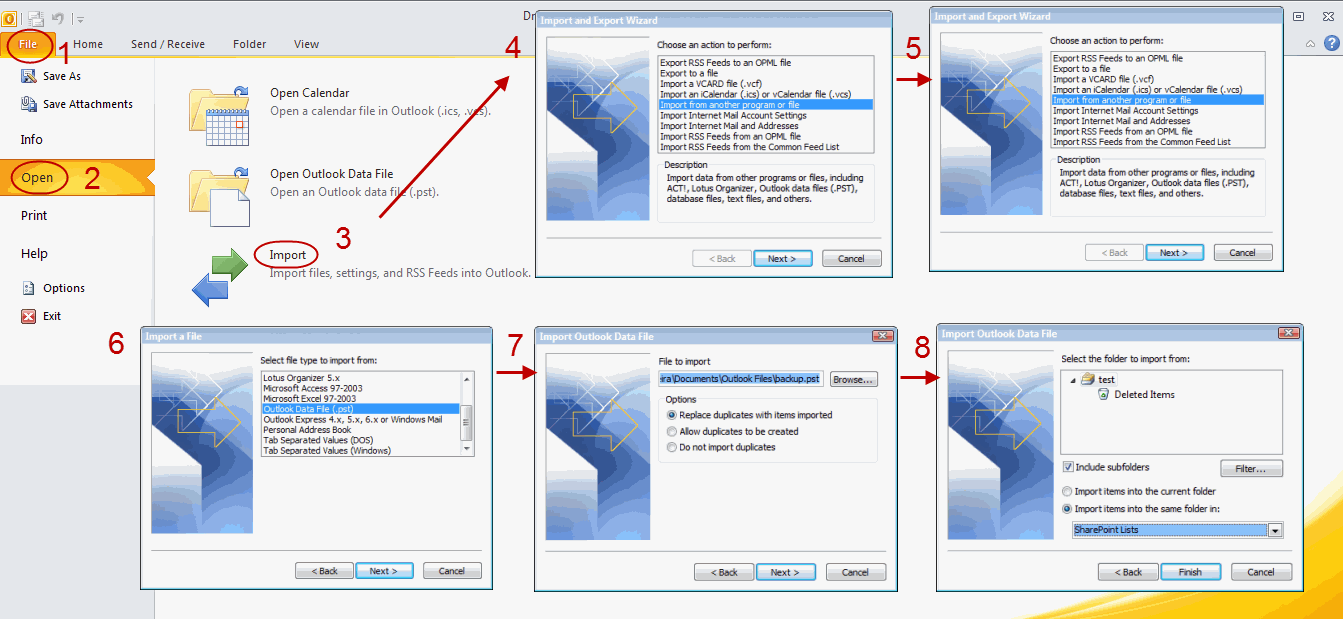
| 13. | Import
the PST file into Outlook.
|
 |
||
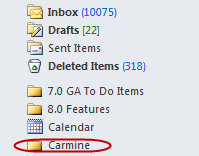
| 14. | View the imported folder in Outlook. |
 |
If you want to further explore this Agent's features read the Advanced sections of this documentation.
|
|