

| Overview | Prepare CommCell | Firewall Using Proxy | Firewall Without Proxy | Create Installation Package | Web Access |
|
Perform the following configurations on CommServe to enable laptop backup:
Ensure you have the following before performing the configuration:
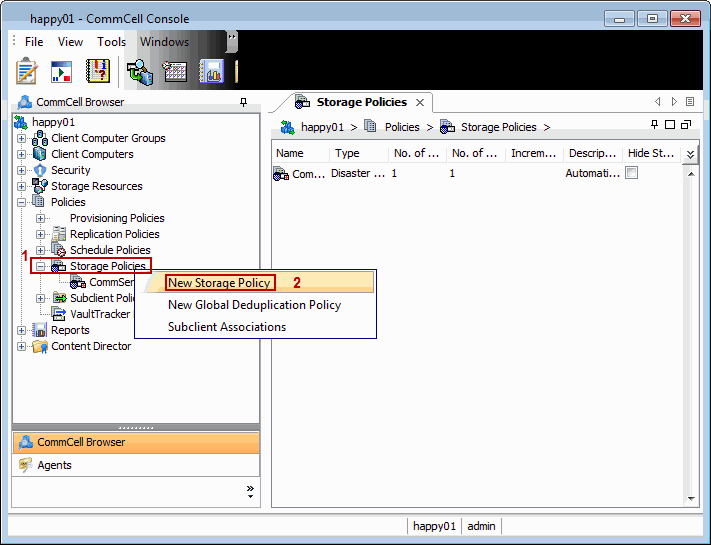
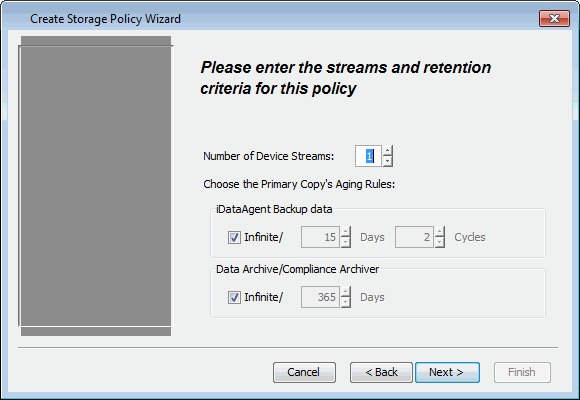
The Storage Policy act as a channel for backup and restore operations. It will map data from its original location to the physical media. Follow the steps given below to create a storage policy for the laptop backup:
| 1. |
|
 |
||
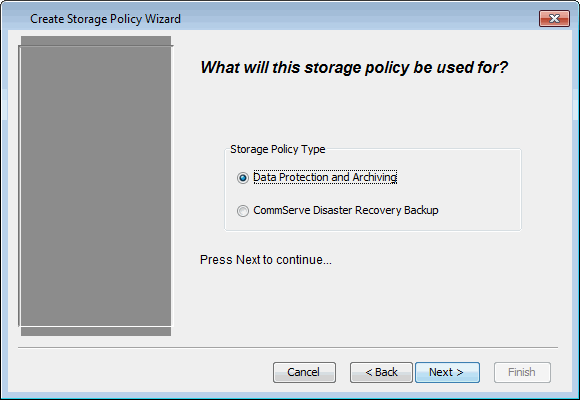
| 2. | Click Next. |
 |
||
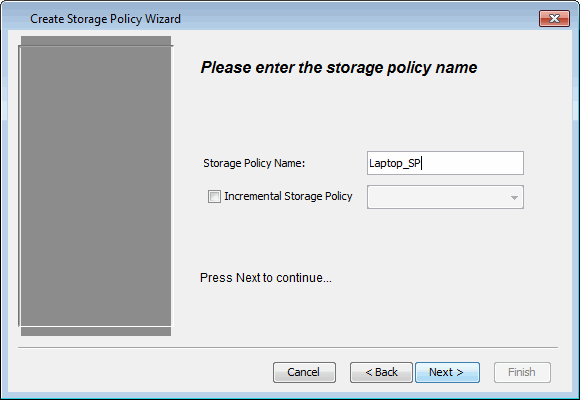
| 3. |
|
 |
||
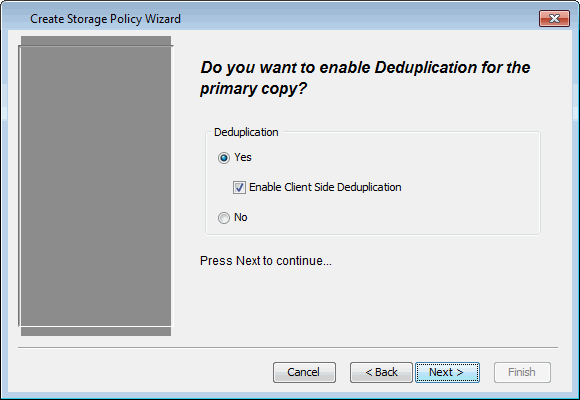
| 4. |
|
 |
||
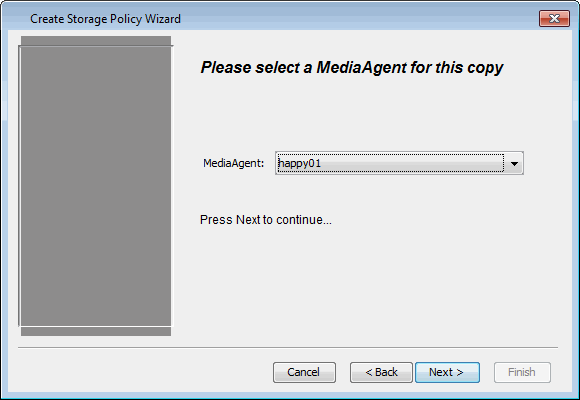
| 5. | Select MediaAgent and click Next. |
 |
||
| 6. | Click Next. |
 |
||
| 7. | Click Next.
|
 |
||
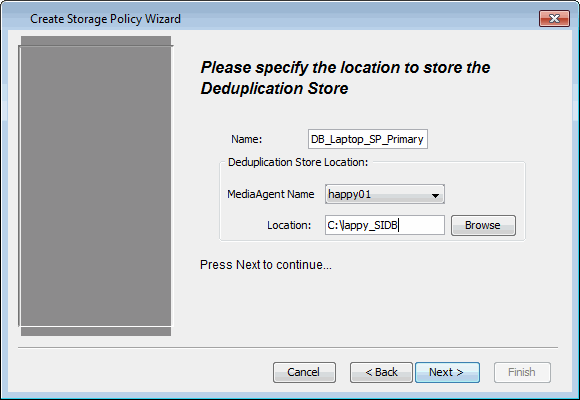
| 8. | Verify Name and MediaAgent Name. Click Browse to specify location for Deduplication Store. Click Next. |
 |
||
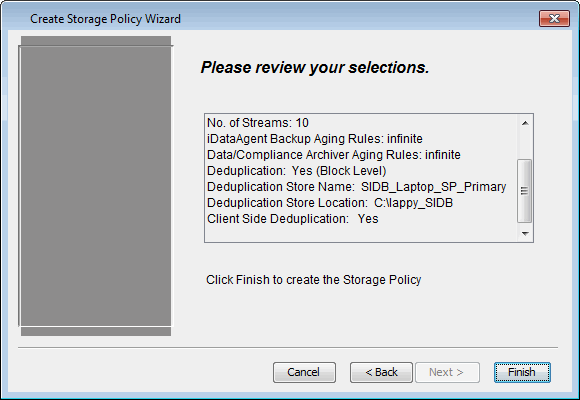
| 9. | Review the details and click Finish to create the Storage Policy. |
 |
||
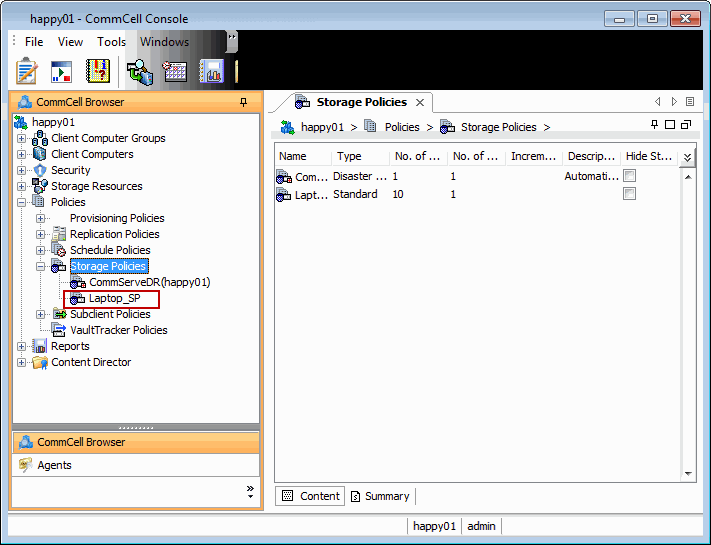
| 10. | You can view the storage policy in the Storage Policies node. |
 |
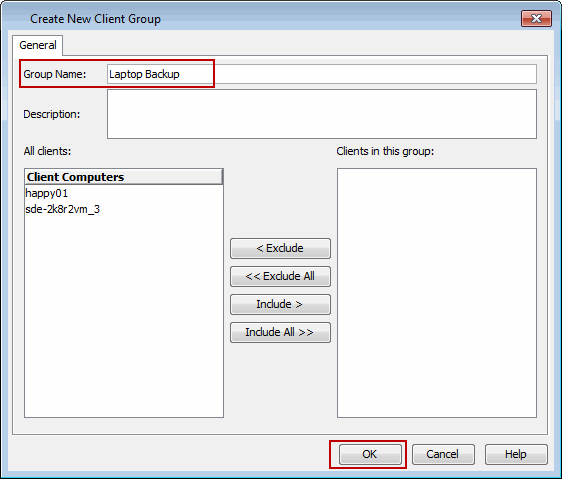
The client computer group is a logical grouping of client computers. Client Computer Group definition help to define options to the entire group instead of the individual clients. Follow the steps given below to create a client group for the laptops which you want to backup:
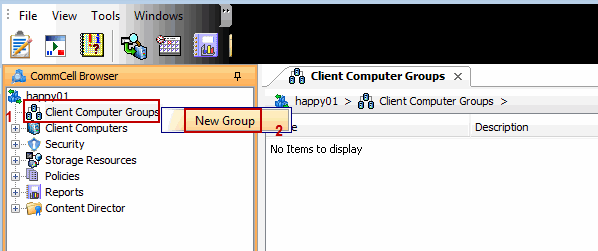
| 11. | From the CommCell Browser, right-click Client Computer Groups node, and click New Group. |
 |
||
| 12. |
|
 |
You can configure several additional settings for laptops before allowing them to backup for the first time. For example:
Follow the steps given below to configure any additional settings:
| 13. |
When the user installs the Installation Package on a laptop, the laptop will be added to the Waiting Room client group. This script will configure the additional settings for the laptops in the waiting room and then move the laptop from the Waiting Room group to Laptop Backup group. After the laptop moves to the Laptop Backup group, the backups will be performed as per the schedule policy. |

|
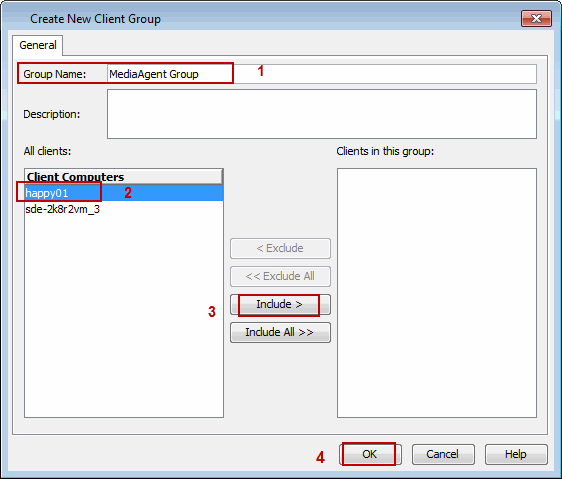
The MediaAgent monitors the transfer of data between client computer and media. Follow the steps given below to create a client group for all the MediaAgents which will be used for the backup and restore:
| 14. | From the CommCell Browser, right-click Client Computer Groups node, and click New Group. |
|
||
| 15. | In the Group Name box, specify the name for the
MediaAgent Group.
|
 |
When multiple clients or tasks require similar operations to be scheduled you can create a schedule policy as a scheduling template and attach it to the respective client or task in the CommCell.
Use the following steps to create a schedule policy.
| 16. |
|
 |
||
| 17. |
|
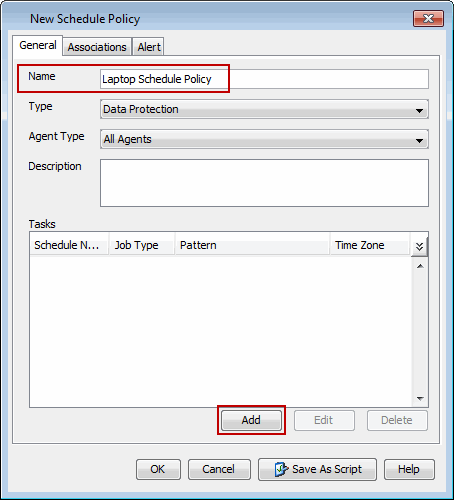 |
||
| 18. | In the Schedule Name box, enter a name of the schedule
pattern. Select Automatic and Click OK.
|
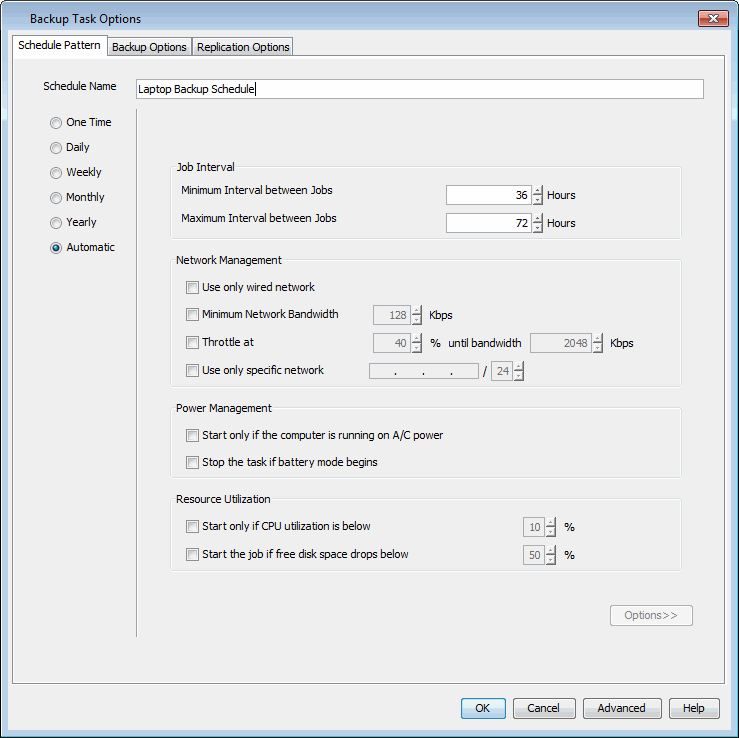 |
||
| 19. |
|
 |
| 20. | From the CommCell Browser, navigate to Policies right-click Subclient Policies node, and click New Subclient Policy. |
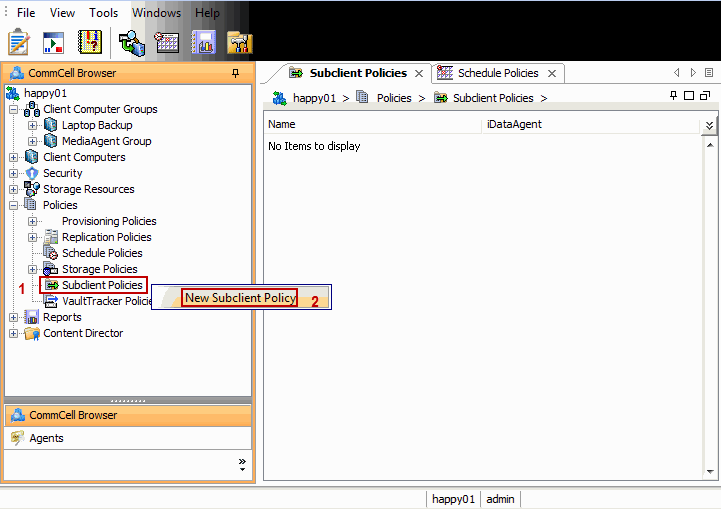 |
||
| 21. |
|
 |
||
| 22. | The display pane will display default subclient. |
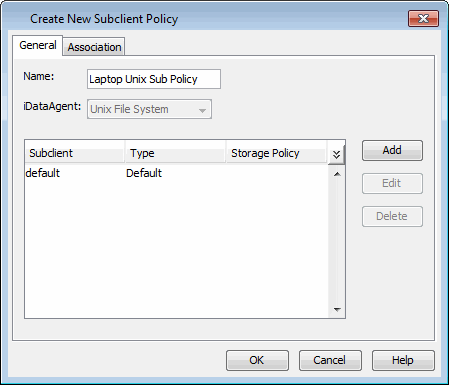 |
||
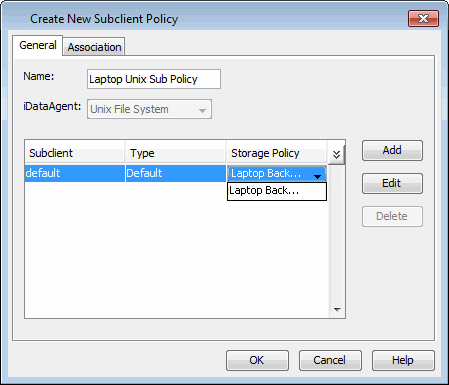
| 23. | Assign a Storage Policy for a subclient created in step 3 during Create Storage Policy. |
 |
||
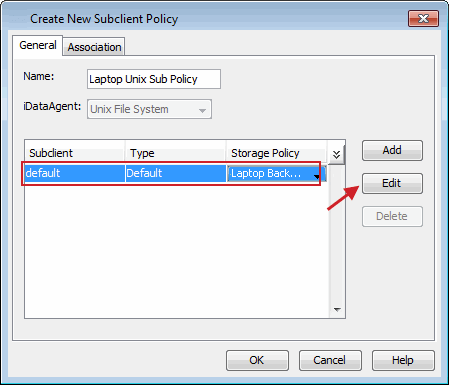
| 24. | Select the subclient and then click Edit. |
 |
||
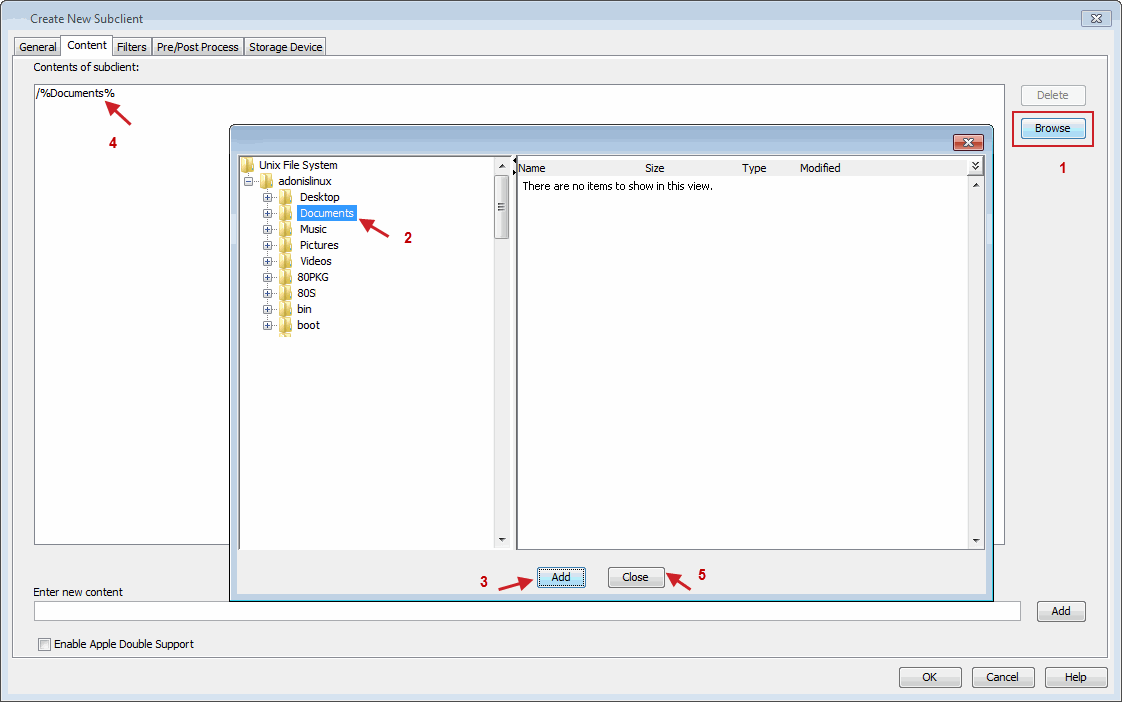
| 25. |
|
 |
||
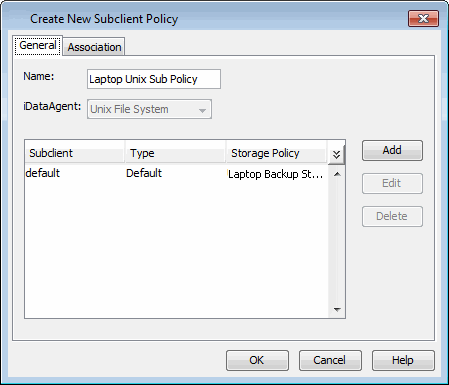
| 26. | Click OK. |
 |
||
| 27. | Click OK. |
 |
|
|