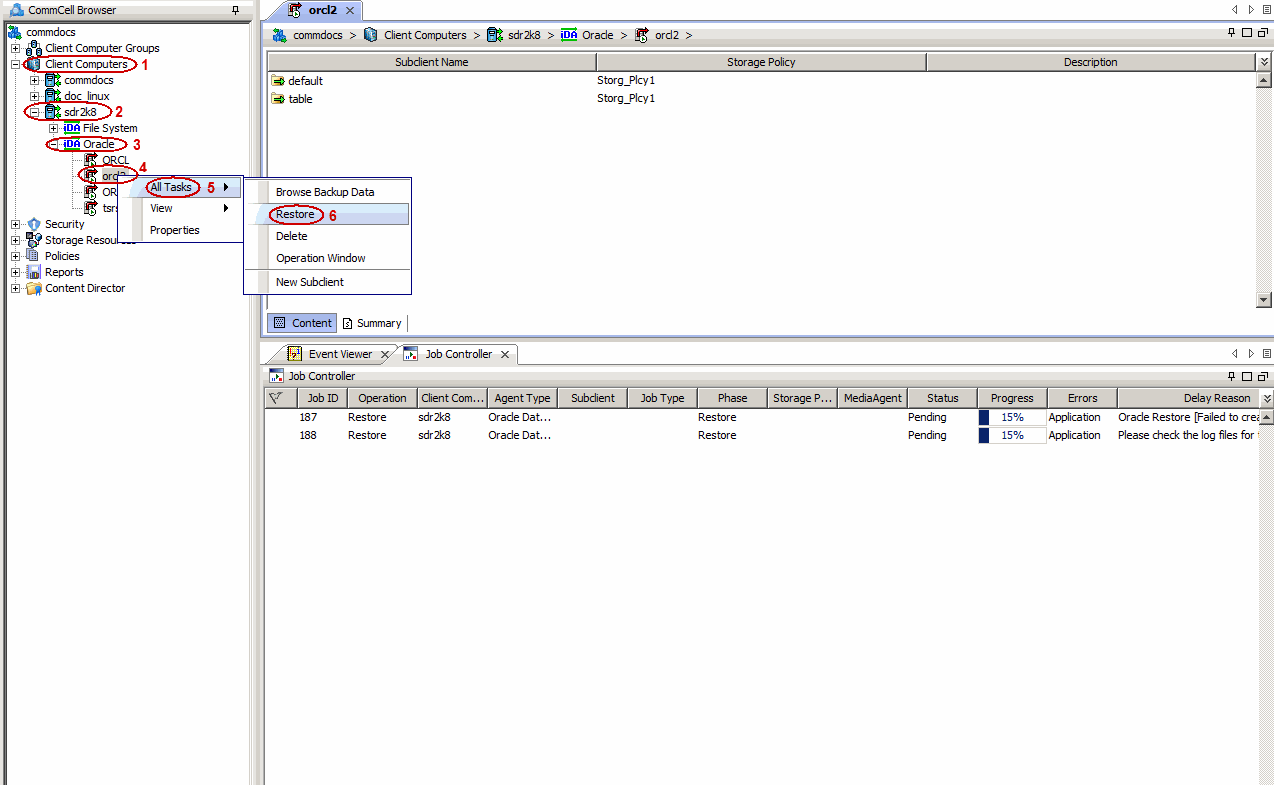
- From the CommCell Browser, navigate to Client Computers | <Client> | Oracle.
- Right-click the <Instance> point to All Tasks and then click Restore.
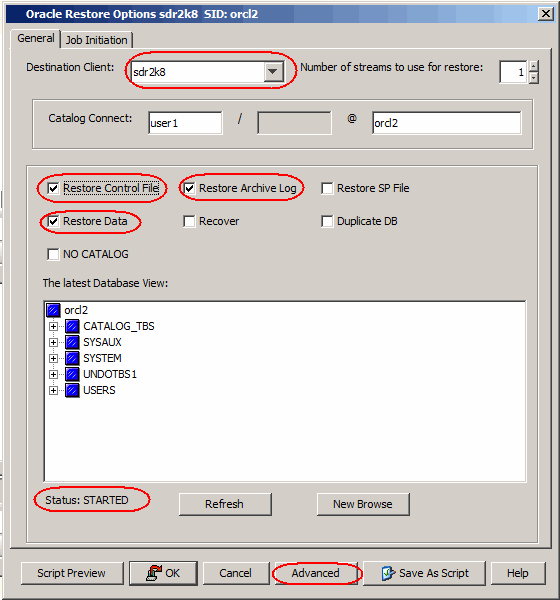
- Select the name of the client computer from the Destination Client list.
- Clear Recover check box.
- Select Restore Archive Log check box.
- Select Restore Control File check box.
- Verify that the Status of the database is displayed as STARTED
- Click Advanced.
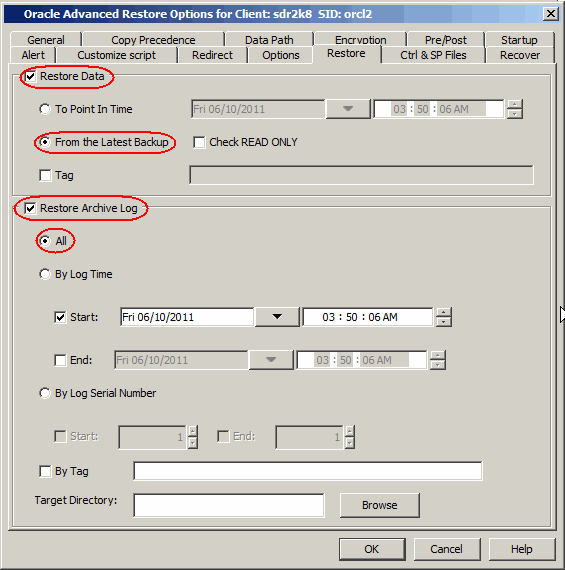
- Click the Restore tab.
- Ensure that the Restore Data with From the Latest Backup and Restore Archive Log with All options are selected.
- Click the Control&SP files tab.
- Ensure that the Restore Control File with From Auto Backup options are selected.

- Click the Options tab.
- Select the Switch Database mode for Restore check box.
- Click OK.

- From the CommCell Browser, navigate to Client Computers | <Client> | Oracle.
- Right-click the <Instance> point to All Tasks and then click Restore.
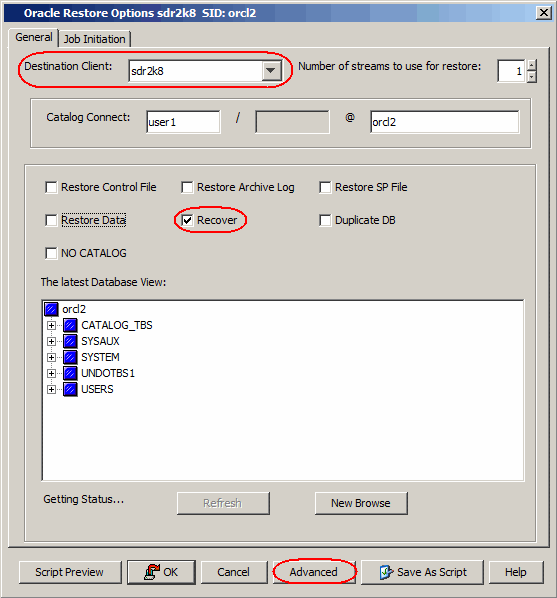
- Select the name of the client computer from the Destination Client list.
- Clear the Restore Data check box.
- Click Advanced.
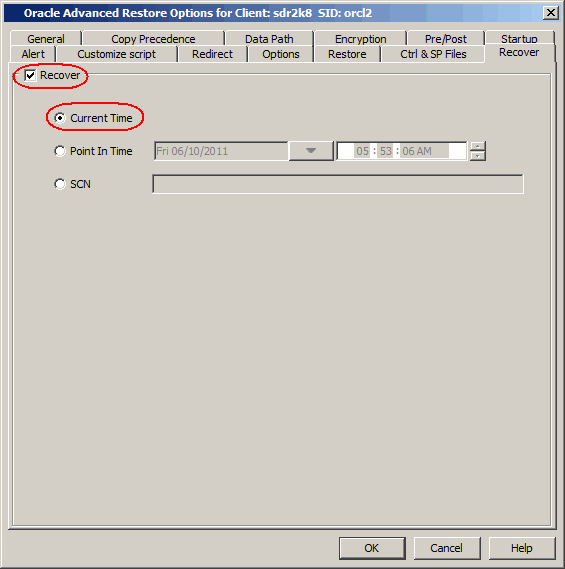
- Click Recover tab.
- Ensure that the Recover with Current Time options are selected.
- Click OK.

After the Database is restored, perform a full backup of the Oracle Database.