

|
|
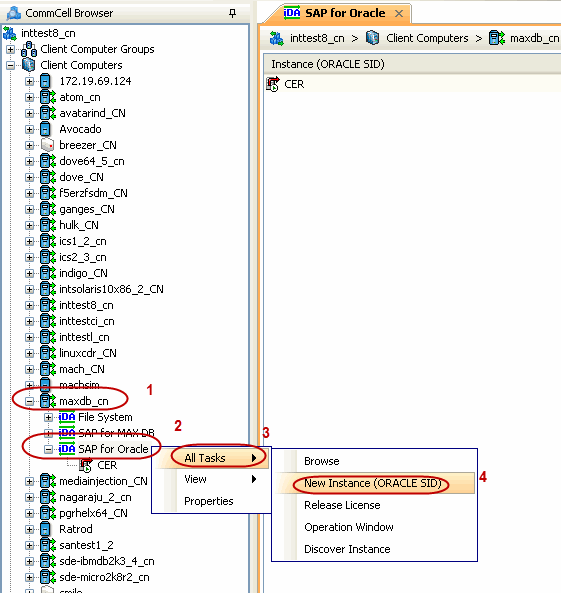
| 1. |
|
 |
| 2. |
|
 |
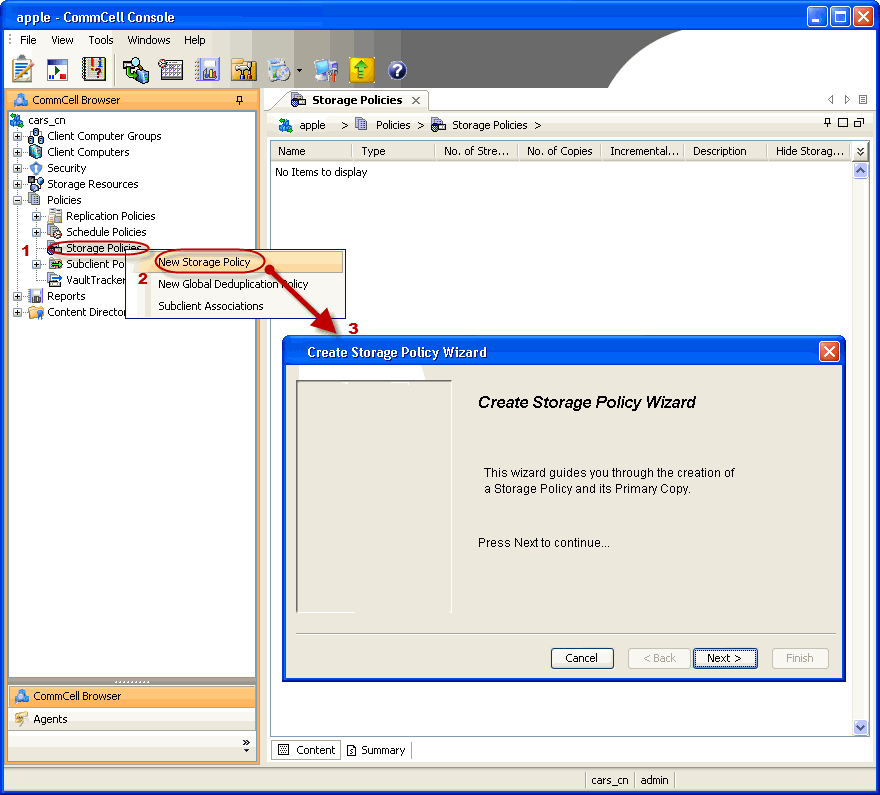
| 3. | Create a Storage Policy:
|
 |
| 4. |
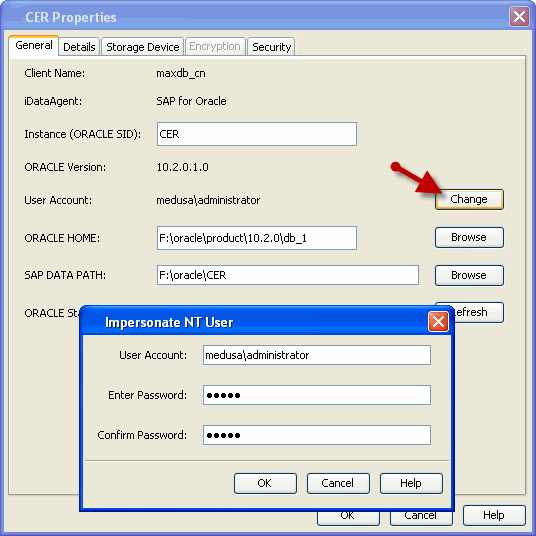
For Windows Client:
Use <client_name>/<SID_name>adm, in order to perform backup and restore operations from CommCell Console for the associated instance. Make sure that the user has administrator privileges to access the Oracle application. |
 |
|
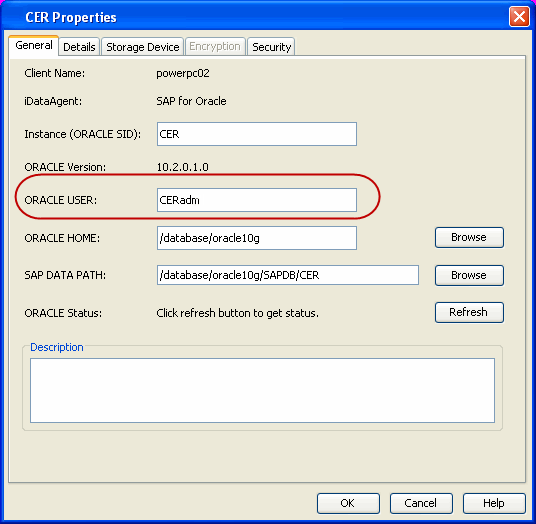
For Unix Client:
Use <SID_name>adm, in order to perform backup and restore operations from CommCell Console for the associated instance. Make sure that the user has administrator privileges to access the Oracle application.
|
 |
|
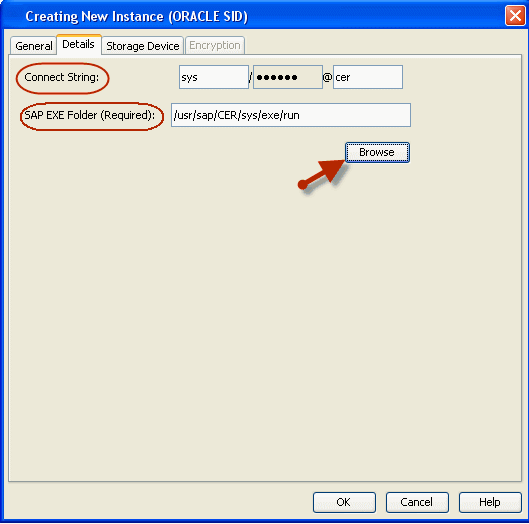
| 5. | Click Details tab and add the following information:
|
 |
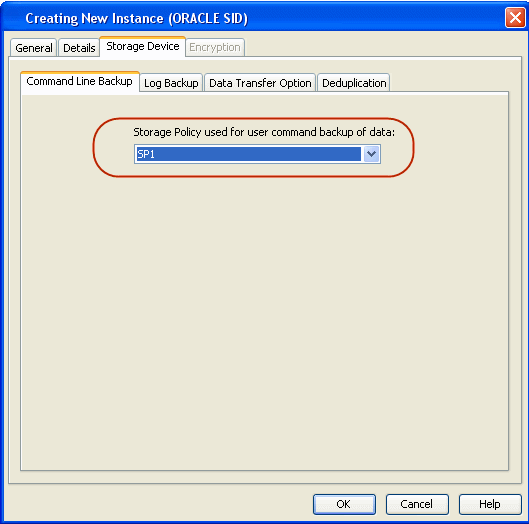
| 6. | Click Storage Device tab.
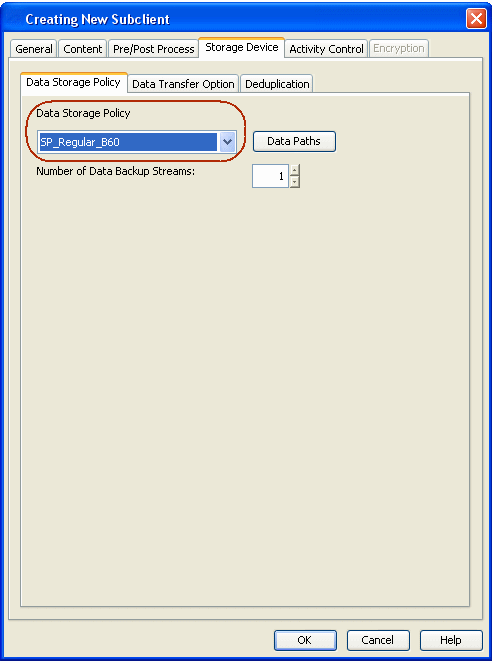
Select a Storage Policy used for user command backup of data from the drop down list. |
 |
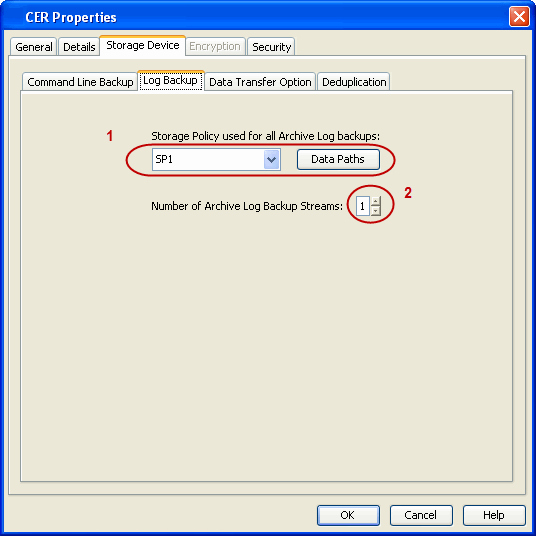
| 7. | Click Log Backup tab.
|
 |
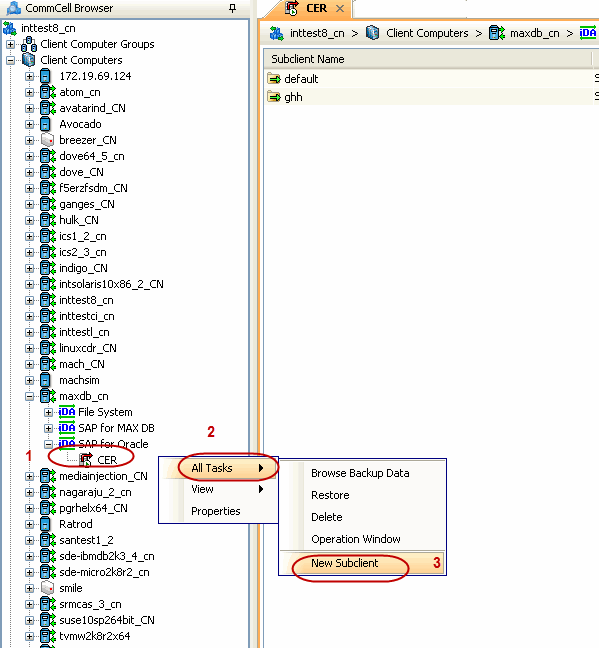
| 8. | From the CommCell Browser, navigate to <Client> |
SAP for Oracle | Instance. Right-click Instance | All Tasks and click New Subclient. |
 |
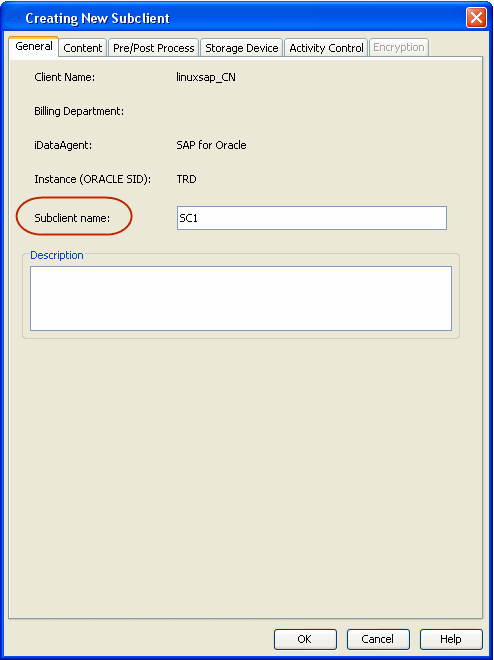
| 9. | Enter the Subclient Name. |
 |
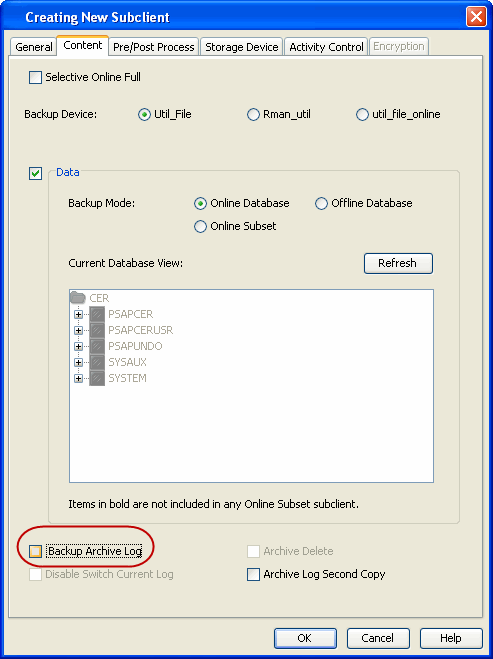
| 10. | Click the Content tab and clear the check box for Backup Archive Log. |
 |
| 11. | Click the Storage Device tab.
|
 |
| 12. | From the CommCell Browser, navigate to <Client> |
SAP for Oracle | Instance. Right-click Instance | All Tasks and click New Subclient. |
|
||
| 13. | Enter the Subclient Name. |
|
||
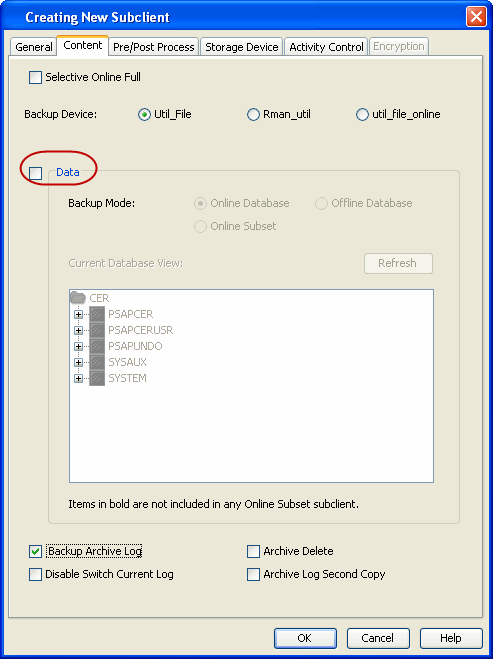
| 14. | Click the Content tab and
clear the check box for Data.
|
 |
||
| 15. | Click the Storage Device tab.
|
|
|
|