The Object Link for SAP Archiving Interface
is an implementation of SAP ArchiveLink
(protocol 0045) which provides an interface between SAP R/3 and the content
store
iDataAgent.
The Object Link for SAP
Archiving Interface
provides a mechanism to store SAP contents such as scanned invoices, print
lists, outgoing documents or SAP Data archive files. These documents/data are
stored using the content store iDataAgent and made accessible to SAP R/3
on demand. The content store iDataAgent would essentially handle all of
SAP document storage needs using our optimized storage solution.
In customizing
SAP, the customer can choose certain image documents reflecting the Business
Objects be archived in a particular content repository. The ArchiveLink is the
generic interface for archiving; almost all SAP application areas use this
interface by customizing the generic business object service for archiving in
the given SAP application.
Once the content store iDataAgent is installed, you must configure it to act as a repository for files to be uploaded to the
Object Link server.
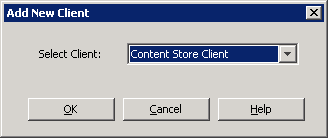
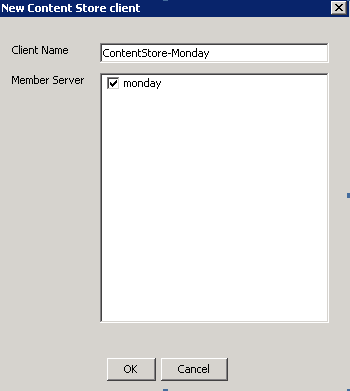
To configure the iDataAgent, you must
add a Object Link Client to the CommCell and create a subclient defined with
sites for the repository. After the site and subclient are configured, user can
configure the Object Link to link to the SAP
Archiving Interface.
You need to first create a subclient before you create a site. Follow the
steps given below to create a Object Link subclient and link it to the defined
site:
1.
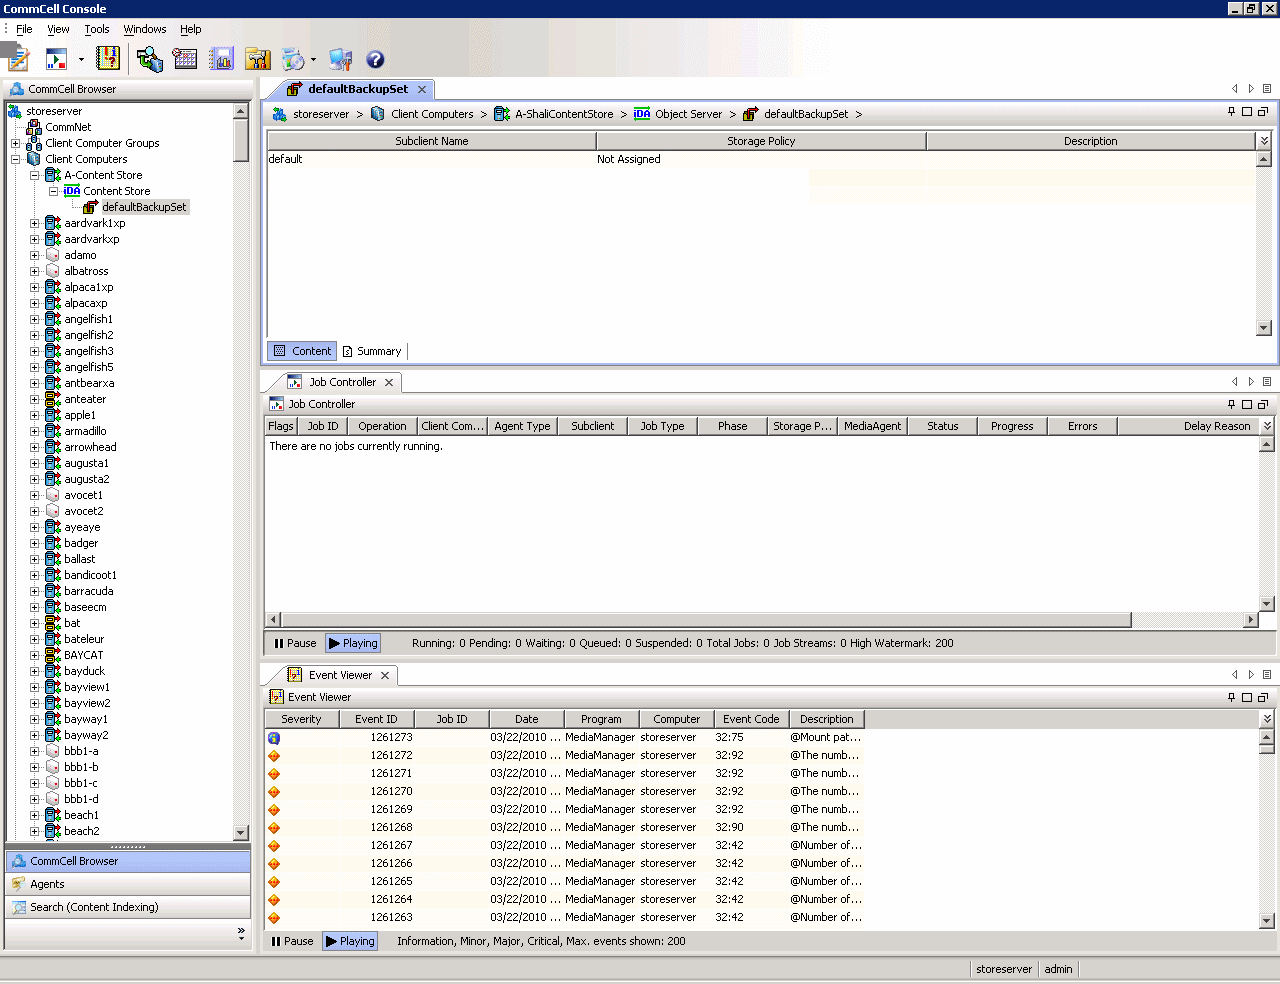
From the CommCell Browser, navigate to Client Computers |
Content Store
Right-click the default BackupSet | All Tasks | New Subclient
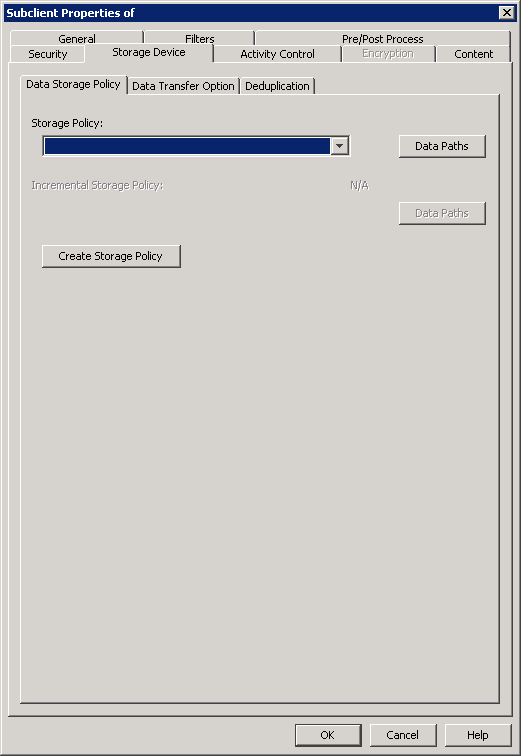
2.
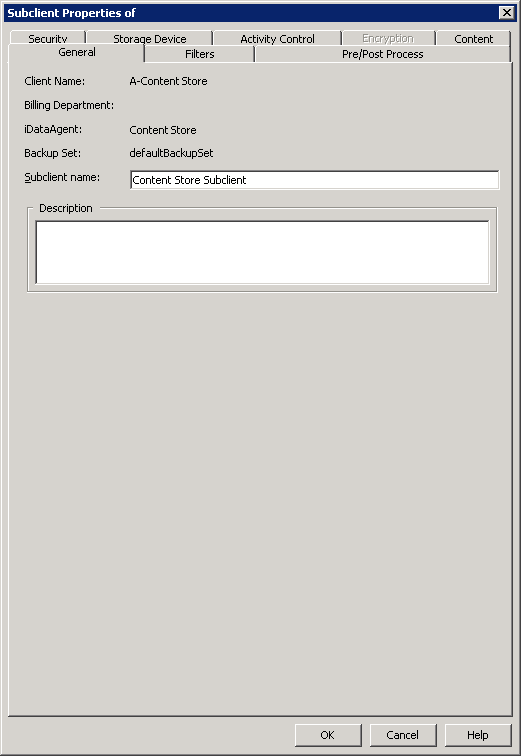
From Subclient Properties| General, enter
the name of the subclient and a description if desired.
Select the Storage Device tab.
3.
From the Data Storage Policy tab, select the
storage policy to
associate with the new subclient.
If necessary, click the Create
Storage Policy button to create a new storage policy for this
subclient.
Click OK to save the subclient.
Note that the subclient created has no content, since it has not yet
been linked to a site.
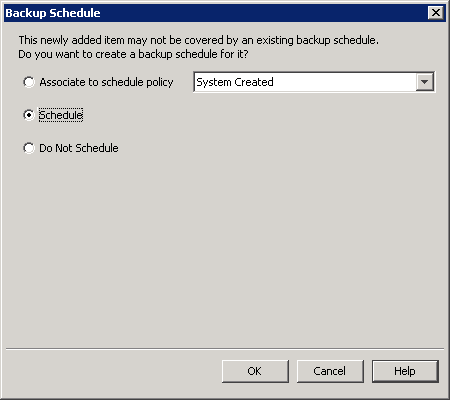
4.
Once the Content Store subclient is defined, the Backup
Schedule dialog box is automatically launched so that you can create
the schedule for the data protection operations.
Select Schedule from the options provided to specifically
schedule the backup for the Content Store subclient.
Click OK.
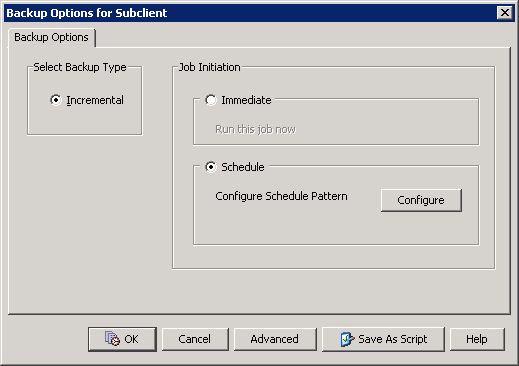
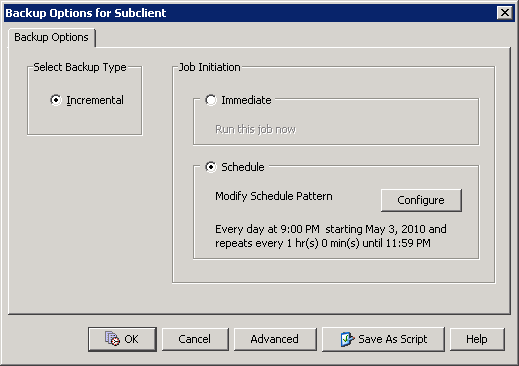
5.
From the Backup Options dialog box, click Configure to
create the schedule pattern.
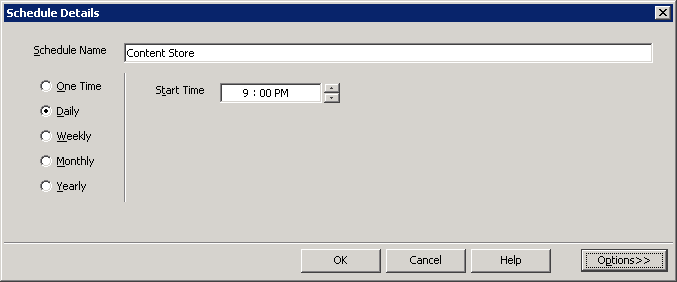
6.
From the Schedule Details dialog box, select the type of
schedule.
You can create a daily schedule for the backup operations of the
Content Store subclient, which only supports incremental backups. An incremental backup is extremely beneficial because it contains data that is new or has changed since the
last backup, consuming less media.
Click Options.
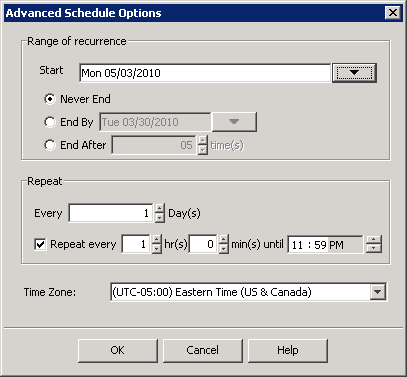
7.
From the Advanced Schedule Options dialog box, select the pattern
options.
With incremental backups, you can schedule backups to
occur hourly by selecting the Repeat field, and specifying the values
accordingly.
Click OK.
8.
The defined schedule and pattern will appear on the Backup Options
dialog box.
Click OK.
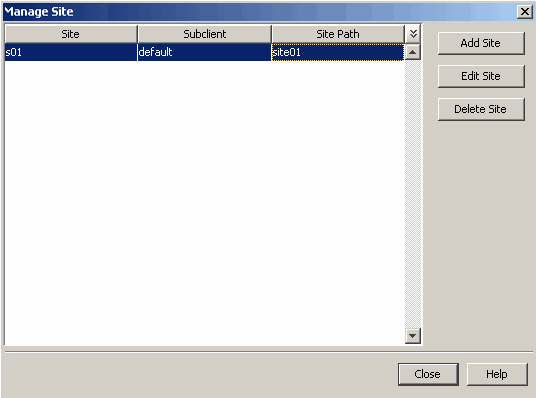
9.
From the CommCell Browser, navigate to Client Computers |
Content Store
Right-click the Content Store
iDataAgent | All Tasks | Manage Site
The Manage Site dialog box
appears with the following information:
Site: Displays the name of the site
Subclient: Displays the name of the subclient associated with this site
Site Path: Displays the URL or path to the site
Click
the Add Site button to define a content repository.
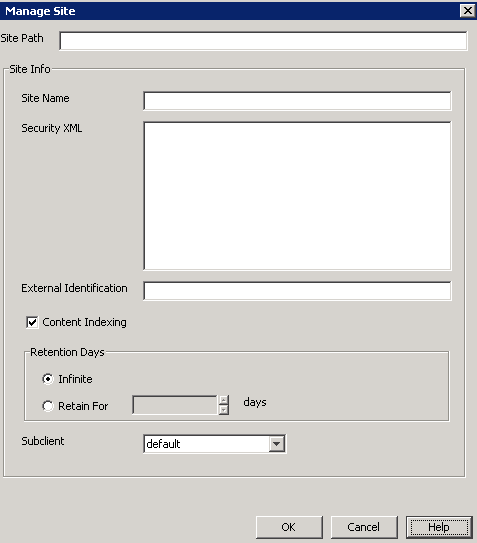
10.
From the Add Site dialog Box, enter the following information:
URL: Enter the directory path of the site. This is the repository
on the server where the files will be uploaded. Note that the URL must
be entered in the following format: /finance_site1.
Site Name: Enter the friendly name for the site.
Security XML: is required for the site that is created. Below
is an illustration for SAP:
The docStatus must always be in the "running" mode.
The boundary can be any valid string so that the xml
format is fixed. For example: "test content repository".
The docProt value can be a blank string, c, r, u,
d or any combination of 'crud'.
External Identification: Enter the third party identifier
here.
Retention Days: Specify the retention period for the site. The
retention period will apply to all the contents within the repository. Note
that this retention period can be overwritten by the subclient's associated storage
policy copy's defined retention if defined for a longer period, unless
it is overwritten by pinning the job.
Subclient: Displays a list of the available subclients, select
the one to be associated with this site. The site will be added in the
selected subclient.
Click OK.
11.
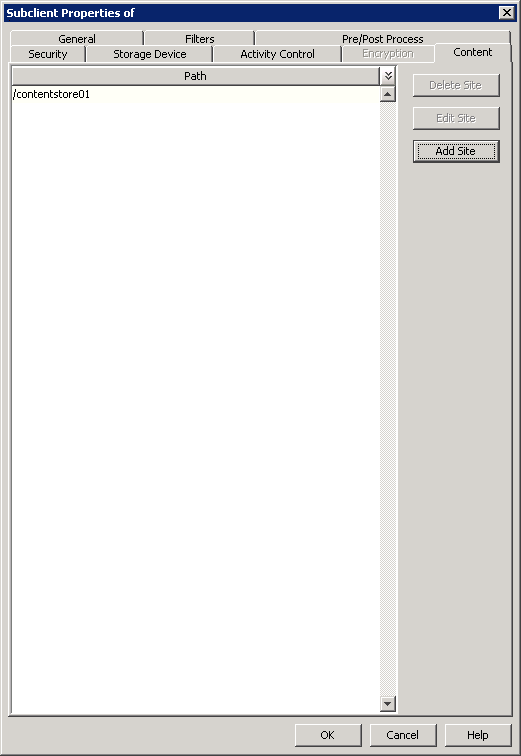
To verify if the site you added is displayed, go to the Path windowpane of the
Subclient Properties - Content tab.
Click OK.
The Content Store subclient is linked to the defined site as the
repository.
This section describes how to configure the Object Link to be also used as
a SAP Archive repository, in
order to manage SAP data. Before customizing the Object Link for SAP
Archiving Interface to use the
Object Link for storing data, user must have already created a site and subclient in the
Object Link repository.
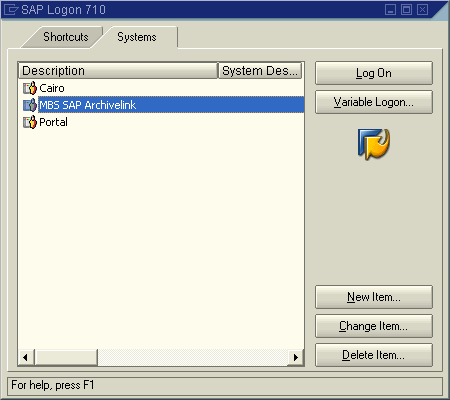
1.
Double click the SAP Logon icon.
From the SAP Logon select the Systems tab. Double-click on the MBS SAP
Archivelink option.
2.
From the SAP Login windowenter valid credentials for
Client, User, Password and Language.
To change your password click the New password icon.
Click the ENTER icon located at the top right corner of the
screen.
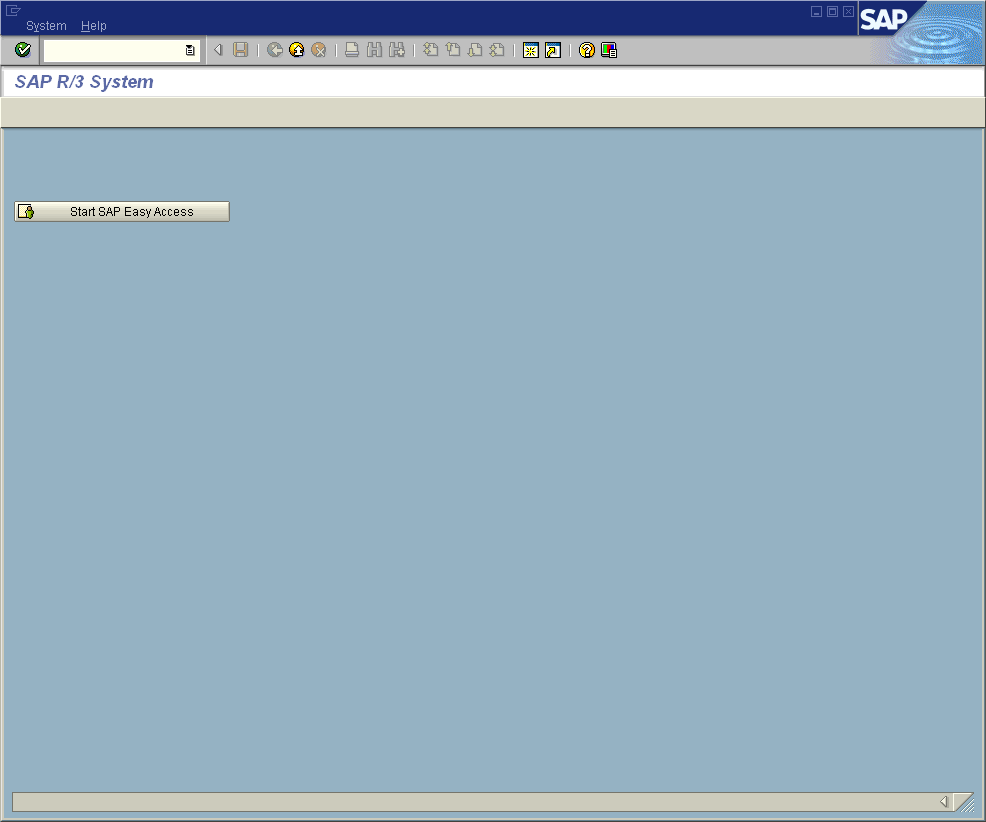
3.
From the SAP R/3 System window, click on Start
SAP Easy Access.
This initiates the SAP Easy Access
program.
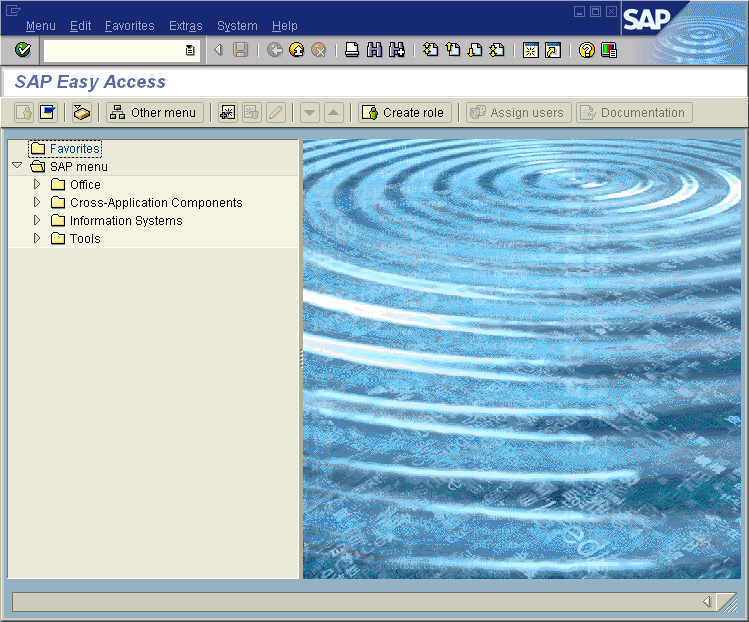
4.
From the SAP Easy Access window, click on the Favorites
folder, to select the existing transactions.
If no transactions have been created, click on Insert icon and
select the Transaction option to manually invoke the required
transaction.
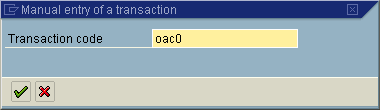
5.
Clicking on Insert --> Transaction opens the Manual
entry of a transaction pop-up window.
Enter the value oac0 forthe Transaction Code.
Click the OK icon.
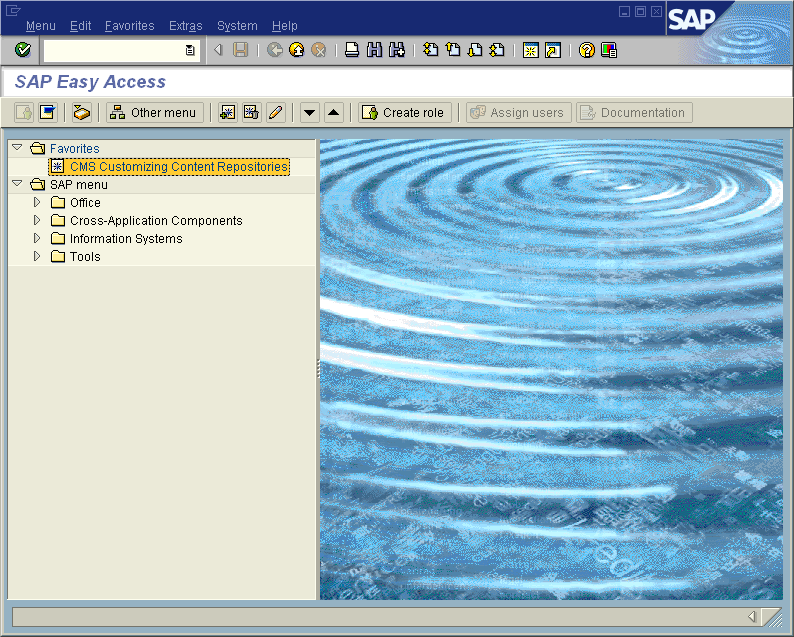
6.
The SAP Easy Access window now has the CMS Customizing Content
Repositories as part of the favorites folder.
Double click the CMS Customizing Content Repositories to
create, view or edit the content repositories.
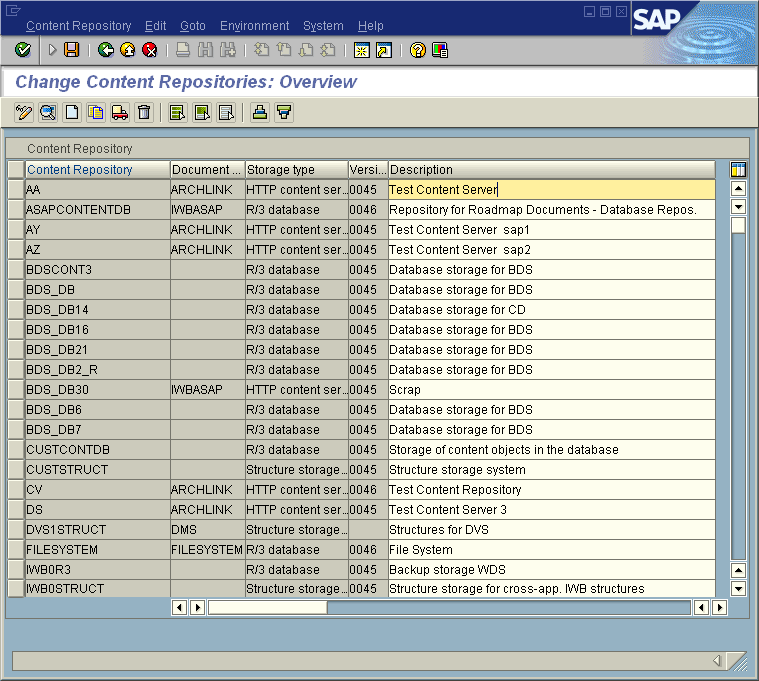
7.
From the Change Content Repositories: Overview window, you can
create a new content repository, edit or delete an existing repository.
To Update an existing repository: Click on the Display/Change
icon (shortcut key: CTRL+F4). Double click the repository you want to
update. The Change Content Repositories: Detail window
opens allowing you to edit the content.
To Delete a repository: Click on the Display/Change
icon (shortcut key: CTRL+F4). Select the content repository you want to
delete and hit the Delete icon (shortcut key: Shift+F2).
To Create a new repository: Click on the Display/Change icon
(shortcut key: CTRL+F4)Now click on Create icon (shortcut key:
F5). The Change Content Repositories: Detail windowallows
you to create a new content repository.
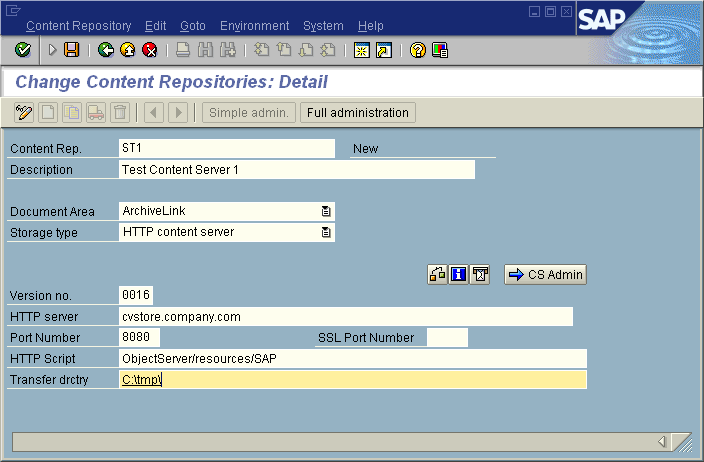
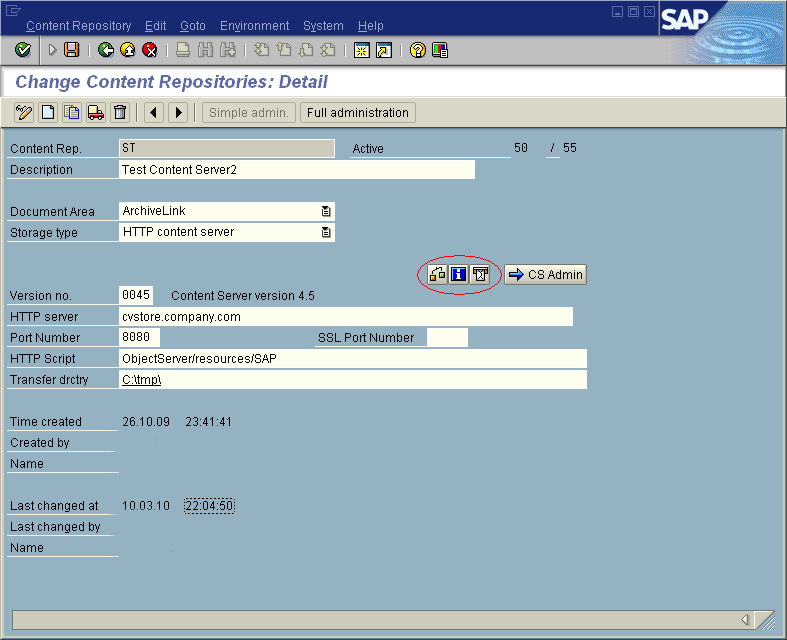
8.
From the Change Content Repositories: Detail windowcreate
a new content repository.
Enter the Content Repository name
in the Content Rep. field. Note that the Content Repository name should
be same as the 'Site Path', created in the
Create a Site section.
Provide a short description to the Content Repository added, in the
Description field.
Select ArchiveLink from the Document Area
drop down.
Select HTTP content server from the Storage type drop down.
Enter the version number in the Version no. field.
HTTP Server: Provide the URL to the content store
webservice.
Enter the Port Number of the content store webservice.
The HTTP Script will be ObjectServer/resources/SAP.
In the Transfer drctry field, enter the path to a valid directory in
the machine running the SAP GUI.
Save the newly created Content Repository via the Save
button (floppy icon).
A
Content Repository for SAP data will be created in the defined HTTP
server URL provided.
9.
After entering all the values as detailed in Step 8, you can validate the
connection by clicking on the Test Connection icon.
Click on the Status Information icon to view the server status
information of all the content repositories hosted on the HTTP Server.
Every new SAP R/3 client using the content store, has to send a
certificate of acceptance by clicking the Send Certificate icon.
Note: Test Connection, Status Information and Send Certificate icons
are highlighted with a red circle in the image.
Click on the -->CS Admin to navigate to the Content
Server Administration-Change window and approve the certificate
just created.
10.
From the Content Server Administration window, select
the Certificates tab.
Click on the Display<-->Change
icon to enable changes.
Select the certificate you created from the Certificate
Properties list by checking the box.
Now activate the certificate by clicking on the Activate icon. Make
sure all credentials are checked before activating/approving the
certificate. User is not given the option to deactivate a certificate.
The Deactivate icon is currently disabled.
Any changes made in this page should be saved using the Save
button (floppy icon).
The statistics tab in the Content Server
Administration - Change windowis currently under
development.