

|
It is recommended that you perform a restore operation immediately after your first full backup to understand the process. The following section describes the steps involved in restoring a virtual machine.
| 1. |
|
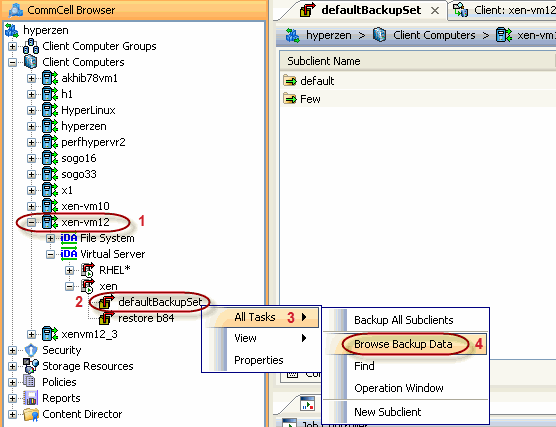 |
| 2. |
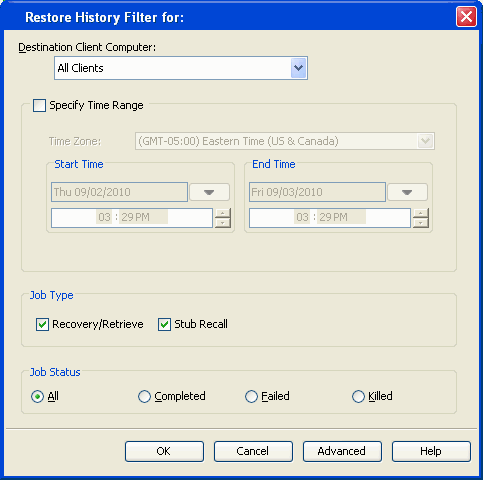
Click OK.
|
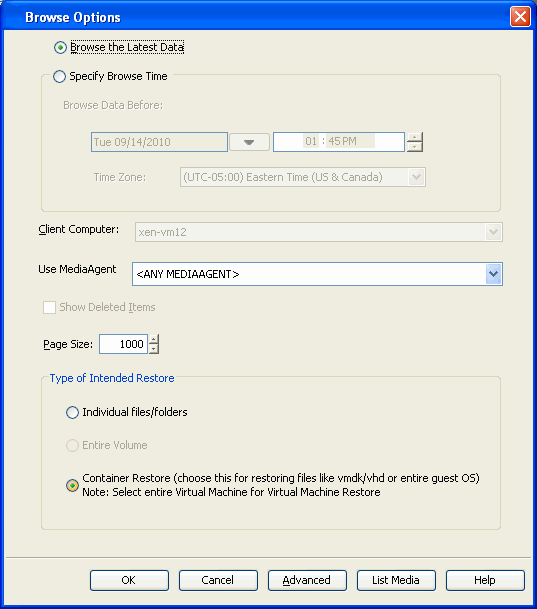 |
| 3. |
|
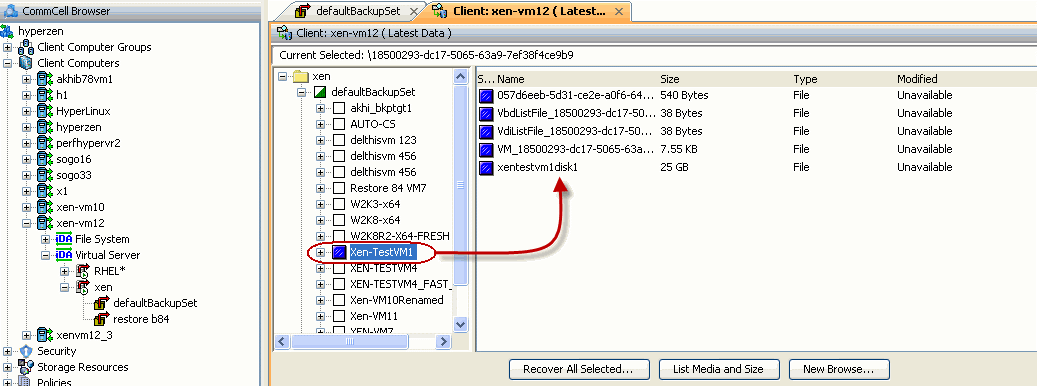 |
| 4. |
|
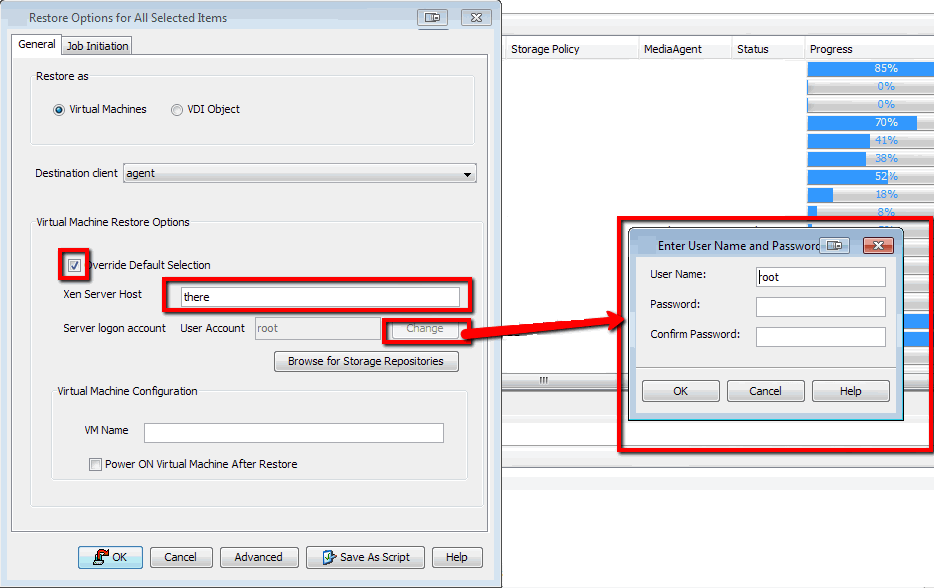 |
| 5. |
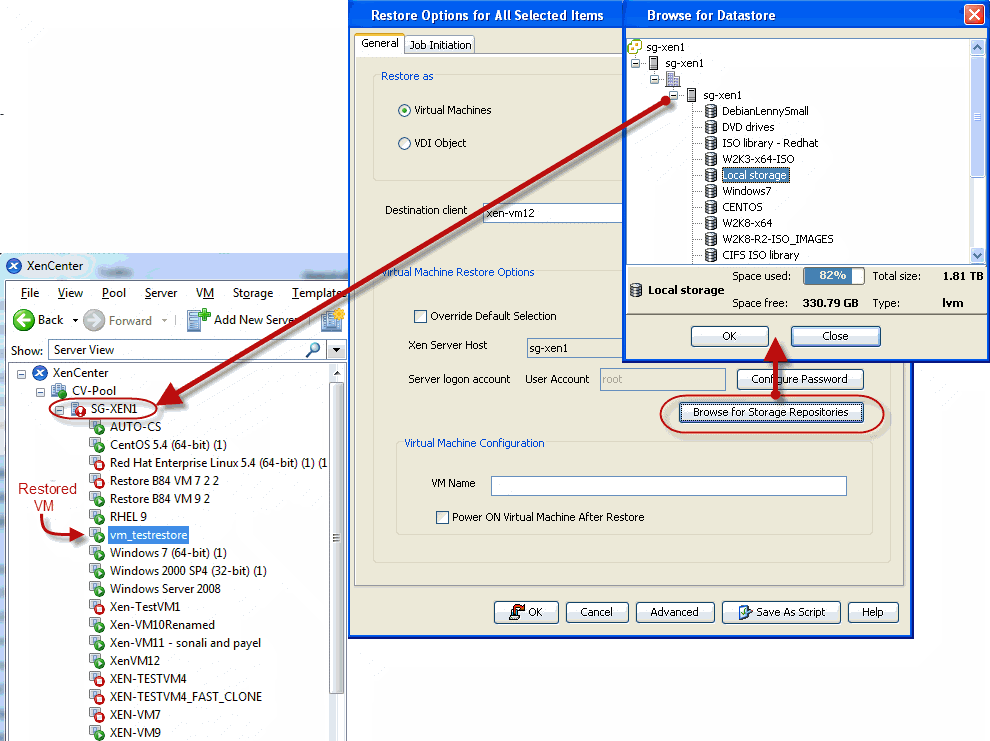
If the selected storage repository does not meet the minimum requirements needed to restore the virtual machine, you can repeat this step until an acceptable storage repository is found. |
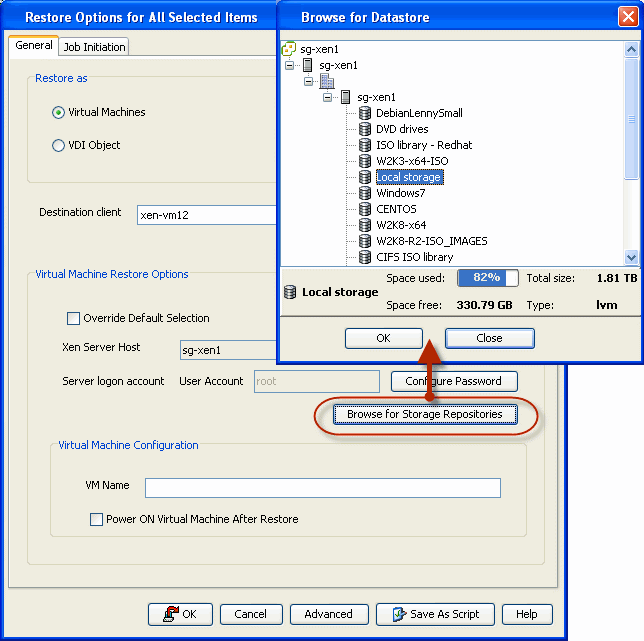 |
| 6. |
Enter the VM Name for the virtual machine. Ensure that you provide a fully qualified name for the virtual machine. Entering an IP address will cause the restore operation to fail.
|
 |
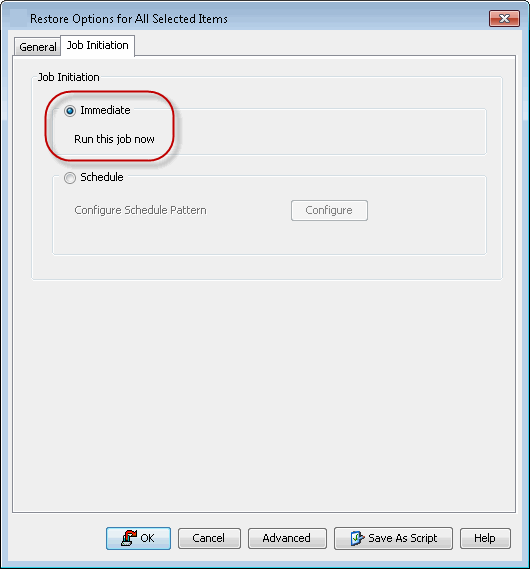
| 6. |
|
 |
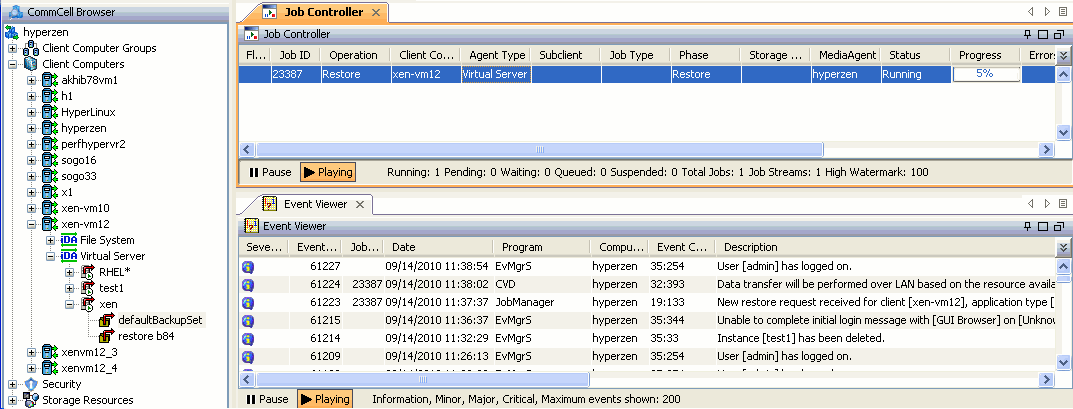
| 7. | You can monitor the progress of the restore job in the Job Controller or Event Viewer window of the CommCell Console. |
 |
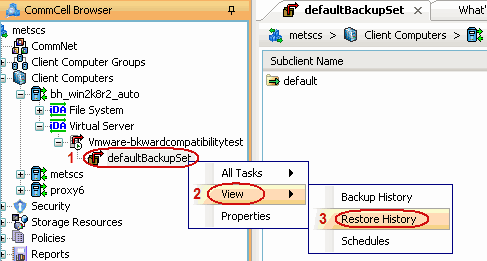
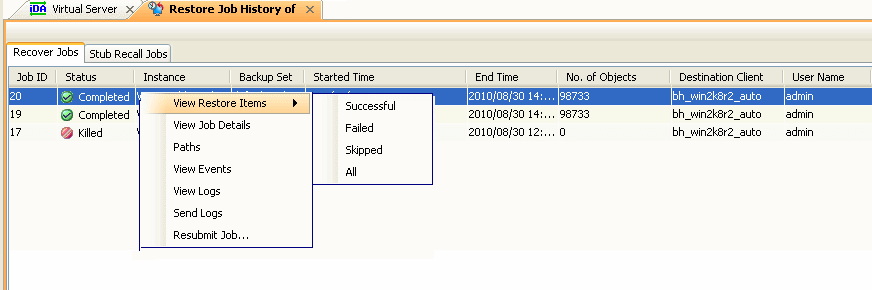
| 8. | Once the restore job has completed, right-click the entity
(e.g. agent, instance) and click View
| Restore History. If the entity chosen is the client computer, click View | Job History. |
 |
| 9. | Click OK. |
 |
| 10. | You can view the
following details about the job by right-clicking the job:
|
 |
| 11. | Once the virtual machine is restored, it is automatically mounted to the Xen Server Host you specified. |
 |
If you want to further explore this Agent's features read the Advanced sections of this documentation.
|