

|
|
Once the storage policy is configured, you are ready to perform your first backup.
Component |
What Gets Backed Up |
| File System | File Allocation Table (FAT) file systems New Technology File Systems (NTFS) Transactional File Systems Distributed File System (DFS) data |
| File System Elements |
Universal Naming Convention (UNC) Paths
Mount Points Encrypted files Compressed Data Shared Volumes Share with Macintosh data Single Instance Storage Remote Storage Service |
| System State |
System File Protection catalog and files Performance monitor configuration files Active Directory Registry Quotas SYSVOL (if this is a domain controller) Certificate Services database (if this is a certificate server) Cluster database (if this server is part of a cluster) COM+ database Terminal Server Licensing database RSM database WMI database DHCP WINS IIS UDDI (only with Windows Server 2003 using VSS) Disk quota information Event logs Content Indexing catalogs Network Policy Server (NPS) 1-Touch Component |
| Office Communication Server (OCS) |
OCS Data
OCS Settings |
Component |
What Does Not Get Backed Up |
| File System | Locked Files - Files that are locked by applications or system programs while they are in use. |
| Office Communication Server (OCS) | OCS Metadata - Use SQL Server iDataAgent to backup the OCS Metadata. |
| Resilient File System (ReFS) on Windows Server 2012 | Change Journal and Data Classification scan methods are not supported on Resilient File System (ReFS) volumes - Use the classic scan to backup the data. |
| System State | Offline files will not get backed up if the client computer has UEFI. |
| Web Server on Windows Server 2012 | Data from the Web Server will not get backed up. |
The following section provides step-by-step instructions for performing your first backup:
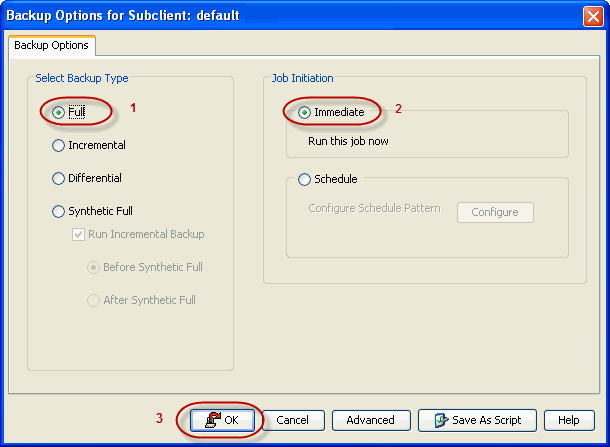
| 1. |
|
 |
| 2. |
|
 |
| 3. | You can track the progress of the job from the Job Controller window of the CommCell console. |
 |
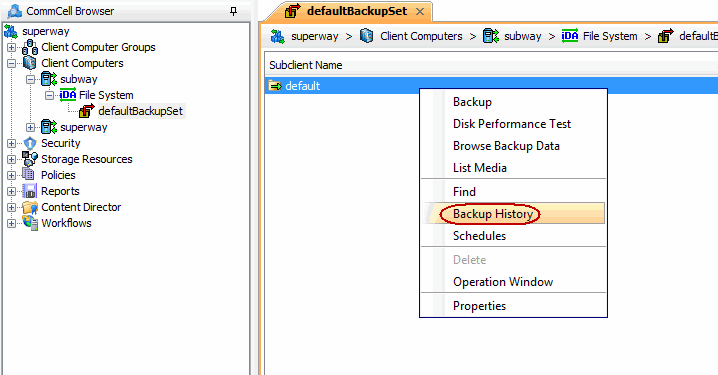
| 4. | Once the job is complete, view the job details from the Backup History. Right-click the Subclient and select Backup History. |
 |
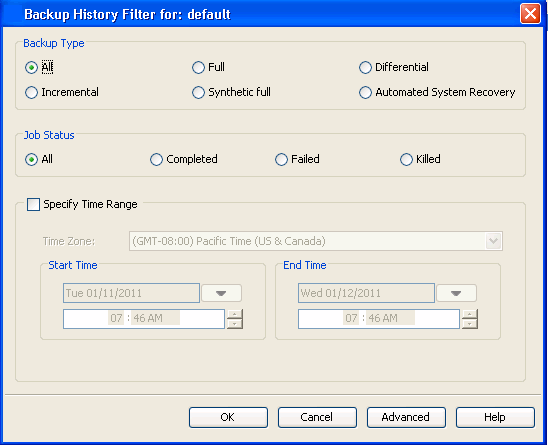
| 5. | Click OK. |
 |
| 6. |
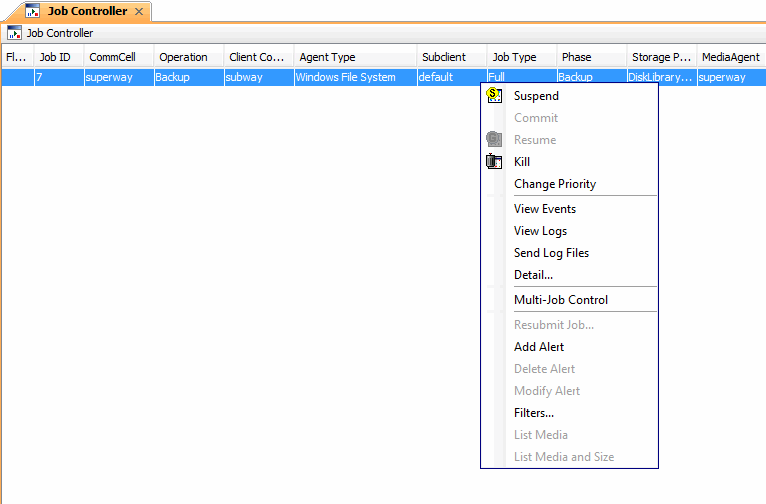
You can view the following details about the job by right-clicking the job:
|
 |
|
|