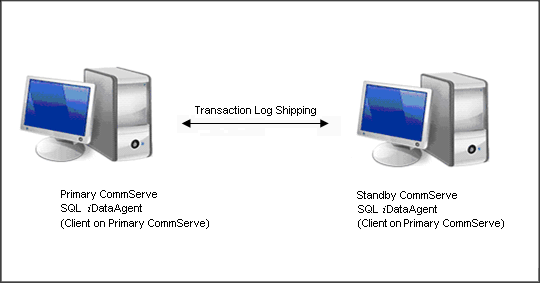
Set Up the Primary SQL Server
|
| 1. |
Install the Microsoft SQL Server
iDataAgent on the primary SQL server
computer. |
See Deployment -
Microsoft SQL Server iDataAgent
for more information. |
Set Up the Hot Standby Server
|
| 2. |
Install the Microsoft SQL Server
iDataAgent on the hot standby server
computer. |
See Deployment -
Microsoft SQL Server iDataAgent
for more information. |
Backup the SQL Server Database(s) on the Primary Server
|
|
3. |
Perform a full backup of the SQL Server database(s) on
the primary server. NOTES
-
If the primary SQL server and hot standby server are connected using
a slow Wide Area Network (WAN) connection, you can make a secondary
copy of the data to a tape or a removable storage device using the
Auxiliary Copy
operation. The tape can then be sent to the hot standby server's location
and restored locally, thereby preserving your WAN resources.
|
See
Start a Full/Incremental/Differential
Backup for step-by-step instructions. See
Start an Auxiliary Copy for step-by-step instructions if you wish to
copy the backed up database to tape.
|
Restore the SQL Server Database(s) to the Hot Standby Server
|
| 4. |
Perform a restore of the last full backup of the primary
database(s), as well as any differential or transaction log backups completed
since the database’s last full backup. |
See Restore Latest
Data (Warm Database Restore) for step-by-step instructions. |
Schedule Routine Backup/Restore Operations for the SQL Server Database(s)
|
| 5. |
Schedule routine differential or transaction log backups
of the SQL Server database(s) on the primary server. Then, schedule routine
restore operations using the Latest Backup Data option. All backup
jobs completed since the last restore operation will be restored.
- Matching the restore schedule with a backup schedule on the source
database keeps the restored databases up to date automatically.
- If you wish to include only the transaction log backups completed
since the last restore operation, you must select the Apply Log Backups
Only option after selecting Latest Backup Data in the
SQL Restore
Options dialog box. The restore operation will then skip any full
backup jobs completed since the last restore operation.
If you do not select the Apply Log Backups Only option and
the database already exists, all backup jobs completed since the last
restore operation will automatically be restored.
If you do not select the Apply Log Backups Only option and
the database does not already exist, the software will automatically
perform a full restore of the database.
- If you wish to retain the capability to view the database(s) contents
on the hot standby server, ensure that the database(s) are restored
in STANDBY mode. If you do not wish to retain this capability,
you can restore the database(s) in NO RECOVER mode.
|
See the following procedures for step-by-step instructions:
|
Using the SQL Server Database(s) on the Hot Standby Server
|
| 6. |
If you wish to use the database(s) on the hot standby server,
you must first bring the database(s) online by selecting the Recover
Only option in the
SQL Restore Options
dialog box. NOTES
- You can also bring the database(s) online by recovering the database
from the SQL Server Enterprise Manager.
- No further restore operations may be performed to the hot standby
server’s database(s) once the database(s) have been recovered. If you
wish to perform more restore operations to the hot standby server after
recovering the database(s), you must setup the hot standby server again
as described in this procedure.
|
|
Perform Disaster Recovery Operations for the Primary SQL Server Database(s)
|
| 7. |
If the primary server's database(s) is lost, you can restore
the database(s) from the hot standby server's database(s) by performing
the appropriate in-place restore operation. If the entire primary server
is lost, you must perform a full system restore.
NOTES
- Once the full system restore has completed, you will need to set
up the hot standby server again by repeating the steps outlined in this
procedure.
|
See Restore Data - Microsoft SQL Server
for step-by-step instructions. See
Restore
Data - Microsoft SQL Server - Full System Restore for step-by-step instructions.
|
