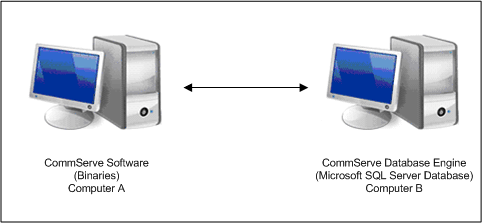
| 1. |
Install the CommServe software on the computer that will
host the CommServe. |
See Install the
CommServe for step-by-step instructions. |
| 2. |
Verify that no jobs are in progress or scheduled to occur
while setting up this configuration. If jobs are in progress or other
tasks (such as reports or updates) are scheduled, either perform this task
at another time or disable all activity or disable all scheduled tasks from
the CommCell Console.
|
To disable activity control:
- From the CommCell Browser, right-click the CommServe and
then click Properties.
- Click Activity Control tab.
- Clear Enable All Job Activity and Enable Scheduler
box.
- Click OK.
|
| 3. |
Stop all services on the CommServe computer. |
To stop services:
- Click the Start button on the Windows task bar and then click
All Programs.
- Navigate to bull | Calypso
and click Service Control Manager.
- Select All Services in Services.
- Click Stop to stop all services.
|
| 6. |
In the CommServe computer, using the SQL Server Management
Studio, backup the CommServ database and create a .dmp file. |
Perform the following steps to back up the CommServe
database to a full database backup:
- Open Microsoft SQL Server Management Studio.
- Navigate to Server Instance | Database | CommServ.
- Right-click the CommServ database, select Tasks and
then click Backup. The Back Up Database dialog box appears.
- In the Database, verify the database name.
- In the Backup type, select Full.
- In the Backup Component, select Database option.
- Accept the default backup set name in the Name, or you can
enter a different name for the backup set.
- Specify when the Backup set will expire. By default After
is selected with value 0.
- In the Destination area select Disk option. To select
the path, click Add. The selected path will be displayed in the
Backup to list.
- To remove backup destination, select the destination path and click
Remove.
- Click OK.
|
| 7. |
Copy the backup dump (.dmp) file created in Step 4
to SQL Server Computer using any of the following method:
- Using a physical media
- Using a network drive that is accessible from both the Servers
|
|
| 8. |
In the SQL Server computer, using the SQL Server Management
Studio, restore the CommServ database. |
Perform the following steps to restore the full database
to the SQL Server computer:
- Open Microsoft SQL Server Management Studio.
- Navigate to Server Instance | Database.
- Right-click Database, select Restore Database. The
Restore Database dialog box appears.
- On the General page, do the following:
- In the To Database, select or type the name of a database.
- To specify the source and location of the backup sets to restore,
select From device option.
Click the Browse button, Backup dialog box appears.
In the Backup media, select one of the device type.
Click Add to provide the path of dump file copied in the
previous step. Click OK.
- On the Options page, do the following:
- Click OK.
|
| 9. |
Run the following query from SQL Management Studio on SQL
Server Computer: Usage:
exec CommServ..executeCSSetupScripts '<path>'
Example
exec CommServ..executeCSSetupScripts 'C:\Program
Files\Bull Calypso\Calypso\'
Where
<path> - This is the path of CommServe Installation Directory
on SQL Server Computer.
|
|
As Disaster Recovery Backup will not work in this setup, use the following
steps to protect the database:
| 13. |
Disable the Disaster Recovery Backup schedule. |
Use the following steps to disable a schedule:
- From the CommCell Browser, right-click the <CommServe>,
point to View and then click Schedules.
- Select and right-click the DR Backup Full schedule in the right pane and click
Disable.
- Click Yes to disable the schedule.
|
| 14. |
Install the File System
iDataAgent on the SQL Server computer. |
See Getting
Started - Windows File System Deployment for more information. |
| 15. |
Using the File System iDataAgent,
create a subclient which includes a script in the pre-scan phase to create
a .dmp file of the CommServ database. Schedule regular backups
of this subclient database from file system
iDataAgent. Recommended schedule is a daily full backup.
|
Use the following command line in a batch file and attach
the batch file as a PreBackup Process:
<sql install path>\Isql.exe -S <SQL ServerName>
-U sa -P <sapwd> -q "BACKUP DATABASE [CommServ] TO DISK = 'C:\cs.dmp'"
This should create a dump file c:\cs.dmp.
You can choose the folder in which the .dmp file is created.
|
| 16. |
If you want a copy of the dump in a disk library (similar
to Disaster Recovery Backup) copy the dump file to another location. This
can be included in the post-backup phase. |
|
Use the following steps to install updates on CommServe and SQL Server computers:
Use the following steps to uninstall updates on Commserve and SQL Server computers: