Deployment - Windows

Skip this page if you are not installing this agent on Windows.

Click to continue with the discovery.

Install External Data Connector software to discover and migrate EMC Networker data. Follow the steps given below to install the External Data Connector software.

Installation

before you begin

  The software can be installed using one of the following methods. Ensure you have the following before performing the install:
  • Software version Service Pack 12, .

Method 1: Interactive Install

Use this procedure to install the software and then customize your configuration.

Method 2: Install Software from CommCell Console

Use this procedure to remotely install the software on a client computer and then customize your configuration.

Download Software Packages

Download the latest software package to perform the install.

System Requirements

Make sure that the computer in which you wish to install the software satisfies the System Requirements.

Method 1: Interactive Install

1. Run Setup.exe from the Software Installation Disc on the client computer where EMC Networker Server resides.
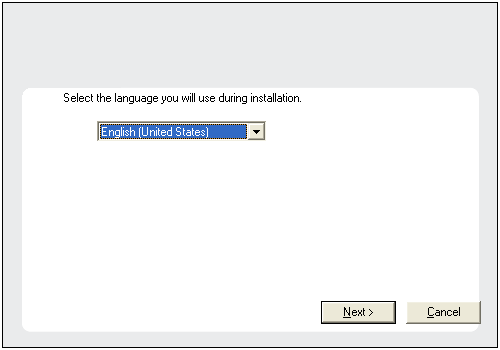
2. Select the required language.

Click Next.

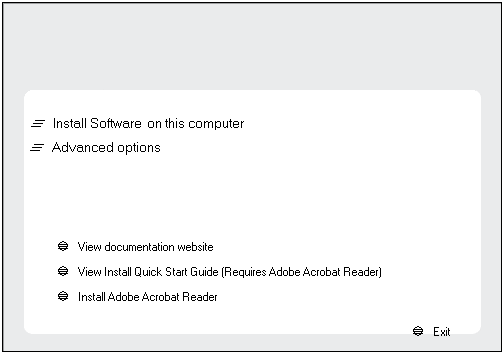
3. Select the option to install software on this computer.

NOTES

  • The options that appear on this screen depend on the computer in which the software is being installed.
4. Click Next.
5. Click OK.
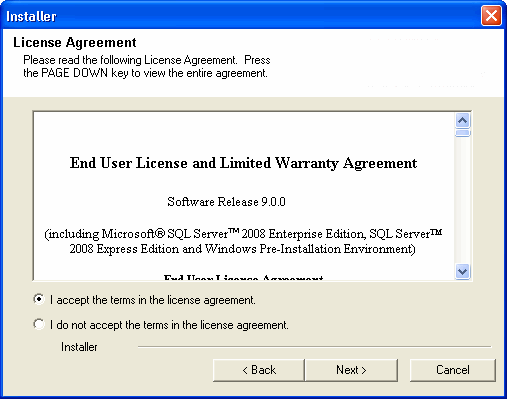
6. Select I accept the terms in the license agreement.

Click Next.

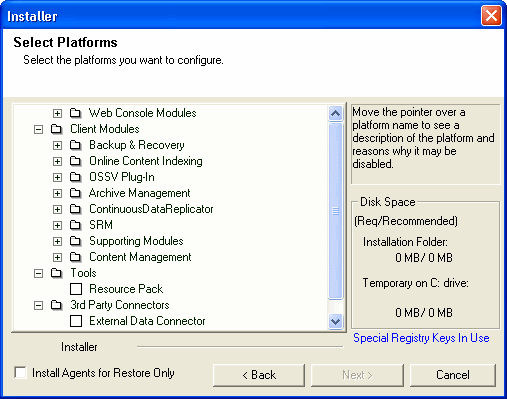
7. Expand 3rd Party Connectors, select External Data Connector, and then click Next.
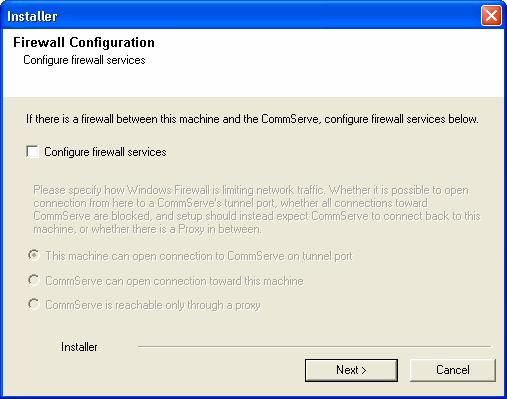
8. If this computer and the CommServe is separated by a firewall, select the Configure firewall services option and then click Next to continue.

For firewall options and configuration instructions, see Firewall Configuration and continue with the installation.

If firewall configuration is not required, click Next to continue.

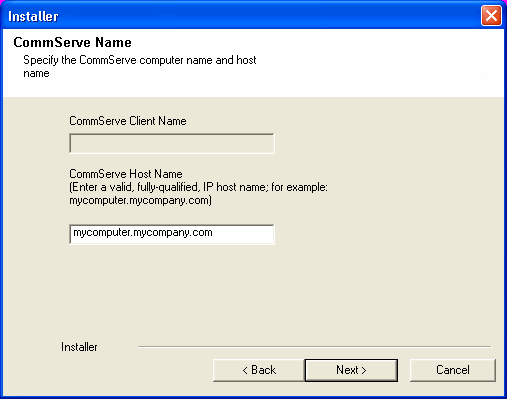
9. Enter the fully qualified domain name of the CommServe Host Name.

Click Next.

NOTES

  • Do not use space and the following characters when specifying a new name for the CommServe Host Name:

    \|`~!@#$%^&*()+=<>/?,[]{}:;'"

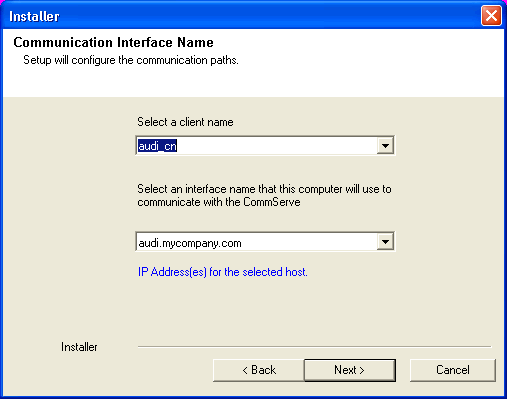
10. Click Next.

NOTES

  • The client computer name and host name must be the same for discovery operations to complete successfully.
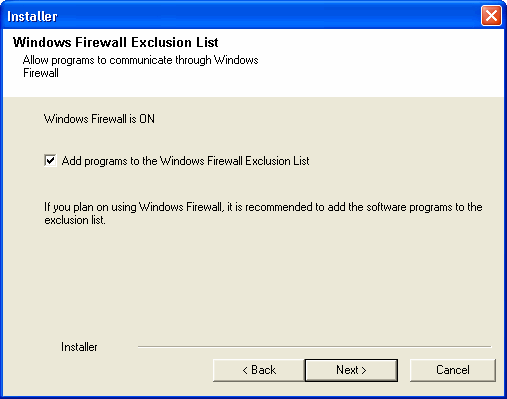
11. Select Add programs to the Windows Firewall Exclusion List, to add CommCell programs and services to the Windows Firewall Exclusion List.

Click Next.

NOTES:

  • If Windows Firewall is disabled on this computer, select this option to add the Commcell programs and services to Windows firewall exclusion list.

    This option enables CommCell operations across the firewall, if the firewall is enabled at a later time.

12. Click Next.
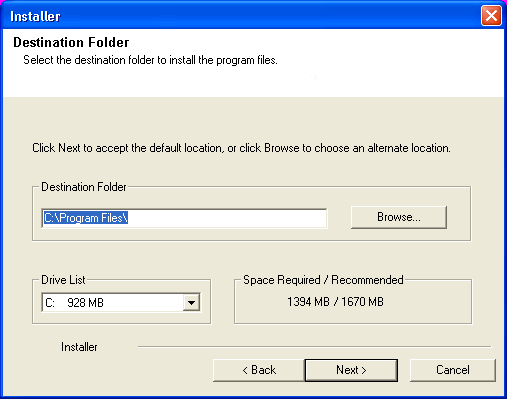
13. Verify the default location for software installation.

Click Browse to change the default location.

Click Next.

NOTES

  • Do not install the software to a mapped network drive.
  • Do not use the following characters when specifying the destination path:

     / : * ? " < > | #

    It is recommended that you use alphanumeric characters only.

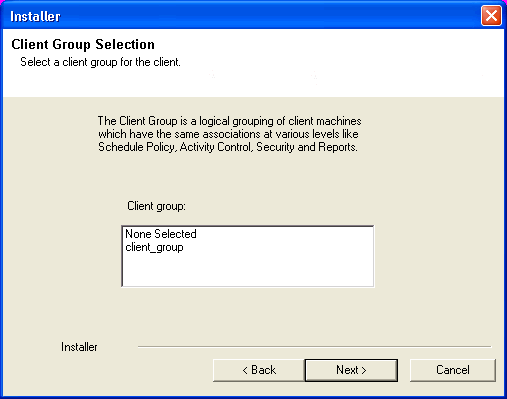
14. Select a Client Group from the list.

Click Next.

NOTES

  • This screen will be displayed if Client Groups are configured in the CommCell Console.
15. Click Next.
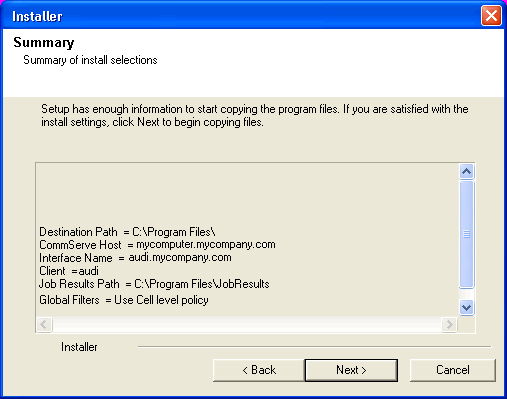
16. Click Next.
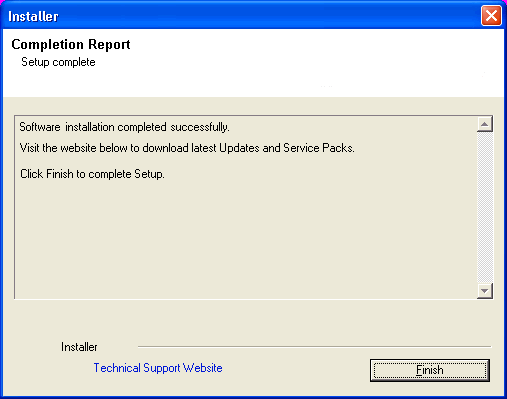
17. Click Finish.

Method 2: Install Software from CommCell Console

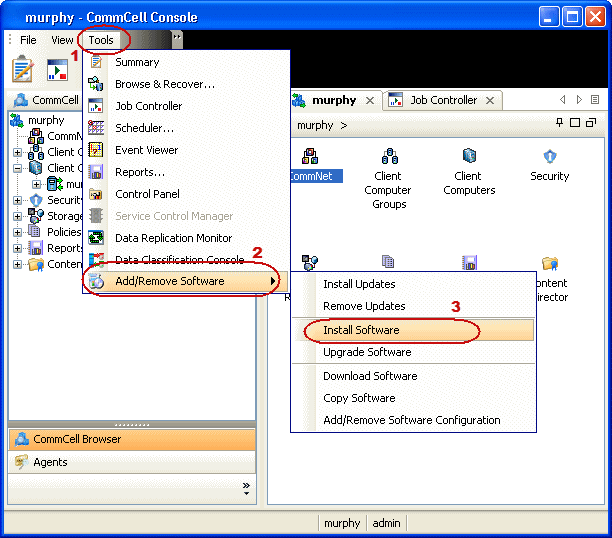
1. From the CommCell Browser, select Tools -> Add/Remove Software -> Install Software.
2. Click Next.
3. Select Windows.

Click Next.

4. Select Manually Select Computers.

Click Next.

5. Enter the fully qualified domain name of the client computer where EMC Networker Server resides.

For example: apple.domain.company.com

The External Data Connector software will be installed on this client computer.

Click Next.

6. Click Next.
7. Specify UserName and Password.

Click Next.

8. Select External Data Connector.

Click Next.

9. Click Next.
10. Select Immediate.

Click Next.

11. Click Finish.
12. You can track the progress of the job from the Job Controller or Event Viewer window.
13. Once the job is complete, view the details of job from the Job History.

Right-click the CommServe computer, click View and then click Admin Job History.

14. Select Install/Upgrade/Remove Software.

Click OK.

15. You can view the following details about the job by right-clicking the job:
  • Items that succeeded during the job
  • Items that failed during the job
  • Details of the job
  • Events of the job
  • Log files of the job