Verify that the NetWare server to which you are installing and the Novell client
from which you are installing satisfies the minimum requirements specified in the
following System Requirements:
In order to secure the File System data on all NetWare servers, you must install
the File System iDataAgent to each NetWare
server.
When you select the File Archiver for NetWare Agent for install, the NetWare
File System iDataAgent is automatically
selected for install.
The install program allows you to install multiple
MediaAgents and Agents at the same time, using either the Express or Custom
installation modes. If you are installing on only one computer the modes
do not apply.
The custom mode is useful to customize each installation.
Use the Custom mode when you wish to:
The Express mode is useful to rapidly install multiple MediaAgents
and/or Agents. Use
the Express mode when all the MediaAgents and/or Agents that you wish to install can
have the following options:
| 1. |
Create the
bIgnoreCommServeVersion registry key. |
To create the registry key, see the following steps:
|
| 2. |
Place the
software installation disc for the Windows platform into the
Novell clientís disc drive or a mapped disc drive on another
computer or a network share.
If the installation menu does not appear:
- Click Start on the Windows task bar, and then click
Run.
- Browse the installation disc drive, right-click Setup.exe, then click
Open.
In the language screen, click
the down arrow, select the desired language from the pull-down list, and then click Next
to continue.
|
|
| 3. |
Select the option to install software on a NetWare server. NOTES
- The options in this menu depend on the computer in which
the software is being installed.
|
|
| 4. |
Read the Welcome screen.
Click Next to continue, if no other applications are
running.
|
|
| 5. |
Select Install from the Install/Uninstall Selection screen. Click Next to continue.
|
|
| 6. |
Read the license agreement, then select I accept the terms
in the license agreement. Click Next to continue.
|
|
|
|
| 7. |
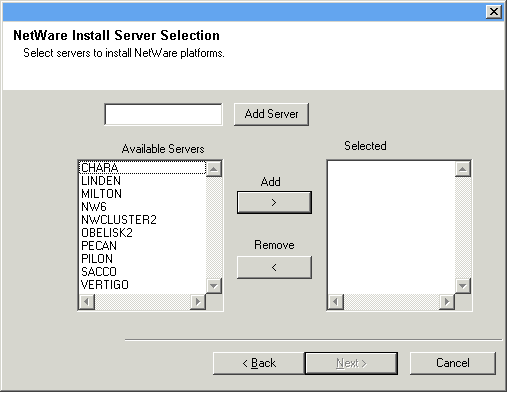
The install program automatically discovers the available NetWare servers. Select the NetWare server(s) to which you want to install the Agent(s). You can select
multiple servers, provided you have supervisor rights on each one.
NOTES
- If the install program was unable to discover an existing server, its name
can be added to the Available Servers list by manually entering the name, and
clicking Add Server.
- To add and remove existing servers to and from the Selected Servers list,
use the Add and Remove buttons.
- If you are not logged on to the selected server(s), the Novell Login
dialog box appears. To install software to the server(s), you must log on as
a user with Supervisor rights or use an account that has
Read/Write/Modify/Erase/Create/File Scan rights to the SYS:SYSTEM directory.
- If your account on any available NetWare server does not have the
appropriate rights, a dialog box warns you that you do not have the
authority to install to that server. The server remains in the list of
available servers. To install to that server, you must log off and log back
on as a user with the appropriate rights.
Click Next to continue.
|
 |
| 8. |
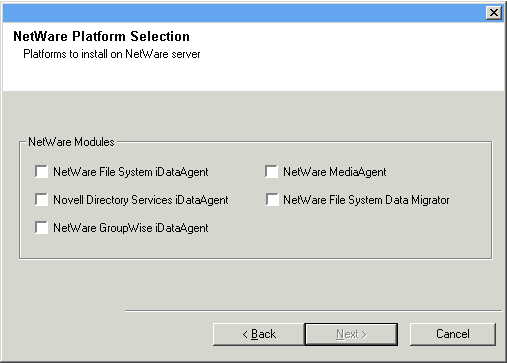
Select any or all of following the Agent(s) you want to install.
- iDataAgent for NetWare File System
- iDataAgent for Novell Directory Services (NDS)
- iDataAgent for NetWare GroupWise
- NetWare MediaAgent
- Agent for NetWare File System DataArchiver
NOTES
- This screen is repeated for each server selected for installation.
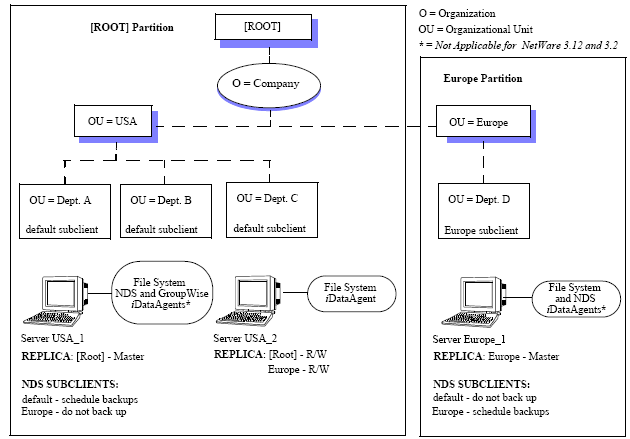
- If you are installing the NDS iDataAgent,
it is recommended that you install it to one NetWare server on each partition
in order to increase the efficiency of back up and restore procedures. See
Install Requirements for more details.
- If you are installing the NetWare File System DataArchiver, then the
NetWare File System iDataAgent is
automatically selected for install.
- The GroupWise iDataAgent will
only be selectable for installation on GroupWise servers.
Click Next to continue.
|
 |
| 9. |
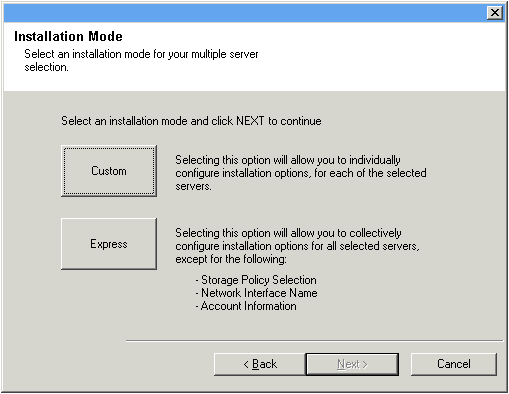
Select Custom to install the software and assign unique configurations
for each of the selected NetWare servers. NOTES
- In Express mode,
the install program leads you through an install in which you assign common
installation options across all servers in one pass. Use this mode to expedite your install
if you are configuring multiple servers to the same CommServe.
- In Custom mode, the install program leads you through an install in which
you assign unique configurations for each of the selected NetWare servers in
turn. While configuring options, each dialog box clearly indicates if you are
working in Express mode or working on a specific serverís configuration
settings.
- This screen will not appear if you have selected one server for
installation.
Click Next to continue.
|
 |
|
|
| 10. |
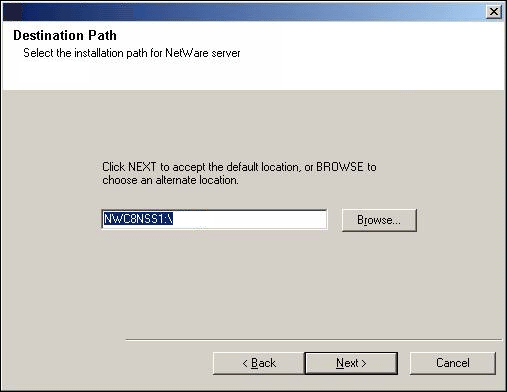
Accept the default Destination Path or enter an alternate install path.
NOTES
- In an Express install the Browse button is disabled.
- Destination folders:
- must follow DOS naming conventions
- must not exceed a length of 8.3 characters
- must not use the following characters when specifying the destination
folder:
/ : * ? " < > |
It is recommended you use alphanumeric characters only.
Click Next to continue.
|
 |
|
|
| 11. |
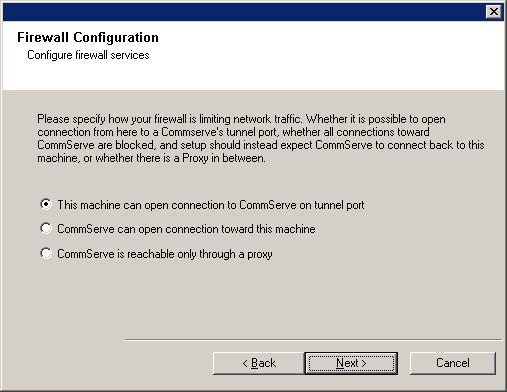
Select from the following:
- If this Client communicates with the CommServe Server and/or MediaAgent across a
firewall, select Yes, configure firewall services, and then click
Next to continue.
Proceed to the next Step.
- If firewall configuration is not required, click No, do not configure
firewall services and then click Next to continue. Proceed to
the next section.
NOTES
- Operating systems, such as Windows 2008 and Windows Vista, may have more
than one profile present. When you select No to configure firewall
services, verify that firewall settings are not enabled in the profile(s).
- If the system detects firewall settings are present in the profile(s),
you must select from the following:
- Disable firewall for ALL profiles: Employ caution when
choosing this option; firewall settings will be disabled in all
profiles. This requires a system reboot; installation automatically
resumes after reboot.
- No, Firewall is not enabled: Select this option if your
firewall settings allow communication with the CommServe computer.
Click Back to configure firewall services.
|
 |
|
|
| 12. |
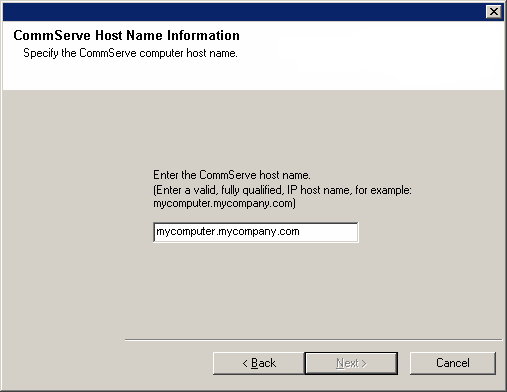
Enter the fully qualified domain name of the CommServe computer. (TCP/IP network
name. e.g., computer.company.com)
NOTES
-
Do not use spaces when specifying a new name for the CommServe Host Name.
- If a component has already been installed, this screen will not
be displayed; instead, the installer will use the same Server Name as previously
specified.
Click Next to continue.
|
 |
| 13. |
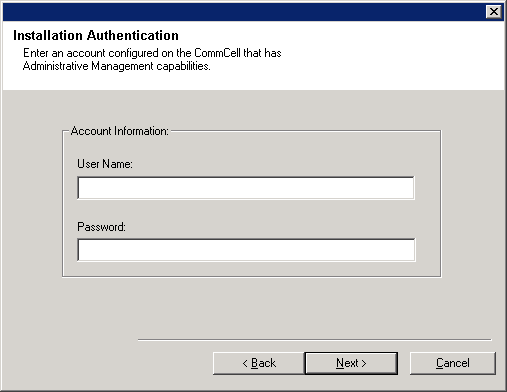
Enter the username and password associated with an external
domain user account or a CommCell user account to authorize the installation
of this agent. NOTES
- This window will be displayed when the Require Authentication for Agent
Installation option is selected in the CommCell Properties. For more
information, see
Authentication for Agent Installs.
Click Next to continue.
|
 |
| 14. |
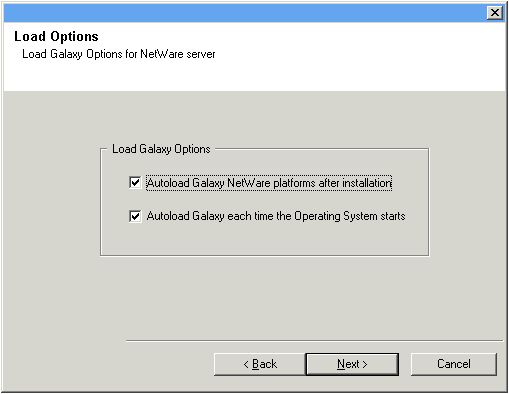
Select one of the Load Options:
- Automatically load the software onto the server after installation.
- Automatically load the software each time you restart the server.
NOTES
- If you choose not to autoload the agents after installation, you will need
to manually load the Agents onto each server after completing the installation.
Click Next to continue.
|
 |
| 15. |
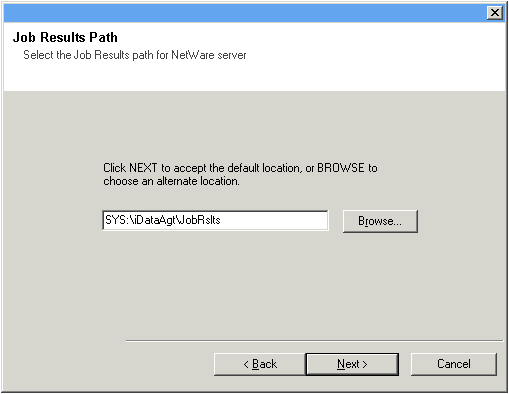
Specify the location of the clientís job results directory.
NOTES
- The Agent uses the job results directory to store the
clientís backup and restore job results.
- In an Express install the Browse button is disabled.
- Job results folders:
- must follow DOS naming conventions
- must not exceed a length of 8.3 characters
- must not use the following characters when specifying the destination
folder:
% * ? < > |
It is recommended you use alphanumeric characters only.
Click Browse to change directories.
Click Next to continue.
|
 |
|
|
| 16. |
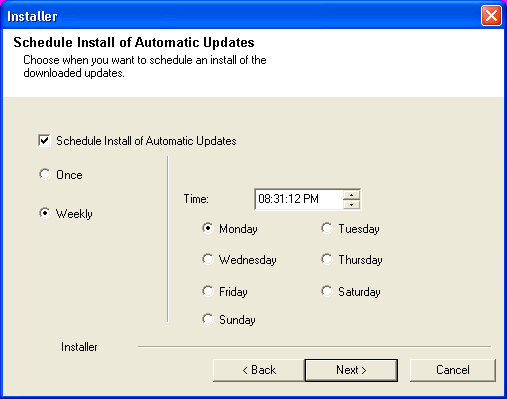
If necessary, select this option to schedule an automatic installation of software
updates.
NOTES
Click Next to continue.
|
 |
|
|
| 17. |
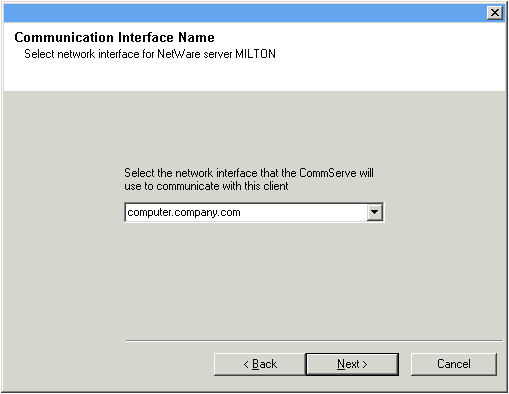
Enter either of the following:
- If resolvable, the local (NetBIOS) name of the client computer.
- The TCP/IP IP host name of the NIC that the client computer must use to
communicate with the CommServe.
NOTES
- This dialog box will appear once for each server selected for
installation. For example, if you are installing four servers, this dialog box
will appear four times.
- The name of the NetWare server you are configuring is indicated in each
screen. In an Express install, this dialog box will repeat for each server
selected for installation.
Click Next to continue. |
 |
|
|
| 18. |
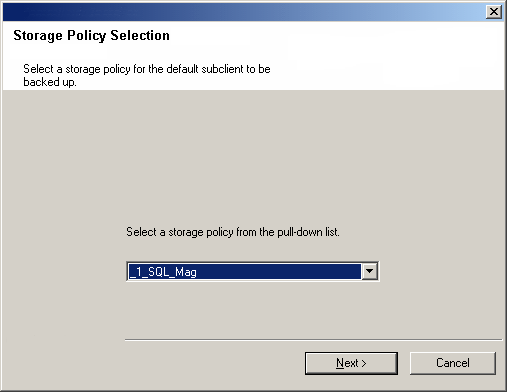
Configure storage policies for the NetWare File System
if selected for installation.
Select the storage policy through which you want to back up/archive the
indicated component (subclient, instance, etc.)
NOTES
- A storage policy directs backup data to a media library. Each library
has a default storage policy.
- When you install an Agent, the install program creates a default subclient
for most Agents.
- If desired, you can change your storage policy selection at any time
after you have installed the client software.
- If this screen appears more than once, it is because you have selected
multiple agents for installation and are configuring storage policy
association for each of the installed agents.
Click Next to continue.
|
 |
|
|
| 19. |
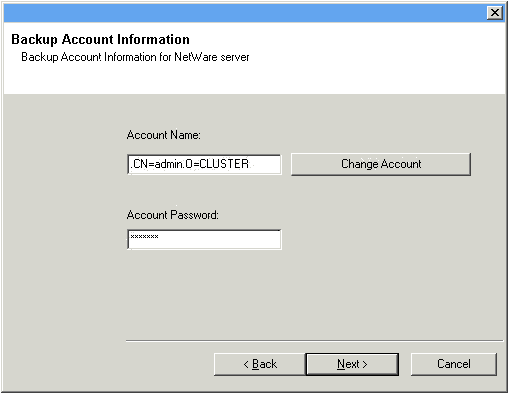
Enter the Backup Account Information. By default, the install program uses
the account of the user currently logged into the NetWare server.
- To use the default user account, enter the password of that account.
- To select a different user account, click Change Account. In the
Select User dialog box, select from the tree of NetWare user accounts, and
click OK.
- To create a new user account, click Change Account. Then click
Create New User. Enter the required account information, assign the
desired rights to the new user, and click Create. The install program
creates the account. In the Select User dialog box, select the new account
from the tree, and click OK.
NOTES
- In order to effectively back up and restore data, you must select a user
account with the appropriate rights.
- For the File System iDataAgent,
GroupWise iDataAgent and File
Archiver for NetWare Agent, it is recommended that the user account have supervisor rights to the
server.
- For the NDS iDataAgent, you
must select a NetWare user account with supervisor rights to the root of the
entire NDS tree.
- Changing a network account requires about five minutes to be synchronized.
Click Next to continue.
See the
NetWare Server iDataAgents section in User Accounts and Passwords
for more information.
|
 |
| 20. |
Configure storage policies for the NDS
iDataAgent and/or GroupWise
iDataAgent if they were selected
for installation. Otherwise skip to the next step.
Select the storage policy through which you want to back up/archive the agent. NOTES
- A storage policy directs backup data to a media library.
- If desired, you can change your storage policy selection at any time
after you have installed the client software.
- This screen may appear more than once, if you have selected multiple
agents for installation. You will be prompted to configure the storage
policy association for each of the selected agents.
Click Next to continue.
|
 |
 |
You will be returned to Step to Destination
Path for each server you have selected to configure for this custom
installation. Once all of the servers have been configured, the install
will continue.
|
|
|
| 21. |
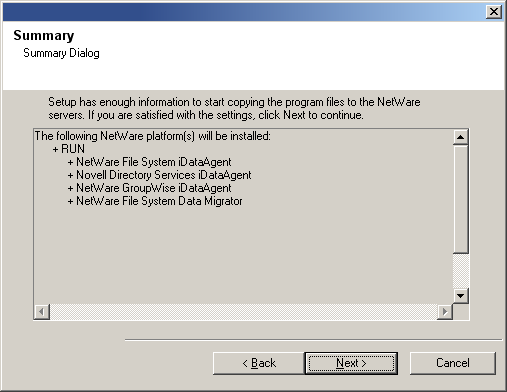
Verify the summary of selected options.
NOTES
- The Summary on your screen should
reflect the components you selected for install, and may look different from
the example shown.
Click Next to continue or
Back to change any of the options.
The install program now starts copying the software to the computer.
This step may take several minutes to complete.
|
 |
|
|
| 22. |
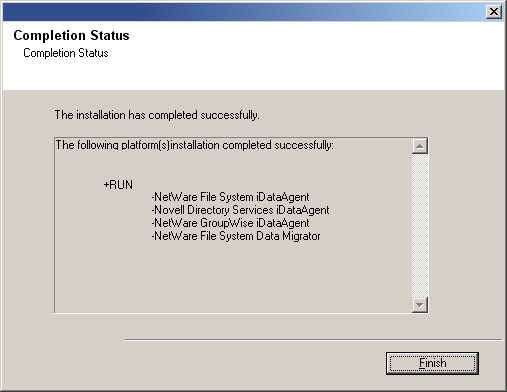
Setup displays the successfully installed components. NOTES
- The Setup Complete message displayed on
your screen will reflect the components you installed, and may look different
from the example shown.
- If you install an Agent with the CommCell Console open, you need to
refresh the CommCell Console (F5) to see the new Agents.
Click Finish to continue.
|
 |
| 23. |
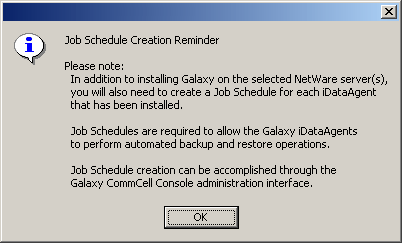
Click OK to exit the install program. The installation is now complete.
NOTES
- Schedules help ensure that the data protection operations for the
Agent are automatically performed on a regular basis without user intervention.
For more information, see Scheduling.
|
 |
General
-
Install post-release updates or Service Packs that may have been released
after the release of the software. When you are installing a Service Pack,
ensure that it is the same version as the one installed in the CommServe Server.
Alternatively, you can enable
Automatic Updates for quick and easy installation
of updates in the CommCell component.
- After installing the Agent, you may want to configure the Agent before running
a data protection operation. The following list includes some of the most common
features that can be configured:
- Configure your subclients - see
Subclients
for more information.
- Schedule your data protection operations - see
Scheduling
for more information.
- Configure Alerts - See
Alerts and Monitoring
for more information.
- Schedule Reports - See
Reports for more
information.
The software provides many more features that you will find useful. See the
Index for a complete list of supported
features.
Agent Specific
-
For the GroupWise iDataAgent, depending on your GroupWise system
configuration, either the GWTSA.NLM or the TSAFSGW.NLM should be loaded prior to
install as well as prior to loading client services each time the server is
rebooted.
If either the GWTSA.NLM or the TSAFSGW.NLM is not loaded, use the appropriate
NetWare Command File (NCF) to load the NLM. The following example
pertains to the GWTSA.NLM, but also applies to the TSAFSGW.NLM:
-
The following configuration tasks are required before performing an Archive
Operation using this Archiver Agent:
- Create a Subclient - see
Subclients -
File Archiver for NetWare for more information.
-
Archiving Rules are initially disabled by default. You must clear the Disable All Rules option in the Subclient Properties (Archiving Rules) or (Rules) tab and configure the archiving rules before conducting rules-based Archive Operations.
Disaster Recovery Considerations
- Before you use your agent, be sure to review and understand the associated
full system restore (or disaster recovery) procedure. The procedure for some
agents may require that you plan specific actions or consider certain items
before an emergency occurs. See
Disaster Recovery for more information
regarding your agent.
|
