Interactive Upgrade - CommNet Server

Table of Contents

Supported Upgrade Paths

Upgrade Requirements

Before You Begin

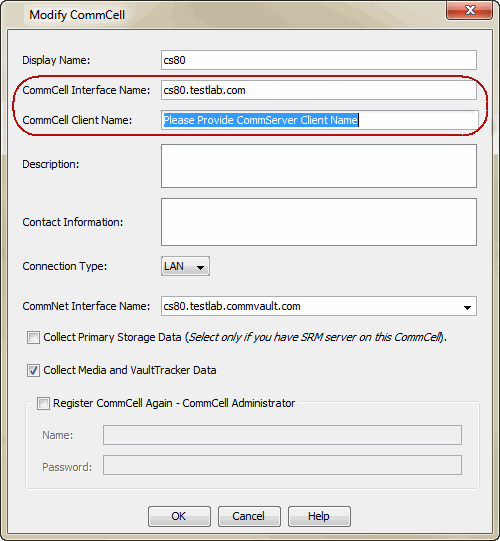
Set the CommCell Interface Name

Upgrade Procedure

Set the Client Name of the Commserve in the CommNet Browser

Supported Upgrade Paths

The following table provides a list of supported upgrade paths for the current software version. If the version currently installed on your computer is not listed here, contact your software provider for more information.

Installed Version

Upgrade to Version 9.0.0

Information

8.0.0 Not Supported Perform a direct upgrade to Version 10.0.0.

Upgrade Requirements

Review the following before upgrading the software:

General

CommNet Specific

Consider the following three scenarios before you upgrade the CommNet Server:

CommServe and CommNet are installed on the same computer

In this case, when you upgrade the CommNet Server, CommServe will get upgraded automatically. For stepwise instructions, see Upgrade Procedure.

After the upgrade, you must set the proper client name of the CommServe in Cell Registration of the CommNet Browser. For stepwise instructions, see Set the Client Name of the CommServe.

CommNet Server is installed as a Stand Alone application

In this case, when you upgrade the CommNet Server, CommServe will be installed automatically on the computer. For stepwise instructions, see Upgrade Procedure.

CommNet Server and any other Agent is installed on the same computer

In this case, when you upgrade the CommNet Server, the agent will get upgraded automatically. For stepwise instructions, see Upgrade Procedure.

There is a Firewall Between the CommServe and CommNet

After the upgrade, you must set the proper client name of the CommServe in Cell Registration of the CommNet Browser. For stepwise instructions, see Set the Client Name of the CommServe.

Before You Begin

Set the CommCell Interface Name

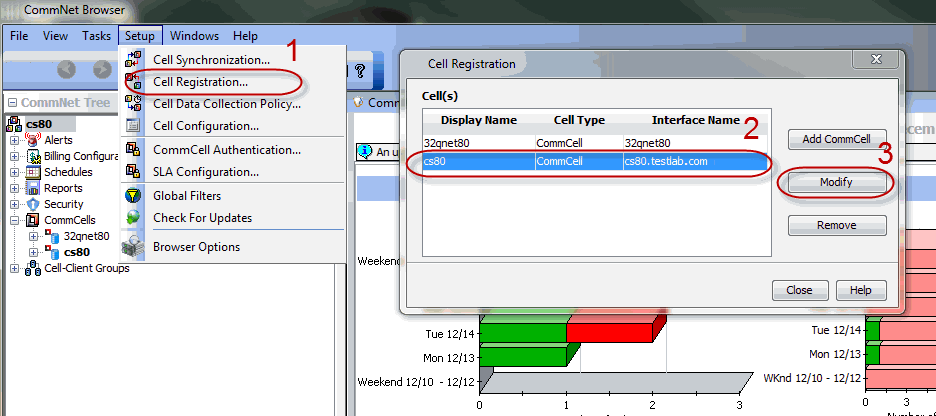
When the CommServe and CommNet are both installed on the same machine the proper interface name of a CommServe should be set in Cell Registration of the CommNet Browser Setup before upgrading the CommNet Server. To set the interface name of the CommServe in the CommNet Browser, do the following:

1.
  • Click Setup and Cell Registration.
  • Click the CommServe and then click Modify.
2.
  • Enter the CommCell Interface Name. You can find the CommCell Interface name in the Value data of  sCSHOSTNAME  registry key on the CommServe computer. 
  • Click OK.

Upgrade Procedure

1. Choose the language you want to use during installation. Click the down arrow and select the desired language from the drop-down list, and click Next to continue.  
2. Select the option to install software.

NOTES

3. Select the option to install software on this computer.

NOTES

  • The options that appear on this screen depend on the computer in which the software is being installed.
4. Read the Welcome screen.

Click Next to continue, if no other applications are running.

5. Read the virus scanning software warning.

Click OK to continue, if virus scanning software is disabled.


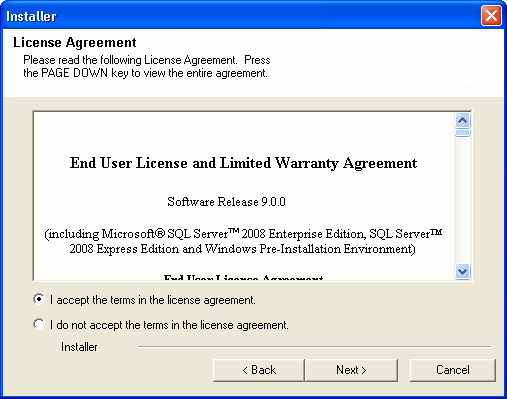
6. Read the license agreement, then select I accept the terms in the license agreement.

Click Next to continue.


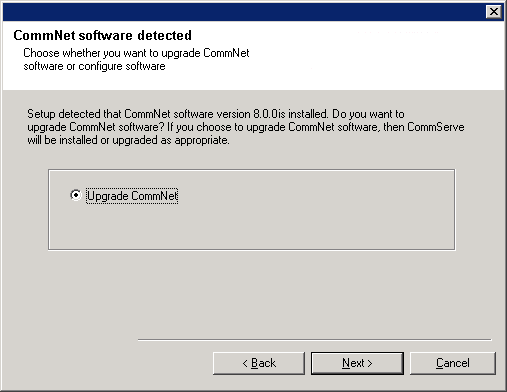
7. Click Next to continue with the upgrade.

NOTES

  • When you upgrade the CommNet software, then the CommServe will install or upgrade automatically on the same computer.
8. Select the option to specify from which the database upgrade scripts should be copied  for use during the upgrade process or use the default location.

The upgrade program copies the necessary database scripts to the install location before running them.

NOTES

  • Select Download latest scripts from the software provider website, if you want to download and install the software using the latest software package.

    Make sure you have internet connectivity when you are using this option.

  • Select Use the scripts contained on the installation media to continue the upgrade from the current location.
  • Select Use scripts from an alternate location, if you have the software package in an alternate location. Type the location of the software package directory, or click Browse to choose the location.
Click Next to continue.
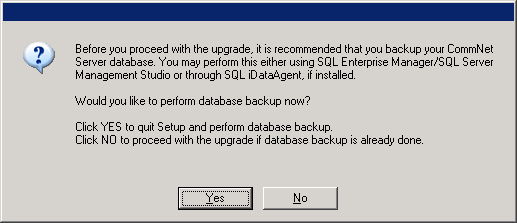
9. Click No to continue the upgrade.

NOTES

  • Click Yes to abort the upgrade and backup the CommNet Database.
10. Specify the SQL Server System Administrator password.

NOTES

  • This is the password for the administrator's account created by SQL during the installation.

Click Next to continue.

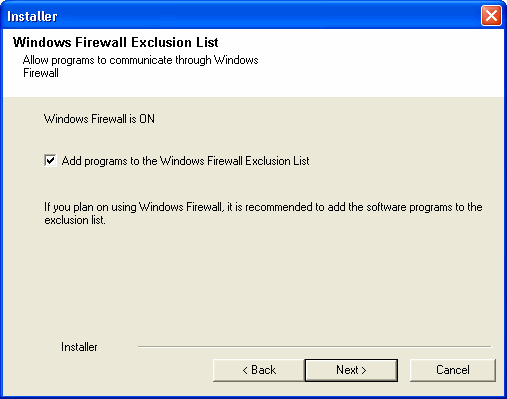
11. Select Add programs to the Windows Firewall Exclusion List, if you wish to add CommCell programs and services to the Windows Firewall Exclusion List.

NOTES:

  • If Windows Firewall is enabled on the computer, this option is selected by default and must be enabled to proceed with the installation.
  • If Windows Firewall is disabled on the computer, you can select this option to add the programs and services to enabled CommCell operations across the firewall, if the firewall is enabled at a later time.

    You can either select this option during install or add the programs and services after installation. For adding the programs and services after installation, see Configure Windows Firewall to Allow CommCell Communication.

Click Next to continue.

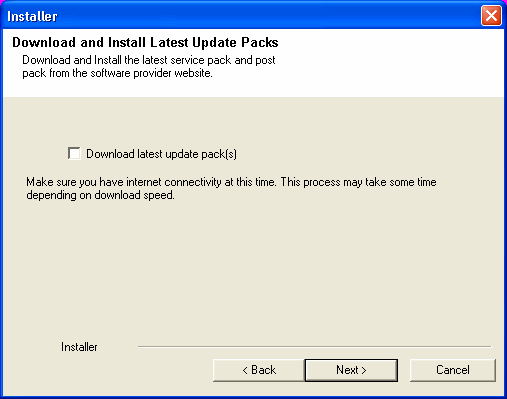
12. Select Download latest update pack(s) to automatically download and install the latest service packs and/or post packs if applicable at the end of this agent install.

NOTES

  • Internet connectivity is required to download updates.
  • Updates are downloaded to the following directory: 
    <software installation>/Base/Temp/DownloadedPacks
    .
    They are launched silently and installed automatically for the first instance.

Click Next to continue.

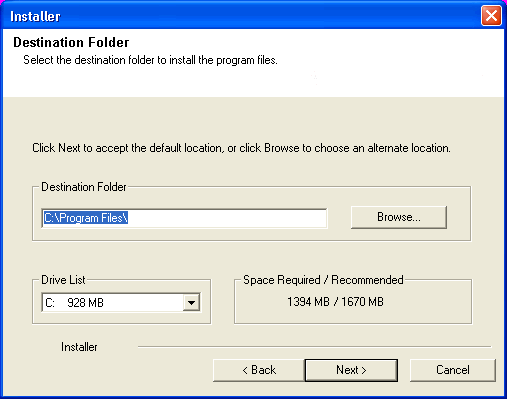
13. Specify the location where you want to install the software.

NOTES

  • Do not install the software to a mapped network drive.
  • Do not use the following characters when specifying the destination path:
     / : * ? " < > | #
    It is recommended that you use alphanumeric characters only.
  • If you intend to install other components on this computer, the selected installation directory will be automatically used for that software as well.
  • If a component is already installed in this computer, this screen may not be displayed. The software will be automatically installed in the same location that was previously specified.

Click Browse to change directories.

Click Next to continue.

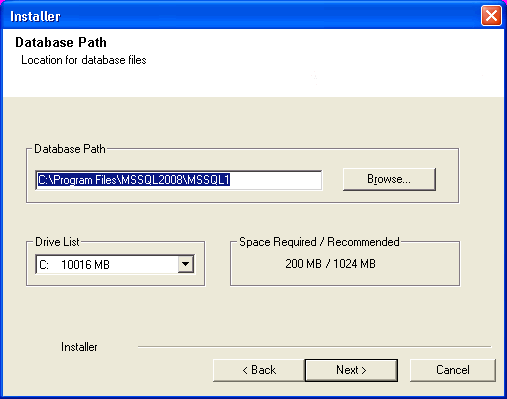
14. Specify the location of the database.

NOTES

  • Do not specify a mapped network drive.
  • You can either accept the default or select a different location on a local disk drive. However, you must ensure that the drive has at least 1GB of free space.
  • The directory file path selected should not be located on a FAT drive. A FAT drive cannot be supported as the location for this database because it does not allow a temporary sparse file to be generated when creating the database snapshot, which is required for data verification.
  • If the default metadata database directory is low in disk space, provide a path that is not associated with another application.

Click Browse to change directories.

Click Next to continue.

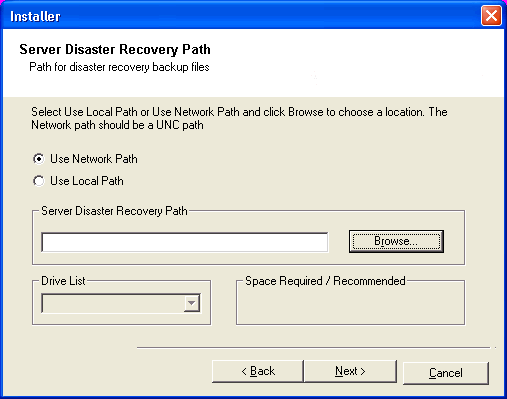
15. Enter the network or local path where Disaster Recovery Backup files should be stored.

NOTES

  • For cluster, specify a shared drive.
  • If you selected Use Network Path, you must enter the Network share username and the Network share password.
    • The Network share username is the domain\username of the user that has administrative rights to the Disaster Recovery Backup destination path.
    • The Network share password is the password of the network share username.

Click Next to continue.

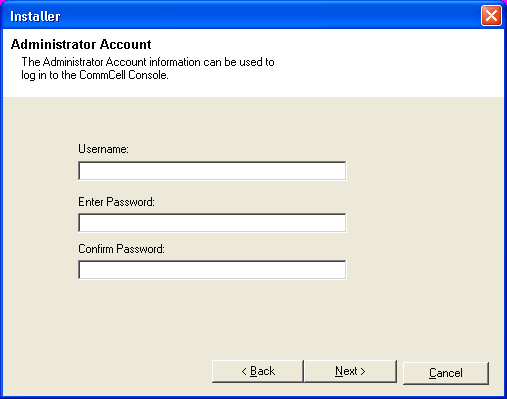
16. Enter the CommCell Username and CommCell Password.

NOTES

  • The CommCell username and password will be used by the Administrator user to log on to the CommCell Console.  This user is automatically created during installation and, by default, has the necessary capabilities to perform all functions. Additional CommCell users with the same or less security rights can be created after the installation of the software.

Click Next to continue.

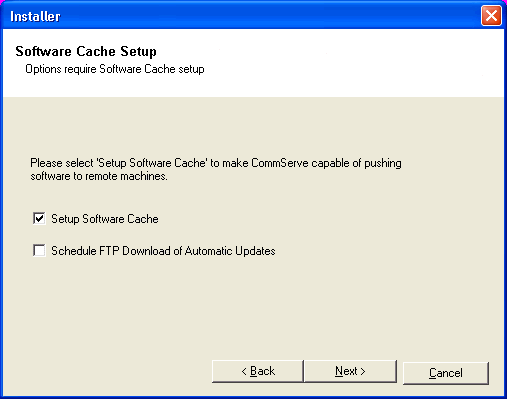
17. Select Setup Software Cache option to download the software updates automatically.

Select Schedule FTP Download of Automatic Updates option to schedule automatic FTP downloading of software updates.

Click Next to continue.

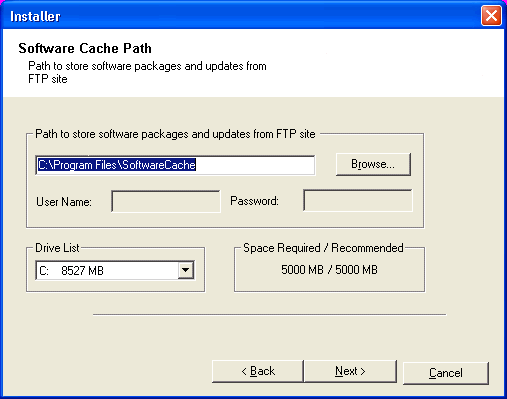
18. Specify the path where the update files from the FTP site should be stored.

NOTES

  • This prompt will only be displayed if the Setup Software Cache option was enabled. 

Click Next to continue.

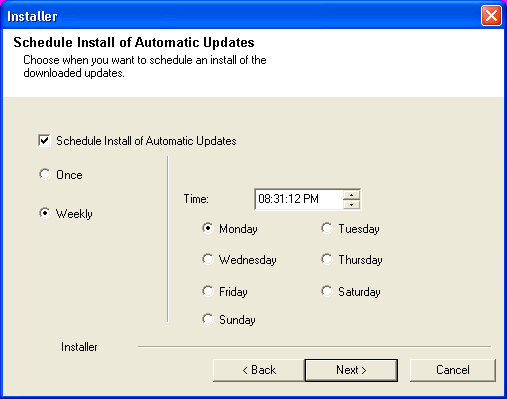
19. If necessary, select this option to schedule an automatic installation of software updates.

NOTES

  • Schedule Install of Automatic Updates allows automatic installation of the necessary software updates on the computer on a single or weekly basis. If you do not select this option, you can schedule these updates later from the CommCell Console.
  • To avoid conflict, do not schedule the automatic installation of software updates to occur at the same time as the automatic FTP downloading of software updates.
  • If a component has already been installed, this screen will not be displayed; instead, the installer will use the same option as previously specified.

Click Next to continue.

20. Click Yes to configure the CommCell Console for web administration, or Click No to continue without configuring the CommCell Console for web administration.

NOTES

  • The Internet Information Server (IIS) must be installed on this computer in order to configure for web administration.
  • Configuring this computer for web administration allows you to:
    • Access the CommCell Console and Books Online from a remote computer using a Web browser.
    • View CommCell reports via a Web browser.
    • Access Books Online by clicking the Help button (the icon with a ?) in the CommCell Console.
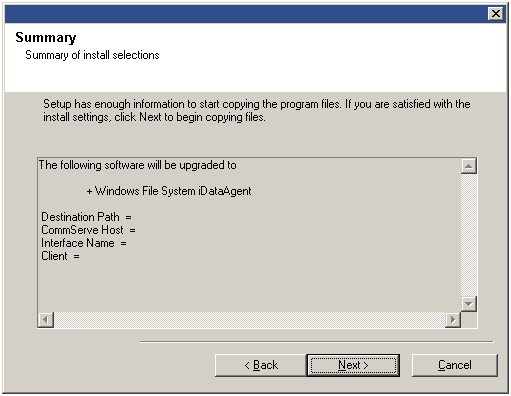
21. Verify the summary and Click Next to continue.

NOTES

  • The Summary on your screen will reflect the components installed on the computer, and may look different from the example shown.

The upgrade program now starts the upgrade process. This step may take several minutes to complete.


22. Contact your software provider to get the permanent license for CommNet Server.

NOTES

The Upgraded CommNet Server has an evaluation license that is valid only for 30 days.

23. Click Finish to complete the upgrade.

NOTES

  • The Completion Report will reflect the components upgraded on the computer, and may look different from the example shown.

The upgrade is now complete.

Set the Client Name of the CommServe in the CommNet Browser

The proper client name of a CommServe should be set in Cell Registration of the CommNet Browser Setup after the CommNet server is upgraded from system version 8.0 to system version 9.0 if one of the following conditions apply:

To set the client name of the CommServe in the CommNet Browser, do the following:

1.
  • Click Setup and Cell Registration.
  • Click the CommServe and then click Modify.
2.
  • Enter the CommCell Client Name. You can find the CommCell Client name in the Value data of  sCSCLIENTNAME registry key on the CommServe computer.
  • Click OK.

Back to Top