Implement EMC SnapView with Recovery Director

Related Topics

"I have an EMC CLARiiON as my storage array and SnapView as the snapshot engine. I know the Quick Recovery Agent has an integrated enabler for SnapView. I want to keep multiple SnapView sessions alive and back them up to tape; I also want to be able to recover from any point-in-time SnapView session. What should I do with Recovery Director?"

EMC SnapView is a hardware based snap engine. It allows creating and maintaining multiple versions of snapshots. Recovery Director can take advantage of this feature and maintain the point-in-time version of data in both replication and backup formats. The data can be recovered from either a Point-In-Time SnapView session (it must be activated) or the corresponding backup image from tape.

The following steps briefly describe the configuration procedure for this implementation scenario.

Requirements

Required Capability: See Capabilities and Permitted Actions

Use Recovery Director to recover from an alive point-in-time SnapView

Configure Recovery Director

1. Install the following components on the Source computer:
  • Recovery Director
  • QuickRecovery Agent
  • SnapView Enabler for Recovery Director
  • ProxyHost iDataAgent
  • Windows File System iDataAgent

Install the following components on the Destination computer:

  • QuickRecovery Agent
  • SnapView Enabler for Recovery Director
  • Windows File System iDataAgent

For installation instructions, refer to Installation.

2. Create a SnapView QR Policy.

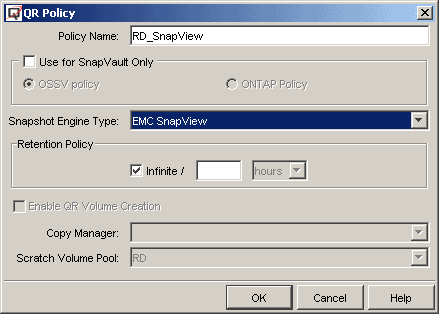
In the QR Policy screen, select EMC SnapView as the Snapshot Engine Type.

Notes

  • For a SnapView QR Policy, the QR volume creation is disabled automatically.
3. Create a Workflow.
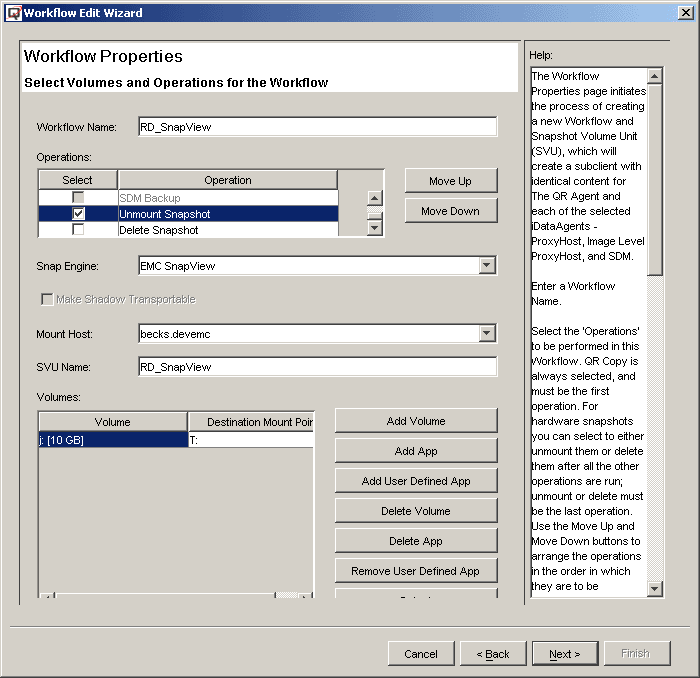
  • Select QR Copy, ProxyHost File System Backup (or Image Level ProxyHost Backup) and Unmount Snapshot as the Workflow operations.
  • Select EMC SnapView as the Snap Engine.
  • Specify the source volume and the mount point of the snapshot.

NOTES

  • The key point here is to check the Unmount Snapshot option. The SnapView session must be mounted for the following backup job, but, at the end of the backup job, the mount point must be released so that the next session can be mounted with the same mount point, which has been defined as the backup content.
4. In the next screen, all the existing EMC SnapView based QR Policies will be displayed.

Select the correct one and continue.

5. In the ProxyHost Subclient Content screen, the SnapView session (T drive) will be used as the BCV and data will be backed up from this snapshot.

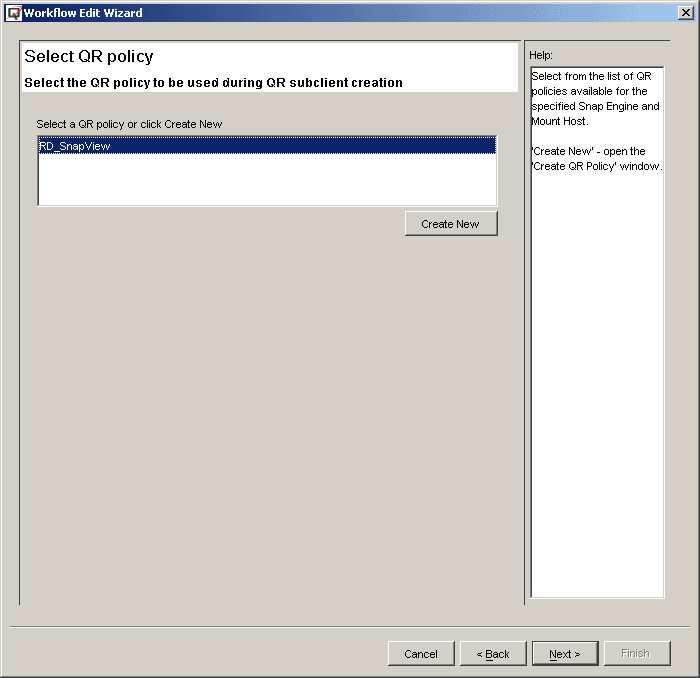
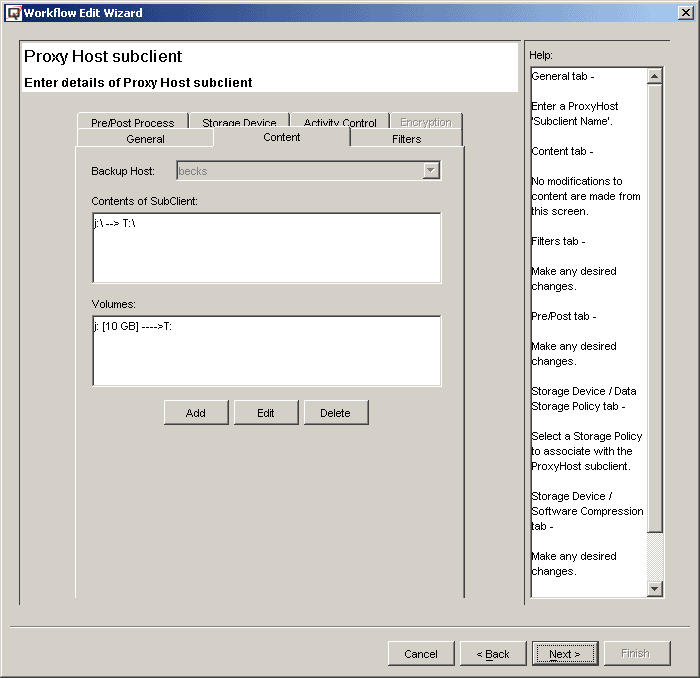
Complete the balance of the Configuration Wizard.

6. When each scheduled Workflow is launched, the QR operation will create the SnapView session by calling the Navisphere CLIs, activating the session on the backup host and assigning the drive letter. The backup job will back up the data from the SnapView snapshot on the mount host, so that the performance of the production host will not be impacted by the backup job. After the backup is completed, the SnapView session will be unmounted. The next scheduled Workflow will create a new session and mount it with the same drive letter.
7. There are two ways to recover the data.
  • Recover from the point-in-time snapshot. This is done through the QR Browse screen. The snapshot must be Activated before it can be recovered.
  • Recover from the point-in-time backup. Since each version of the snapshot has been backed up, they can be restored to anywhere, including the source volumes.