Using this report, you can easily find clients not meeting SLA, thereby
enabling to troubleshoot and overcome the conditions that made the clients not
meet the SLA.
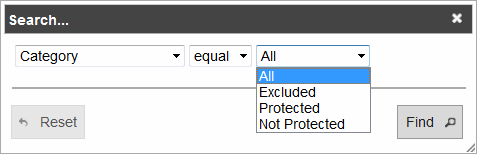
Generate a Report and click Search on top of the Report.
Select Category > equal > Not
Protected and
click Find.
All Backup Not Scheduled, Backup may
be Scheduled At a Later Time, Backup scan phase not
started, Backup scan phase not completed, Backup
Failed without transfer data and Backup Failed with
transfer data clients will be displayed.
The client computers from the selected category will be filtered out and
displayed in the SLA report.
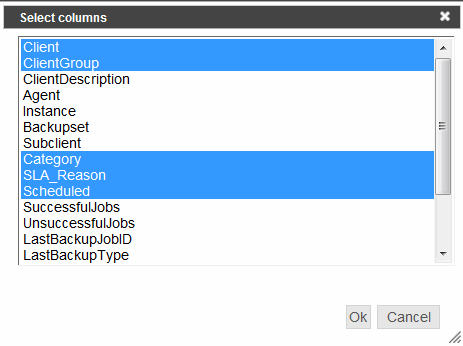
Adding more columns for the Report
You can use more filters to view your report data if you have selected more
number of columns for your report, you can do so as follows:
Click Columns under the Summary section of Report.
Select one or more columns by holding
key and click OK.
You can filter your results based on all the columns selected here.
Exporting the Report
Click Export to Excel under the Summary section of Report.
Click Save to save the report at your desired location.
The
report will be saved with .xls extension.
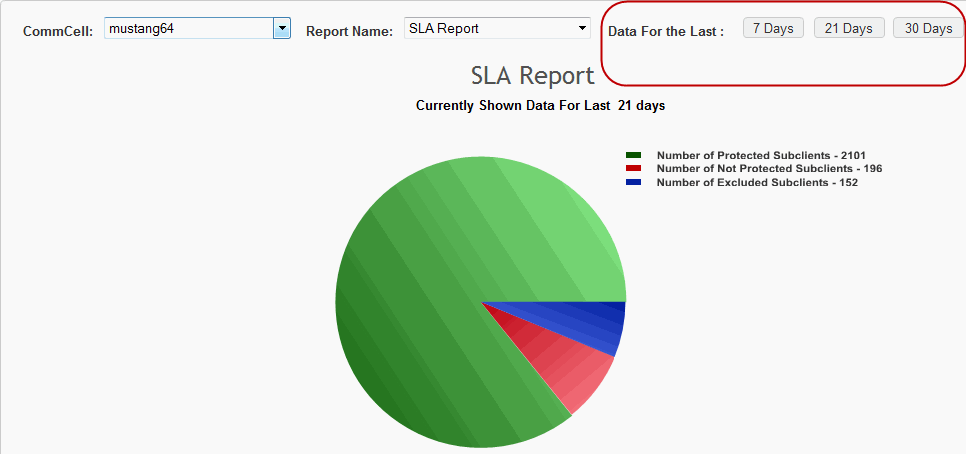
Changing the number of Days for report
generation
By default this report analysis data for last 21 days, you can change this
from the report screen as shown below:
From the top right corner of the report select one of the following:
7 Days: data from last 7 days will be displayed
21 Days: data from last 21 days will be displayed
30 Days: data from last 30 days will be displayed
The report will be refreshed to display results from the selected number
of days.