- Start Group Policy Management.
- Right-click the GPO you want to edit and click Edit.

- Click Add.
- Select the CVOutlookAddin.adm template and click Open.

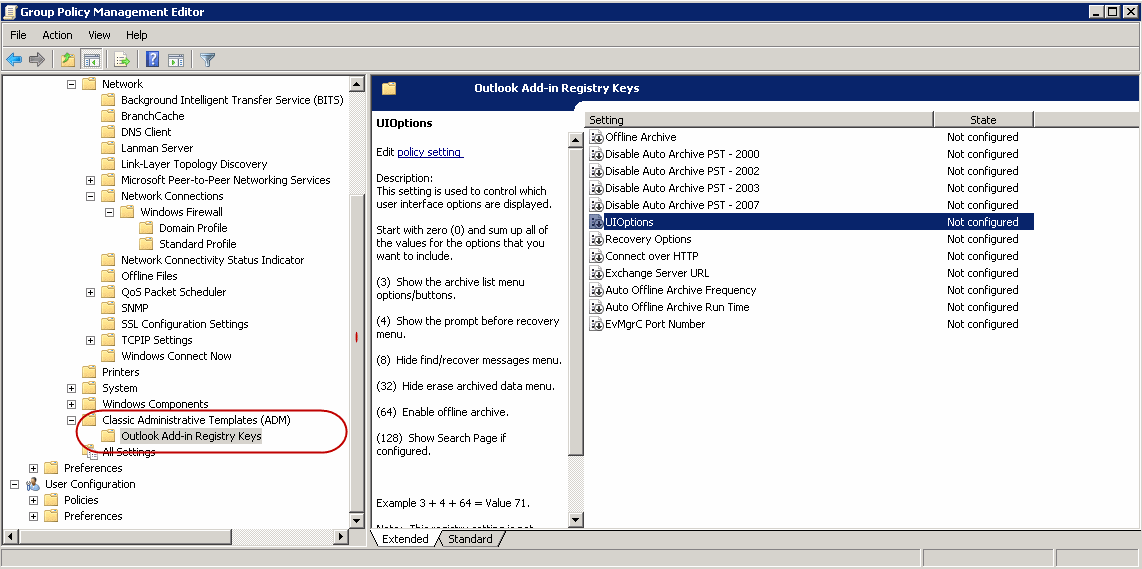
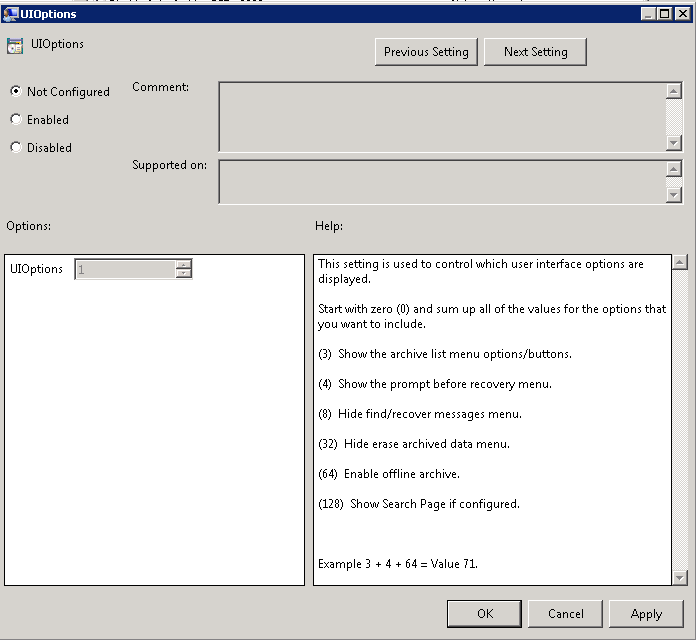
- In the Setting column, double-click a registry key and change the values.
- Click OK.
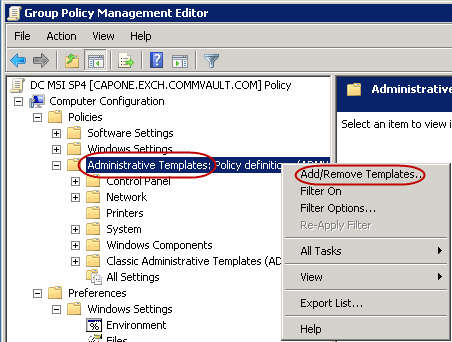
If you want to change settings to the Active Directory template, you can do so as follows:
| 1. |
|
|
| 2. | Right-click Administrative Templates and select Add/Remove Templates. |
|
| 3. |
|
|
| 4. | Click the Outlook Add-In Registry Keys template under Classic Administrative Templates (ADM). |
|
| 5. |
|
|
By default end-users cannot trigger stub recalls if they do not have access to Virtual Private Network (VPN) or Outlook Web Access (OWA).
You can configure to provide the end-user with the capability to trigger stub recalls over a secured connection if they have access to their message mailbox without accessing VPN or OWA as follows:
| 1. | Log on to the client computer, which has IIS server installed as local Administrator or as a member of the Administrators group. | |||
| 2. | Run Setup.exe from the Software Installation Package. | |||
| 3. |
Select the required language. Click Next. |
 |
||
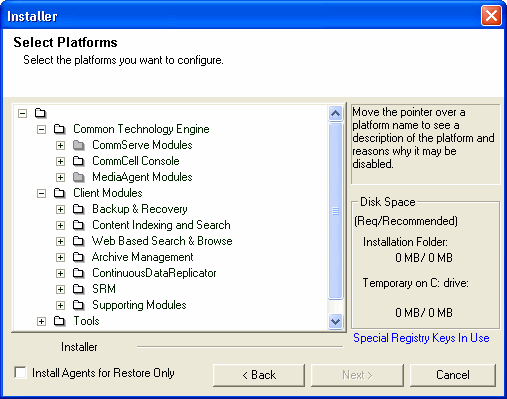
| 4. | Select the option to Install Calypso
on this computer.
|
 |
||
| 5. |
Select I accept the terms in the license agreement. Click Next. |
 |
||
| 6. | Expand Client Modules | Archive Management, and select Exchange WebProxy Archiver Agent. |
 |
||
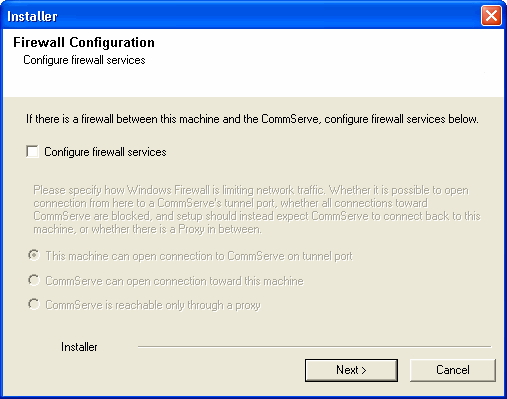
| 7. |
If this computer and the CommServe is separated by a firewall, select the Configure
firewall services option and then click Next.
For firewall options and configuration instructions, see Firewall Configuration and continue with the installation. If firewall configuration is not required, click Next. |
 |
||
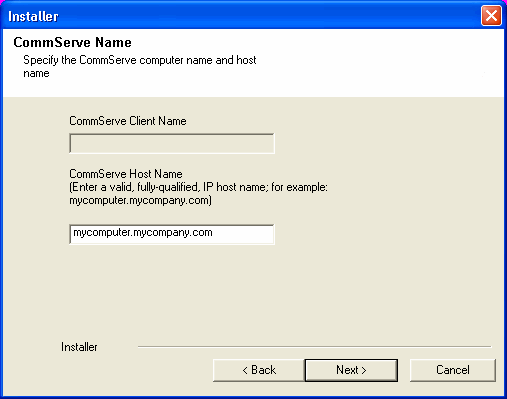
| 8. |
Enter the fully qualified domain name of the CommServe
Host Name. Click Next.
|
 |
||
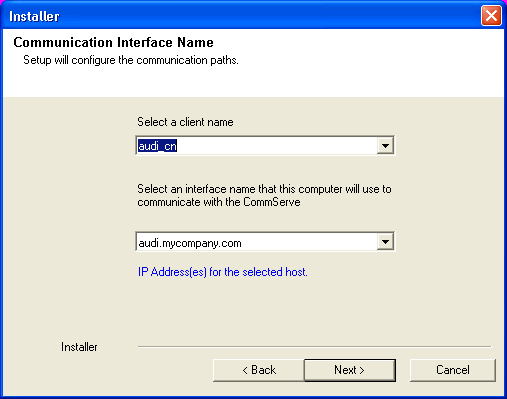
| 9. | Click Next. |
 |
||
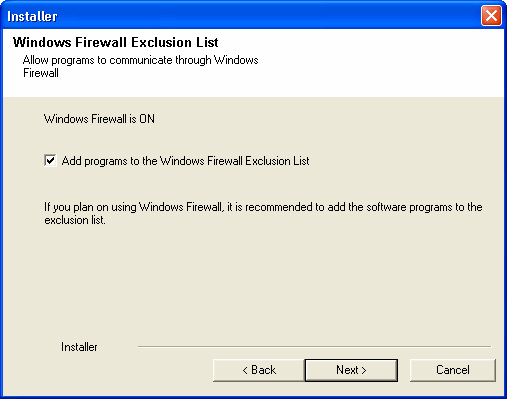
| 10. |
Select Add programs to the Windows Firewall Exclusion
List, to add CommCell programs and services to the Windows Firewall
Exclusion List. Click Next.
|
 |
||
| 11. |
Verify the default location for software installation. Click Browse to change the default location. Click Next.
|
 |
||
| 12. | Click Next. |
 |
||
| 13. | Click Next. |
 |
||
| 14. | Click Finish. |
 |
||
| 15. |
Create
ConnectOverHttp registry keys on to the computers where
Outlook Add-In is installed to set the connectivity mode. To mass deploy ConnectOverHttp registry key on all the computers where Outlook Add-In is installed, see Install Using AD Group Policies. |
|
||
| 16. |
Create
URL registry key on to the computers where Outlook Add-In is
installed. To mass deploy URL registry key on all the computers where Outlook Add-In is installed, see Install Using AD Group Policies. |
|
In cases where Outlook is not installed on a client computer, users can be given the ability to use the Outlook Add-In Find and Recover capability from a web browser. To provide this ability, you need to:
Once this is configured, users can access the Find and Recover
functionality by typing the web URL of the CommCell Console into a supported web
browser. For example, a user can access the Find and Recover functionality by
typing the following URL into a web browser: http://
| 1. |
When installing the CommCell Console, ensure that Yes was
selected when prompted for web administration.
|
 |
||
| 2. |
Grant End User Search capability as
follows:
|
 |
||
| 3. |
|
 |
||
| 4. |
|
 |
||
| 5. |
If you want the user group to be associated with specific objects (e.g., client computer group, client computers, libraries, MediaAgents, Storage Policies), click Associated Entities. |
 |
||
| 6. |
To assign users to a users group, click Users, and then assign users to the group, as necessary. You can click Create New User to create a user to be associated with this user group. Click OK. |
 |
In order for the end-user to use Find and Recover from Outlook or a Web Browse, a Commcell Console must be configured for web based administration. By default the CommCell Console on the Commserve is used. In case an alternate server has to be used for the web application configure the following:
|
 |
If you did not configure the OWA Proxy Enabler after installation, you can do so as follows:
|
 |
There are several ways to keep Outlook Add-In clients up-to-date with Java software updates as described in the following sections.
Java updates can be downloaded from the CommServe computer between 12:00AM and
6:00AM as follows:
|
 |
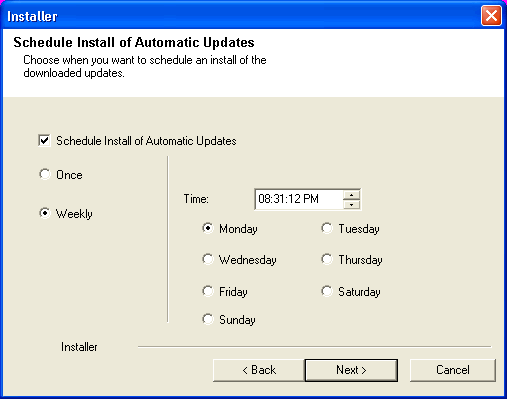
Java updates can be downloaded from the CommServe computer at a specific hour and minute of the hour each day. Note, however, that if you have configured Java updates to download overnight as described above, these configurations will automatically override that setting.
|
 |
|
 |
If it is not desirable to obtain Java updates directly from the CommServe computer, you can configure an alternate computer to facilitate these downloads. Doing so offsets the network traffic and resources required of the CommServe to obtain the updates.
|
|
By default, Outlook Add-In uses the language setting of Outlook. This can be changed by configuring a registry key as follows:
|
 |
You can configure unique settings for users in Citrix environments as described in the following sections.
The AllowPerUserSettings registry key is configured first to enable the overall functionality. Once this key is created, additional keys can then be created to provide individualized settings. All keys are created under:
[Registry_Key_Area]\SOFTWARE\Microsoft\Office\Outlook\Addins\Galaxy.Ex2KMBDM.CVEAAddin
The following settings can be configured for all users on the Citrix Server. These keys are configured in the HKEY_LOCAL_MACHINE area and apply to all users logged in to the Citrix Server.
| Registry Key | Description |
| nSearchRangeDays | Specifies the default number of days to search for protected messages. |
You can create customized settings for individual users logged in to the Citrix Server. These settings are configured in one of the following areas:
By default, users logged into the Citrix sever with the AllowPerUserSettings configured are assigned the registry key values that exist in HKEY_CURRENT_USER.
The following settings can be configured for individual users logged on to the Citrix Server.
| Registry Key | Description |
| UIOptions | Allows changes to the current settings for the Outlook Add-In user interface options. |
| nEvMgrCPortNumber | Specifies the network port to be used during restore operations. |
The client computer can be configured to automatically download Java updates from the CommCell Console during the software installation.
|
 |