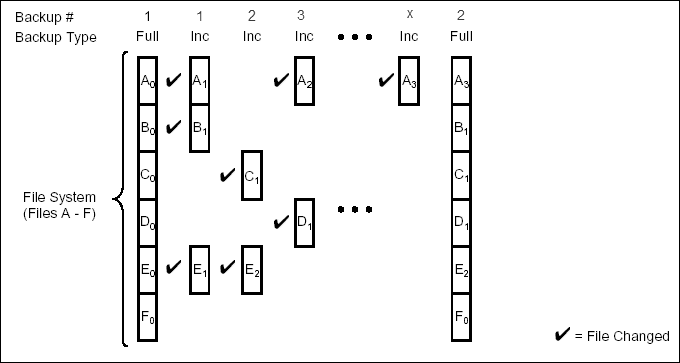
An incremental backup contains only data that is new or has changed since the
last backup, regardless of the type. On average, incremental backups consume less media and use less resources than full backups.
The illustration on the right clarifies the nature of full and incremental backups.
Follow steps given below to perform an incremental backup:
To perform an incremental backup, the
Pre-selected Backup Type must have been configured for
incremental backups during installation.
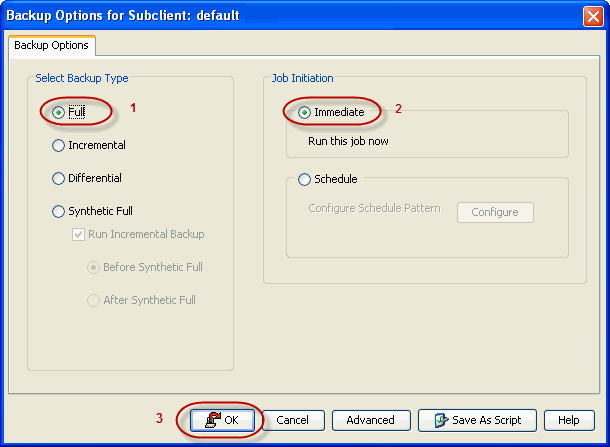
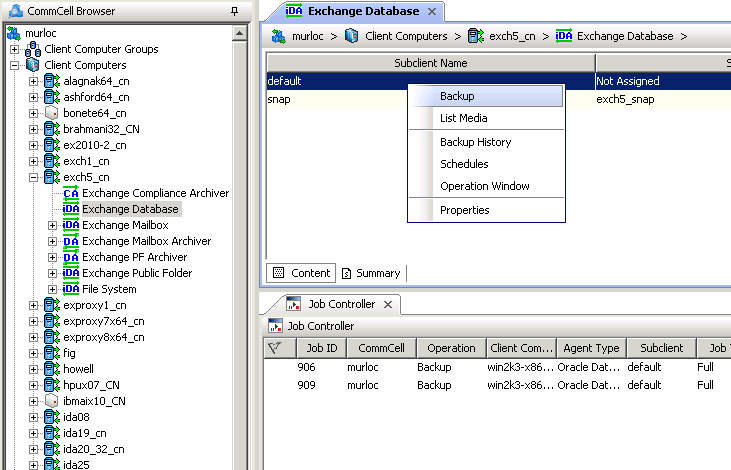
From the CommCell Browser, navigate to <Client> |
Exchange Database.
Right click the <Subclient> and click Backup.
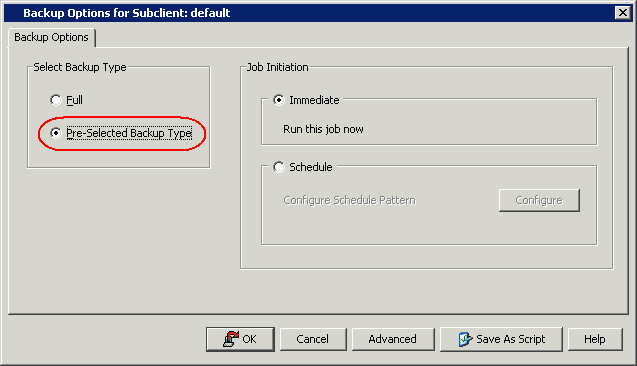
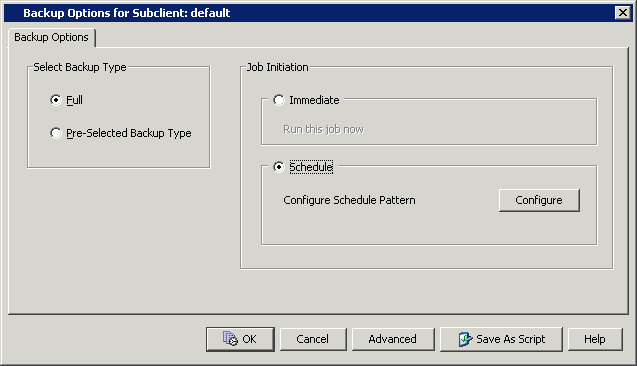
Select Pre-Selected Backup Type
as backup type and Immediate to run the job immediately.
Click
OK.
You can track the progress of the job from the Job Controller.
When the backup has completed, the Job Controller displays Completed.
A differential backup contains only the data that is new or has changed since
the last full backup. Like incremental backups, differential backups also
consume less media and use less resources than full backups.
Differential backups are cumulative. This means that each differential backup
contains all changes accumulated since the last full backup. Each successive
differential backup contains all the changes from the previous differential
backup.
The illustration on the right demonstrates the nature of differential
backups. For simplicity, assume there is a file system that contains six files
as represented in the figure.
To perform a differential backup, the
Pre-selected Backup Type must have been configured for
differential backups during installation.
From the CommCell Browser, navigate to <Client> |
Exchange Database.
Right click the <Subclient> and click Backup.
Select Pre-Selected Backup Type
as backup type and Immediate to run the job immediately.
Click
OK.
You can track the progress of the job from the Job Controller.
When the backup has completed, the Job Controller displays Completed.
Pause points allow Exchange system resources to be made available periodically to
other processes (e.g. send and receive e-mail messages) during the following:
Prolonged consistency checks of large databases
High load on the Exchange Server
From the CommCell Browser, navigate to <Client> |
Exchange Database.
Right click the <Subclient> and click Backup.
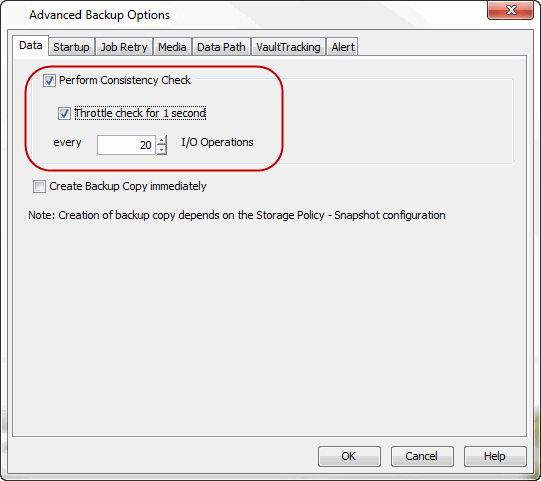
Click Advanced.
Click the Data tab and select the Perform Consistency Check option.
Select the Throttle check for 1 second
option and enter the
number of I/O operations to complete before the throttle check is performed.
Once you initiate the backup operation, a backup job is generated in the Job
Controller. Jobs can be managed in a number of ways. The following sections provide
information on the different job management options available:
Jobs that fail to complete successfully are automatically restarted based on
the job restartability configuration set in the Control Panel. Keep in mind that changes
made to this configuration will affect all
jobs in the entire CommCell.
To Configure the job restartability for a specific job, you can modify the
retry settings for the job. This will override the setting in the Control Panel. It is also possible to override the default CommServe configuration for individual
jobs by configuring retry settings when initiating the job. This configuration,
however, will apply only to the specific job.
Backup jobs for this Agent are resumed from the point-of-failure.
Configure Job Restartability at the CommServe Level
From the CommCell Browser, click Control Panel icon.
Select
Job Management.
Click Job Restarts tab and select a Job Type.
Select Restartable to make the job restartable.
Change the value for Max Restarts to change the maximum number of
times the Job Manager will try to restart a job.
Change the value for Restart Interval (Mins) to change the time
interval between attempts for the Job Manager to restart the job.
Click OK.
Configure Job Restartability for an Individual Job
From the CommCell Console, navigate to <Client> |
Exchange Database
Right-click the Subclient and select Backup
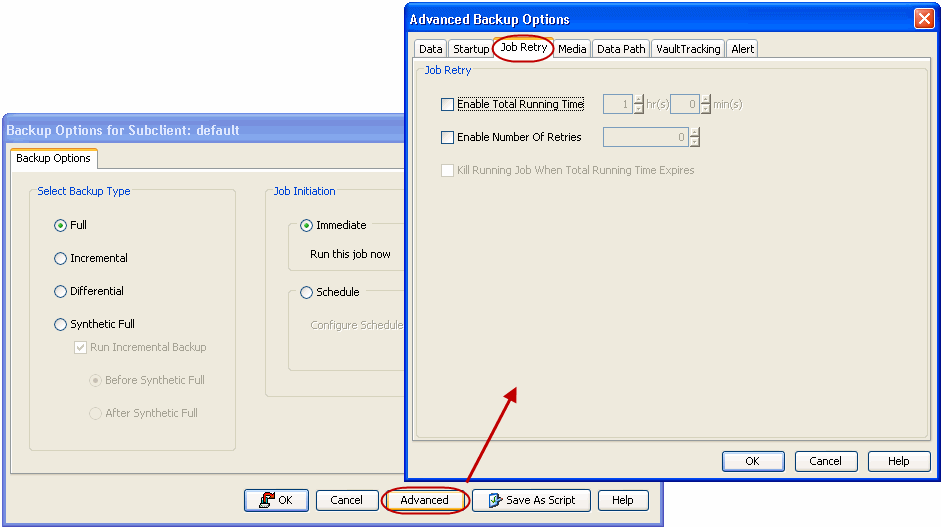
Click Advanced.
In the Advanced Backup Options dialog box, click the Job Retry tab.
Select Enable Total Running Time and specify the maximum elapsed
time before a job can be restarted or killed.
Select Kill Running Jobs
When Total Running Time Expires to kill the job after reaching the
maximum elapsed time.
Select Enable Number Of Retries and specify the number of
retries.
The following controls are available for running jobs in the Job Controller window:
Suspend
Temporarily stops a job. A suspended job is not
terminated; it can be restarted at a later time.
Resume
Resumes a job and returns the
status to Waiting, Pending, Queued, or Running. The status depends on
the availability of resources, the state of the Operation Windows, or
the Activity Control setting.
Kill
Terminates a job.
Suspending a Job
From the Job Controller of the CommCell Console, right-click the job and
select Suspend.
The job status may change to Suspend Pending
for a few moments while the operation completes. The job status then changes
to Suspended.
Resuming a Job
From the Job Controller of the CommCell Console, right-click the job and
select Resume.
As the Job Manager attempts to restart the job,
the job status changes to Waiting, Pending, or Running.
Killing a Job
From the Job Controller of the CommCell Console, right-click the job and
select Kill.
Click Yes when the confirmation prompt
appears if you are sure you want to kill the job. The job status may
change to Kill Pending for a few moments while the operation
completes. Once completed, the job status will change to Killed and
it will be removed from the Job Controller window after five minutes.
You can perform backups of Exchange Databases from the command line interface.
Command line backups enable you to perform backup operation on multiple clients
simultaneously. In order to run the backups from command line, you need an input xml file
which contains the parameters for configuring the backup options. This input xml
file can be obtained from one of the following ways:
Download the
input xml file template and save it on the computer from where the
backup will be performed.
Generate the input xml file from the CommCell Console and save it on the
computer from where the backup will be performed.
In addition to the parameters provided in the template xml file, if you want
to include additional options for the backup, you can do so by selecting the
required options from the CommCell Console and generate the command line xml
script for the backup.
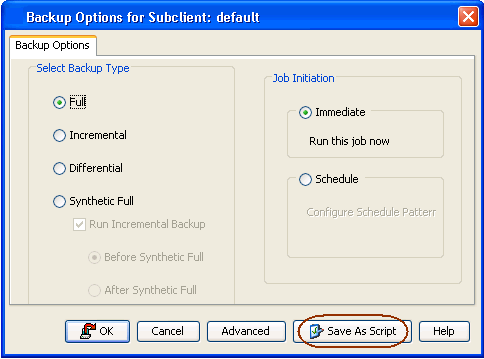
Follow the steps given below to generate a script which you can use to
perform a backup from the command line interface:
From the CommCell Console, navigate to <Client> |
Exchange Database iDataAgent | defaultBackupSet.
Right click the default subclient and click Backup.
Select the required backup options which you want to execute using the
script.
Click Save as Script.
Enter the location where you want to save the script or click
Browse and navigate to the location.
The script will be saved as a .xml file
and a .bat file is created.
If a file with the same name already exists in the specified location,
the .xml file will be created with a timestamp. However, the .bat file will
overwrite the existing file.
Enter the username and password for the user account which you want to
use to perform the backup.
By default, the user account which you have used to login to CommCell
console is used for performing the backup. However, if the user account does
not have access to any application or database, click Use a
different account.
Several additional options are available to further refine your backup operations.
The following table describes these options, as well as the steps for configuring
them.
Be sure to read the overview material referenced for each feature prior to using
them.
Option
Description
Related topics
Startup Options
The Job Manager will use the startup priority setting when allocating the
required resources. This is useful if you have jobs that are very important and
must complete, or jobs that can be moved to a lower priority.
From the CommCell Browser, navigate to <Client> |
Exchange Database.
Right-click the Subclient and click Backup.
Click OK.
Click Advanced.
Select Startup.
Select Default Priority. You can select Change
Priority for a job, between 0 (highest priority) and 999 (lowest
priority).
Select Start up in suspended State to specify the selected job to
start in the Job Controller in a suspended state.
The Job Retry option helps in configuring the retry behavior of the backup jobs.
You can specify the maximum elapsed time before a job can be restarted or killed
and the maximum number of restart attempts.
From the CommCell Browser, navigate to <Client> |
Exchange Database.
Right-click the Subclient and click Backup.
Click OK.
Click Advanced.
Select Job Retry.
Select Enable Total Running Time
and specify the maximum elapsed time in hours and minutes.
Select Number Of Retries and specify the number of retries.
Based on this number, the Job Manager attempts to restart the job.
Select Kill Running Jobs When Total Running Time Expires.
The job will be killed when the job is still
in running status even after reaching the maximum elapsed time.
The Mark Media Full on Success option marks the Media as Full, 2 minutes
after the successful completion of the backup/archive. This feature prevents any
other data being written to the same media.
From the CommCell Browser, navigate to <Client> |
Exchange Database.
The Allow Other Schedules to use Media Set option allows jobs that are part
of the schedule or schedule policy and using the specific storage policy to
start a new media. It also prevents other jobs from writing to the same set of
media.
From the CommCell Browser, navigate to <Client> |
Exchange Database.
This option allows you to extend the retention end time of the selected
job. You can extend the retention period to infinite period or for a
specified number of days. You can also extend to storage policy default
period.
From the CommCell Browser, navigate to <Client> |
Exchange Database.
Right-click the Subclient and click Backup.
Click OK.
Click Advanced.
Select Media.
Select any of the following Extend Job Retention period options:
Infinite/Number of days/Storage Policy default.
Click OK.
Data Path Options
Data Protection operations use a specific data path (Library, MediaAgent,
Drive Pool, and Drive) to perform the backup operations as configured in the
CommCell. By default, the system automatically identifies the data path for the
backup operations.
The following are some of the important situations where you may need to change
the data path:
When the preferred MediaAgent, library or drive pool is not available
during the backup
When you need to use a different MediaAgent, library or drive pool for
load balancing purposes.
When you need to direct that backup to a particular location for
compliance purposes.
From the CommCell Browser, navigate to <Client> |
Exchange Database.
Right-click the Subclient and click Backup.
Click OK.
Click Advanced.
Select Data Path.
Select the MediaAgent
and Library.
Select the Drive Pool and Drive for optical and tape
libraries.
The VaultTracker feature provides the facility to manage media that are
removed from a library and stored in offsite locations. The VaultTracker
function provides the following capabilities in your day-to-day operations:
Identifies media that must be sent off-site for storage or brought back
from off site locations.
Automatically moves the media in sequence in the library and provides a
pick-up list for the operators.
Identifies and tracks the media during transit.
Records and tracks the movement of media not used by all MediaAgents or
Foreign Media.
From the CommCell Browser, navigate to <Client> |
Exchange Database.
The Alert option is used for setting up the criteria to raise
notifications/alerts for job statuses such as failure, success, or any other
conditions triggered by the backup job. Adding alerts helps the user or the user group to get the
notification automatically about the status of the backup job.
From the CommCell Browser, navigate to <Client> |
Exchange Database.
Right-click the Subclient and click Backup.
Click OK.
Click Advanced.
Select Alert.
Click Add
Alert.
From the Add Alert Wizard window, select the Threshold and Notification Criteria.
Click Next.
Command Line Interface enables you to perform backups from the command line. The
commands can be executed from the command line or can be integrated into your own
scripts or scheduling programs. In addition, you can also generate scripts for specific operations from the
CommCell Console using the Save As Script option. These scripts can later
be executed using the commands from the command line interface.