

| Installation | Monitor | Restore |
|
Use the following steps to restore your backup job:
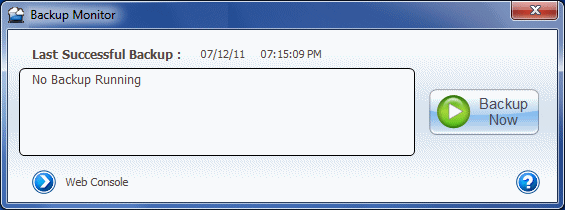
| 1. | From the System Tray, double-click the
Backup Monitor icon |
|||
| 2. | From Backup Monitor dialog click Web
Console link. Alternatively,
|
 |
||
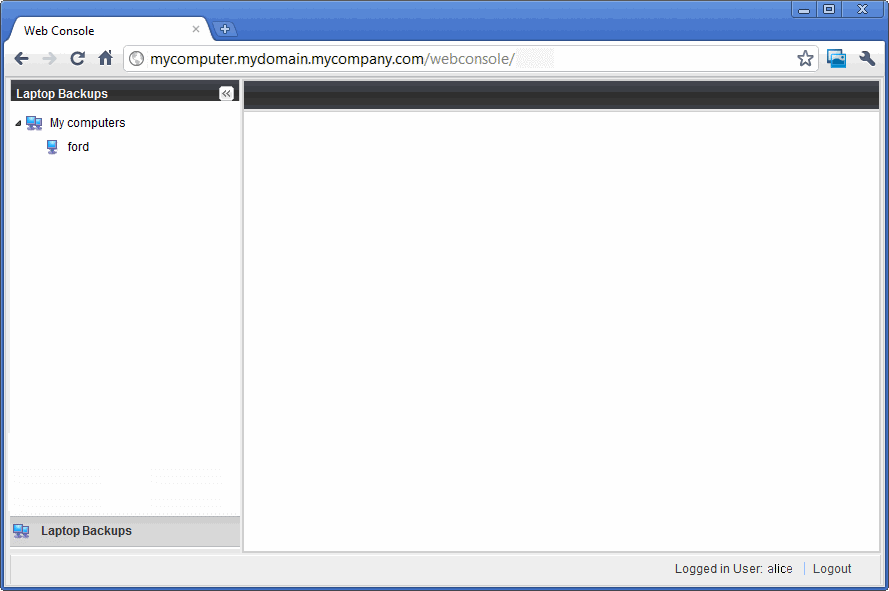
| 3. | Click Laptop Backups to perform browse and restore operations of the backed up data. |
 |
||
| 4. | Your client computer will be listed in left pane under the Laptop Backups. |
 |
||
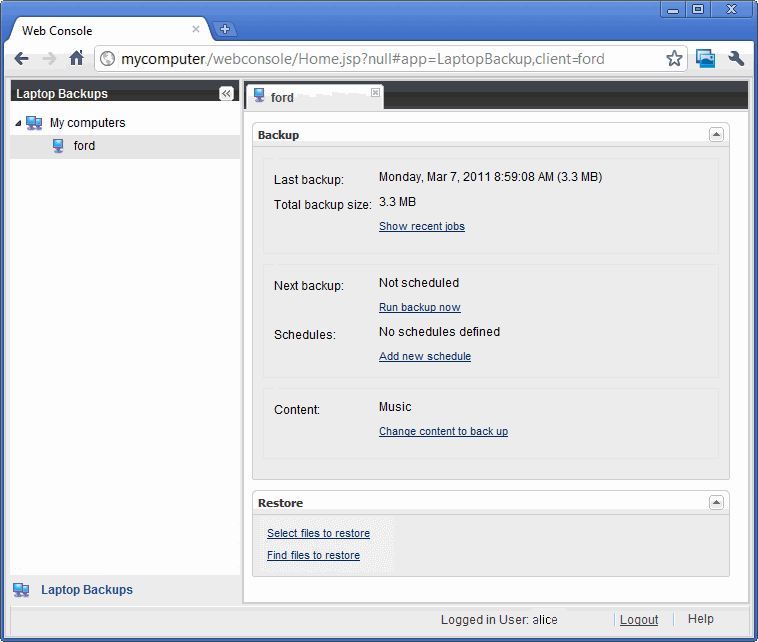
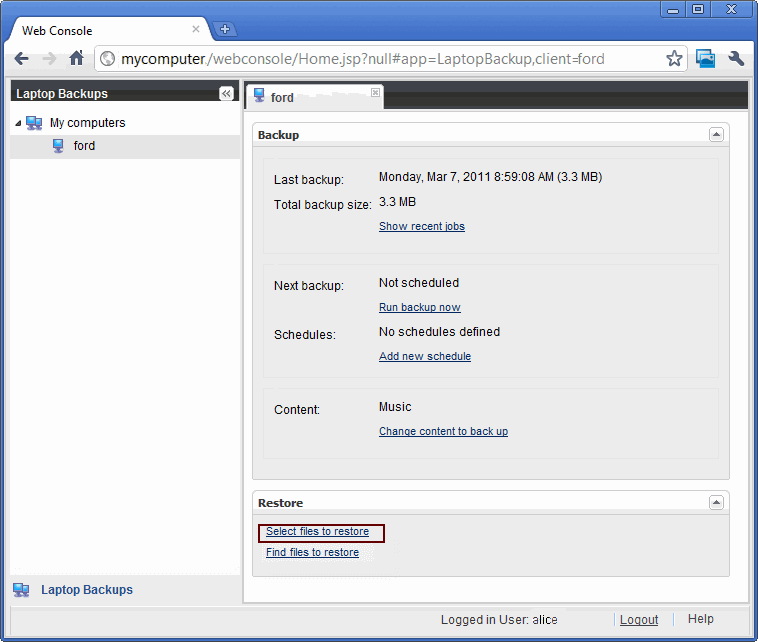
| 5. | Click the <client_computer>. The summary of the client computer will be displayed on the right pane. |
 |
||
| 6. | From the Web Console, click Select files to restore. |
 |
||
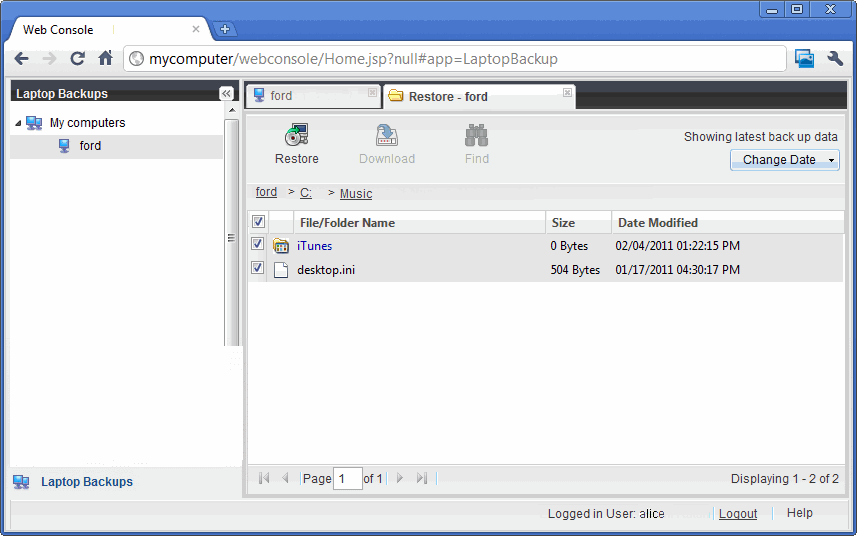
| 7. | Navigate and select the files and folder that you want
to restore. Click Restore.
|
 |
||
| 8. |
|
 |
||
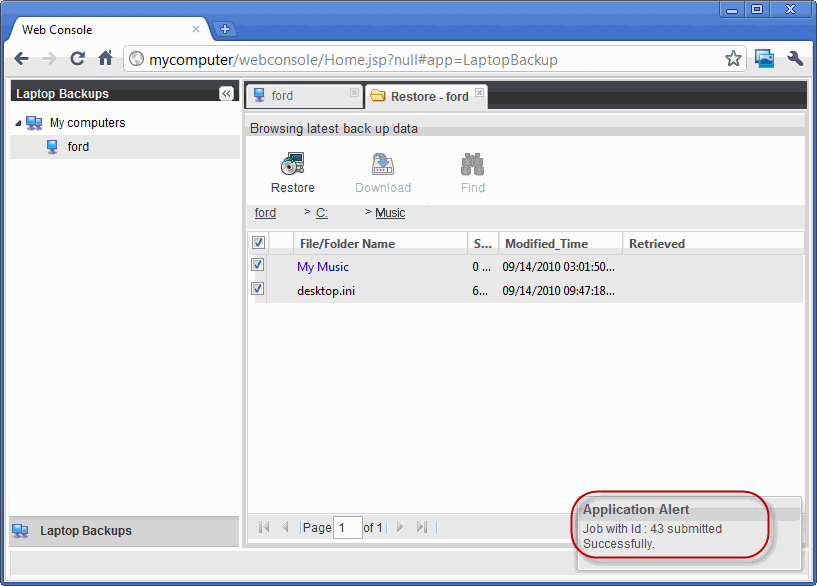
| 9. | You will be prompted with a message restore job has been submitted. |
 |
||
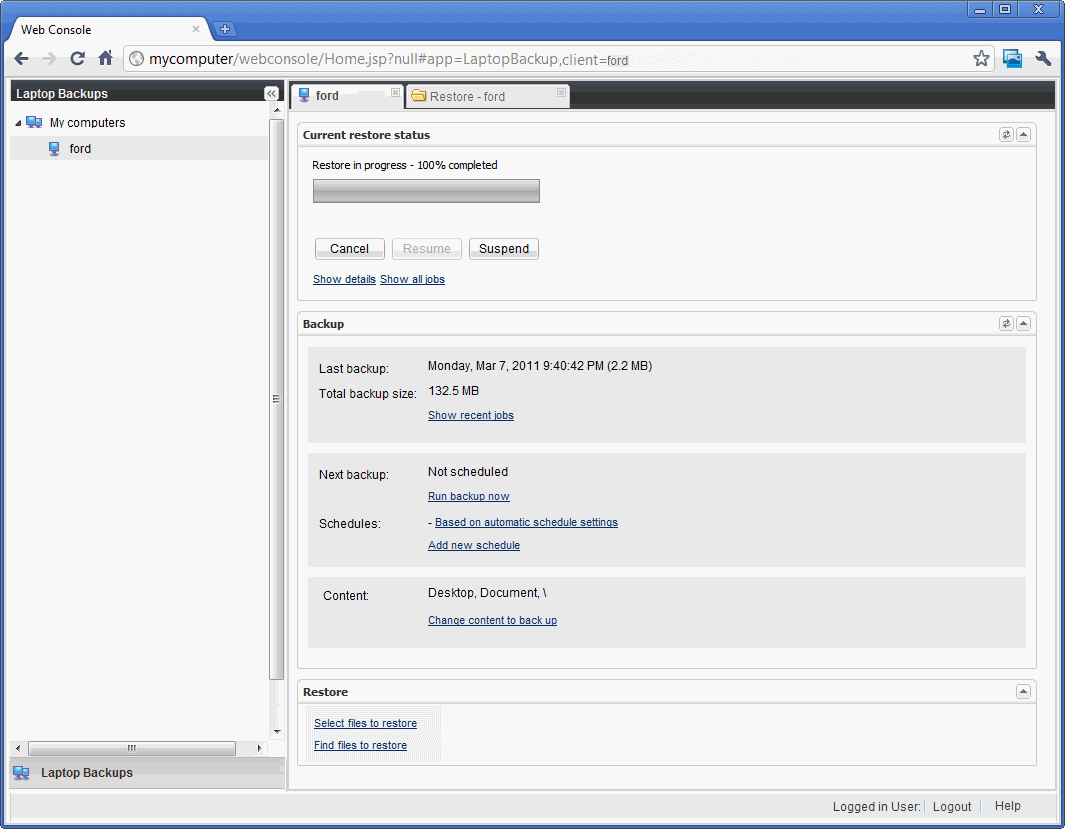
| 10. | You can monitor the progress of the restore job by clicking the <Client> in the left pane to see the status of the submitted job. |
 |
|
|