Getting Started - NAS iDataAgent Configuration

add a nas client

1.
  • From the CommCell Browser, right-click Client Computers.
  • Select New Client.
2.
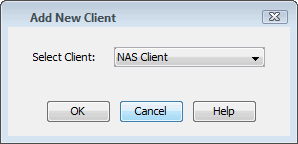
  • Select NAS Client from the list.
  • Click OK.
3.
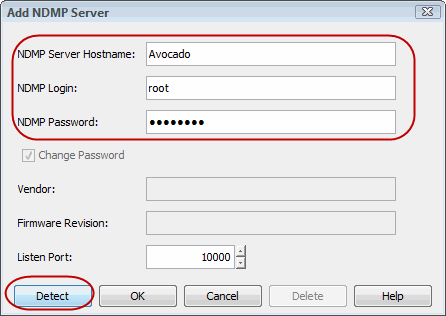
  • Enter the NAS file server in the NDMP Server Hostname field.
  • Enter the user account used to access the storage device in the NDMP Login field.
    • For NetApp, type root.
    • For EMC Celerra, type ndmp.
    • For all other file servers, use any valid login.
  • In the NDMP Password field, enter the password for the login account.
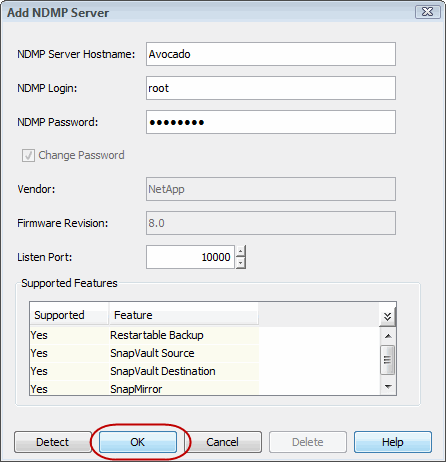
  • Click Detect. The system automatically populates the Vendor, Hardware OS Revision, and Listen Port information.
4. Click OK.

Depending on the File Server you are using, your screen may look different from the example shown.

5. In the CommCell Browser, confirm that the NAS client was added under Client Computers.

configure libraries and drives attached to NAS file server using automatic detection

  These steps are required only if the file server has tape drives attached to it. Backups can be performed to tape drives on other file servers or to data paths on the MediaAgent.
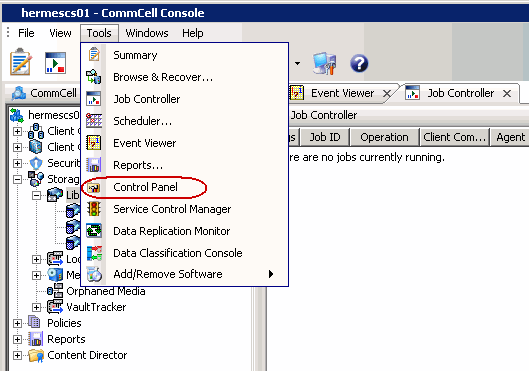
6. From the Tools menu in the CommCell Console, click Control Panel.
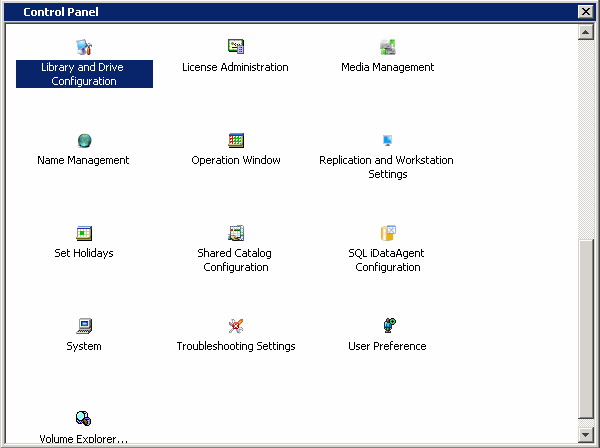
7. Double click Library & Drive Configuration.
8.
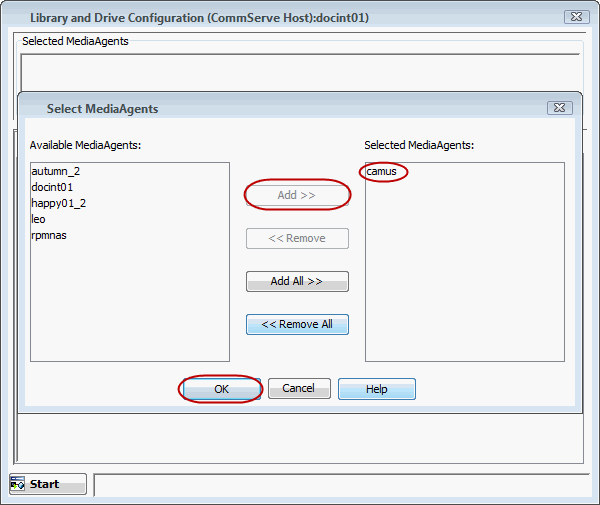
  • Under Available MediaAgents, select the MediaAgent and click Add.
  • Click OK.
9.
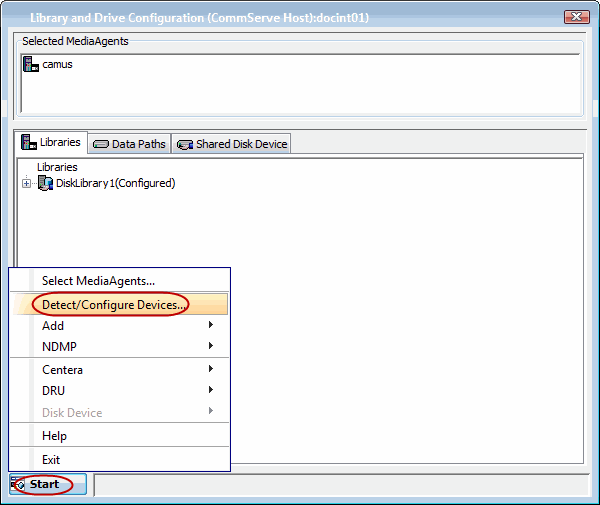
  • Click Start.
  • Select Detect/Configure Devices...
10.
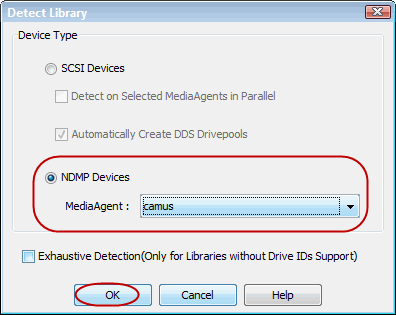
  • Click NDMP Devices. The MediaAgent that controls the library is displayed.

  • Click OK.
11.
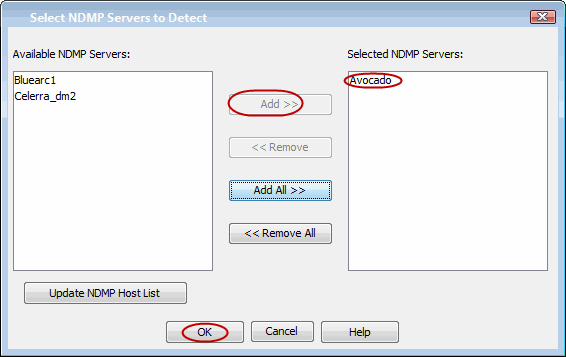
  • Under Available NDMP Servers, select the name of the file server added in step 3 and click Add.
  • Click OK.
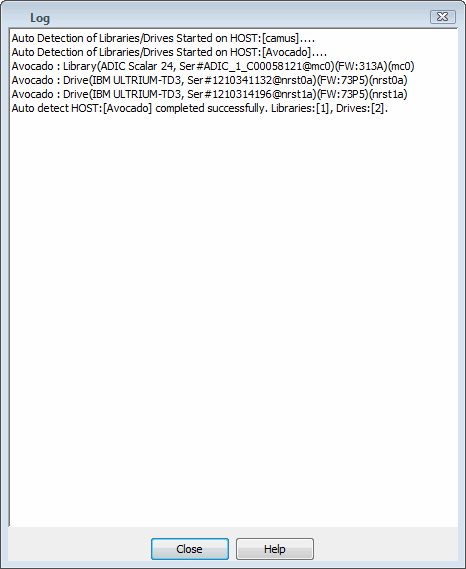
12. Click Yes. The system will detect the devices and mount the media in the drives to verify the correct drive-to-library mapping.
13. Click Close.
14. Click OK.
15. Right-click the library and select Configure.
16.
  • Click Library and all drives to configure all the drives within the library.
  • Click OK.
17. Click Yes.
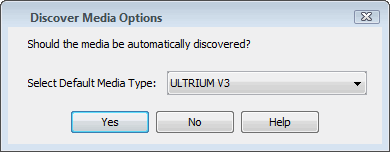
18. Select Default Media Type from the list and click Yes.
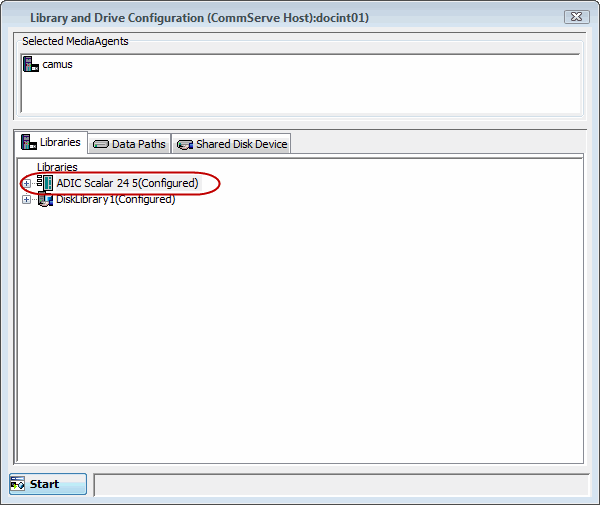
19. The status of the library changes to Configured.

If you chose to configure all associated drives, the status of the drives also changes to Configured.

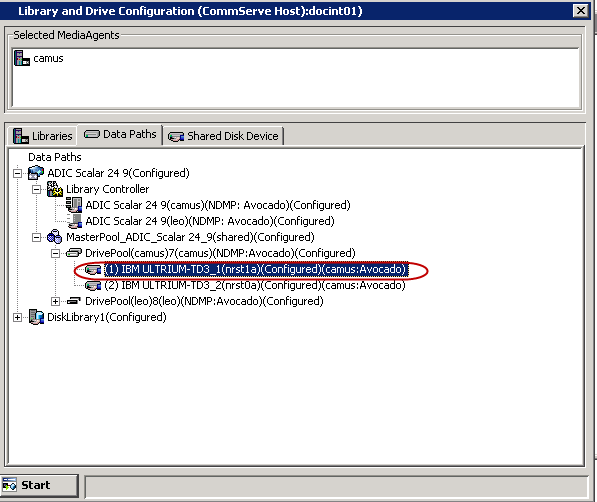
The Libraries tab provides the physical view of the devices (library and drives).
  The Data Paths tab provides a logical view of the data path used to access the devices - library, master drive pool, drive pool, drive.

Create Storage Policy and Assign to Subclient

You can either use an existing storage policy or create a new one. If you create a new storage policy, you can select the library where you want the data to be written, including libraries for tapes that are attached to file servers, or libraries for media that are attached to MediaAgents.

20.
  • If you want to use an existing storage policy, skip to step 21.
  • From the CommCell Browser, select Policies.
  • Right-click Storage Policies and select New Storage Policy.
  • Follow the prompts displayed in the Storage Policy Wizard. The required options are mentioned below:
    • Select the Storage Policy type as Data Protection and Archiving and click Next.
    • Enter the name in the Storage Policy Name box and click Next.
    • From the Library list, select the name of a library and click Next.
    • From the Drive Pool, select the drive pool that for the MediaAgent as shown in step 19 and click Next.
    • Click Next.
    • Click Next.
    • Click Next.
    • Review the details and click Finish to create the Storage Policy.
21.
  • From the CommCell Console, navigate to Client Computers | <Client> | <File Server> NAS NDMP | defaultBackupSet.
  • Right-click the default subclient and then click Properties.
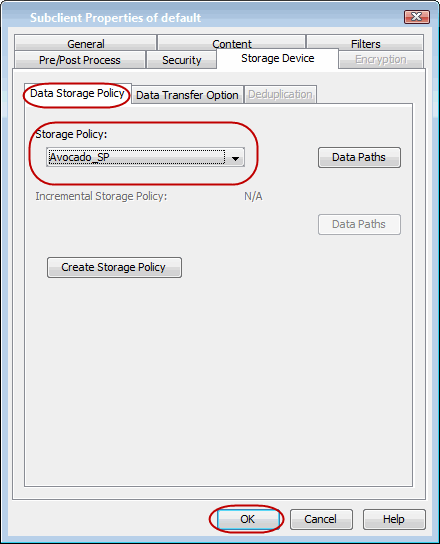
22.
  • Click the Storage Device tab.
  • In the Storage Policy box, select the Storage Policy created in step 20.
  • Click OK.