

|
|
Skip this page if you are not installing this agent on Unix.
Click  to continue with the
deployment.
to continue with the
deployment.
Install the software on a client computer that is connected to a NAS file server that you want to protect and satisfies the minimum requirements specified in the System Requirements.
To backup the NAS data, you need to install the MediaAgent software which includes the NAS iDataAgent. If the library is attached to the MediaAgent, you need to install the NDMP Remote Server software.
The following procedures describe the steps for installing both the MediaAgent and the NDMP Remote Server. You can skip this installation step if you have already installed the MediaAgent.
Installation |
Before You Begin |
||
|
Download the latest software package to perform the install. Make sure that the computer in which you wish to install the software satisfies the System Requirements. |
| 1. |
Logon to the client computer as root or as a sudo user. If you are installing the software using a sudo user account, make sure that sudo user account is configured on this computer. For more information, see FAQ - Install. |
|||
| 2. |
If your are installing the software from CD, run the following command to
mount the CD: mount -t iso9660,udf /dev/cdrom /mnt/cdrom Run the following command from the Software Installation Package or mount point: ./cvpkgadd |
|||
| 3. |
The product banner and other information is displayed. Press Enter. |
|||
| 4. | Read the license agreement. Type y and press Enter. | |||
| 5. | Press Enter. |
Please select a setup task you want to perform
from the list below: Advance options provide extra setup features such as creating custom package, recording/replaying user selections and installing External Data Connector software. 1) Install data protection agents on this computer 2) Advance options 3) Exit this menu Your choice: [1] |
||
| 6. | Press Enter. |
Certain Calypso
packages can be associated with a virtual IP, or in other words, installed
on a "virtual machine" belonging to some cluster. At any given time the
virtual machine's services and IP address are active on only one of the
cluster's servers. The virtual machine can "fail-over" from one server to
another, which includes stopping services and deactivating IP address on
the first server and activating the IP address/services on the other server. You now have a choice of performing a regular Calypso install on the physical host or installing Calypso on a virtual machine for operation within a cluster. Most users should select "Install on a physical machine" here. 1) Install on a physical machine 2) Install on a virtual machine 3) Exit Your choice: [1] |
||
| 7. |
If you have only one network interface, press Enter
to accept the default network interface name and continue. If you have multiple network interfaces, enter the interface name that you wish to use as default, and then press Enter.
|
We found one network
interface available on your machine. We will associate it with the physical
machine being installed, and it will also be used by the CommServe to connect
to the physical machine. Note that you will be able to additionally customize
Datapipe Interface Pairs used for the backup data traffic later in the Calypso
Java GUI. Please check the interface name below, and make connections if necessary: Physical Machine Host Name: [angel.company.com] |
||
| 8. | Press Enter. |
Please specify the client
name for this machine. It does not have to be the network host name: you can enter any word here without spaces. The only requirement is that it must be unique on the CommServe. Physical Machine Client name: [angel] |
||
| 9. |
Type the number associated with the
Unix File System iDataAgent, MediaAgent and press Enter.
|
Install Calypso
on physical machine angel Please select the Calypso module(s) that you would like to install. [ ] 1) UNIX File System iDataAgent
[1101] [CVGxIDA] [a=all n=none r=reverse q=quit
d=done >=next <=previous ?=help] |
||
| 10. |
A confirmation screen will mark your choice with an "X". Type d for Done, and press Enter. |
Install Calypso
on physical machine angel Please select the Calypso module(s) that you would like to install. [X] 1) UNIX File System iDataAgent
[1101] [CVGxIDA] [a=all n=none r=reverse q=quit
d=done >=next <=previous ?=help] |
||
| 11. | Press Enter. | Do you want to use the agents for restore only without consuming licenses? [no] | ||
| 12. |
Type the appropriate number to install the latest software
scripts and press Enter.
|
Installation Scripts
Pack provides extra functions and latest support and fix performed during
setup time. Please specify how you want to get this pack. If you choose to download it from the website now, please make sure you have internet connectivity at this time. This process may take some time depending on the internet connectivity. 1) Download from the software provider website. 2) Use the one in the installation media 3) Use the copy I already have by entering its unix path Your choice: [1] 2 |
||
| 13. |
Press Enter.
|
Keep Your Install Up
to Date - Latest Service Pack Latest Service Pack provides extra functions and latest support and fix for the packages you are going to install. You can download the latest service pack from software provider website. If you decide to download it from the website now, please make sure you have internet connectivity at this time. This process may take some time depending on the internet connectivity. Do you want to download the latest service pack now? [no] |
||
| 14. |
Press Enter to accept the default path.
|
Please specify where
you want us to install Calypso binaries. It must be a local directory and there should be at least 176MB of free space available. All files will be installed in a "calypso" subdirectory, so if you enter "/opt", the files will actually be placed into "/opt/calypso". Installation Directory: [/opt] |
||
| 15. |
Press Enter to accept the default location.
|
Please specify where
you want to keep Calypso log files. It must be a local directory and there should be at least 100MB of free space available. All log files will be created in a "calypso/Log_Files" subdirectory, so if you enter "/var/log", the logs will actually be placed into "/var/log/calypso/Log_Files". Log Directory: [/var/log] |
||
| 16. | Press Enter. |
Most of Software
processes run with root privileges, but some are launched by databases and
inherit database access rights. To make sure that registry and log files
can be written to by both kinds of processes we can either make such files
world-writeable or we can grant write access only to processes belonging
to a particular group, e.g. a "calypso" or a "dba"
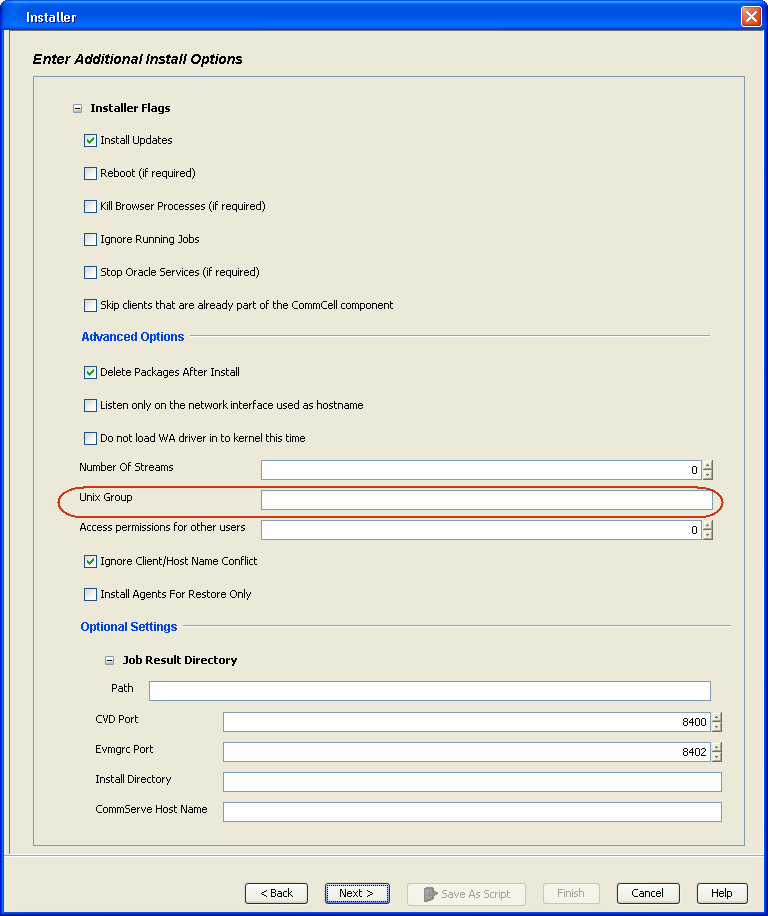
group. We highly recommend now that you create a new user group and enter its name in the next setup screen. If you choose not to assign a dedicated group to Software processes, you will need to specify the access permissions later. If you're planning to backup Oracle DB you should use "dba" group. Would you like to assign a specific group to Software? [yes] |
||
| 17. |
Type the Group name and press Enter. Press Enter again. |
Please enter the name
of the group which will be assigned to all Software files and on behalf
of which all Software processes will run.
In most of the cases it's a good idea to create a dedicated "calypso" group. However, if you're planning to use Oracle iDataAgent or SAP Agent, you should enter Oracle's "dba" group here. Group name: sky1 REMINDER If you are planning to install Calypso Informix, DB2, PostgreSQL, Sybase or Lotus Notes iDataAgent, please make sure to include Informix, DB2, etc. users into group "sky1". Press <ENTER> to continue ... |
||
| 18. |
Type a network TCP port number for the Communications Service (CVD) and
press Enter. Type a network TCP port number for the Client Event Manager Service (EvMgrC) and press Enter. |
Every instance of Calypso
should use a unique set of network ports to avoid interfering with other
instances running on the same machine. The port numbers selected must be from the reserved port number range and have not been registered by another application on this machine. Please enter the port numbers. Port Number for CVD : [8400] Port Number for EvMgrC: [8402] |
||
| 19. |
If you do not wish to configure the firewall services, press Enter.
|
Is there a firewall between this client and the CommServe? [no] | ||
| 20. |
Type the fully qualified CommServe host name and press Enter.
|
Please specify hostname
of the CommServe below. Make sure the hostname is fully qualified, resolvable
by the name services configured on this machine. CommServe Host Name: mycommserve.company.com |
||
| 21. | Type 3 and press Enter. |
Certain Calypso packages can be
associated with a virtual IP, or in other words, installed on a "virtual machine"
belonging to some cluster. At any given time the virtual machine's services and
IP address are active on only one of the cluster's servers. The virtual machine
can "fail-over" from one server to another, which includes stopping services and
deactivating IP address on the first server and activating the IP address/services
on the other server. Currently you have Calypso installed on physical node angel.company.com. Now you have a choice of either adding another package to the existing installation or configure Calypso on a virtual machine for use in a cluster. 1) Add another package to angel.company.com 2) Install Calypso on a virtual machine 3) Exit Your choice: [3] |
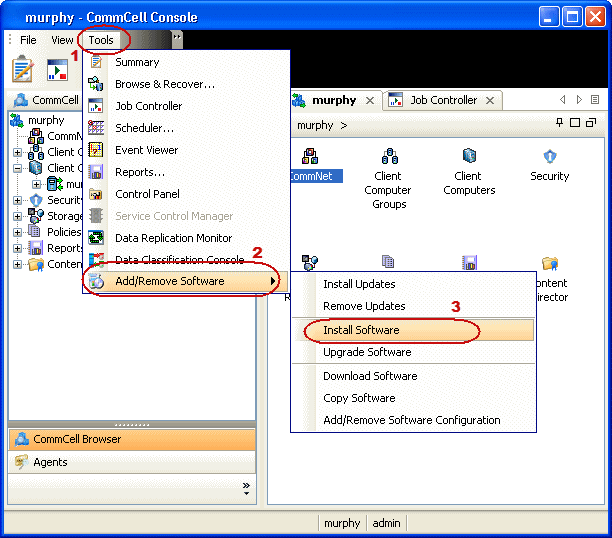
| 1. | From the CommCell Browser, select Tools menu, point to Add/Remove Software, and then click Install Software. |
 |
||
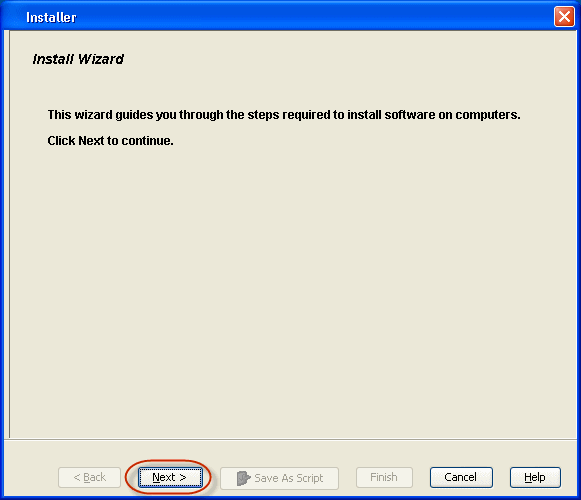
| 2. | Click Next. |
 |
||
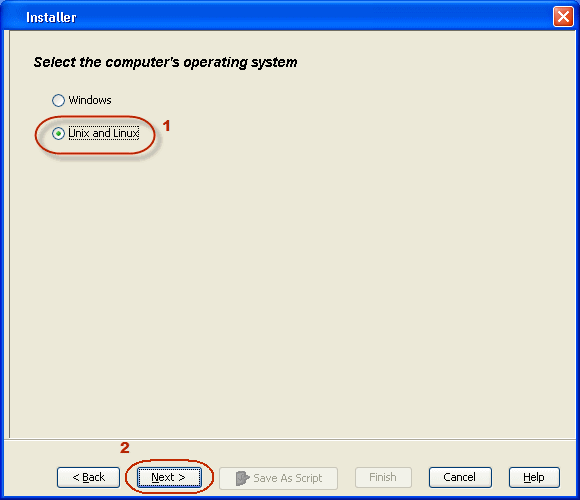
| 3. | Select Unix and Linux, and then click Next. |
 |
||
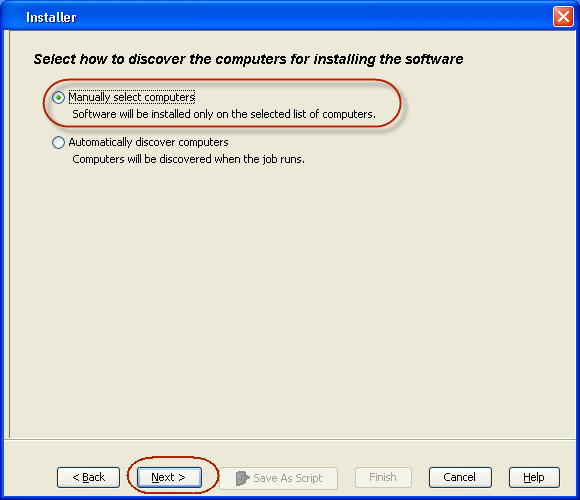
| 4. | Select Manually Select Computers ,and then click Next. |
 |
||
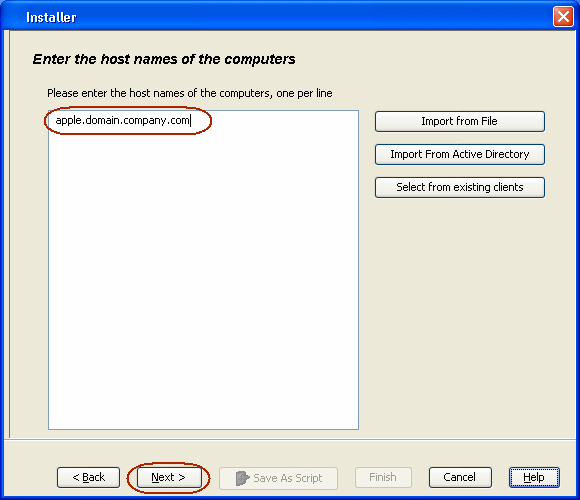
| 5. | Enter the fully qualified domain name of the computer
in which you wish to install. For example: apple.domain.company.com Click Next. |
 |
||
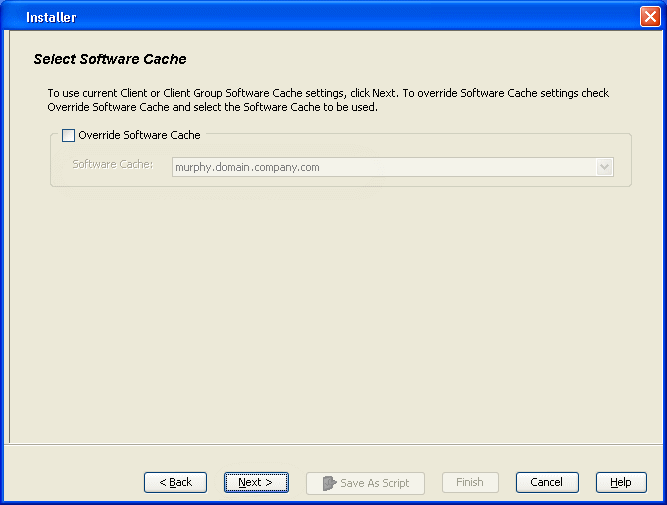
| 6. | Click Next. |
 |
||
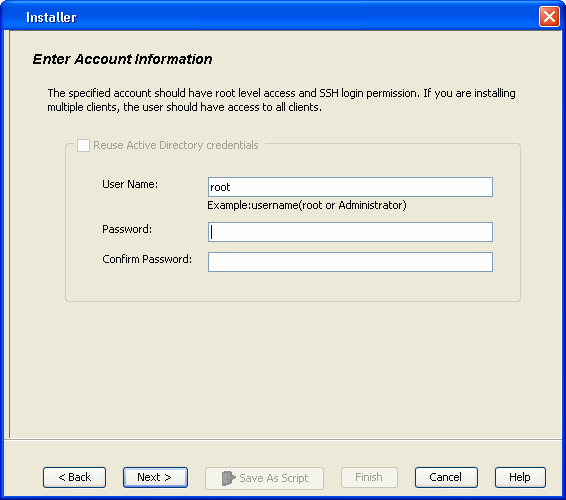
| 7. | Type User Name and Password that must
be used to access the client computer. Click Next. |
 |
||
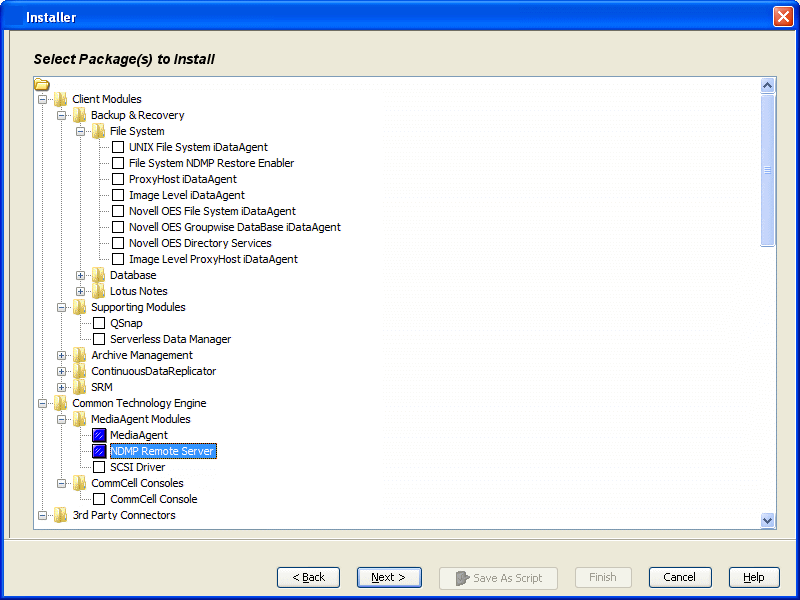
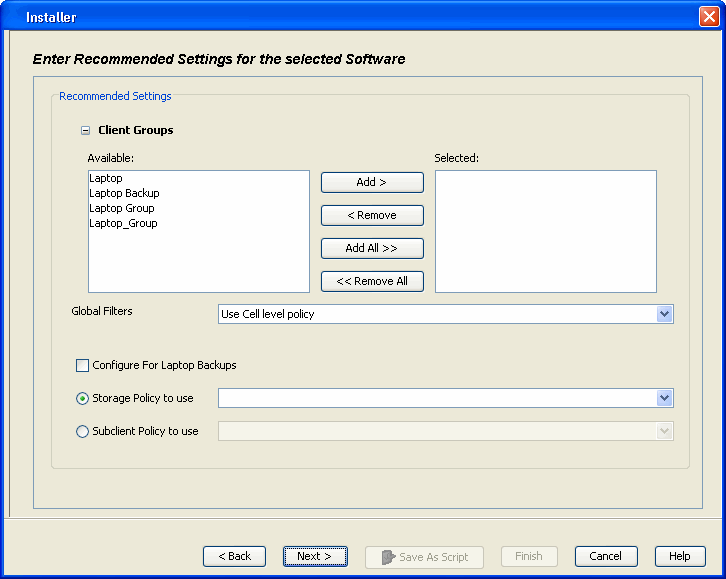
| 8. | Expand Client Modules | Backup & Recovery
| File System and select Unix File System
iDataAgent. Expand MediaAgent Modules and select MediaAgent.
Click Next. |
 |
||
| 9. |
|
 |
||
| 10. | Click Next. |
 |
||
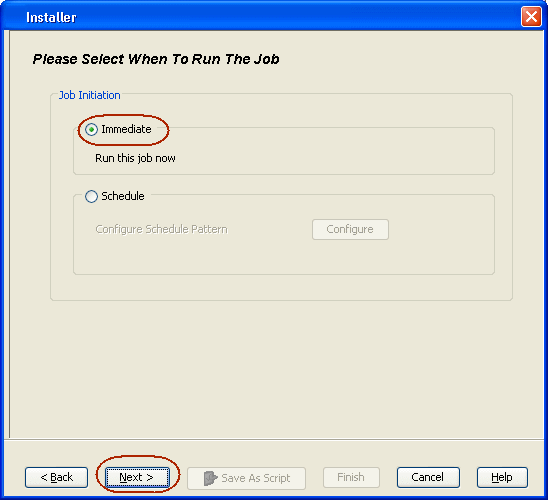
| 11. | Select Immediate. Click Next. |
 |
||
| 12. | Click Finish. |
 |
||
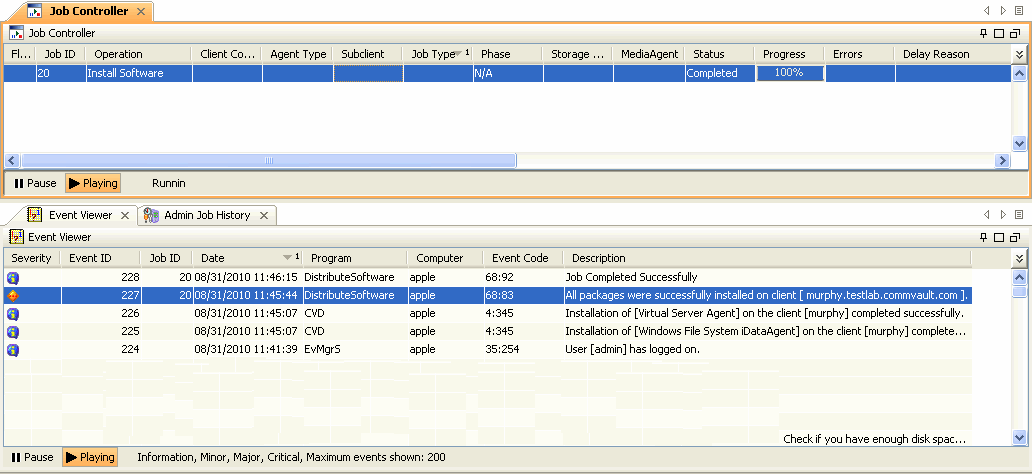
| 13. | You can track the progress of the job from the Job Controller or Event Viewer window. |
 |
||
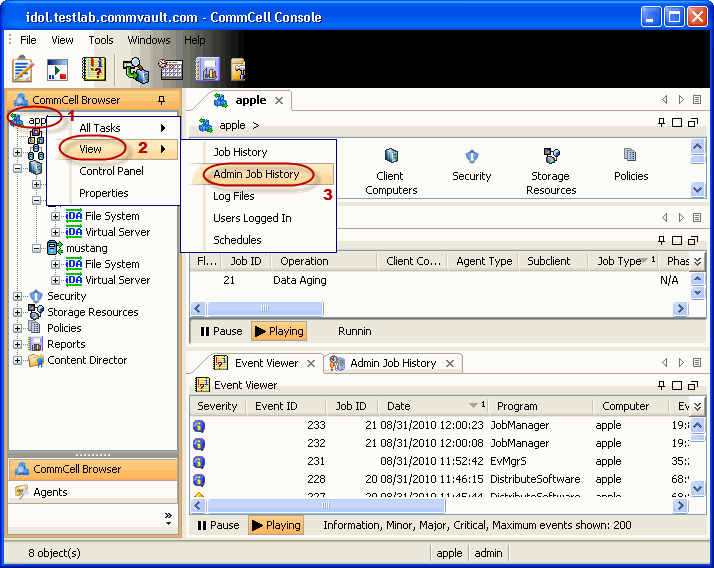
| 14. | Once the job is complete, right-click the <CommServe>, point to View, and then click Admin Job History. |
 |
||
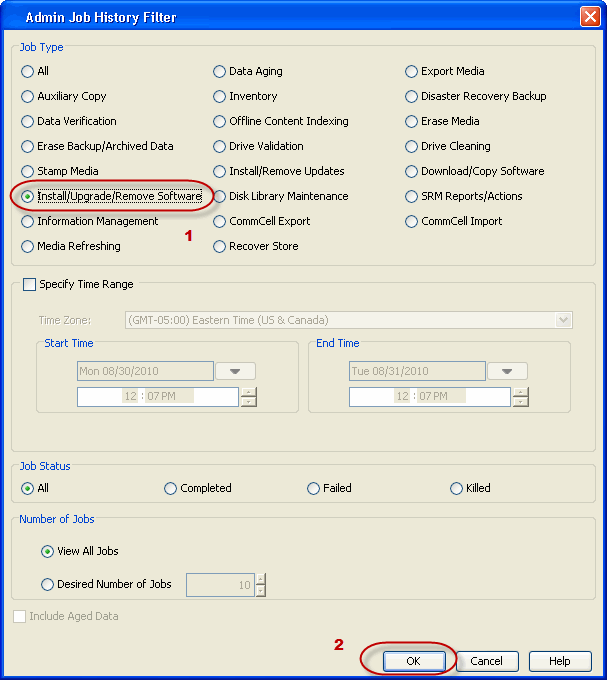
| 15. | Select Install/Upgrade/Remove Software. Click OK. |
 |
||
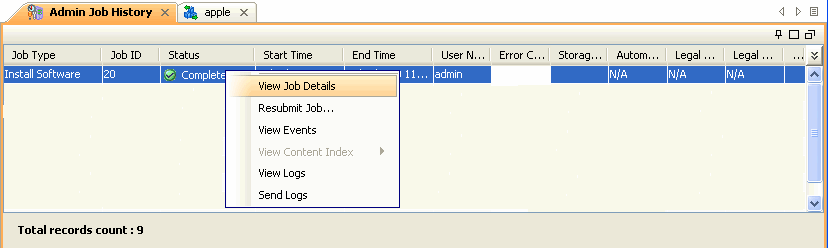
| 16. |
You can view the following details about the job by right-clicking
the job:
|
 |
|
|