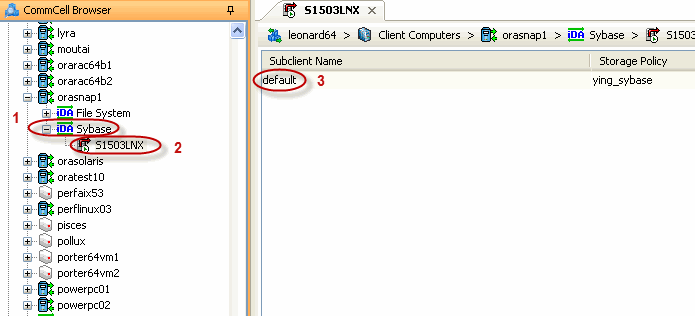
Agent
Facilitates the creation of Sybase Server instance.
Instance
Defines the Sybase Server to be backed up.
Subclient
Defines the Sybase databases to be backed up.
The Sybase iDataAgent
uses the following logical entities to manage backup and restore
operations from the CommCell Console.AgentFacilitates the creation of Sybase Server instance. InstanceDefines the Sybase Server to be backed up. SubclientDefines the Sybase databases to be backed up. |
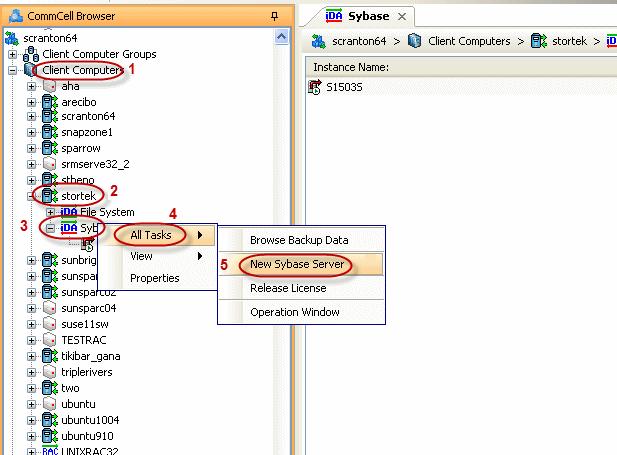
In the CommCell Console each instance references a Sybase server. Hence it is necessary to create an instance for each Sybase Server to be backed up. You can manage your server/instance as described in the following sections:
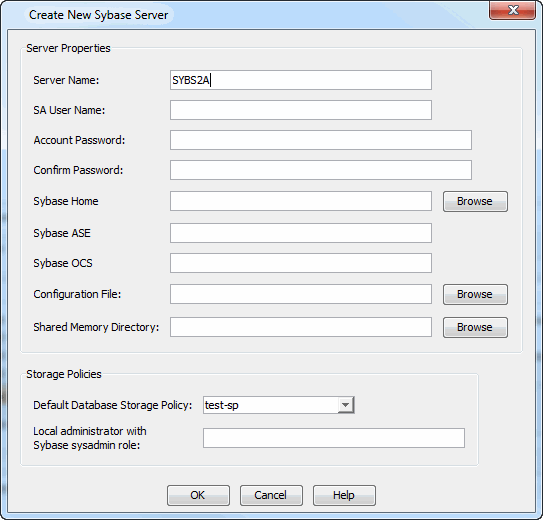
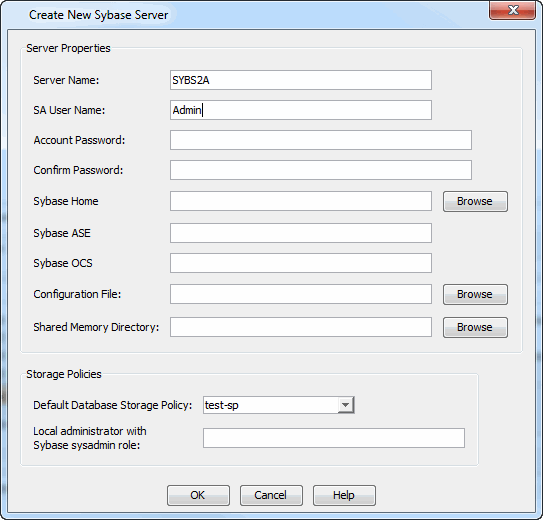
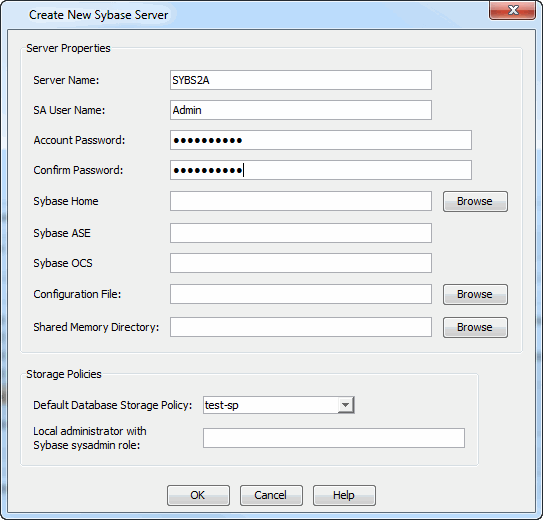
Whenever a new Sybase Server is created on the client, you will add the Sybase Server to the CommCell using the following steps:
|
 |
|
 |
|
 |
|
 |
|
 |
|
 |
|

|
|
 |
|
 |
|
 |
|
|
|
 |
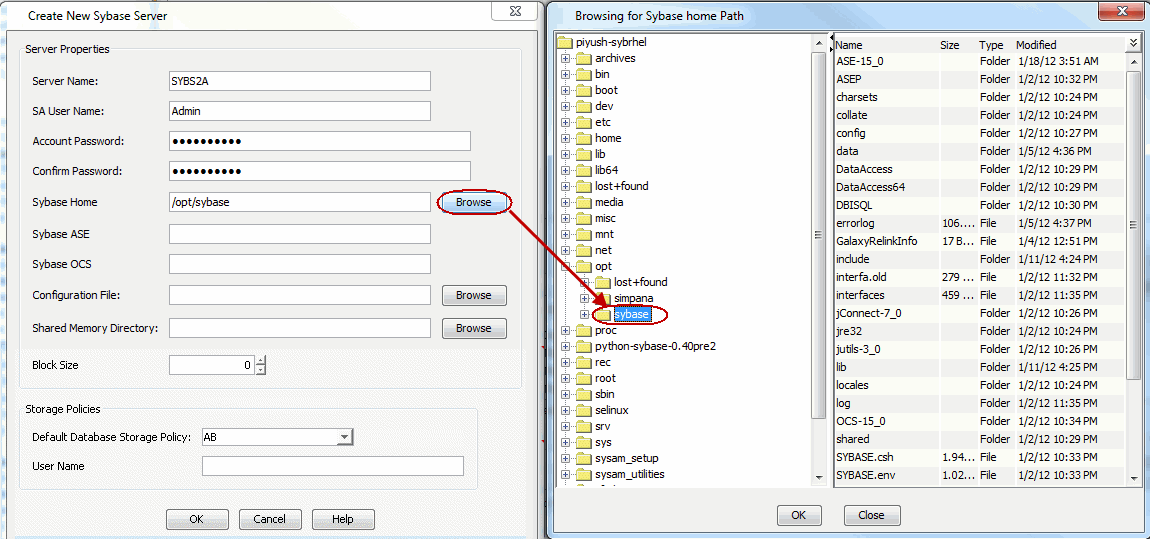
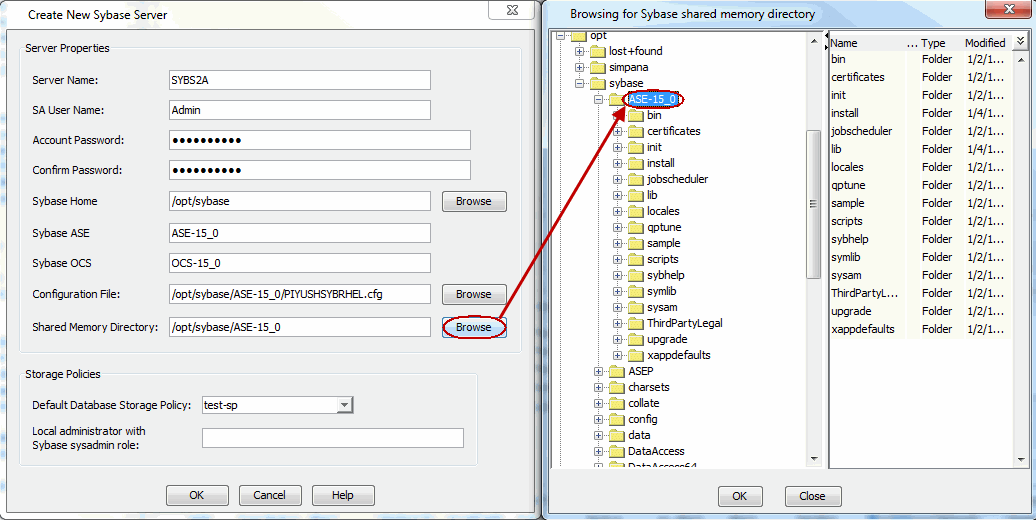
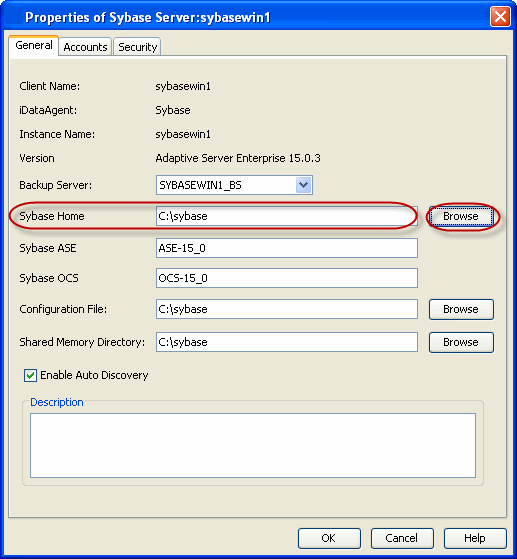
Sybase HOME directory refers to the location where the Sybase application resides. You can modify the home path location for an instance at any point of time. Use the following steps to change the Sybase HOME directory:
|
 |
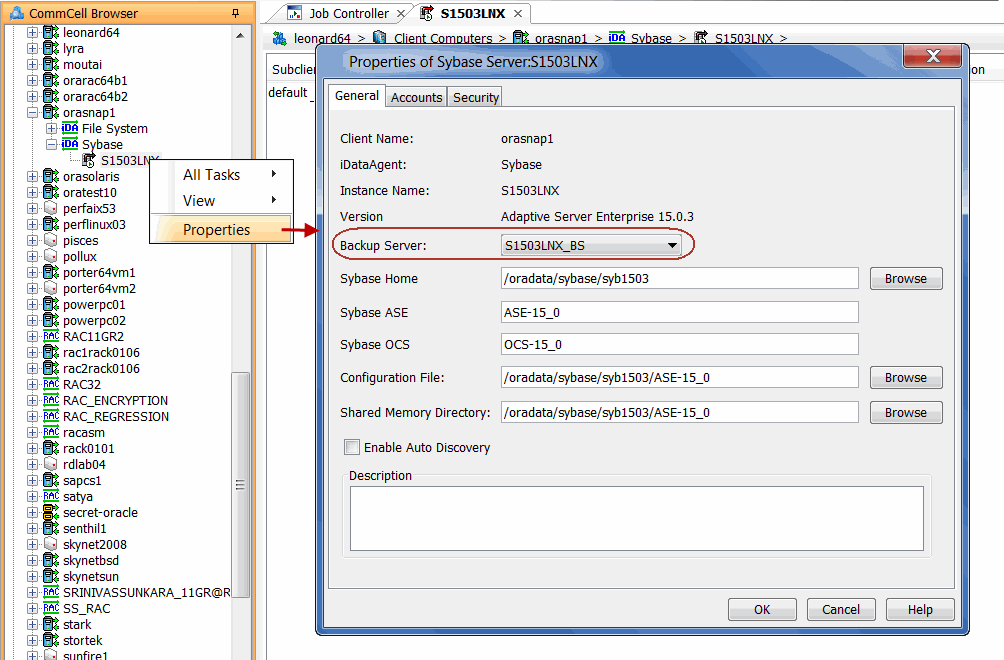
If a backup server that is associated to a Sybase server instance reaches its maximum storage capacity even after compressing your earlier backups, you can change the backup server to enhance your backup and restore jobs.
Use the following steps to change the backup server:
|
|
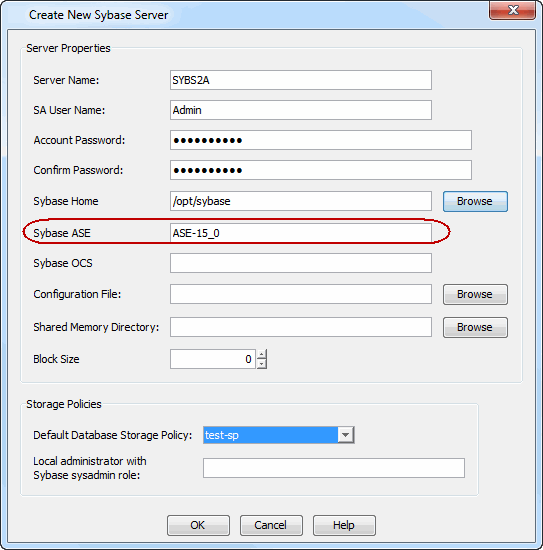
By default, the Sybase ASE (Adaptive Server Enterprise) server library and Open Client Server (OCS )environment variable are located under the Sybase ASE server home directory. Use the following steps to configure Sybase environment variables:
|
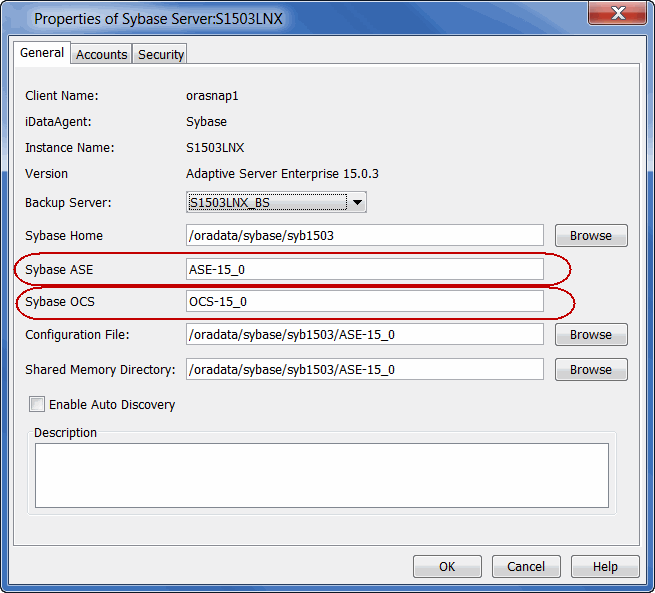 |
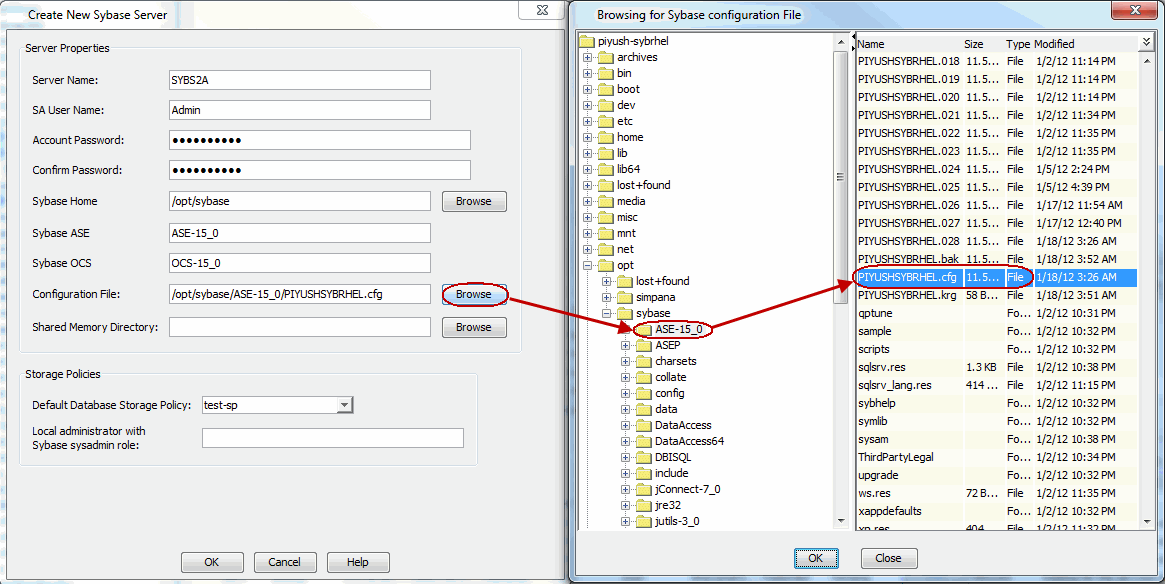
Use the following steps to change the location of the configuration file:
|
 |
Sybase uses shared memory for inter process communication and caching the data. Use the following steps to change the location of the shared memory directory:
|
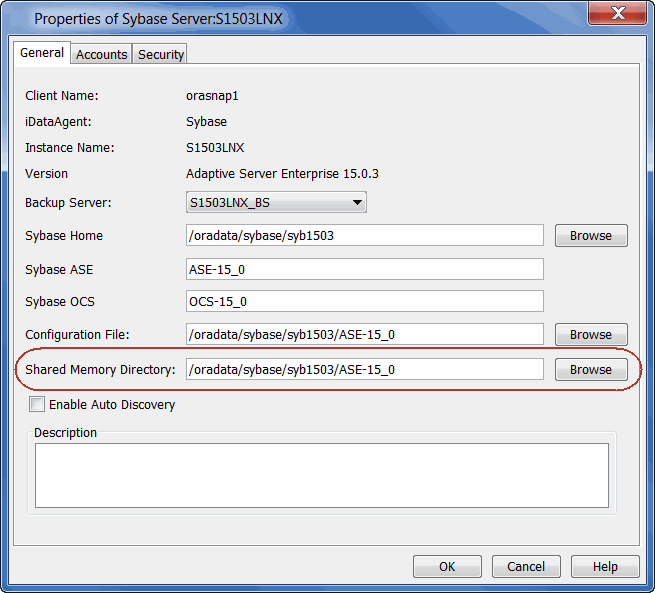 |
When you restore an entire Sybase server or a master database, it is highly recommended to select Sybase create devices. However, you can also create a master database manually and then perform a restore without selecting Sybase create devices.
Use the following steps to manually create a master database:
First, you need to shut down the Sybase server.
Remove the old master database device and manually delete the master.dat from the database directory.
Execute the command to create the new master device with an empty password.
Example:
/sybase/syb1503/ASE-15_0/bin/dataserver -s S1503LNX -b200M -f -z 2048 -d /sybase/syb1503/data/master.dat -c /sybase/syb1503/ASE-15_0/S1503LNX.cfg
Execute the command to start the Sybase server
Example:
./startserver �f RUN_S1503LNX
Execute the command to alter the master database
Example:
alter database master on master="87M"
Restart the Sybase server without a password.
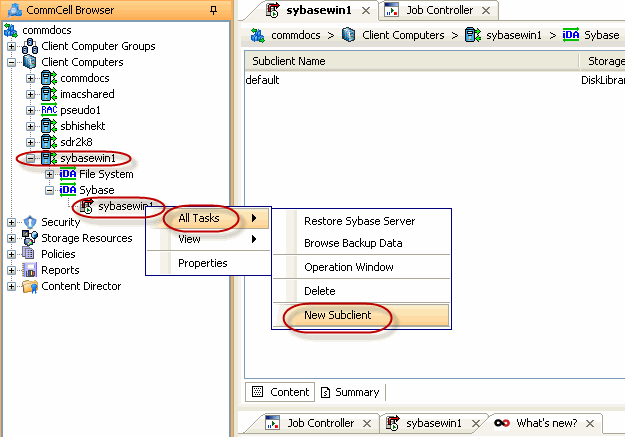
When you create an instance, a default subclient is automatically created. The default subclient includes all the databases associated with that instance. If a new database is added to the instance, then that database is automatically assigned to the content of the default subclient. However, you can create user-defined subclients to backup individual or a group of databases.
If you want to back up groups of specific databases, you can do so by creating a user-defined subclient containing any number of databases that exist within the instance. This is useful if you want to back up a subset of databases at certain times or with a particular frequency.
If you want to divide your backups into smaller groups, you can do so by creating user-defined subclients using the following steps:
|
 |
|
 |
|
 |
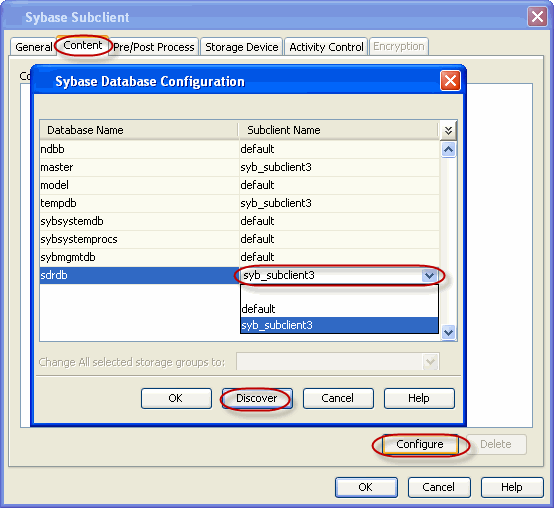
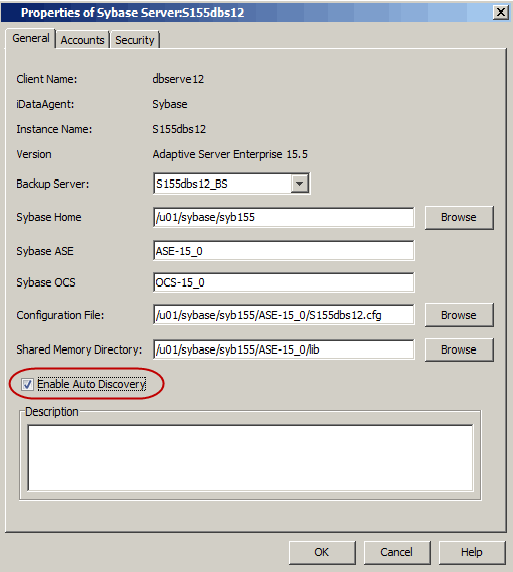
When an automatic database discovery is enabled, all the existing Sybase databases are discovered automatically on the default subclient when a backup job is submitted. If any new databases are added after a previous backup, these newly added databases will be automatically discovered on the default subclient when a backup job is performed.
Use the following steps to enable automatic database discovery:
|
 |
Whenever a backup job is initiated, newly created Sybase databases are discovered automatically on the default subclient. However, for a user-defined subclient, you need to manually discover the databases prior to running any backup jobs. Use the following steps to manually discover the Sybase databases:
|
|
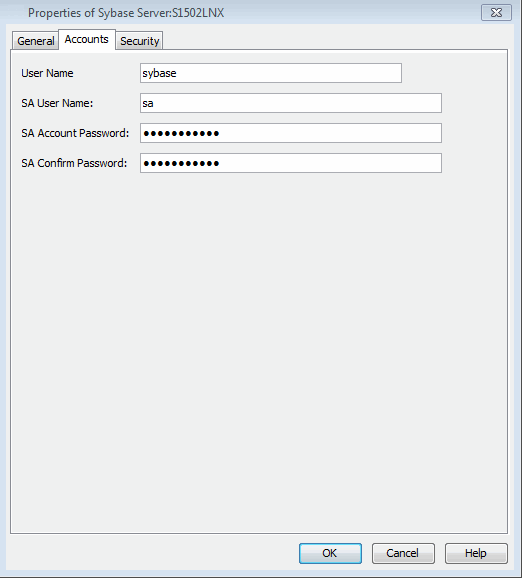
The Sybase iDataAgent requires two user accounts to access the Sybase application and database to perform backup and restore operations:
On Unix computers, the account information for accessing the database is provided during the Sybase iDataAgent installation.
On Windows computers, the account information is provided during the instance configuration after the installation of the Agent.
The following table illustrates the required user account privileges for backup and restore operations:
| Operations | User Account needed: |
| Create Sybase server | Sybase database administrator account (SA role) |
| Backup Sybase database and Restore non-system databases | Operating system user account (operator role) with access to all the databases in an instance. |
| Restore Sybase system databases | Sybase database administrator account (SA role) |
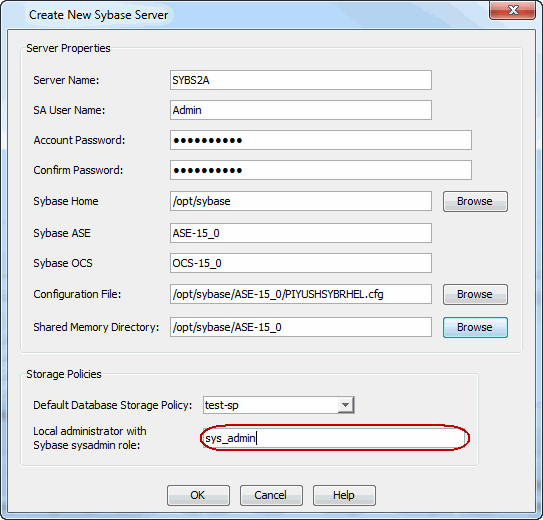
By default, the Sybase database administrator account is used for all components. You can change the user account to be used for backups at the Instance level. This user account will be used for all subclients within the instance. Configure the user account at this level if backup and restore operations will be conducted by a different person for each instance.
|
 |
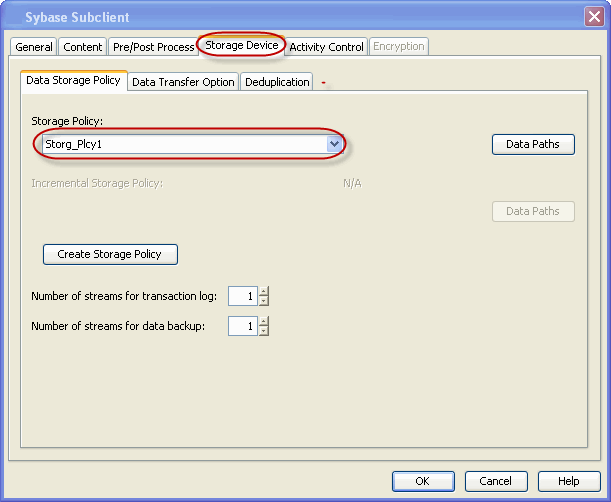
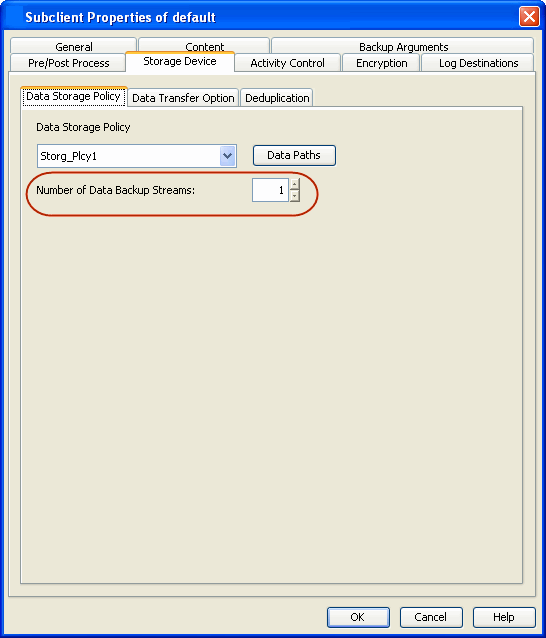
By default, backup data is sent to media in two streams. This means that a database is sent to media during a backup in two parallel waves. This results in backup taking about half the time to complete as it otherwise would if only one stream is used.
You can increase the number of streams used for backups for a particular subclient provided the number of streams does not exceed the maximum number configured in the subclient's storage policy. Increasing the number of streams for a subclient further reduces the amount of time a backup takes to complete. For example, increasing the number of streams from 2 to 3 enhances backup time from one-half that of a single stream to one-third.
Keep in mind that the same number of streams used for performing a backup will be needed to restore the data.
|
 |
You can add, modify, or delete several configurable properties for the Sybase iDataAgent from the command line interface.
Command line configuration enables you to:
The following sections describe the available command line configurations:
To run command line operations you must first login to the CommServe as follows:
qlogin -cs <commserve name> -u <user name>
qlogin -cs server1 -u user1
qoperation execute -af CreateInstance_Template.xml -appName 'Sybase Database' -instanceName xxxxx -clientName xxxxx -sybaseHome 'xxxxx' -sybaseASE xxxxx -sybaseOCS xxxxx -configFile 'xxxxx' -sharedMemoryDirectory 'xxxxx' -backupServer xxxxx -defaultDatabaseStoragePolicy/storagePolicyName xxxxx -localAdministrator/userName xxxxx -localAdministrator/password xxxxx -saUser/UserName xxxxx -saUser/password xxxxx -enableAutoDiscovery xxxxx
qoperation execute -af ModifyInstance_Template.xml -appName 'Sybase Database' -instanceName xxxxx -clientName xxxxx -sybaseHome 'xxxxx' -sybaseASE xxxxx -sybaseOCS xxxxx -configFile 'xxxxx' -sharedMemoryDirectory 'xxxxx' -backupServer xxxxx -saUser/userName xxxxx -enableAutoDiscovery xxxxx
qoperation execute -af GetInstance_Properties_Template.xml -appName 'Sybase Database' -instanceName xxxxx -clientName xxxxx
qoperation execute -af deleteInstance_Template.xml -appName 'Sybase Database' -instanceName xxxxx -clientName xxxxx
The following table displays all the parameters that you can use with the commands mentioned in the above sections. To add a parameter to your command, use the following syntax: (An example is provided at the end of the table.)
qoperation execute -af <template XML file> -<parameter name> <value>
| Parameter | Description of Parameter Values |
| description | A general description of the instance if needed. |
| clientName | Name of the client computer. |
| appName | Name of the application. In this case it would be 'Sybase Database'. |
| instanceName | Name of the Sybase instance. The instance name needs to be entered along with the client name, e.g. instance1. |
| backupServer | Name of the Sybase Server |
| enableAutoDiscovery | Option to enable/disable auto discovery of Sybase
databases. Valid values are True/False. |
| sharedMemoryDirectory | Path for the shared memory files |
| configFile | Path of the configuration file for the instance |
| sybaseOCS | Sybase OCS environment variable |
| sybaseASE | Sybase ASE environment variable |
| sybaseHome | Path for the Sybase application software |
| local administrator userName | Name of the user that has local administrator rights to administer the Sybase application. This is the account used by the user to log in to and use the application to run jobs. |
| password | Password for the Local Administrator |
| saUser/userName | Name of the Sybase database administrator who has permissions to perform jobs |
| saUser/password | Password for the Sybase database administrator |
The following example shows how to add a parameter for a command:
| Adding Configuration file |
To include the configuration file for the instance, add the 'configFile'
parameter to the following command: qoperation execute -af ModifyInstance_Template.xml -appName 'Sybase Database' -instanceName instance1 -clientName client1 -configFile '/data/sybase/syb_xxx/config_file.cfg' |
For detailed information on the instance parameters see Instance Properties.
qoperation execute �af create_subclient_template.xml -appName 'Sybase Database' -instanceName xxxxx -clientName xxxxx -subclientName xxxxx
qoperation execute -af get_subclient_properties_template.xml -appName 'Sybase Database' -instanceName xxxxx -clientName xxxxx -subclientName xxxxx
qoperation execute -af update_subclient_template.xml -appName 'Sybase Database' -instanceName xxxxx -clientName xxxxx -subclientName xxxxx -dataBackupStoragePolicy/storagePolicyName xxxxx -contentOperationType xxxxx -sybaseContent/databaseName xxxxx
qoperation execute �af remove_subclient_template.xml -appName 'Sybase Database' -clientName xxxxx -instanceName xxxxx -subclientName xxxxx
The following table displays all the parameters that you can use with the commands mentioned in the above sections. To add a parameter to your command, use the following syntax: (An example is provided at the end of the table.)
qoperation execute -af <template XML file> -<parameter name> <value>
| Parameter | Description of Parameter Values |
| clientName | Name of the client computer. |
| appName | Name of the application. In this case it would be 'Sybase Database'. |
| subclientname | Name of the Sybase subclient. |
| contentOperationType | Modification type. Valid values are
|
| backupsetName | BackupSet Name. In this case it would be 'DefaultBackupset' |
| enableBackup | Option to enable backup of Subclient. Valid values are True/False. |
| storagePolicyName | Name of the Storage Policy used for the backup. |
| sybaseContent/databaseName | Databases to be backed up. |
| numberOfBackupStreams | Option to change the number of streams for data backup. |
The following examples show how to add a parameter for a command:
| Adding a Database |
To add a database for backup, add the 'sybaseContent/databaseName'
parameter to the following command: qoperation execute -af update_subclient_template.xml -appName 'Sybase Database' -instanceName instance1 -clientName client1 -subclientName subclient1 -contentOperationType ADD -sybaseContent/databaseName db1 |
| Setting a Storage Policy |
To assign a storage policy to a subclient, add the 'dataBackupStoragePolicy/storagePolicyName'
parameter to the following command: qoperation execute -af update_subclient_template.xml -appName 'Sybase Database' -instanceName instance1 -clientName client1 -subclientName subclient1 -dataBackupStoragePolicy/storagePolicyName sp1 |
| Changing the Number of Streams for Data Backup |
To change the number of streams for data backup, add the 'sybaseSubclientProp/numberOfBackupStreams'
parameter to the following command: qoperation execute -af update_subclient_template.xml -appName 'Sybase Database' -instanceName instance1 -clientName client1 -subclientName subclient1 -dataBackupStoragePolicy/storagePolicyName sp1 -sybaseSubclientProp/numberOfBackupStreams 3 -contentOperationType ADD -sybaseContent/databaseName db1 |
For detailed information on the Subclient parameters see Subclient Properties.
qoperation execute �af sched_policy_association_template.xml �taskName mypolicy
| Parameter | Description of Parameter Values |
| taskName | Name of the Schedule Policy to be associated. |
There are several configurable properties available for your agent that can be modified from the agent, instance, or subclient level as per need.
It is recommended that that you do not modify the properties of a subclient when a job is in progress for that specific subclient. If a job is in progress, either wait for the job to complete or kill the job from the Job Controller.
The following table describes the properties that can be configured from the agent, instance, and subclient levels.
| Option | Description | Related Topics |
| Change Storage Policies |
You can modify the
storage policies in any of the following situations:
You can change the storage policies from the subclient level.
|
Refer to Storage Policies. |
| Rename a Subclient |
You can rename a subclient:
|
|
| Data Transfer Options |
You can efficiently configure the available resources for transferring data secured
by data protection operations from the subclient level. This includes the following:
You can configure the data transfer options.
|
Refer to Data Compression and Network Bandwidth Throttling. |
| View Data Paths |
You can view the data paths associated with the primary
storage policy copy of the selected storage policy or incremental storage
policy. You can also modify the data paths including their priority from
the subclient level.
|
|
| Configure a Subclient for Pre/Post Processing of Data Protection |
You can add, modify or view Pre/Post processes for the
subclient. These are batch files or shell scripts that you can run before
or after certain job phases.
|
Refer to Pre/Post Processes. |
| Configure Activity Control |
You can enable backup and restore operations from the agent and subclient level.
However, you can enable restore operations only from the agent level.
|
Refer to Activity Control. |
| Enable/Disable Data Encryption |
You can enable data encryption from the suclient level.Encryption must be enabled at the client level prior to configuring any
instances residing on that client.
|
Refer to Data Encryption. |
| View Software Version and Installed Updates |
The Version tab, at the Agent level displays the
software version of
the component.
|
|
| CommCell Configuration Report |
The CommCell Configuration Report provides the properties of the
CommServe, MediaAgents, clients, agents, SRM agents, subclients, and
storage policies within the CommCell based on the selected filter
criteria.
|
Refer to CommCell Configuration. |
The following sections describe the steps involved in deleting an agent, instance, or subclient.
|
When you delete an instance or backupset, the associated data is logically deleted and you can no longer access the corresponding data from CommCell Console for recovery purposes. Refer to the troubleshooting article on Recovering Data Associated with Deleted Clients and Storage Policies for information on how to recover data if you accidentally delete an entity. |
You need to uninstall or DeConfigure the agent software from the client computer before deleting from CommCell Browser. After you delete the client software, you can either leave the corresponding data intact for appropriate action or you can remove the data immediately. If you choose to remove the data immediately, you must delete the agent from the CommCell Browser. If you delete the agent, all of the agent's data is irretrievably lost.
This operation will permanently delete the data backed up from this level and it cannot be restored.
Consider the following before deleting an instance:
Consider the following before deleting a subclient:
Click No to cancel the deletion and retain the subclient, or click Yes to continue the deletion.