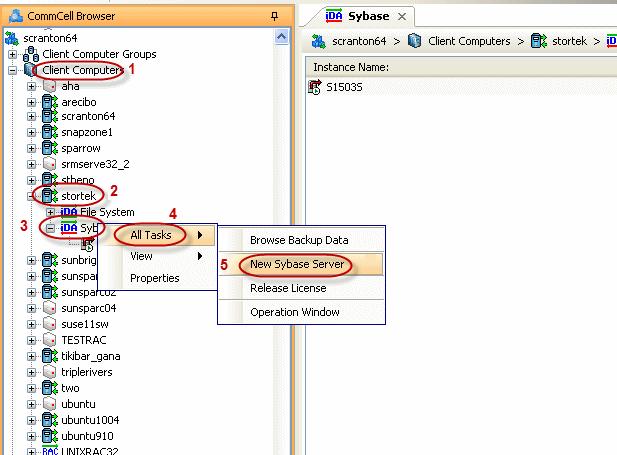
| 1. |
- From the CommCell Browser, navigate to Client Computers |
<Client>.
- Right-click Sybase,
point to
All Tasks, and then click New Sybase Server.
|
 |
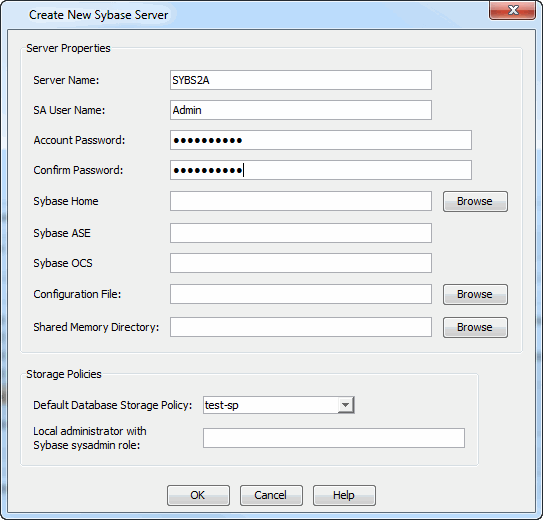
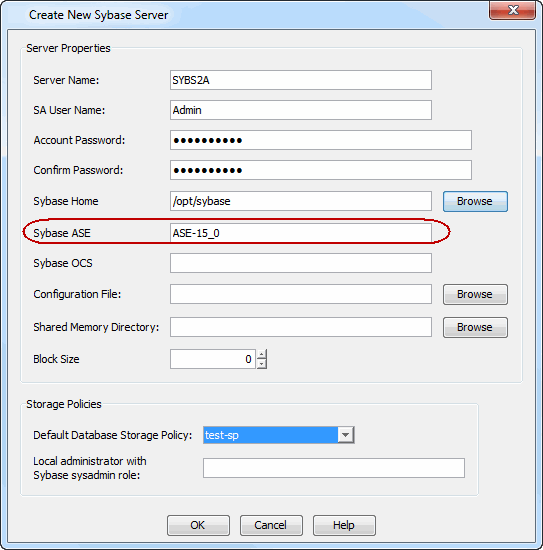
| 2. |
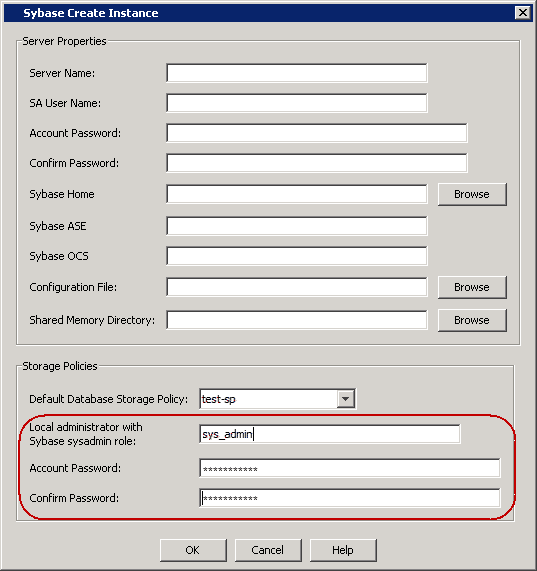
In the Server Name box, type the Sybase server name. |
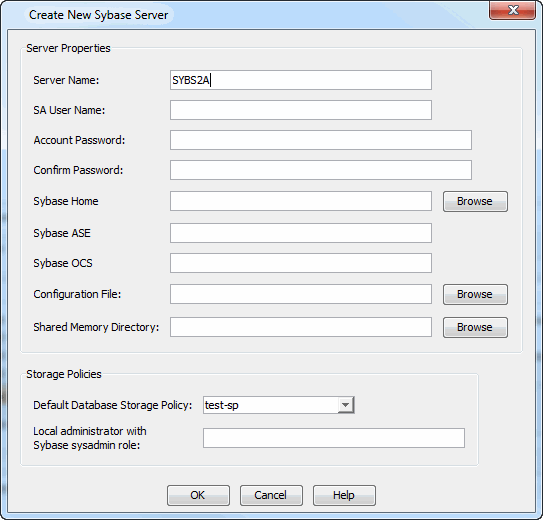 |
| 3. |
- In the SA User Name box, type the Sybase administrator user
name.
- In the Account Password box, type the account password
for the Sybase administrator user account.
- In the Confirm Password box, re-type the password.
|
 |
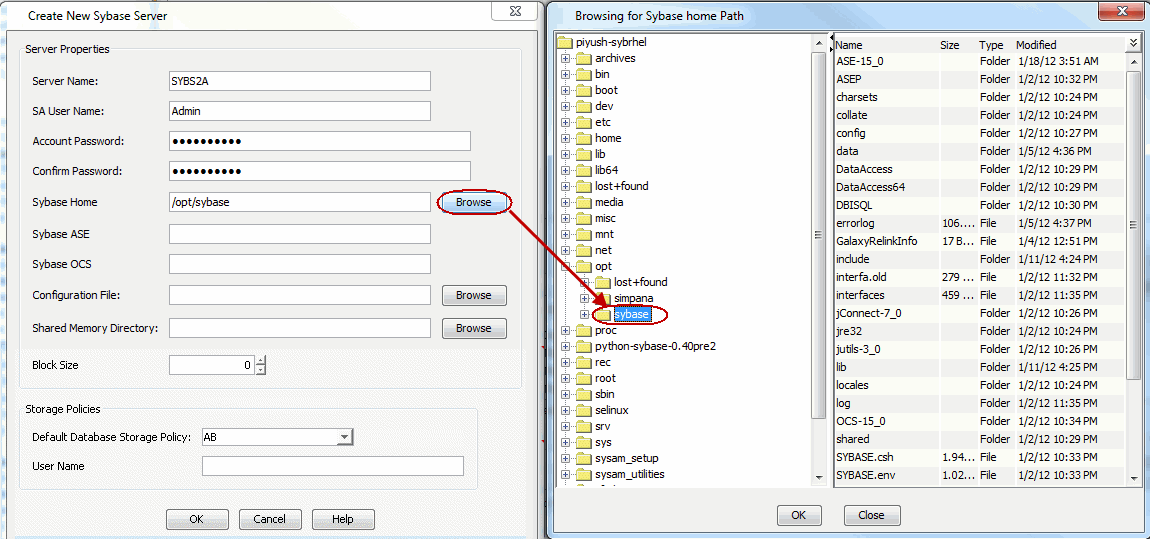
| 4. |
In the Sybase Home box, type the path to the Sybase
application. Alternatively, click Browse to select the location. |
 |
| 5. |
|

|
| 6. |
|

 |
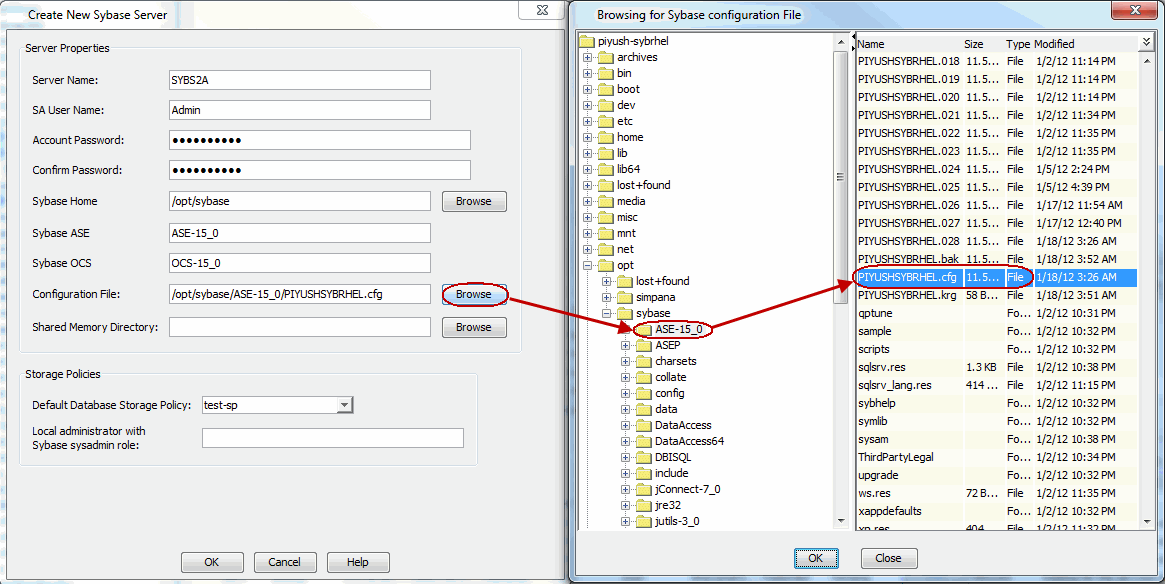
| 7. |
In the Configuration File box, type the path to the
configuration file. Alternatively, click Browse to select the
location. |
 |
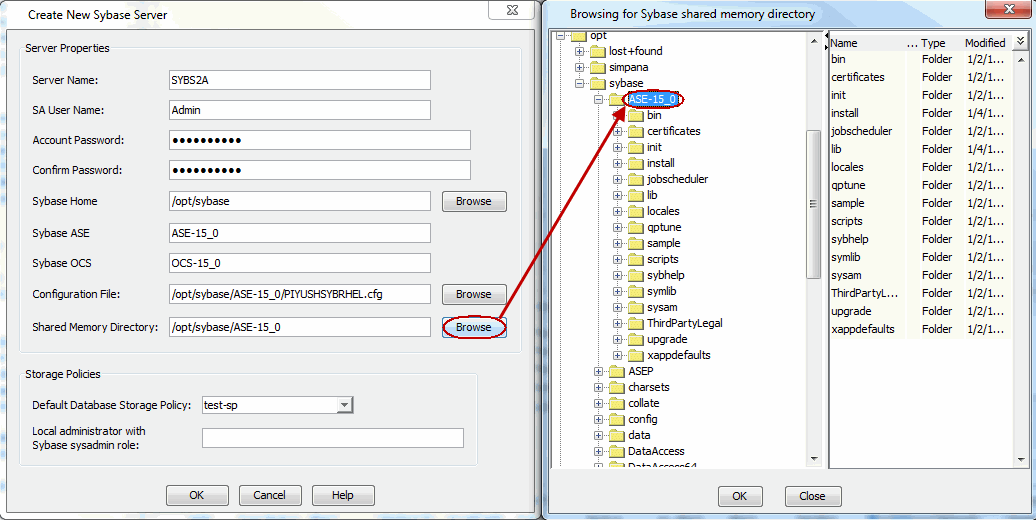
| 8. |
In the Shared Memory Directory box, type the location of the
directory where you specify the shared memory file name. When you start
an Adaptive Server, it creates a shared memory file that resides in
the home directory. for example: /opt/sybase/ASE-15_0. Alternatively, click Browse to select the
location. |
 |
| 9. |
In the Default Database Storage Policy box, select the
storage policy name. |
 |
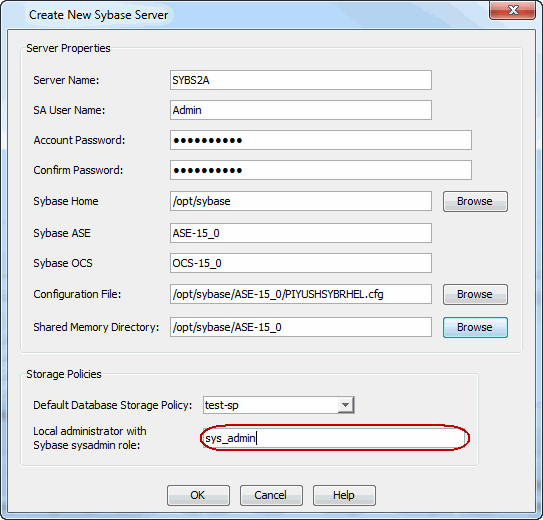
| 10. |
For Unix:
- In the Local administrator with Sybase sysadmin role
box, type the user name of the local system administrator with Sybase sysadmin
role privileges.
- Click OK.
|
 |
| |
For Windows:
- In the Local administrator with Sybase sysadmin role
box, type the user name of the local system administrator with Sybase sysadmin
role privileges.
- In the Account Password box, type the password for the user
account.
- In the Confirm Password box, re-type the password.
- Click OK.
|
 |
| 11. |
- From the CommCell Browser, navigate to Client Computers |
<Client> |
Sybase iDataAgent.
- Right-click the <Instance>, and then click
Properties.
|
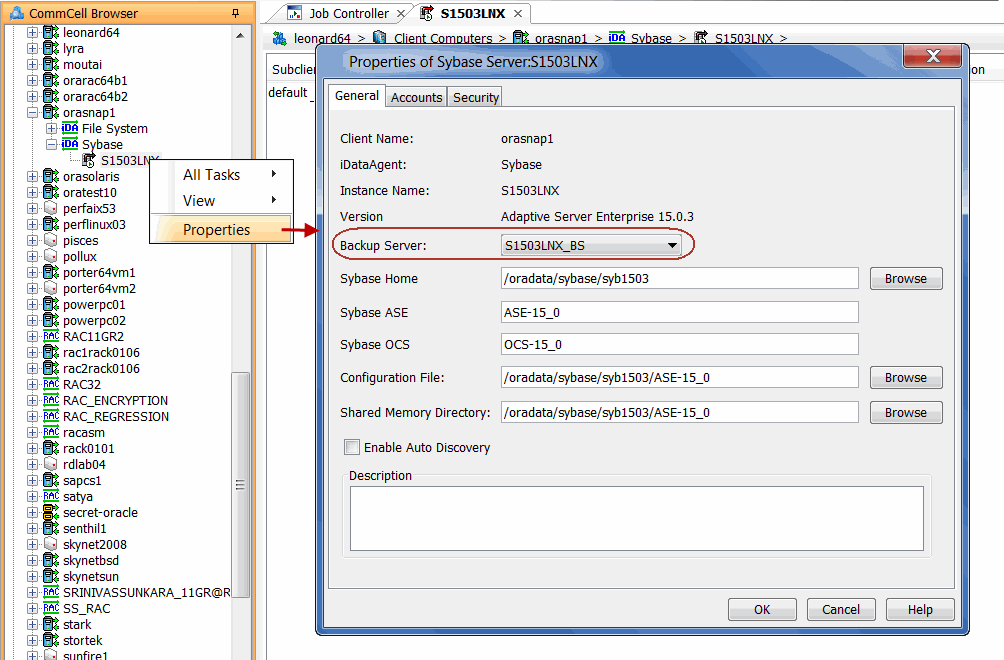 |
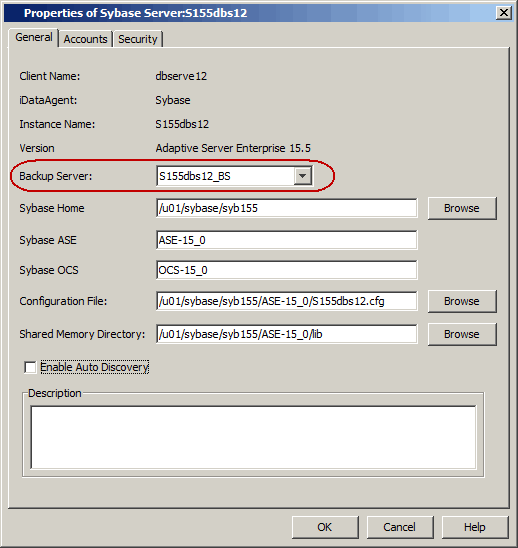
| 12. |
- Select the Backup Server from the list.
- Click OK.
|
 |
| 13. |
- From the CommCell Browser, navigate to Client Computers | <Client> |
Sybase |
<Instance>.
- Right-click the default Subclient, and then click
Properties.
|
 |
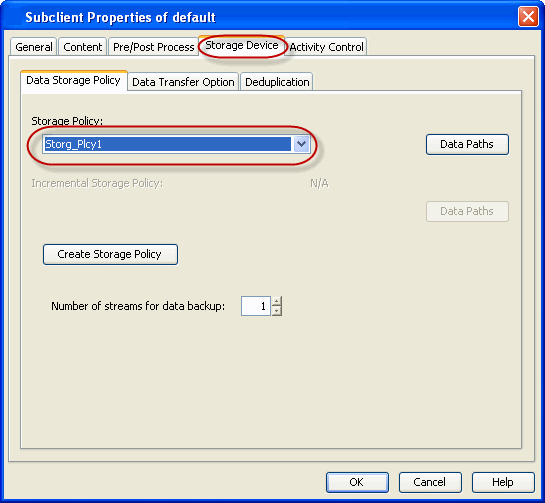
| 14. |
- Click the Storage Device tab.
- In the Storage Policy box, select the storage policy.
- Click OK.
Click
 to continue. If you do not
have Storage Policy created, follow the step given below to create a
storage policy. to continue. If you do not
have Storage Policy created, follow the step given below to create a
storage policy. |
 |
| 15. |
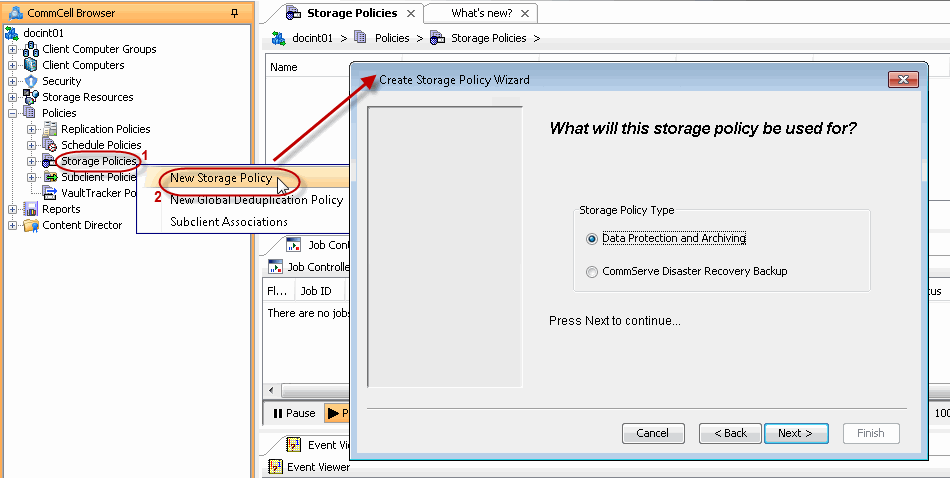
- Click Create Storage Policy.
- Follow the prompts displayed in the Storage Policy Wizard. The required
options are mentioned below:
- Select the Storage Policy type as
Data Protection and Archiving and click Next.
- Enter the name in the Storage Policy Name box and click
Next.
- From the Library list, click the name of a disk library
to which the primary copy should be associated and then click Next.
- Ensure that you select a library attached to a
MediaAgent operating in the current release.
- From the MediaAgent list, click the name of a MediaAgent
that will be used to create the primary copy and then click Next.
- For the device streams and the retention criteria information,
click Next to accept default values.
- Select Yes to enable deduplication for the primary copy.
- From the MediaAgent list, click the name of the
MediaAgent that will be used to store the Deduplication Store.
- Type the name of the folder in which the deduplication database must
be located in the Deduplication Store Location or click the Browse to select the folder and then click
Next.
- Review the details and click
Finish to create the Storage Policy.
|
 |

