The following procedure describes the steps involved in configuring the IIS
Server for Celerra Proxy Stub Subclient support.
Before You Begin
|
- The user ID must have administrator-level privileges on the computer
hosting the IIS Server in order to perform these tasks.
- Keep in mind that the computer hosting the IIS Server being
configured for Celerra Proxy Stub Subclient support can either be on the same
computer as the File Archiver for Windows Agent, or a physically
different computer.
|
|
|
| 1. |
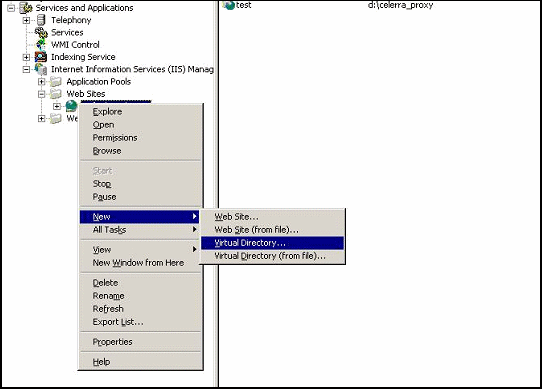
From Internet Information Services (IIS) Manager, create a new Virtual Directory. To do this, right-click Default Web Site, select New, then click Virtual Directory. |
 |
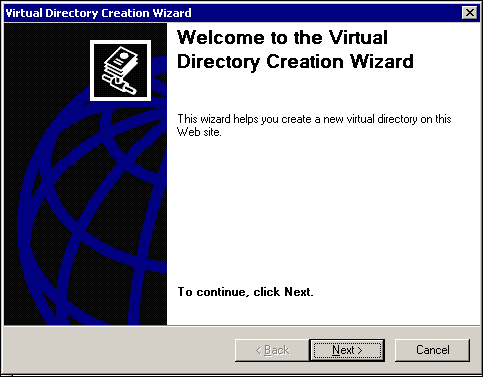
| 2. |
The Virtual Directory Creation Wizard will display. Click Next to continue. |
 |
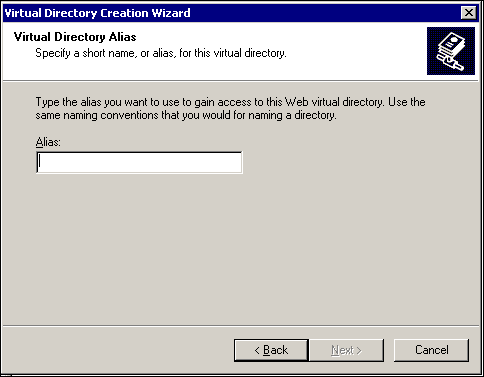
| 3. |
Type in the Alias name for the Virtual Directory
to be created, which can be any descriptive name (e.g., Celerra_proxy), then click
Next.
|
 |
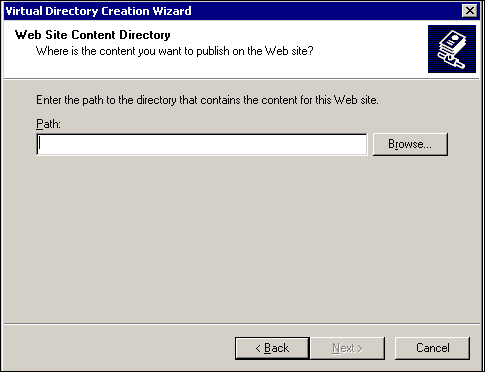
| 4. |
Type in or Browse the local Path to the
directory that will be used as a Virtual Directory, then click
Next.
|
 |
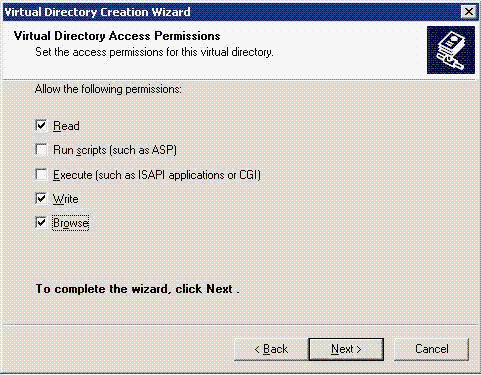
| 5. |
On the Virtual Directory Access Permissions
dialog, select the options for Read and Write and
Browse permissions,
then click Next. |
 |
| 6. |
Click Finish on the completion dialog. |
 |
|
|
| 7. |
Right-click the Virtual Directory that was just
created, then select Properties and click the Directory
Security tab. Click Edit in the Authentication and
access control portion of the Directory Security tab to
display the Authentication Methods dialog. |
 |
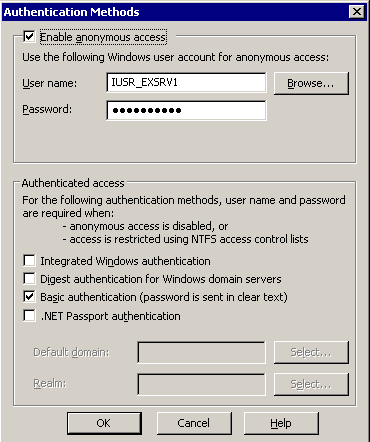
| 8. |
On the Authentication Methods dialog, select the
Basic authentication checkbox and click OK. |
 |
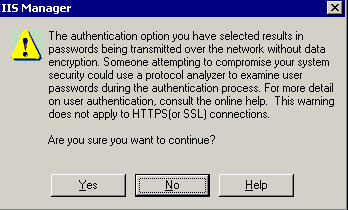
| 9. |
Click Yes to confirm. |
 |
| 10. |
On the Authentication Methods dialog, type in or
Select the name of the Default domain and click OK. |
 |
|
|
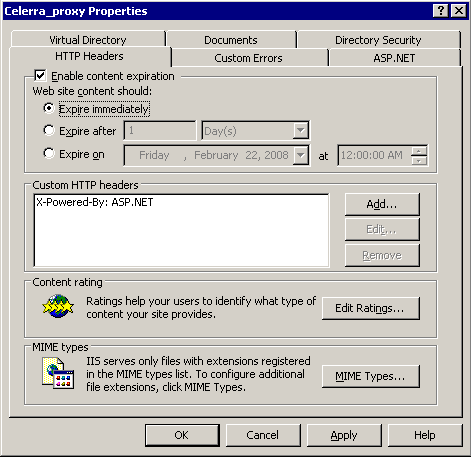
| 11. |
On the Properties dialog, click the Header
Security tab, then select the Enable content expiration
checkbox. This option will allow stub files to expire when not needed. Click Apply
then click OK. After configuring the IIS Server, follow the
procedure to
Configure the EMC Celerra File Server for Celerra Proxy Stub Subclient Support. |
 |