NAS NDMP Library and Drive Configuration - How To

Topics | Configure | How To | Related Topics


Add NDMP Drives

Edit NDMP Server List or Properties

Move a Library attached to a NAS File Server


Add NDMP Drives

You can add and configure NDMP drives after installing the MediaAgent software.

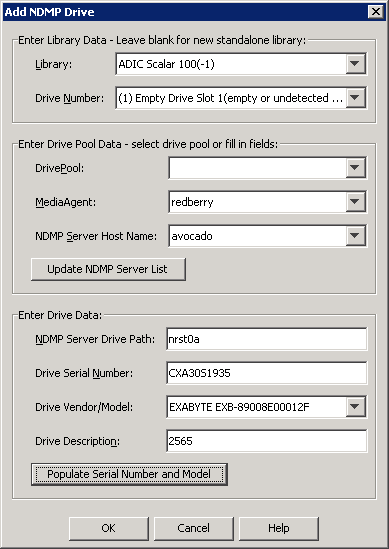
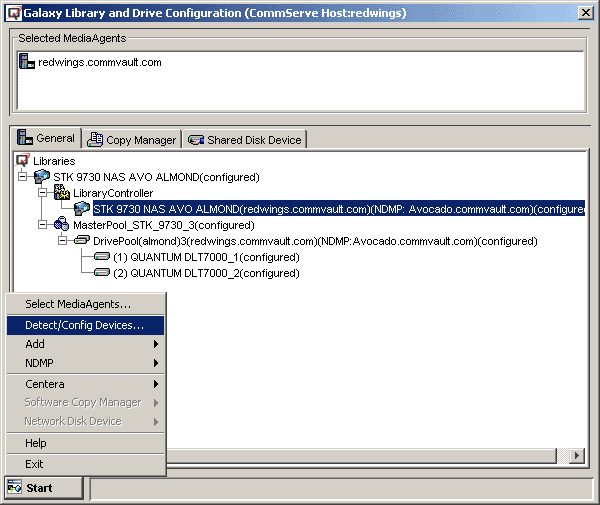
To add an NDMP drive

1. Display the Library and Drive Configuration window.
2. Click the Start button, point to NDMP, and then Add Drive... from the short-cut menu.
3. Enter the following information:

Library: The name of the library containing the drive.

Drive Number: The physical location of the drive.

DrivePool: If you are adding the first drive for the library, leave the field blank; if a drive pool has already been created for this NAS file server, select the name of the drive pool from the list.

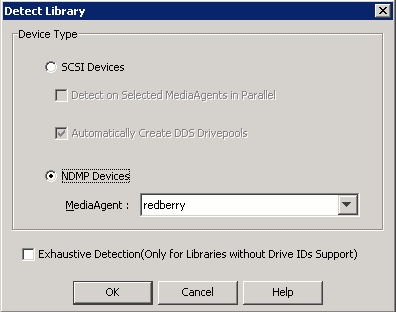
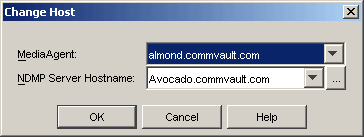
MediaAgent: The name of the MediaAgent that controls the library’s media changer.

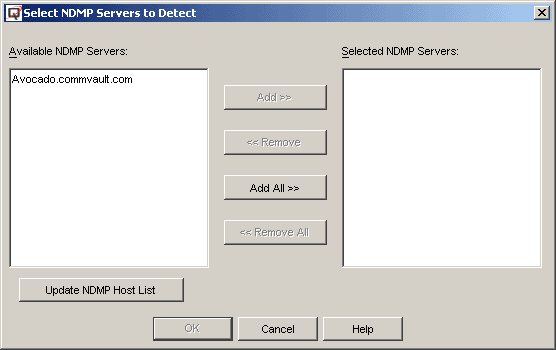
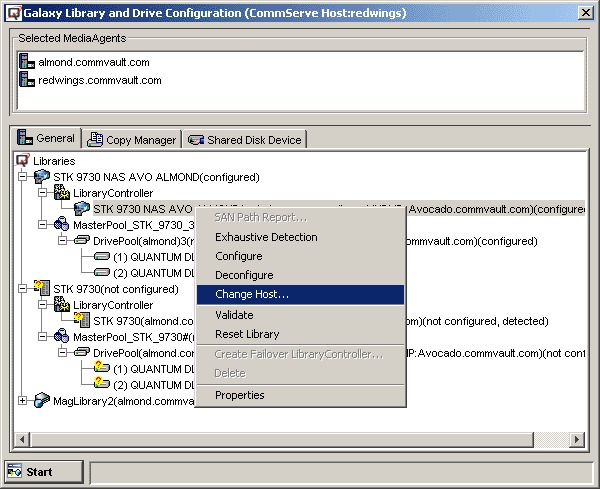
NDMP Server Host Name: Select the name of the NAS file server from the drop-down menu. Keep in mind that you must add the host to which the library is connected before selecting the host from this field.

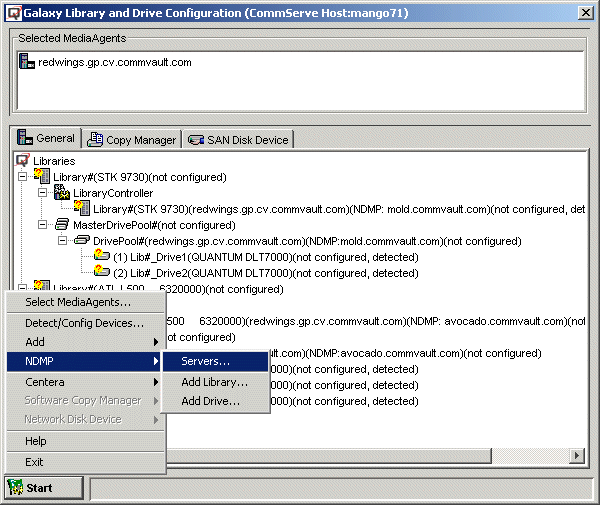
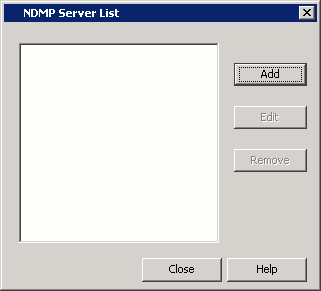
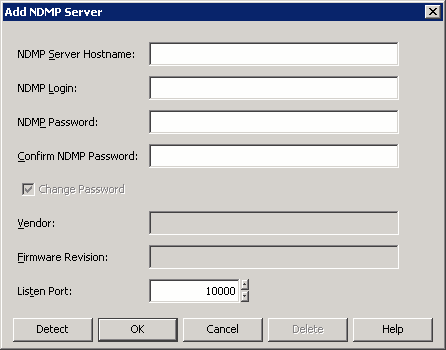
  • Click the Update NDMP Server List button to add or edit existing hosts through the NDMP Server List dialog box.

NDMP Server Drive Path: The access path through which the NAS file server communicates with the drive.

Click the Populate Serial Number and Model button. This automatically populates the Drive Serial Number and Drive Vendor/Model fields. If they do not display automatically, you have to add the information manually.

Drive Description: The description of the drive (e.g., NetApp filer ADIC drive 1) is optional.

Click OK.

Repeat this process (Steps 2 and 3) until all drives are added.

NOTES

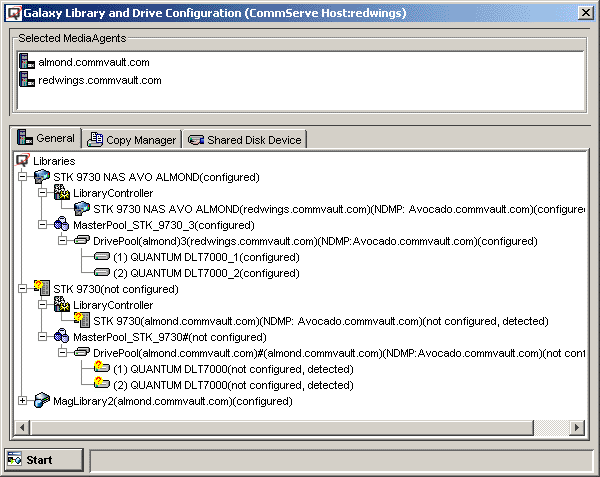
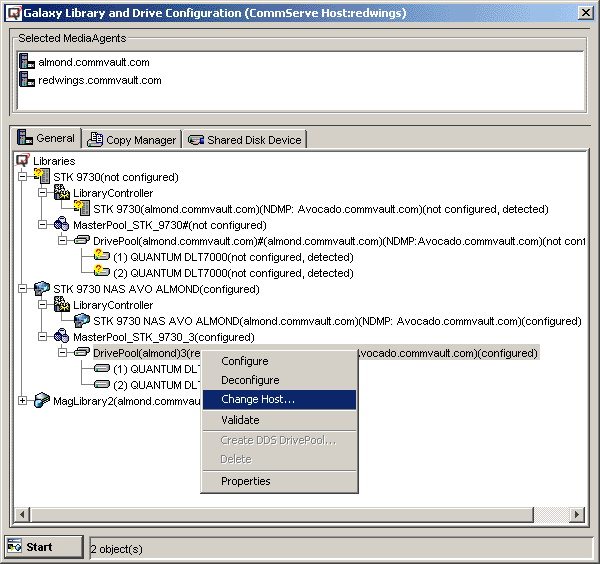
  • If this is the first drive that you are adding for the filer, a new drive pool is created within the library and the drive is added. Otherwise, the drive is added to the existing drive pool.
  • You can change the names of the drive pools and drives at this point, before they are configured. For the NDMP drives, consider renaming the drives and drive pools to distinguish NDMP from non-NDMP drives.
4. After all of the drives attached to the NAS File Server have been added, configure the library as described in Configure Libraries / Drives.


Edit NDMP Server List or Properties

When a drive pool is created or selected in the Add NDMP Drive dialog box, the system automatically supplies the MediaAgent and NDMP Server Host Name. In the event that a new server is configured, or the properties of an existing server have changed, you can edit an NDMP Server's properties, add a new Server to the list, or delete a Server from the list by following the applicable procedure below.

NOTES

Select from the following:

Add an NDMP Server to the NDMP Server List

1. Display the Library and Drive Configuration window.
2. Click the Start button, then click NDMP, and select Servers...
3. Select a server from the NDMP Server List and click the Add button.
4. Enter or edit the following information in the Add NDMP Server dialog and then click OK.

NDMP Server Hostname: The long name of the NAS file server.

NDMP Login: The user account through which the system will access the filer.

NDMP Password: The password for the NDMP Server Login account.

Confirm NDMP Password: The password for the NDMP Server Login account, for confirmation.

Click the Detect button. The system automatically populates the Vendor, Hardware OS Revision and Listen Port information.

NOTES

  • If the NAS file server version does not support detection, you will have to enter the Vendor and Firmware Revision information manually.
  • Note that this will create a NAS client for the NDMP server added. If there are no available licenses for this NAS client type, this action will fail.
  • Use the following accounts for NDMP Login:
    • For BlueArc, this account is user-defined.
    • For EMC Celerra, this account must be ndmp.
    • For Hitachi NAS, this account is user-defined.
    • For NetApp, this account must be root.
5. Repeat Steps 3 and 4 to add another server.

OR

Click Close to complete the process.


Edit the Properties of an NDMP Server

1. Display the Library and Drive Configuration window.
2. Click the Start button, then click NDMP, and select Servers...
3. The NDMP Server List dialog box displays the currently available NDMP Servers.

Click Edit.

4. Enter or edit the following information in the Add NDMP Server dialog and then click OK.

NDMP Server Hostname: The long name of the NAS file server.

NDMP Login: The user account through which the system will access the filer.

NDMP Password: The password for the NDMP Server Login account.

Confirm NDMP Password: The password for the NDMP Server Login account, for confirmation.

Click the Detect button. The system automatically populates the Vendor, Hardware OS Revision and Listen Port information.

NOTES

  • If the NAS file server version does not support detection, you will have to enter the Vendor and Firmware Revision information manually.
  • Note that this will create a NAS client for the NDMP server added. If there are no available licenses for this NAS client type, this action will fail.


Delete an NDMP Server from the NDMP Server List

Before You Begin

1. Display the Library and Drive Configuration window.
2. Click the Start button, then click NDMP, and select Servers...
3. The NDMP Server List dialog box displays the currently available NDMP Servers.

Click Remove.

4. Click Close to complete the process.


Move a Library attached to a NAS File Server

In some situations you may have the need to move a library that is attached to a NAS file server, due to re-configuration or other requirements. You can move the library from one MediaAgent to another, or, in a SAN environment, from one NAS file server to another (as long as both NAS file servers can see the library at the same time.)

The following procedures are not for moving libraries from one NAS file server to another in a non-SAN environment, which can be accomplished using Change Data Path.

To move a NAS-attached library to another MediaAgent

1. Display the Library and Drive Configuration window.
2. Click the Start button, and then select Detect/Configure Devices.
3. Select NDMP Devices and the MediaAgent to which the library is being moved, or the current MediaAgent if moving the library from one NAS file server to another in a SAN environment.
4. Select the NAS filer server to which the library is currently attached, or the NAS file server to which you are moving the library if moving the library from one NAS file server to another in a SAN environment.
5. Check that the library that you are moving has been properly detected.
6. Right-click the library that you are moving, and select Change Host...
7. Select the MediaAgent and NDMP filer server on which you want the library to be configured, then click OK.
8. Right-click any drive pool(s) to be moved, and select Change Host...
9. Select the MediaAgent and NDMP filer server on which you want the drive pool to be configured, then click OK.

Repeat Steps 9 and 10 for any additional drive pools to be moved.

The task is now complete.