Verify that the computer in which you wish to install the software satisfies
the minimum requirements specified in
System Requirements -
CommServe.
This procedure describes the steps involved in installing CommServe with
an existing upgraded CommServe database.
If you choose to install additional components simultaneously, refer
to the appropriate procedures for installation requirements and steps specific
to the component. Note that when you install multiple components, the sequence
of the install steps may vary.
Review the following Install Requirements before installing the software:
| 5. |
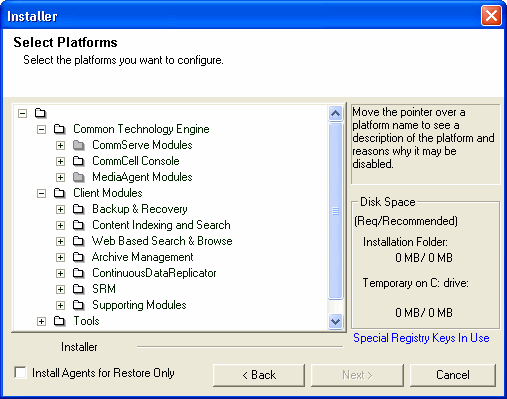
Select the component(s) to install. NOTES
- Your screen may look different from the example shown.
- Components that either have already been installed, or which cannot be installed, will be dimmed.
Hover over the component for additional details.
- If you wish to install the agent software for restore only, select
Install Agents for Restore Only checkbox. See
Installing Restore Only Agents for
more information.
- The Special Registry Keys In Use field will be highlighted when GalaxyInstallerFlags
registry key is enabled. Move the mouse pointer over this field to
see a list of registry keys that have been created in this computer.
Click Next to continue.
To install the CommServe software from the Common
Technology Engine folder expand the CommServe
Modules folder and select the following:
The CommCell Console and Java Runtime Environment will be selected by
default. CommCell Console and Java Runtime Environment
is located in the CommCell Console folder.
|
 |
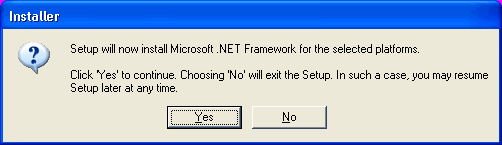
| 6. |
Click YES to install Microsoft .NET Framework
package. NOTES
- Follow the on-screen prompts for installing the Microsoft .NET
Framework package.
- If you are prompted to install the Service Pack for the
Microsoft .NET Framework, click Yes.
- This prompt is displayed only when Microsoft .NET Framework is
not installed.
- Once the Microsoft .NET Framework is installed, the software
automatically installs the Microsoft Visual J# 2.0 package.
|
 |
|
|
| 7. |
Click Yes to set up the required privileges for the local administrators group.
NOTES
- This option will only appear if the Windows user account used to install
the software does not have the required administrator rights (e.g., if the
operating system was newly installed).
- If you choose to click Yes, the install program will automatically assign the
required rights to your account. You may be prompted to log off and log
back on to continue the installation.
- If you choose to click No, the installation will be aborted.
- You will be prompted at the end of the
installation to decide if you want these privileges to be revoked.
|
 |
 |
The install program checks
your Windows user account for the following necessary operating system
rights:
- Right to increase quotas (this is referred to as adjust memory
quotas for a process on Windows Server 2003).
- Right to act as a part of the operating system.
- Right to replace a process level token.
|
|
|
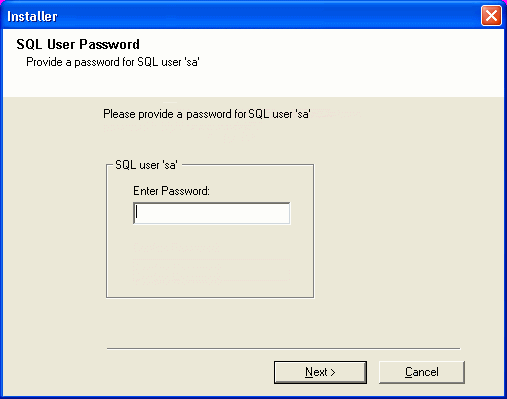
| 8. |
Specify the SQL Server System Administrator password.
NOTES
- This is the password for the administrator's account containing
the CommServe database.
Click Next to continue.
|
 |
| 9. |
Click Yes to set up a dedicated instance of Microsoft SQL
Server for the CommServe Server.
NOTES
- This prompt will only be displayed if SQL Server database
instance is not
installed on this computer.
- Clicking No will exit the install program.
|
 |
| 10. |
Enter the Installation Path for the Database Engine. NOTES
- This is the location where you want to setup the Microsoft SQL Server System
databases.
- If you plan to perform VSS enabled backups on the CommServe computer, it
is recommended that the CommServe database is not installed on the system
drive. VSS restores could cause system state restore issues.
Click Browse to change directories.
Click Next to continue.
The install program installs the database instance.
|
 |
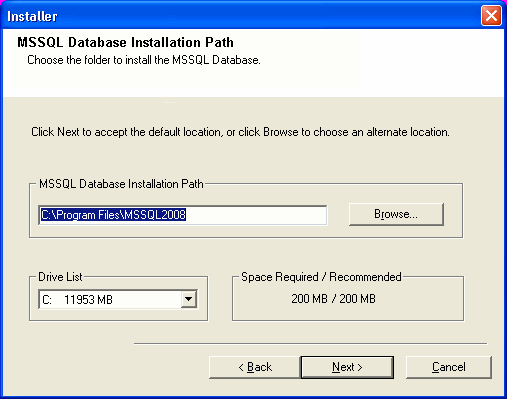
| 11. |
Enter the MSSQL Server Installation Path. NOTES
- This is the location where you want to install Microsoft SQL Server.
Click Browse to change directories.
Click Next to continue.
This step may take several minutes to complete.
|
 |
| 12. |
Click Yes to install the Java Runtime Environment (JRE) or click No
if you would like to use the JRE Version already available in your computer.
NOTES
- This prompt will be displayed only if the computer is running a JRE
version prior to the one supplied in this installation program or no JRE version is available at all.
See
System Requirements
- CommServe for more information on JRE versions.
|
 |
|
|
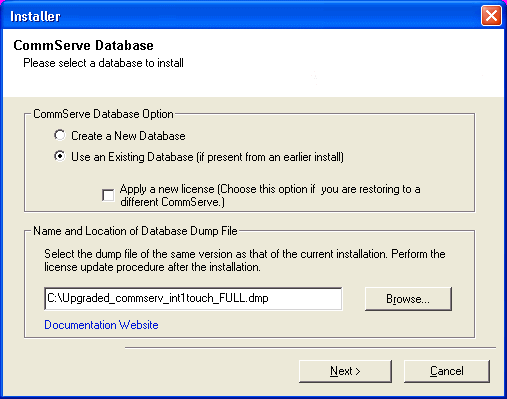
| 13. |
Select Use an Existing Database to use a CommServe
database from an earlier installation. Click Browse to locate the
CommServe database dump. |
 |
| 14. |
Enter the network or local path where Disaster Recovery Backup
files should be stored.
NOTES
- For cluster, specify a shared drive.
- If you selected Use Network Path, you must enter the Network
share username and the Network share password.
- The Network share username is the domain\username of the user that
has administrative rights to the Disaster Recovery
Backup destination path.
- The Network share password is the password of the network
share username.
Click Next to continue.
|
 |
|
|
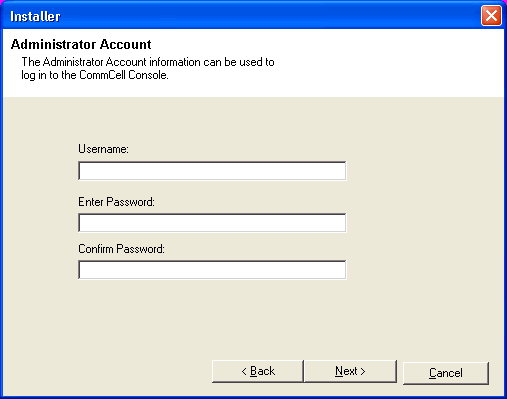
| 15. |
Enter the CommCell Username and CommCell Password. NOTES
- The CommCell username and password will be used by the Administrator user
to log on to the CommCell Console. This user is automatically created
during installation and, by default, has the necessary capabilities to
perform all functions. Additional CommCell
users with the same or less security rights can be created after the
installation of the software.
Click Next to continue.
|
 |
| 16. |
Enter and confirm the Media Password. NOTES
- This password is used to protect unauthorized data access from media
used by the system.
- If you choose to password protect your media, it is essential that you record
this password. In certain disaster recovery scenarios, it may be necessary to
read your backup data directly from the backup media. This password will be required to directly access the media.
Click Next to continue.
|
 |
|
|
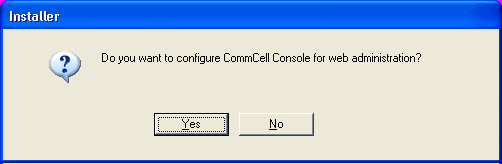
| 17. |
Click Yes to configure the CommCell Console for web administration, or
Click No to continue without configuring the CommCell Console for web
administration. NOTES
- The Internet Information Server (IIS) must be installed on this computer
in order to configure for web administration.
- Configuring this computer for web administration allows you to:
- Access the CommCell Console and Books Online from a remote computer
using a Web browser.
- View CommCell reports via a Web browser.
- Access Books Online by clicking the Help button (the icon with a ?)
in the CommCell Console.
|
 |
| 18. |
Specify the location where you want to install the software. NOTES
- Do not install the software to a mapped network drive.
- Do not use the following characters when specifying the destination path:
/ : * ? " < > | #
It is recommended that you use alphanumeric characters only.
- If you intend to install other components on this computer, the selected installation directory will be automatically used for that software as well.
- If a component is already installed in this computer, this screen may not be displayed.
The software will be automatically installed in the same location that was
previously specified.
Click Browse to change directories.
Click Next to continue.
|
 |
|
|
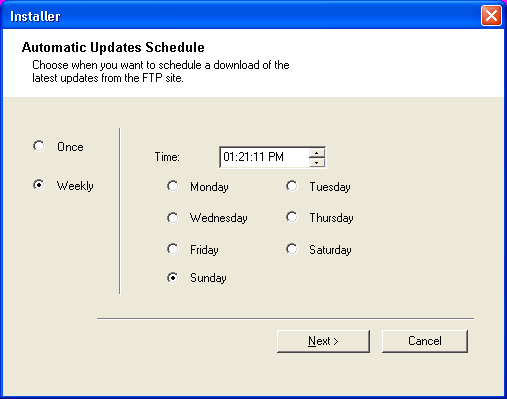
| 19. |
Schedule to download the latest software updates from the FTP site.
NOTES
- This screen will appear, when you select the Schedule FTP Download of
Automatic Updates option in the above step.
- Automatic Updates Schedule allows automatic downloading of software
updates on a single or weekly basis.
- If you do not select this option, you can schedule these updates later
from the CommCell Console.
Click Next to continue.
|
 |
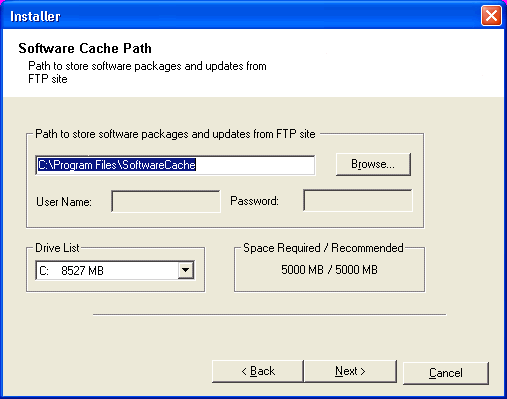
| 20. |
Specify the path where the update files from the FTP site
should be stored. NOTES
- This prompt will only be displayed if the Setup Software Cache option was enabled.
Click Next to continue.
|
 |
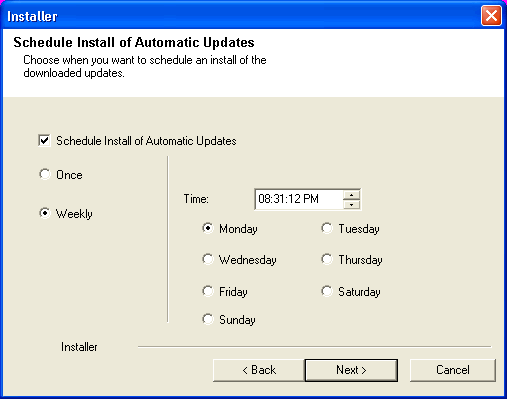
| 21. |
If necessary, select this option to schedule an automatic installation of software
updates.
NOTES
Click Next to continue.
|
 |
|
|
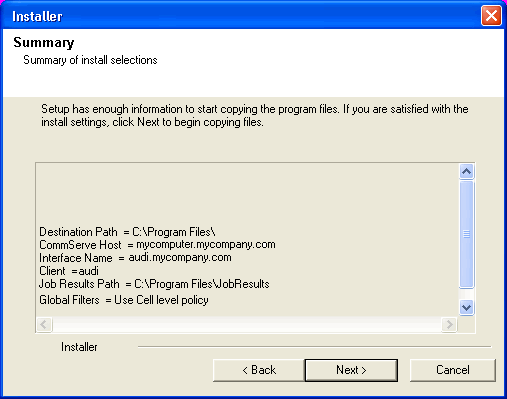
| 22. |
Verify the summary of selected options.
NOTES
- The Summary on your screen should
reflect the components you selected for install, and may look different from
the example shown.
Click Next to continue or
Back to change any of the options.
The install program now starts copying the software to the computer.
This step may take several minutes to complete.
|
 |
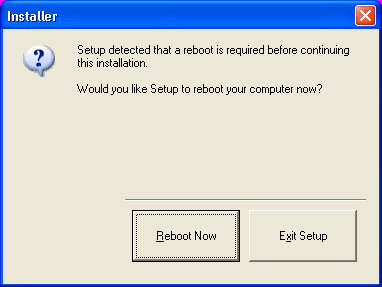
| 23. |
The System Reboot message may be displayed. If so, select one of the following:
- Reboot Now
If this option is displayed without the
Skip Reboot
option, the install program has found files required by the software
that are in use and need to be replaced. If Reboot Now is displayed
without the Skip Reboot option, reboot the computer at this point. The
install program will automatically continue after the reboot.
- Exit Setup
If you want to exit the install program, click
Exit
Setup.
|
 |
|
|
| 24. |
Click Yes to remove the privileges that were assigned earlier by the
install program. If you do not wish to remove them, click No.
NOTES
- This option will only be displayed if you were prompted to assign the
privileges earlier in the installation.
|
 |
|
|
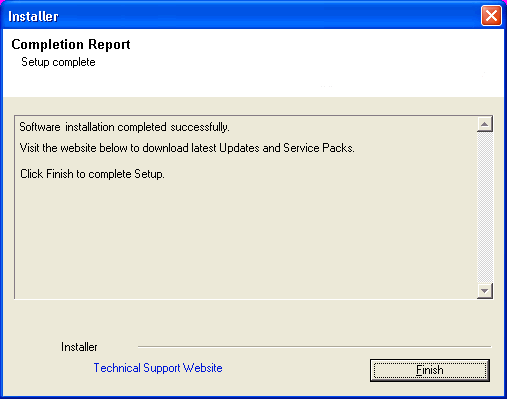
| 25. |
Setup displays the successfully installed components.
NOTES
- The Setup Complete message displayed on
your screen will reflect the components you installed, and may look different
from the example shown.
- If you install an Agent with the CommCell Console open, you need to
refresh the CommCell Console (F5) to see the new Agents.
- If Reboot Now button is displayed make sure to reboot the
computer before performing any other operations from the computer.
Click Finish to close the install program.
The installation is now complete.
|
 |
| 26. |
To complete the installation, follow the configuration
requirements in rebuilding the CommServe in a disaster recovery scenario. |
See
Configure the CommServe Computer for step-by-step instructions. |
General
Review Install Considerations
after installing the software.
|


