| 1. |
On the Production CommServe, perform a Disaster Recovery
Backup. Perform the following steps to start a Disaster Recovery Backup:
- From the CommCell Browser, right-click the CommServe, point
to All Tasks, and then click Disaster Recovery Backup.
- By default, the backup type is selected as Full.
- Click the Client Selection tab to backup up the log files
from clients with your CommCell.
- Select the client(s) from the available list of clients.
- Click the Job Initiation tab.
- Click Immediate.
- Click OK to run immediately.
Make sure that the associated disaster recovery
folder (SET_XXX folder) is saved
and available in a safe location. |
 |
| 2. |
On the Standby CommServe computer, install the CommServe
software and the Database Upgrade tool.
| |
- The DBUpgrade tool from resource
pack in previous release is now renamed as Database Upgrade
tool.
- Make sure that all the updates are installed on the standby CommServe.
|
|
See
Install the CommServe Software for step-by-step instructions on installing
CommServe software. See
Install the Database Upgrade
tool for step-by-step instructions.
|
| 3. |
On the Standby CommServe, restore the disaster recovery
backup using the CommServe Disaster Recovery Tool. Perform the following
steps to restore a disaster recovery backup:
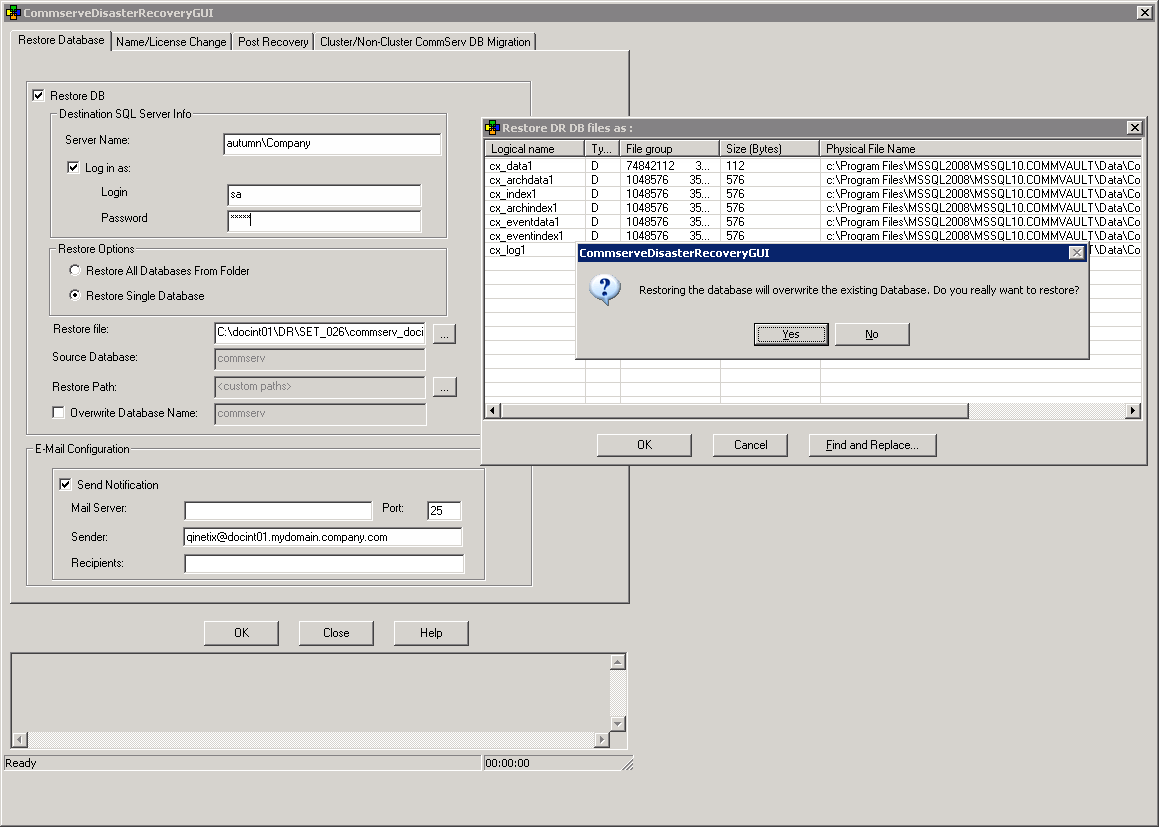
- From the Windows Explorer, navigate to the
<software installation path>\base
folder.
- Double-click CommserveDisasterRecoveryGUI.exe. This will
launch the CommServe Disaster Recovery Tool.
- Select the Restore DB check box.
- In the Destination SQL Server Info, select Log in as:
check box and provide the SQL Server user account credentials.
- Select one of the restore options:
- Click Restore All Databases From Folder to restore multiple
databases from the specified folder containing the dump files.
- Click Restore Single Database to restore a single dump
file containing the database.
- In the Restore file box, type or browse the name of the Disaster
Recovery Backup file or folder where the dump files are located.
- In Restore Path, click the Browse [...] button to
change the target location of the files from the Restore DR DB file
as: dialog box.
To change the target perform the following:
- In the Physical File Name column, click a row, type the
new location and then click Find and Replace.
- You will be prompted Do you want to replace all physical
file locations to c for the restore, click Yes.
- Click OK.
- Click Yes to overwrite the existing Database.
- In the Mail Server box, specify a valid mail server name to be used for e-mail
messages.
- In the Port box, specify the port number. The default
Mail Server port number is 25.
- In the Sender box, specify a valid e-mail address that displayed in the mail generated from the
software.
- In the Recipients box, specify a valid e-mail address of the recipient that will receive an
e-mail message indicating that the restore operation has completed.
- Click OK.
|
 |
| 4. |
On the Standby CommServe, from the Windows Explorer, navigate to the <software
installation path>\base folder. |
|
| 5. |
Double-click DBUpgradeUI.exe. This will launch the
DBUpgrade User Interface wizard. |
|
| 6. |
From the Product Type list, click CommServer.
Click Next.
|
 |
| 7. |
Standby CommServe host name is automatically populated
in the Host Name list. Click Next.
|
 |
| 8. |
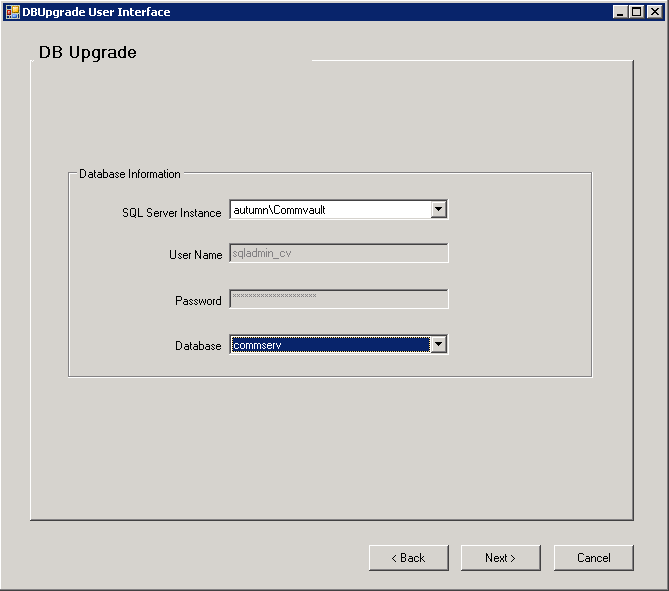
Standby SQL server database information is displayed in
the Database Information. Click Next.
|
 |
| 9. |
- In the Path to backup Database, click Browse [...] button
to select the directory for database backup.
- In the DBUpgrade Log Location, click Browse [...] button
to select the directory for logs.
- Click Next.
|
 |
| 10. |
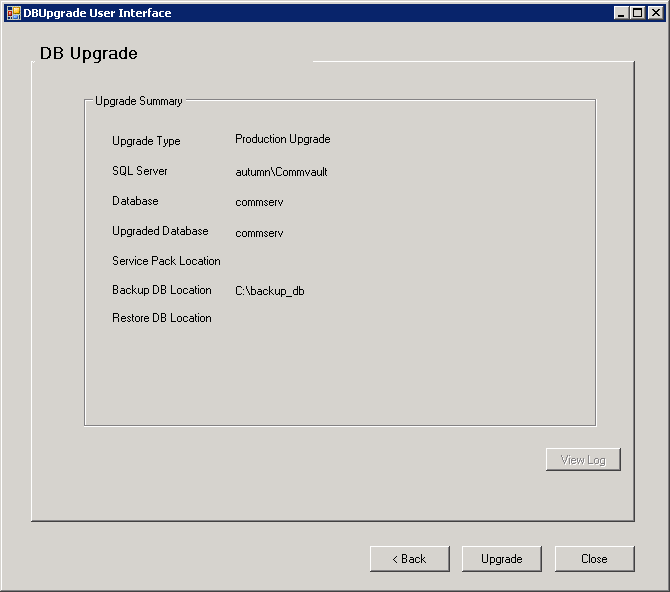
Click Upgrade. |
 |
| 11. |
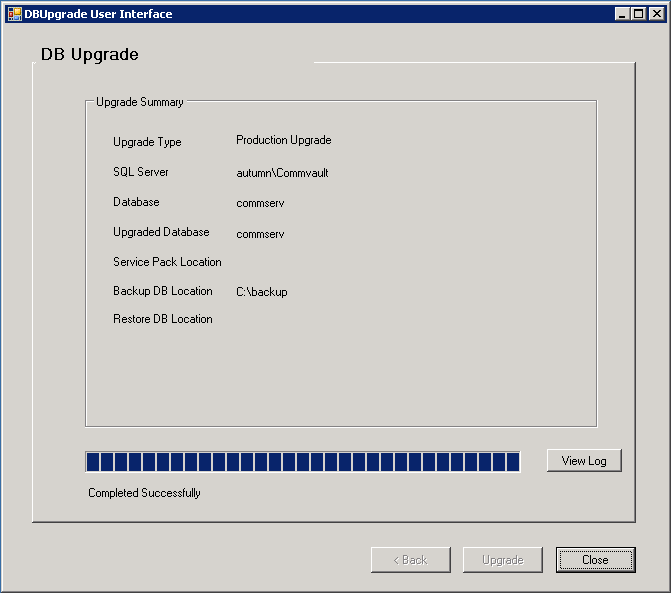
Upgrade is Successful. Click Close.
|
 |
| 12. |
Start all services on the Standby CommServe. |
To start services:
- Click the Start button on the Windows task bar and then click
All Programs.
- Navigate to bull | Calypso
and click Service Control Manager.
- Select All Services in Services.
- Click Start to start all services.
|
| 13. |
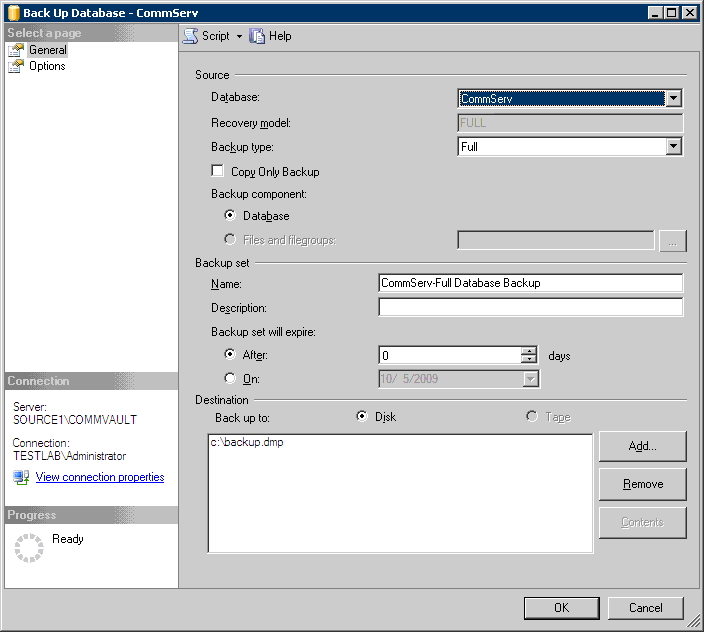
On the Standby CommServe, use the SQL Server
Management Studio, to backup the upgraded CommServ database and
create a
.dmp file. Perform the following steps to back up the
upgraded database to
a full database backup:
- Open Microsoft SQL Server Management Studio.
- Navigate to Server Instance | Database | CommServ.
- Right-click the CommServ database, select Tasks and
then click Backup. The Back Up Database dialog box appears.
- In the Database, verify the database name.
- In the Backup type, select Full.
- In the Backup Component, select Database option.
- Accept the default backup set name in the Name, or you can
enter a different name for the backup set.
- Specify when the Backup set will expire. By default After
is selected with value 0.
- In the Destination area select Disk option. To select
the path, click Add. The selected path will be displayed in the
Backup to list.
To remove backup destination, select the destination
path and click Remove.
- Click OK.
|
 |
| 14. |
On the Production CommServe, uninstall the old version
and re-install the latest version of the CommServe software. |
See
Uninstalling Components
for more information on uninstalling CommServe software. See
Install the CommServe Software
for more information on installing CommServe software.
|
| 15. |
On the Production CommServe computer, restore the CommServ
Database using the Commserve Disaster Recovery tool. Perform the
following steps to restore a disaster recovery backup:
- From the Windows Explorer, navigate to the
<software installation path>\base
folder.
- Double-click CommserveDisasterRecoveryGUI.exe. This will
launch the CommServe Disaster Recovery Tool.
- Select the Restore DB check box.
- In the Destination SQL Server Info, select Log in as:
check box and provide the SQL Server user account credentials.
- Select one of the restore options:
- Click Restore All Databases From Folder to restore multiple
databases from the specified folder containing the dump files.
- Click Restore Single Database to restore a single dump
file containing the database.
- In the Restore file box, type or browse the name of the Disaster
Recovery Backup file or folder where the dump files are located.
- In Restore Path, click the Browse [...] button to
change the target location of the files from the Restore DR DB file
as: dialog box. To change the restore path perform the following:
- In the Physical File Name column, click a row, type the
new location and then click Find and Replace.
- You will be prompted Do you want to replace all physical
file locations to c for the restore, click Yes.
- Click OK.
- Click Yes to overwrite the existing Database.
- In the Mail Server box, specify a valid mail server name to be used for e-mail
messages.
- In the Port box, specify the port number. The default
Mail Server port number is 25.
- In the Sender box, specify a valid e-mail address that displayed in the mail generated from the
software.
- In the Recipients box, specify a valid e-mail address of the recipient that will receive an
e-mail message indicating that the restore operation has completed.
- Click Name/License Change tab.
- Select CommServe Name Change check box.
- Select Activate License check box.
Click Browse
[...] button to specify the location
of the license XML file.
- Click OK.
|
 |
| 16. |
You will be prompted with Database restore operation
completed successfully dialog box. Click OK. Click Close.
|
 |
| 17. |
Start all services on the Production CommServe. |
To start services:
- Click the Start button on the Windows task bar and then click
All Programs.
- Navigate to bull | Calypso
and click Service Control Manager.
- Select All Services in Services.
- Click Start to start all services.
|
 This
procedure is used to upgrade the CommServe database on a separate computer,
to ensure that the Production CommServe does not get disrupted during the
process of upgrade.


