| 1. |
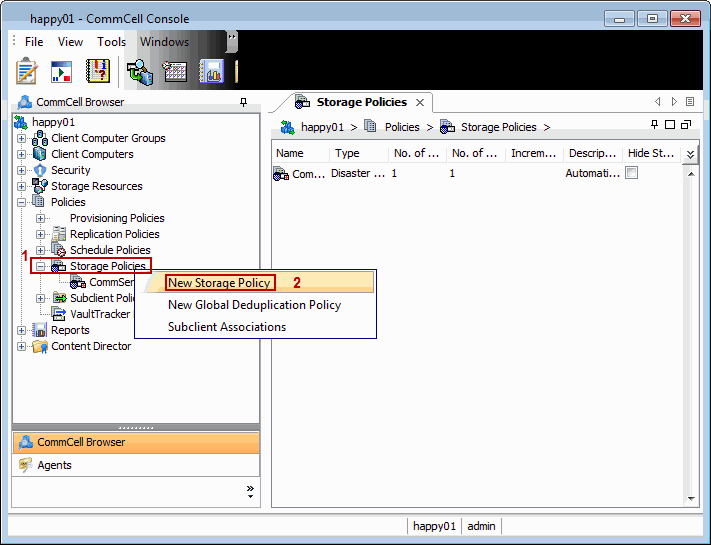
- From the CommCell Browser, navigate to Policies.
- Right-click the Storage Policies node and click New
Storage Policy.
|
 |
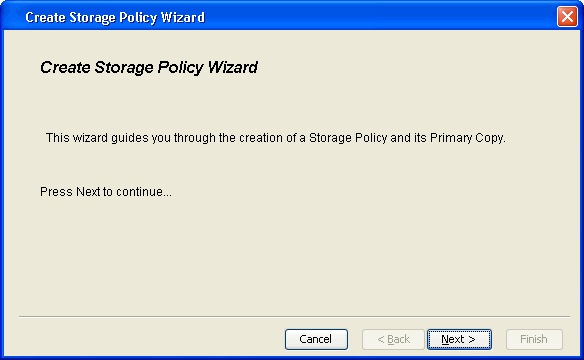
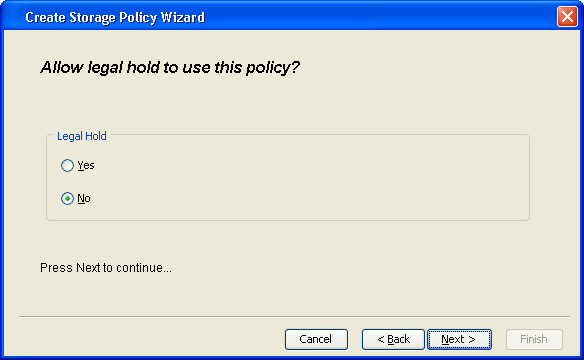
| 2. |
Click Next. |
 |
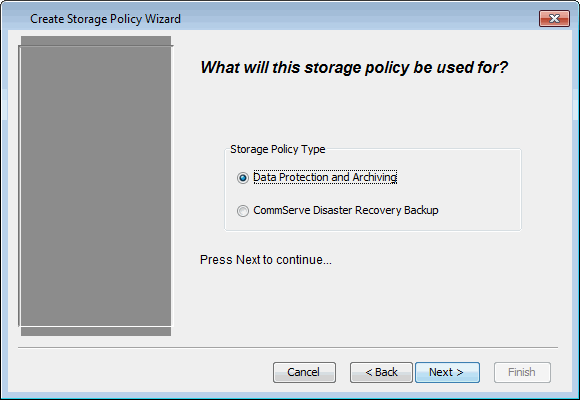
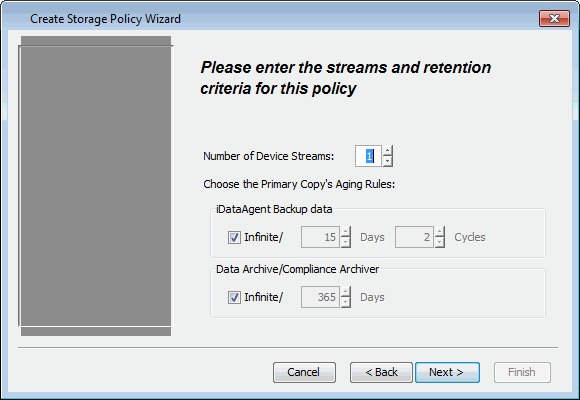
| 3. |
Click Next. |
 |
| 4. |
Click Next. |
 |
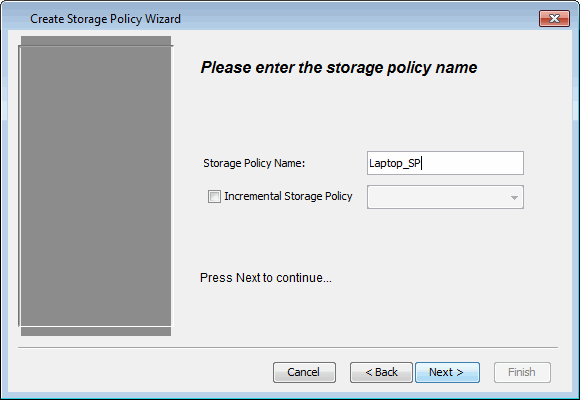
| 5. |
- Specify the name of the Storage Policy in the Storage
Policy Name box.
- Click Next.
|
 |
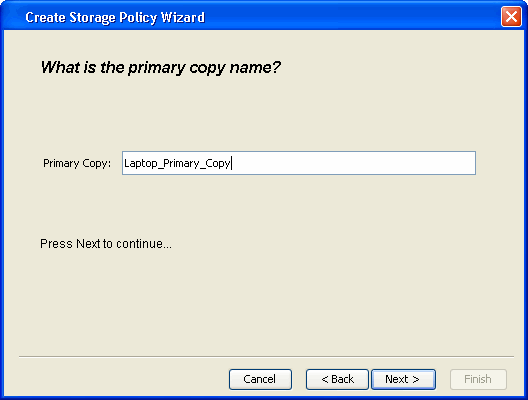
| 6. |
- Specify the name of the Primary Copy in the Primary
Copy box.
- Click Next.
|
 |
| 7. |
- In the Library list, select the default library to which
the Primary Copy should be associated.
- Click Next.
|
 |
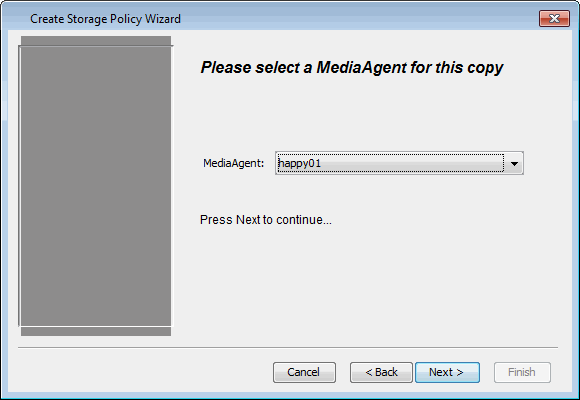
| 8. |
- In the MediaAgent list, select a MediaAgent.
- Click Next.
|
 |
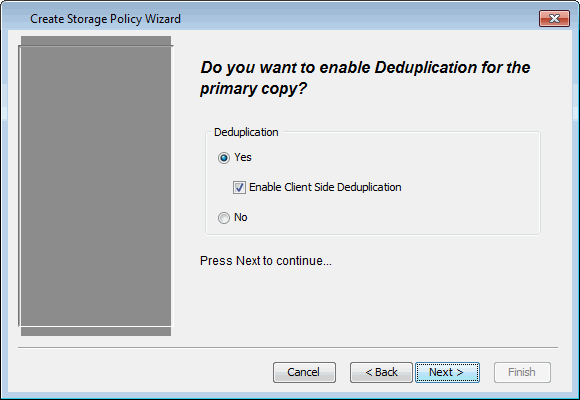
| 9. |
Click Next. |
 |
| 10. |
Click Next.
| |
Make Sure that the Enable Client Side Deduplication
check box
is selected. |
|
 |
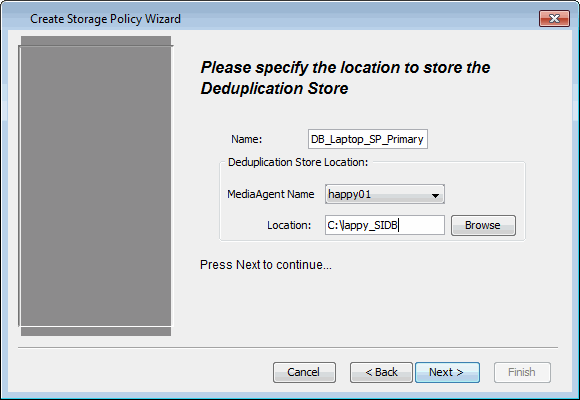
| 11. |
- Verify Name and MediaAgent Name.
- Click
Browse to specify location for Deduplication Store.
- Click Next.
|
 |
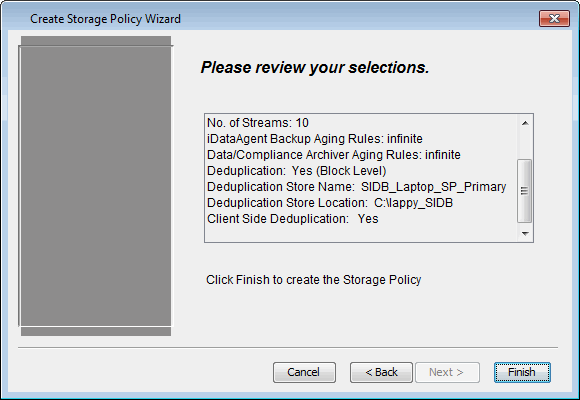
| 12. |
Review the details and click Finish to create the
Storage Policy. |
 |
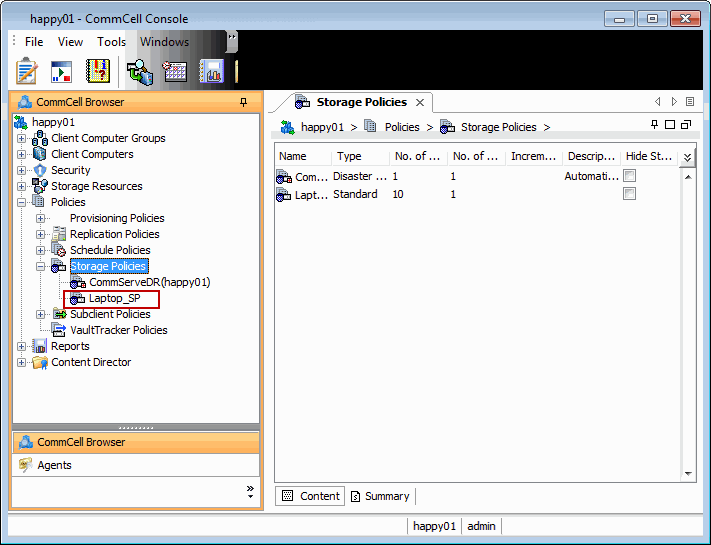
| 12a. |
You can view the storage policy in the Storage Policies
node. |
 |
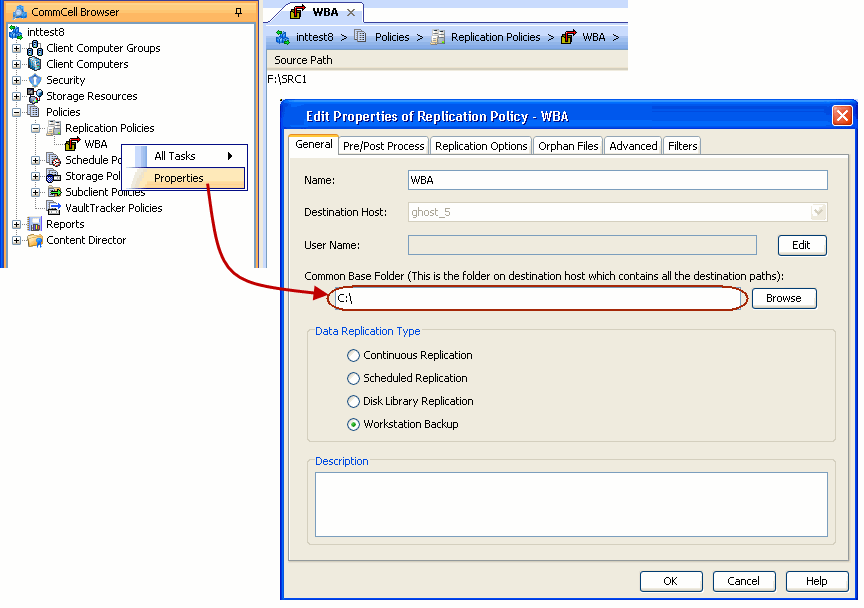
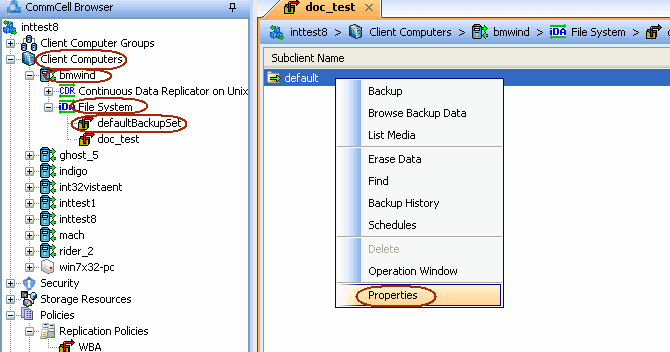
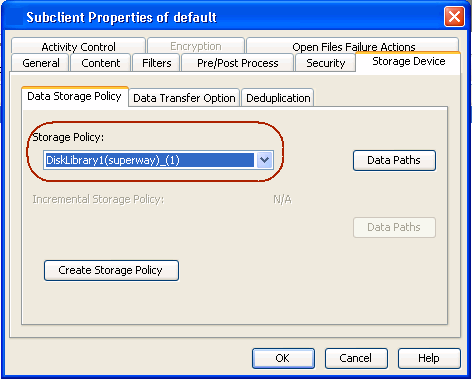
The Common Base Folder on the destination computer contains the data from all
the source clients. Follow the steps given below to configure a subclient to
backup up the common base folder:
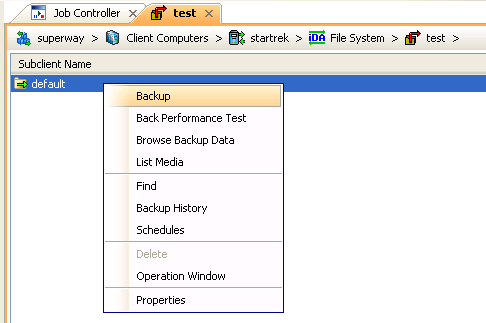
Follow the steps given below to perform a backup of the subclient configured
for the the common base folder:
The following section describes the steps to create a custom install package.
The custom install package is used to install the backup client on a laptop.
| 1. |
Run Setup.exe from the Software Installation
Disc. |
| 2. |
Select the required language. Click Next.
|

|
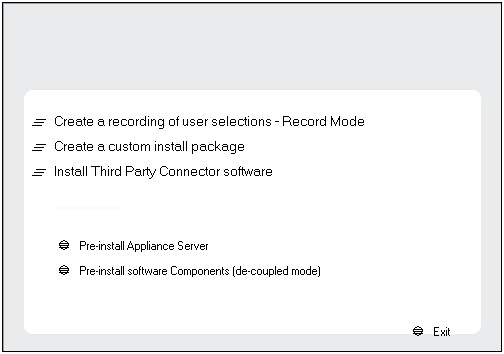
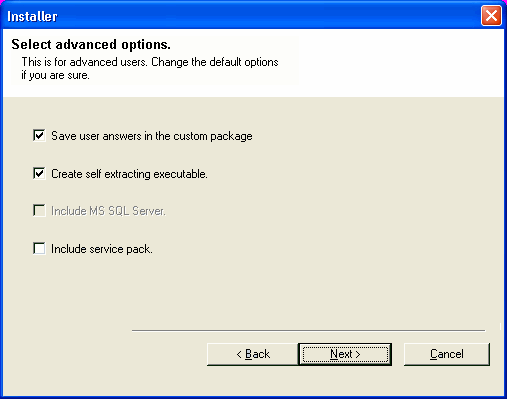
| 3. |
Click Advanced options. |

|
| 4. |
Click Create a custom install package. |
|
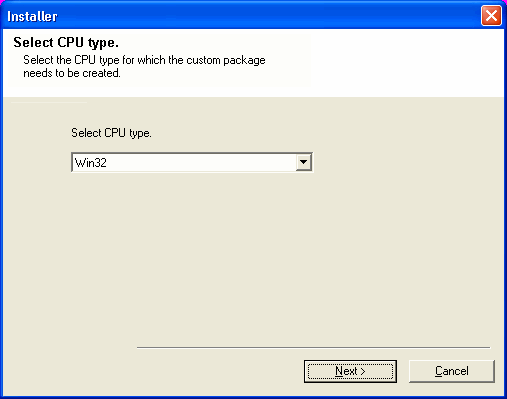
| 5. |
Select the CPU type corresponding to the binaries
that you wish to create the custom package. Click Next.
NOTES
- Select Win32 for a 32-bit package and WinX64 for a 64 bit package.
|
|
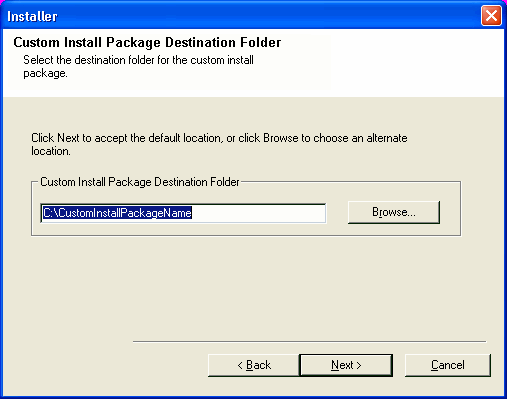
| 6. |
Verify the default location for creating the custom package.
Click Browse to change the default location.
Click Next.
NOTES
|
 |
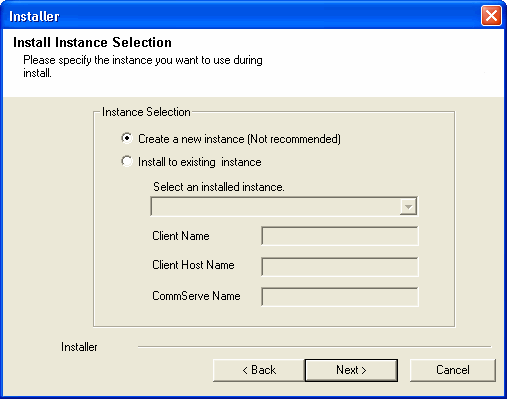
| 7. |
Select Create a new instance option, to install the
Agents on separate instance. Click Next. |
 |
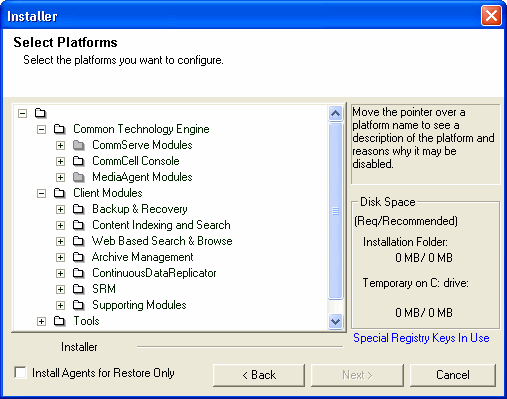
| 8. |
Expand Client Modules | Backup & Recovery
| File System and select Windows File System
iDataAgent. Click Next.
|
 |
| 9. |
Select Include service pack box. Click Next. |
 |
| 10. |
Select the Configure Firewall Services option.
Select CommServe is reachable only through a proxy option and click
Next.
|
 |
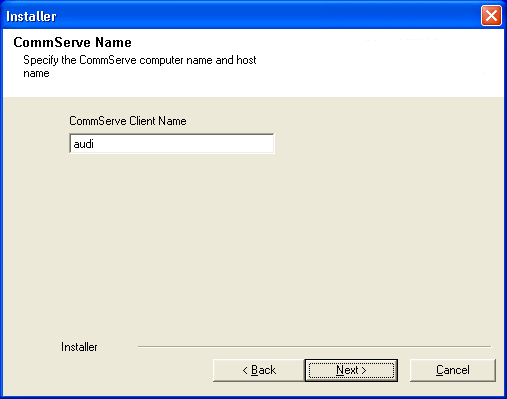
| 11. |
Enter the name of the computer in CommServe client name
field. Click Next.
|
 |
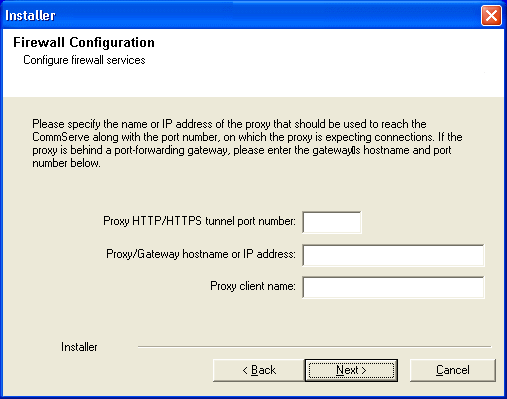
| 12. |
Provide the following information:
- In the Proxy HTTP/HTTPS tunnel port number field, provide
the tunnel port on which the proxy is expecting connections to the CommServe.
If the proxy is behind a port-forwarding gateway, then provide the port
number of the port-forwarding gateway to reach the CommServe.
- In the Proxy hostname or IP address field, specify the hostname
of the proxy through which the CommServe can be reached. If the proxy
is behind a port-forwarding gateway, then provide the host name or the
IP address of the port-forwarding gateway.
- In the Proxy client name field, specify the client name of
Calypso proxy.
Click Next.
|
 |
| 13. |
Click Next. |
 |
| 14. |
Specify the port numbers to be used by the Bull Calypso
Communications Service (CVD) and Bull Calypso
Client Event Manager (EvMgrc)
Services. Click
Next to continue.
NOTES:
- Valid range for the port number is between 1024 and 65000.
- Ensure that the port numbers specified here are within the valid
range and are not used by any other services.
|
 |
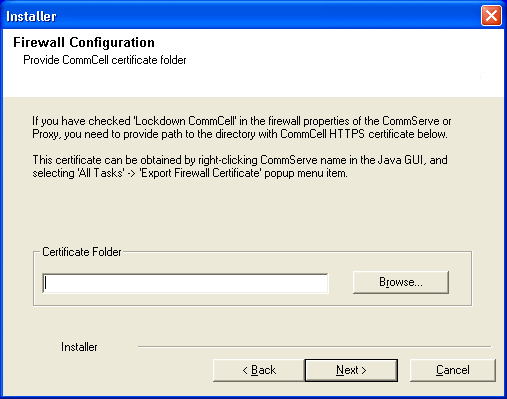
| 15. |
If the CommCell is in the Lockdown mode, specify the path
to the folder in which the CommCell HTTPS certificates are available.
NOTES:
Click Next to continue installation.
|
 |
| 16. |
Click Browse to provide the location. Click
Next.
NOTES
|
 |
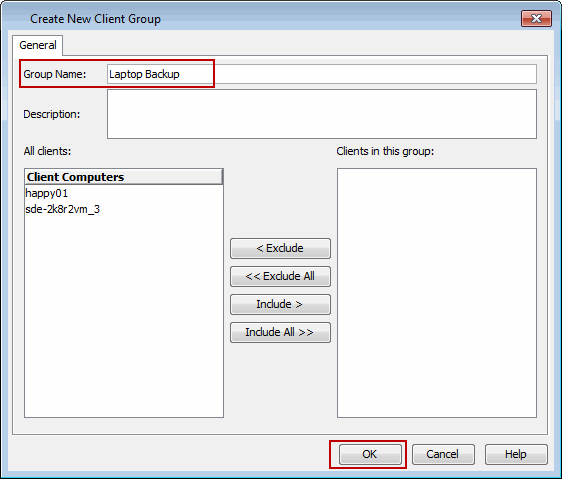
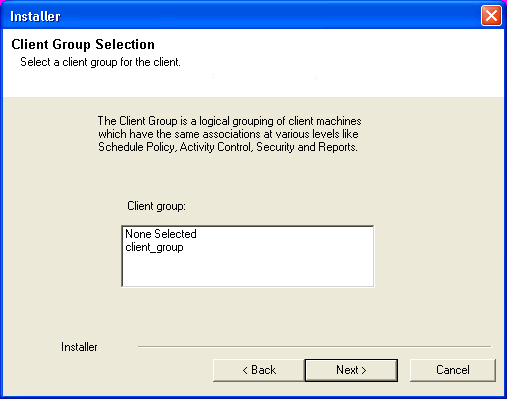
| 17. |
Select the Laptop Backup group.
Click Next.
|
 |
| 18. |
Click Next. |
 |
| 19. |
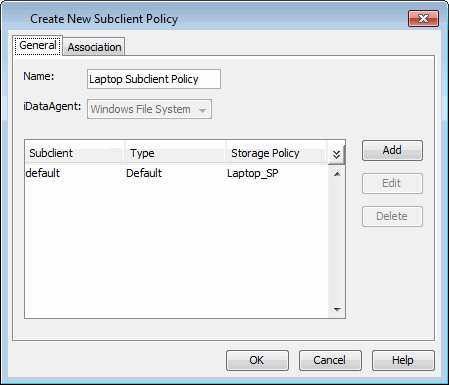
Select Configure for Laptop or Desktop Backup.
Select a Subclient policy created in
step 2 during Create Subclient Policy.
Click Next.
|
 |
| 20. |
Click Next. |
 |
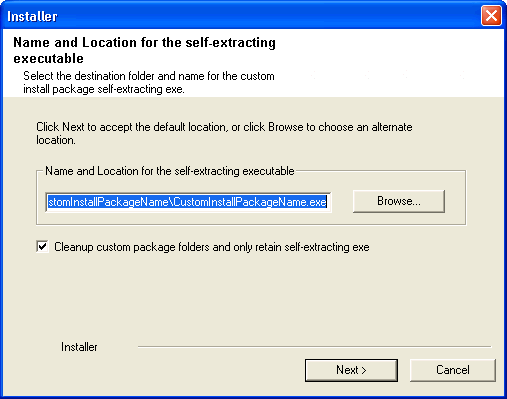
| 21. |
Verify the default location for Self Extracting executable
package. Click Browse to change the default location.
Click Next.
|
 |
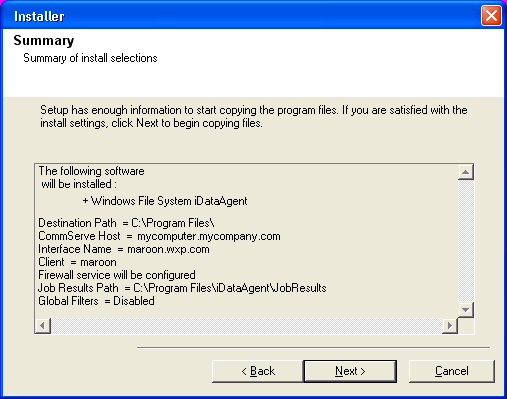
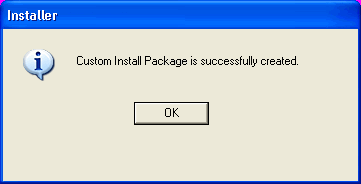
| 22. |
Custom Install Package is now created. Click
OK.
|
 |
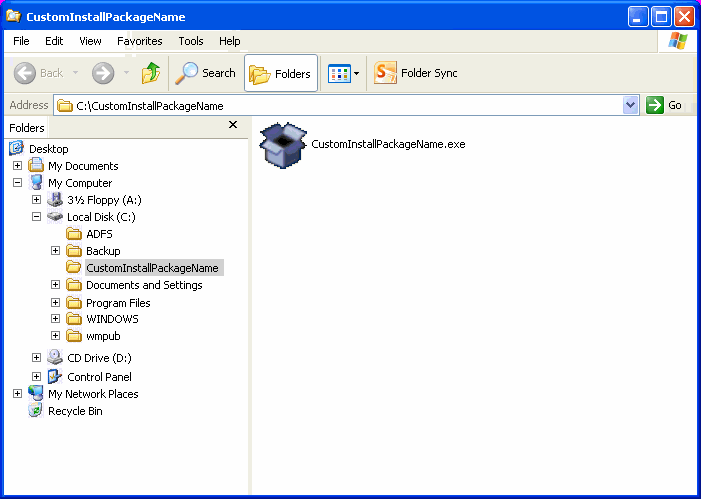
| 23. |
The CustomInstallPackageName.exe is created in the
folder which you provided in step 6.You can now
provide this package to Work Station Agent Users.
|
 |