In order for alerts to reach their intended recipients, alerts must first be
configured. The following steps need to be taken in order to configure alerts:
|
Procedure
|
|
Specify an E-Mail Server
|
| 1. |
From the CommCell Browser, right-click the CommCell icon, click
Control Panel, and then click E-Mail and IIS Configuration.
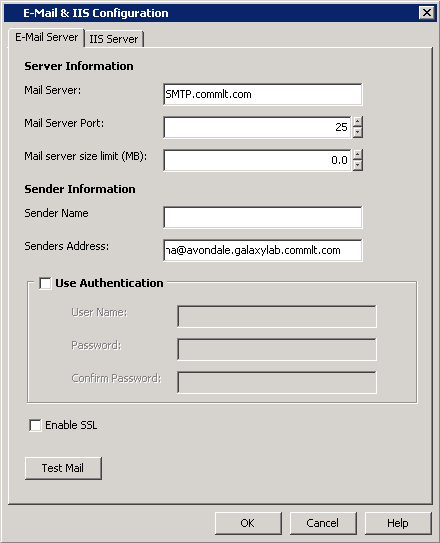
From the E-Mail and IIS Configuration dialog box, select the
E-Mail Server tab, and specify a valid
Mail Server to be used by alerts, scheduled reports and log files. The
Mail Server must support SMTP messages. Select the port number in the Mail Server Port
box. The default Mail Server port number is 25.
Specify the Mail Server Size Limit per e-mail.
Specify a valid e-mail address in the Senders
Address box.
Click OK.
|
 |
|
Select an Alert Category and
Alert Type
|
| 2. |
From the CommCell Browser, right-click the CommCell icon, click
Control Panel, and then click Alerts. From the Alerts window, click Add. In the
General
Information step of the
Alert Wizard dialog box:
Enter a name for the alert in the Display Name box.
Select a category and alert type. See
Available Alerts and Alert Descriptions for a complete list of available alerts.
Click Next.
NOTES
Depending on what options you select, your screen may look different than the
example shown.
|
 |
|
Associate Entities with the Alert
|
| 3. |
Associate entities with the alert (if applicable).
NOTES
- Alerts must be associated with an entity based on the alert
type. Once conditions with the entity meet a pre-selected criteria, an
alert will be generated based on those conditions. Entities differ
according to the type of alert selected. See
Available Alerts and Alert Descriptions for a list of entities available for each alert type.
- A user must have the correct associations and capabilities to
associate entities with alerts. See the capabilities column in
Available Alerts and Alert Descriptions for more information.
Click Next. NOTES
Depending on what options you select, your screen may look different than the
example shown.
|
 |
|
Select the Threshold and Notification Criteria
|
| 4. |
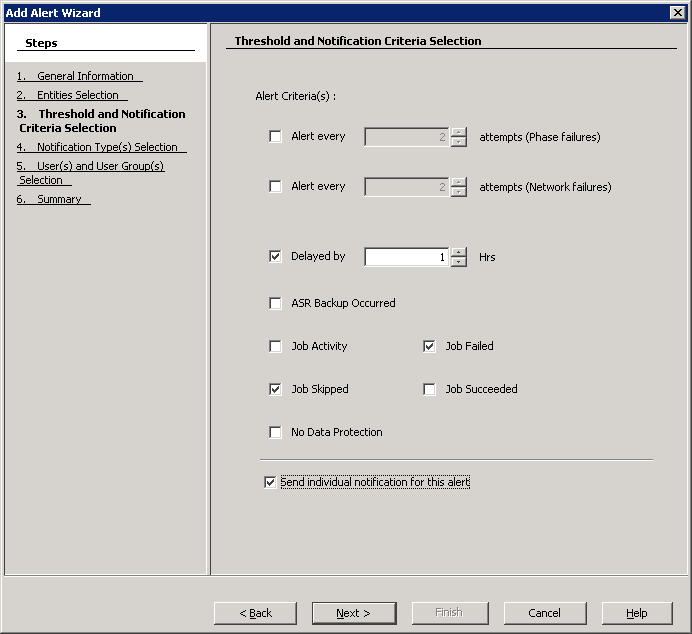
Select the conditions that will initiate the alert in the Alert Wizard's
Threshold and Notification Criteria Selection dialog box.
Then enable or disable the Send
Individual Notification for This Alert option. (When enabled, recipients
will only receive one notification for this alert.) Click Next.
NOTES
- The threshold and notification criteria determine when and at
which frequency an alert is generated.
- An alert is sent:
- Once conditions within the entity have met the selected criteria for the
alert. For example, if the criteria of Job Skipped
is selected for a Data Protection alert, then an alert will be sent if a
data protection operation is skipped
- Either:
- Repeat if the condition persists for certain length of time.
(Available for the Device Status and Library Management
alerts.)
- When the condition clears. (Available for the Device Status and Library
Management alerts only.)
- After a specified number of attempts during a phase or
network failure. (Available for the Auxiliary Copy and Data Protection
alerts.)
-
If the alert notification was configured to send an escalated alert. If this
option is available, select the time at which the escalated alert
notification should be sent, the frequency and whether notification should
be sent when the condition clears.
- If configuring a Job Management Data Protection alert, you can
select from the following additional notification options:
Notify only when jobs qualify for extended
retention
If selected, when a data protection job meets the thresholds of
the configured alert criteria, users will only be notified of those
jobs that are set for extended retention.
Notify only when job contains failed objects
If selected, when a data protection job meets the thresholds of the configured
alert criteria, users will only be notified of those jobs that contain failed
objects.
- Depending on what options you select, your screen may look
different than the example shown.
|
 |
|
Select the Locale
|
| 5. |
Select the language (locale) in which the alert is to be sent to its intended
recipient in the Alert Wizard's
Notification Type(s) Selection dialog box. NOTES
- The locale can be different than the locale of the CommCell
Console. A warning message will prompt you to confirm the change of
the locale.
- Depending on what options you select, your screen may look different than the
example shown.
|
 |
|
Select the Notification Type
|
| 6. |
Select the way in which the alert is to be sent to its intended
recipient. E-mail/pager messages can be customized by adding
tokens to the body of the e-mail. The following notification types are available: |
|
|
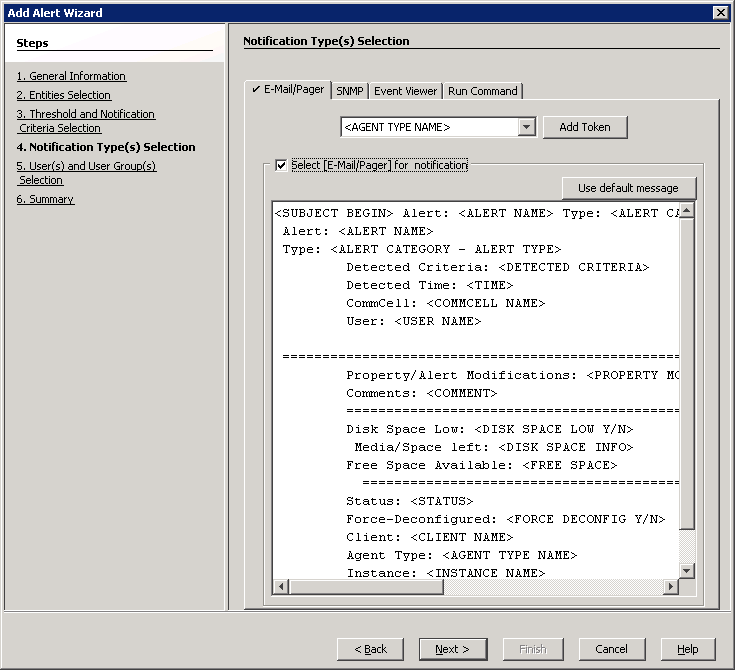
E-Mail/Pager
If you wish to send the alert by e-mail or pager:
Click the E-Mail/Pager tab.
Click the Select [E-Mail/Pager] for notification
checkbox.
If you wish to customize the e-mail or pager notification, click a
token from the list and then click Add Token.
Click Next.
NOTES
Depending on what options you select, your screen may look different than the
example shown.
|
 |
|
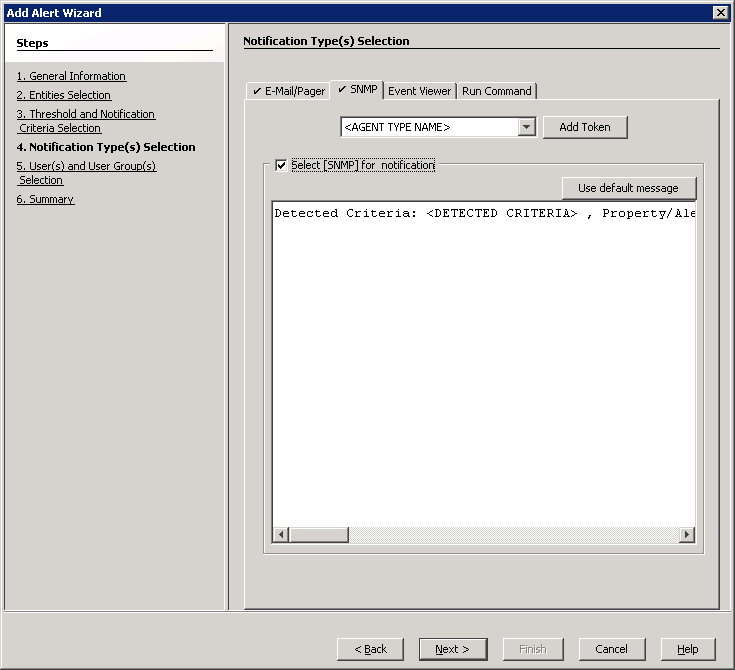
If you wish to send the alert by a SNMP trap:
Click the SNMP tab.
Click the Select [SNMP] for notification checkbox.
If you wish to customize the SNMP notification, click a token
from the list and then click Add Token.
Click Next.
NOTES
Depending on what options you select, your screen may look different than the
example shown.
|
 |
|
If you wish to send the alert to the System Event Viewer:
Click the Event Viewer tab.
Click the Select [Event Viewer] for notification
checkbox.
If you wish to customize the Event Viewer message, click a token
from the list and then click Add Token.
Click Next.
NOTES
Depending on what options you select, your screen may look different than the
example shown.
|
 |
|
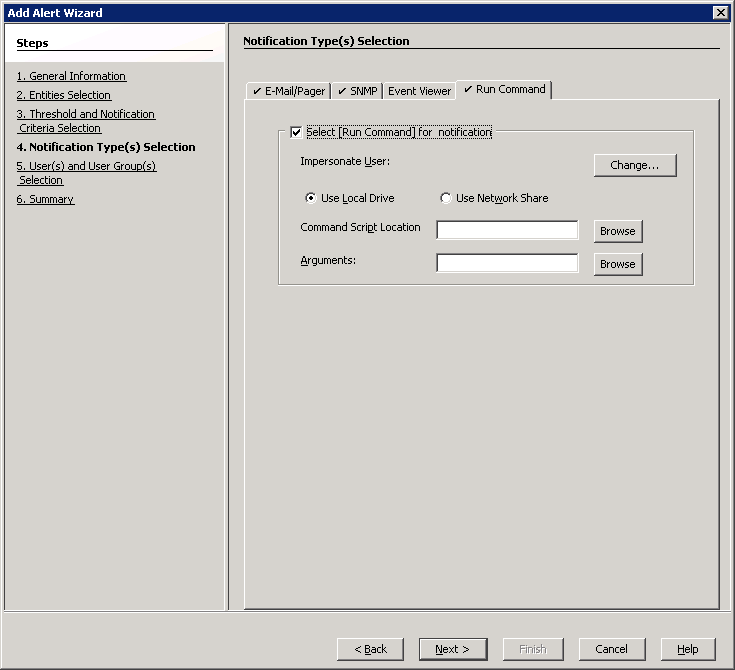
If you wish to send the alert by executing a command script:
Click the Run Command tab.
Click the Select [Run Command] for notification checkbox.
Click Use Local Drive or Use Network Share. Use the
Change button to change the account information to access the
network share.
Enter the location of the Command Processor executable file in the
Command Script Location box, or click Browse to browse to the
location, e.g., C:\WINDOWS\system32\cmd.exe.
Enter the following in the Arguments field prior to adding any
arguments: /C C:\Tmp\runCommandTest.bat.
Where the \C signifies that the Command
Processor must carry out the given command in the following string and
then
terminate. Note that C:\Tmp\runCommandTest.bat is the location of the batch file you wish to run when the alert
criteria threshold is met.
Add the arguments by clicking on the Browse button. Manually add
quotation marks around the tokens, e.g.,
"$<DETECTED CRITERIA>$"; this resolves any white space issues.
The Arguments filed will resemble the following format:
/C C:\Tmp\runCommandTest.bat "$<ALERT
NAME>$"
"$<DETECTED CRITERIA>$"
The following is the content of the batch file used in this
example:
REM runCommandTest.bat
@echo %date% %time% >> c:\tmp\alert1.log
echo %~1>>c:\tmp\alert1.log
echo %~2>>c:\tmp\alert1.log
echo %3>>c:\tmp\alert1.log
echo %4>>c:\tmp\alert1.log
echo %5>>c:\tmp\alert1.log
echo %6>>c:\tmp\alert1.log
echo %7>>c:\tmp\alert1.log
echo %8>>c:\tmp\alert1.log
echo %9>>c:\tmp\alert1.log
REM End Batch File
Note the '~' character between the '%' character and the parameter
position number above; this signifies the command processor to strip
off the quotation characters at the beginning and end of the
parameter. If this is not done, the quotation marks remain as part
of the parameter, which may be useful if the batch file is calling
another program or batch file.
Click Next.
NOTES
- The Run Command can be located on the CommServe or remote
machines, but is executed only on the CommServe machine.
- Depending on what options you select, your screen may look
different than the example shown.
|
 |
|
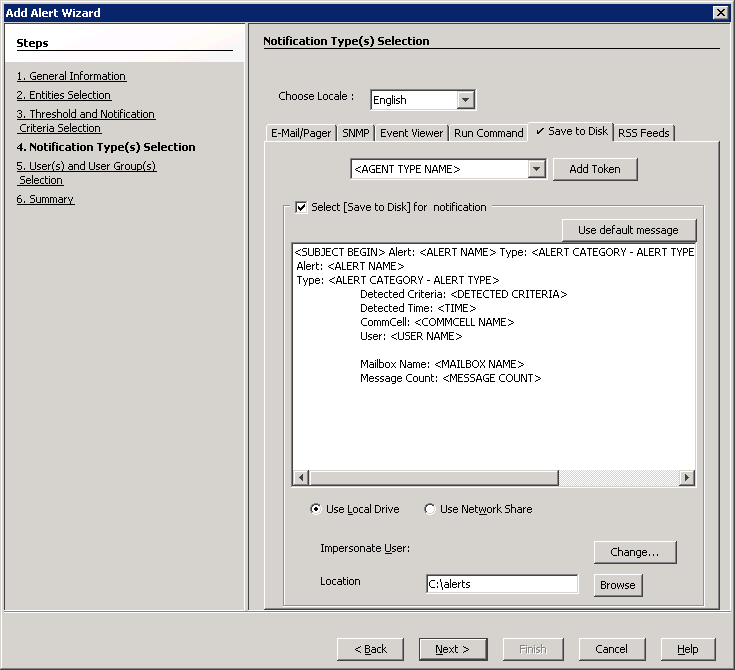
If you wish to send the alert to a local directory or network share:
Click the Save to Disk tab.
Click the Select [Save to Disk] for notification checkbox.
Click Use Local Drive or Use Network Share and specify
the Location. Use the
Change button to change the account information to access the
network share.
Click Next.
NOTES
Depending on what options you select, your screen may look
different than the example shown. |
 |
|
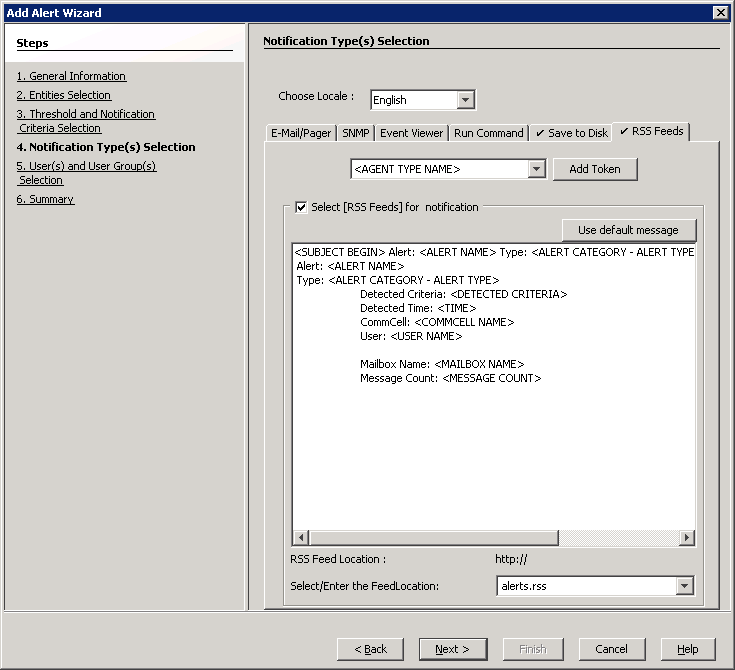
If you wish to send the alert to an RSS feed:
Click the Save to Disk tab.
Click the Select [RSS Feeds] for notification checkbox.
Select or Enter the Feed Location.
Click Next.
NOTES
Depending on what options you select, your screen may look
different than the example shown. |
 |
|
Select the CommCell Users and/or CommCell User Groups to Receive the Alert
|
| 7. |
Select the CommCell users and/or CommCell user groups that will receive the
alert; or enter the e-mail address(es) of the recipient(s) in the Email to
Recipient field; these recipients can reside within an external
domain. See User Administration and
Security for more information. Click Next. NOTES
-
An alert can be configured to send e-mail notifications to user groups
created from within the CommCell Console as well as external domain user groups.
However, individual external domain users will not receive the alert
notification e-mail if they have not previously logged on to the CommCell
Console. Users (from the user groups created from within the CommCell Console)
will receive the alert e-mail notification regardless of their login status.
- This step is not necessary for alerts sent as SNMP traps or to the Windows System Event
Viewer.
- Depending on what
options you select, your screen may look different than the example
shown.
|
 |
| 8. |
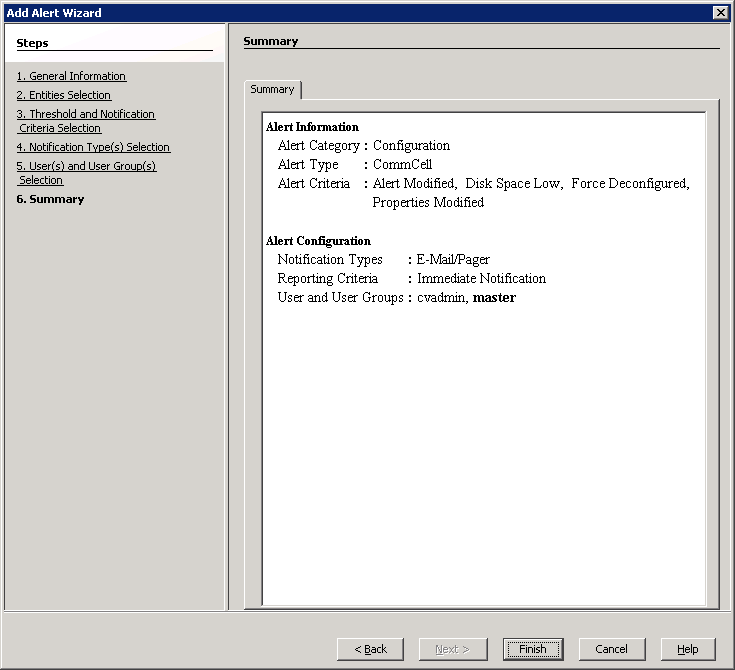
The Summary step displays a summary of the options that you have
selected for the alert. Click Finish.
The alert is now configured and displayed in the Alerts window.
NOTES
- If the e-mail server and sender's address are not configured correctly, the
alerts will not be sent to the intended e-mail and pager recipients. If you want
to test that the alert is configured correctly, right-click on the
alert in this window, and click Test. A test alert will be
sent to the configured recipients; this alert will not contain any
data.
- Depending on what options you select, your screen may look different
than the example shown.
|
 |
In order for alerts to reach their intended recipients, alerts must first be
configured. The following steps need to be taken in order to configure alerts:
|
Procedure
|
|
Getting Started |
| 1. |
You can create job-based alerts while configuring an immediate job,
scheduled job, configuring a schedule policy, or for a running job. While in the
process of these configurations you will encounter an opportunity to
create the alert, such as a tab or button. For a running job, right
click on the job in the Job Controller window to initiate the popup
menu. Click Add Alert.
NOTES
Depending on what options you select or what job you are creating, your screen may look different than the
example shown.
|
 |
|
Select an Alert Category and
Alert Type
|
| 2. |
From the Alerts window, click Add. In the
General
Information step of the
Alert Wizard dialog box:
Enter a name for the alert in the Display Name box.
Select a category and alert type. See
Available Alerts and Alert Descriptions for a complete list of available alerts.
Click Next.
NOTES
Depending on what options you select, your screen may look different than the
example shown.
|
 |
|
Associate Entities with the Alert
|
| 3. |
Associate entities with the alert (if applicable).
NOTES
- Alerts must be associated with an entity based on the alert
type. Once conditions with the entity meet a pre-selected criteria, an
alert will be generated based on those conditions. Entities differ
according to the type of alert selected. See
Available Alerts and Alert Descriptions for a list of entities available for each alert type.
- A user must have the correct associations and capabilities to
associate entities with alerts. See the capabilities column in
Available Alerts and Alert Descriptions for more information.
Click Next. NOTES
Depending on what options you select, your screen may look different than the
example shown.
|
 |
|
Select the Threshold and Notification Criteria
|
| 4. |
Select the conditions that will initiate the alert in the Alert Wizard's
Threshold and Notification Criteria Selection dialog box.
Then enable or disable the Send
Individual Notification for This Alert option. (When enabled, recipients
will only receive one notification for this alert.) Click Next.
NOTES
- The threshold and notification criteria determine when and at
which frequency an alert is generated.
- An alert is sent:
- Once conditions within the entity have met the selected criteria for the
alert. For example, if the criteria of Job Skipped
is selected for a Data Protection alert, then an alert will be sent if a
data protection operation is skipped
- Either:
- Repeat if the condition persists for certain length of time.
(Available for the Device Status and Library Management
alerts only.)
- When the condition clears. (Available for the Device Status and Library
Management alerts only.)
- After a specified number of attempts during a phase or
network failure. (Available for the Auxiliary Copy and Data Protection
alerts only.)
-
If the alert notification was configured to send an escalated alert. If this
option is available, select the time at which the escalated alert
notification should be sent, the frequency and whether notification should
be sent when the condition clears.
- If configuring a Job Management Data Protection alert, you can
select from the following additional notification options:
Notify only when jobs qualify for extended
retention
If selected, when a data protection job meets the thresholds of
the configured alert criteria, users will only be notified of those
jobs that are set for extended retention.
Notify only when job contains failed objects
If selected, when a data protection job meets the thresholds of the configured
alert criteria, users will only be notified of those jobs that contain failed
objects.
- Depending on what options you select, your screen may look different than the
example shown.
|
 |
|
Select the Locale
|
| 5. |
Select the language (locale) in which the alert is to be sent to its intended
recipient in the Alert Wizard's
Notification Type(s) Selection dialog box. NOTES
- The locale can be different than the locale of the CommCell
Console. A warning message will prompt you to confirm the change of
the locale.
- Depending on what options you select, your screen may look different than the
example shown.
|
 |
|
Select the Notification Type
|
| 6. |
Select the way in which the alert is to be sent to its intended
recipient. E-mail/pager messages can be customized by adding
tokens to the body of the e-mail. The following notification types are available: |
|
|
E-Mail/Pager If you wish to send the alert by e-mail or pager:
Click the E-Mail/Pager tab.
Click the Select [E-Mail/Pager] for notification
checkbox.
If you wish to customize the e-mail or pager notification, click a
token from the list and then click Add Token.
Click Next.
NOTES
Depending on what options you select, your screen may look different than the
example shown.
|
 |
| |
If you wish to send the alert by a SNMP trap:
Click the SNMP tab.
Click the Select [SNMP] for notification checkbox.
If you wish to customize the SNMP notification, click a token
from the list and then click Add Token.
Click Next.
NOTES
Depending on what options you select, your screen may look different than the
example shown.
|
 |
| |
If you wish to send the alert to the System Event Viewer:
Click the Event Viewer tab.
Click the Select [Event Viewer] for notification
checkbox.
If you wish to customize the Event Viewer message, click a token
from the list and then click Add Token.
Click Next.
NOTES
Depending on what options you select, your screen may look different than the
example shown.
|
 |
|
If you wish to send the alert by executing a command script:
Click the Run Command tab.
Click the Select [Run Command] for notification checkbox.
Click Use Local Drive or Use Network Share. Use the
Change button to change the account information to access the
network share.
Enter the location of the Command Processor executable file in the
Command Script Location box, or click Browse to browse to the
location, e.g., C:\WINDOWS\system32\cmd.exe.
Enter the following in the Arguments field prior to adding any
arguments: /C C:\Tmp\runCommandTest.bat.
Where the \C signifies that the Command
Processor must carry out the given command in the following string and
then
terminate. Note that C:\Tmp\runCommandTest.bat is the location of the batch file you wish to run when the alert
criteria threshold is met.
Add the arguments by clicking on the Browse button. Manually add
quotation marks around the tokens, e.g.,
"$<DETECTED CRITERIA>$"; this resolves any white space issues.
The Arguments filed will resemble the following format:
/C C:\Tmp\runCommandTest.bat "$<ALERT
NAME>$"
"$<DETECTED CRITERIA>$"
The following is the content of the batch file used in this
example:
REM runCommandTest.bat
@echo %date% %time% >> c:\tmp\alert1.log
echo %~1>>c:\tmp\alert1.log
echo %~2>>c:\tmp\alert1.log
echo %3>>c:\tmp\alert1.log
echo %4>>c:\tmp\alert1.log
echo %5>>c:\tmp\alert1.log
echo %6>>c:\tmp\alert1.log
echo %7>>c:\tmp\alert1.log
echo %8>>c:\tmp\alert1.log
echo %9>>c:\tmp\alert1.log
REM End Batch File
Note the '~' character between the '%' character and the parameter
position number above; this signifies the command processor to strip
off the quotation characters at the beginning and end of the
parameter. If this is not done, the quotation marks remain as part
of the parameter, which may be useful if the batch file is calling
another program or batch file.
Click Next.
NOTES
- The Run Command can be located on the CommServe or remote
machines, but is executed only on the CommServe machine.
- Depending on what options you select, your screen may look
different than the example shown.
|
 |
|
If you wish to send the alert to a local directory or network share:
Click the Save to Disk tab.
Click the Select [Save to Disk] for notification checkbox.
Click Use Local Drive or Use Network Share and specify
the Location. Use the
Change button to change the account information to access the
network share.
Click Next.
NOTES
Depending on what options you select, your screen may look
different than the example shown. |
 |
|
If you wish to send the alert to an RSS feed:
Click the Save to Disk tab.
Click the Select [RSS Feeds] for notification checkbox.
Select or Enter the Feed Location.
Click Next.
NOTES
Depending on what options you select, your screen may look
different than the example shown. |
 |
|
Select the CommCell Users and/or CommCell User Groups to Receive the Alert
|
| 7. |
Select the CommCell users and/or CommCell user groups that will receive the
alert; or enter the e-mail address(es) of the recipient(s) in the Email to
Recipient field; these recipients can reside within an external
domain. See User Administration and
Security for more information. Click Next. NOTES
-
An alert can be configured to send e-mail notifications to user groups
created from within the CommCell Console as well as external domain user groups.
However, individual external domain users will not receive the alert
notification e-mail if they have not previously logged on to the CommCell
Console. Users (from the user groups created from within the CommCell Console)
will receive the alert e-mail notification regardless of their login status.
- This step is not necessary for alerts sent as SNMP traps or to
the Windows System Event Viewer.
- Depending on what
options you select, your screen may look different than the example
shown.
|
 |
| 8. |
The Summary step displays a summary of the options that you have
selected for the alert. Click Finish.
The alert is now configured and displayed in the Alerts window.
NOTES
- If the e-mail server and sender's address are not configured correctly, the
alerts will not be sent to the intended e-mail and pager recipients. If you want
to test that the alert is configured correctly, right-click on the
alert in this window, and click Test. A test alert will be
sent to the configured recipients; this alert will not contain any
data.
- Depending on what options you select, your screen may look different
than the example shown.
|
 |
The alert is now deleted.
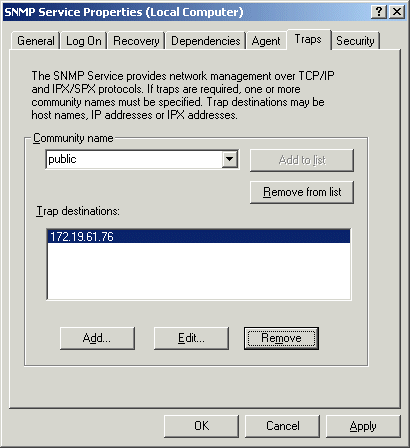
Once the CommServe SNMP Traps software is installed on the CommServe
computer, you can add additional computers to receive SNMP Traps.


