Topics | How To | Related Topics
Import Metadata from a Tape or Optical Media
Recovering Data Associated with Deleted Clients and Storage Policies
The following procedure describes the steps for importing metadata from a removable media.
Before You Begin |
||
The following procedure must be performed using the Windows Media Explorer. If the required media is available on a library attached to a Unix or NetWare computer, move the media to a library attached to a Windows computer with the Media Explorer software and then perform this operation. | ||
To import metadata from a tape or optical media |
||
1. | Open Media Explorer by running the following program: 
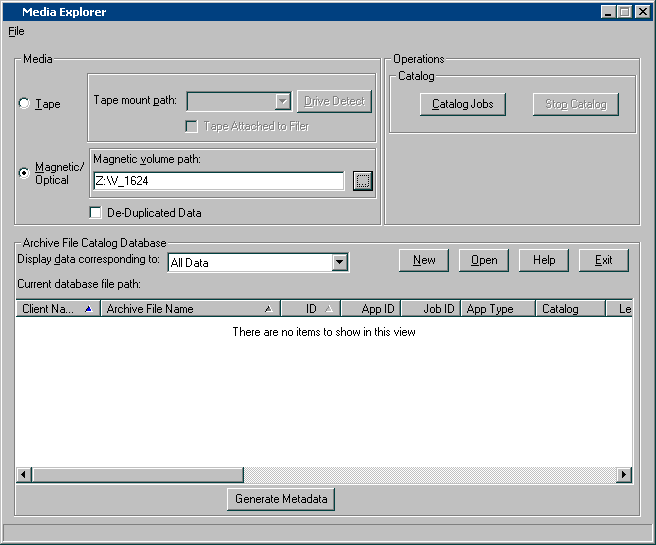
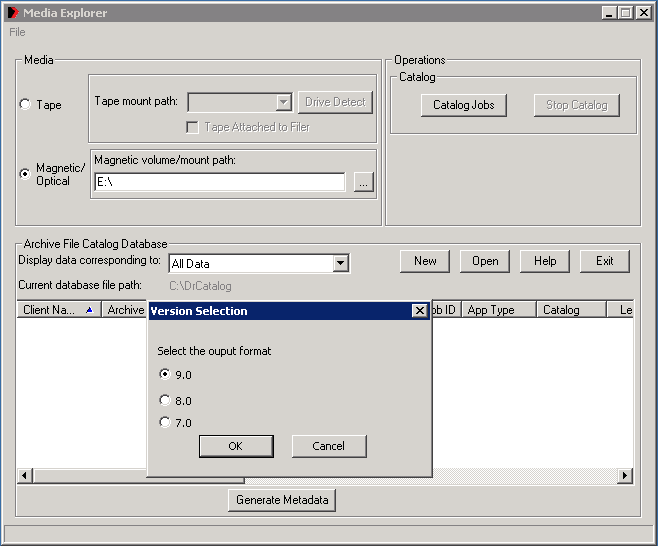
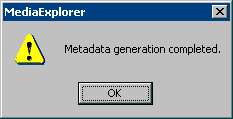
<Media Explorer install folder>\MediaExplorer.exe |
![]() |
2. | Catalog the appropriate media as described in Cataloging Media Procedure. | |
3. | Once the media is catalogued, you can export the information using the Generate Metadata option. Click Generate Metadata to generate metadata information from a backup media and use the metadata to merge the backup data back into the CommCell. Select the Version to which you want to generate the output and click OK. |
![]() |
4. | Select the location to generate the metadata and click OK. |
![]() |
5. | Click OK in the Media Explorer prompt which is displayed when the metadata is successfully generated. |
![]() |
6. | The metadata information can be located in the Metadata For Import folder within the specified location. |
![]() |
7. | If the computer in which the metadata is generated is different from the CommServe computer, copy the Metadata For Import folder to the CommServe computer. | |
8. | Locate the
CommCellInfo_DR_Tool_capture.CAB
and unzip its contents from the zip file.
This will create the CommCellInfo_DR_Tool_capture folder. |
![]() |
9. | Run the following command from the command
prompt: <software installation path>/Base/CommCellMigration -convert -<mediafilesdir> Where: <mediafilesdir> is the directory in which the source files (captured in Step 6) are located. convert is the option to create a SQL dump file (CommServ_Convert.dmp) in the current directory. This file can be used as an input to the merge command to merge the information in this database to the main database. |
|
10. | Merge the captured data to the main CommServe
using the following command from the command prompt: <software installation path>/Base/CommCellMigration -merge [ | -tapeImport] [-restorefile ] -path [-pathUser -pathPassword ] [-Consumelicense] [-setTapeReusable] Where: restorefile is the SQL dump file name (CommServ_Convert.dmp) path is the software installation path>/Base path pathUser, pathhPasword is the user name and password to login to the CommServe. This option is not necessary if you have already executed the qlogin command. For example, you can use the following command to import the data captured from media using Media Explorer from the same CommCell: CommCellMigration -merge -tapeImport -restorefile CommServ_Convert.dmp -path <software_install_folder>\Base |
The following procedure describes the steps involved in recovering data associated with the following entities:
This procedure can be performed when the following are available:
See License Administration for more details.
If you regularly run and have copies of the Data on Media and Aging Forecast report you can check them to see if the appropriate media is available.
When you start the Command Line Interface to capture data, use the name of the standby CommServe in the -commcell argument. |
This will bring back the entity in the CommServe database and the entity will now be visible in the CommCell Browser. (Press F5 to refresh the CommCell Browser if the entity is not displayed after a successful merge.)
As a precaution, mark media (tape and optical media) associated with the source CommCell as READ ONLY before performing a data recovery operation in the destination CommCell. |