NOTES
- Your screen may look different from the example shown.
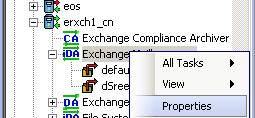

Table of contents |
Related Topics |
|
Assign a Filter Storage Policy Enable Erase Data in Storage Policy View Erased Data in a Log File |
The list of Agents that support erasing data. The most common procedures for erasing data. |
The Erase Data feature allows you to permanently erase any data that was archived. This is useful if you want to erase data so that it cannot be recovered again. For example, you may want to erase archived data for legal purposes or compliance regulations.
Keep in mind that the erase data operation only erases the archived data - the source data will remain on the local hard drive. Therefore, it is recommended to delete the data from the source first so that it will not be archived again.The Erase Data operation makes the data inaccessible for browsing and recovery - the data will remain on the media and take up space until it is aged off according to the retention rules set for the data. Data will not be recoverable using any data recovery methods. If the archive job is already content indexed, the data being erased will be removed from the index.
Using Erase Data, you can erase data such as file system, system state, and office communications server (OCS) data.
The Erase Data feature requires:
To erase data, you need to first configure the following:
To erase data, a filter storage policy needs to be associated with the Agent. Ensure that the filter storage policy that you associate with the agent has retention criteria that is greater than or equal to the retention criteria of the storage policy for the data to be erased.
| 1. |
From the CommCell Browser, right-click the agent or instance that contains the data which you want to erase, select All Tasks and then click Erase Data By Browsing. NOTES
|
 |
||
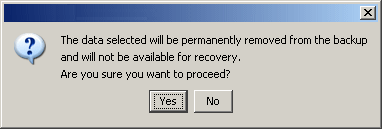
| 2. | You are warned that the data will be permanently removed. Click Yes to continue. |
 |
||
| 3. |
From the
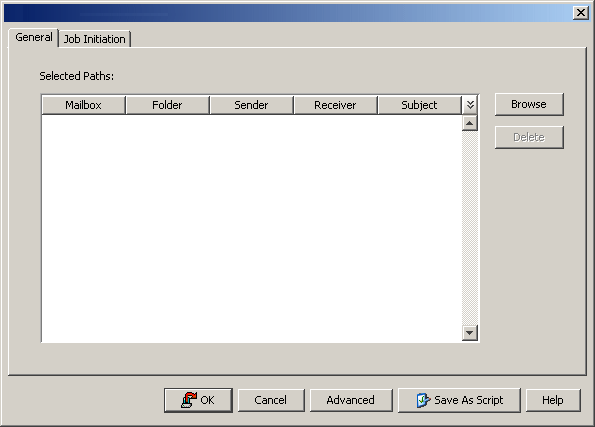
Erase Data by Browsing dialog box, click Browse.
|
 |
||
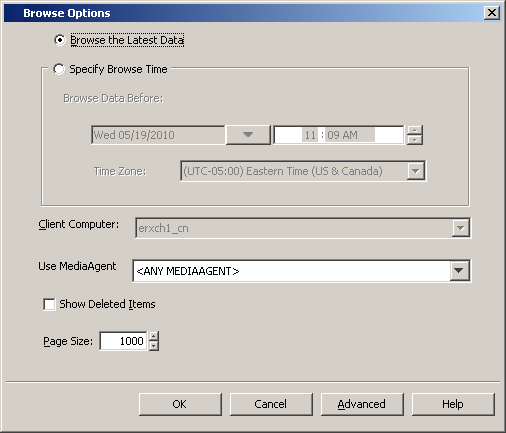
| 4. | In the Browse Options dialog box, select a browse time range and any advanced browse options, and click OK. |
 |
||
| 5. |
From the browse selection window, select the data objects that you want
to erase, and click OK.
|
 |
||
| 6. | Optionally, you can click Advanced to configure an alert for this job. | |||
| 7. |
Click Job Initiation if you would like to run this job
immediately or schedule it.
|
Stubs contain information abut the archived data to facilitate end-users with non-browse recovery operations (i.e., stub recalls) from third-party applications.
Keep in mind that the erase stubs operation only erases the archived stubs - the source stubs will remain on the local hard drive. Therefore, it is recommended to permanently delete the stubs from the source first so that it will not be archived again.The Erase Stubs operation makes the archived data inaccessible for recalling - the stubs will remain on the media and take up space until they are aged off according to the retention rules set for them. Stubs will not be recoverable using using any data recovery methods. If the archive job is already content indexed, the stubs being erased will be removed from the index.
| After erasing stubs, it may take up to one hour for the erase data cache to be erased. Therefore, a recall operation may succeed during that time. Once the erase data cache is refreshed on the CommServe, stub recalls will be blocked for the data that has been erased. |
To erase stubs, you need to first configure the following:
To erase data, a storage policy needs to be associated with the subclient that contains the stubs you want to delete.
In this step, you will specify a location (e.g., drive, folder, path, UNC path) where the system will be monitoring for hard-deleted stubs. For example, you may want to specify the C:\ drive as the location for monitoring the stubs. Stubs could be dragged and dropped from the D:\ drive to the C:\ drive and hard-deleted from there.
Once a stub is hard-deleted from this location, it is added to a collect file. When a Erase Data Job is run, the archived data that is associated with the deleted stub will be erased.
| 1. |
From the CommCell Browser, right-click the appropriate agent icon
and then click
Properties. NOTES
|
 |
||
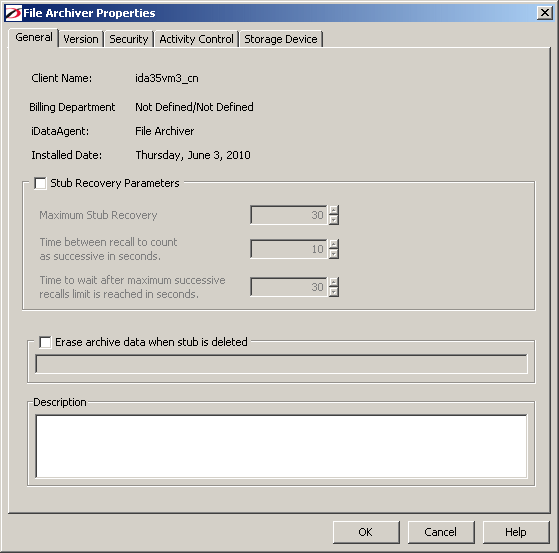
| 2. | From the General tab of the Agent Properties dialog box, select the Erase archive data when stub is deleted option. |
 |
||
| 3. |
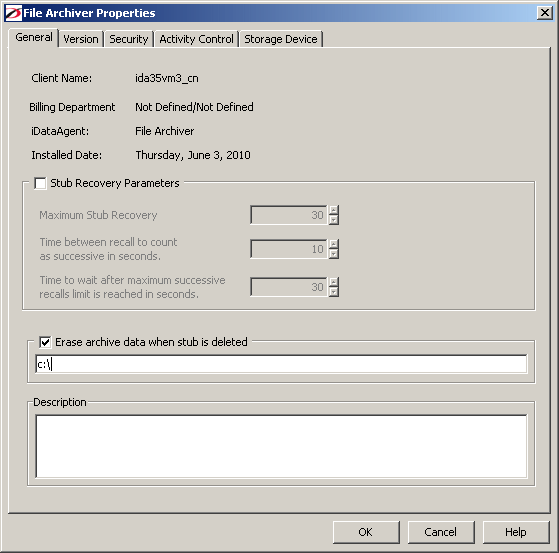
In the text box, specify the location where if stubs are deleted from
there, they will be
collected in a file. This could be the entire
computer (indicated by a \), a particular drive (C:\),
a particular folder (C:\deleted_data), or a UNC path (\\filer\directory).
Multiple locations could also be specified, separated by the
; delimeter.
|
| ||
| 4. | Click OK. | |||
| 5. | Recycle the services by restarting the DataArchiver Services from Service Control Manager. For step-by-step instructions, see Start Services on Windows. |
| Instance Type | Consideration |
| Local File System | A folder can be created to contain the stubs to be hard-deleted (SHIFT_DELETE). This folder would then be part of the path that is specified (e.g., (C:\deleted_data).This would alleviate specifying entire volumes. From the volumes, you can then move the stubs (cut+paste) to the specified deletion folder. To move stubs across volumes, you must use the GXHSMUtility tool. |
| Celerra |
The list that records the deleted stubs is not populated immediately after the
stub is deleted. This can be modified by configuring the Proxy Prune Interval in the Celerra instance. See
Configure Celerra Proxy Settings
for details. A folder cannot be created to contain the stubs that are deleted. You can instead restrict the deletion to certain folders by specifying a subclient path or a path that is a parent to the subclient path. |
| Network File Share | Erasing stubs is not supported. |
| FPolicy |
A folder cannot be created to contain the stubs that are deleted. You
can instead restrict the deletion to certain folders by specifying a subclient path or a path that is a
parent to the subclient path. Stubs can be erased only on NetApp File Servers with ONTAP versions 7.2 or higher. Stubs must be deleted on computers other than the computer in which the File Archiver for Windows Agent is installed. You can specify "\" or a specific deletion folder path (see footnote below). |
| Celerra and FPolicy: |
If the intended deletion folder path is: \\<filer_name>\<volume_name>\<folder_name> the deletion folder specification needs to be: \\<fully_qualified_filer_name>\ONTAP_ADMIN$\vol\<volume_name>\<folder_name>;\\<short_filer_ name>\ONTAP_ADMIN$\vol\<volume_name>\<folder_name> Otherwise, the data will not be erased. |
| 1. |
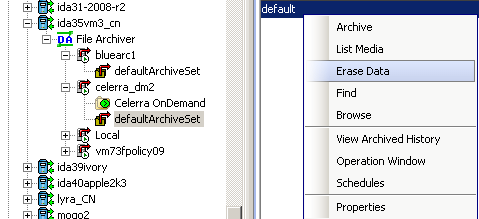
From the CommCell Browser, right-click a subclient of an appropriate Agent, click All Tasks and then click Erase Data. NOTES
|
 |
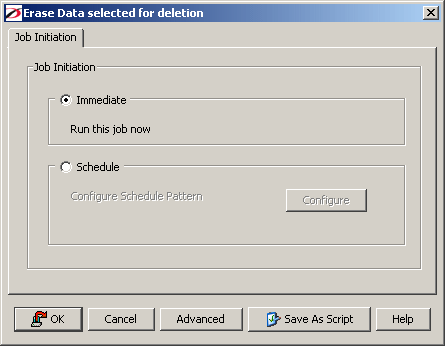
| 2. | The Erase Data selected for deletion (Job Initiation) dialog will appear allowing you to Schedule the job or run it Immediately. |
 |
| 3. |
If you select Immediate, the Erase Data job will begin when you click
OK, and you can track the progress in Job Controller. If you select Schedule and then click Configure, the Schedule Details dialog box will open. This allows you to create a new schedule for this operation. After you are finished click OK to continue. Your Erase Data operation will execute according to the specified schedule. See Create a Job Schedule for more information. |
 |
| 4. | Optionally, you can click Advanced to configure an alert for this job or the number of job retries. | |
| 5. | Click OK. |
These features are available to view the data erased.
You can view detailed, historical information about the Erase Data jobs in the Admin Job History Filter dialog box.
![]() To
view admin job history:
To
view admin job history:
The files have been erased can be viewed in the SelDelete.log file. For example, TempFil_00008.txt is a file that had been erased:
4836 17a4 10/15 14:37:10 1106 ::main() - 1: '/ext3/fsdm/HW_1/erasedata/TempFil_00008.txt'
![]() To view the log files
of a CommServe, MediaAgent, or client computer.
To view the log files
of a CommServe, MediaAgent, or client computer.
An Administrative Job Summary Report provides details of all the Erase Data jobs.
![]() To
create an Erase Data Job Summary report:
To
create an Erase Data Job Summary report:
See Erase Backup/Archived Data Job Summary Report for details.
When erasing stubs, you can click Advanced in the Erase Stubs selected for deletion dialog box to access the Job Retry tab where you can set a number for Job Retries and the total Job Running Time options.
For more information, see:
The Find feature allows you to search and locate data such as files, directories, and messages in a backup. Once located, this data can be erased. After erasing the data, it can no longer be browsed or restored. However, the data will remain on the media and take up space until it is aged off according to the retention rules set for the data.
Keep in mind that the erase data operation only erases the backup data - the source data will remain on the local hard drive. Therefore, it is recommended to delete the data from the source first so that it will not be backed up again.These features are available to view the data erased.
You can view detailed, historical information about the Erase Data jobs in the Admin Job History Filter dialog box.
![]() To
view admin job history:
To
view admin job history:
The files have been erased can be viewed in the SelDelete.log file. For example, TempFil_00008.txt is a file that had been erased:
4836 17a4 10/15 14:37:10 1106 ::main() - 1: '/ext3/fsdm/HW_1/erasedata/TempFil_00008.txt'
![]() To view the log files
of a CommServe, MediaAgent, or client computer.
To view the log files
of a CommServe, MediaAgent, or client computer.
An Administrative Job Summary Report provides details of all the Erase Data jobs.
![]() To
create an Erase Data Job Summary report:
To
create an Erase Data Job Summary report:
See Erase Backup/Archived Data Job Summary Report for details.
Once an erase data job has completed, it may be useful to view specific historical information about the job, such as the following:
This information can be viewed in the Job History window. The history provided depends on the entity from which the job history is viewed. For example, viewing job history from the subclient level will yield information for the jobs performed for that subclient. Conversely, viewing job history from the instance level will yield information for jobs run from all subclients within that instance.
To view the backup job history:
To view the additional options discussed above, right-click the desired job choose the appropriate option.