This implementation allows you to create snapshot-based replication, even if
an expensive hardware snapshot system is not available and a tape backup from the
same version of snapshot without extra administration work. The backup job can be
moved to a BCV on a remote machine using either the ProxyHost or Image Level ProxyHost
iDataAgent.
The following steps briefly describe the configuration procedure for this implementation
scenario.
Requirements
|
|
Required Capability: See
Capabilities and Permitted Actions
|
To create a replication and tape backup from the same QSnap snapshot
|
| 1. |
Identify the scratch volumes that will
be used to host the replication data. These volumes will also be used as
the BCV or Clone for the backup. The volumes can reside on either the local
machine for quick recovery purpose or on a remote machine for disaster recovery
purposes. Create the
Scratch Volume
Pool that will contain these scratch volumes.
|
| 2. |
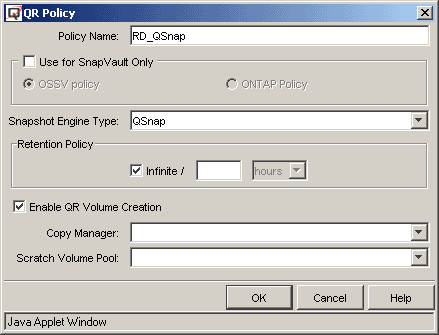
Create the QR policy for the QR volume creation.
In the QR Policy
screen, select QSnap as the Snapshot Engine Type.
Select the LAN Copy Manager on the machine where scratch volumes reside.
|
 |
| 3. |
Identify a Storage
Policy that can be used for the backup. If the destination machine is
a remote machine, it is recommended to install the MediaAgent on that remote
machine so that the backup will be a LAN free backup. |
| 4. |
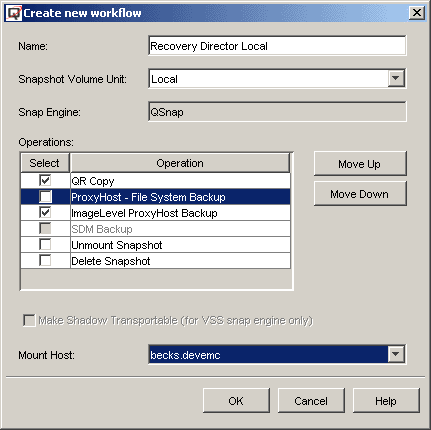
Create the Snapshot Volume Unit
(SVU) and the Snapshot Management
Workflow. Although they can be created separately through the 'classic' method,
the Workflow Configuration Wizard
for Recovery Director simplifies the process considerably. The Configuration
Wizard leads you through all the required configuration tasks in sequence,
and will prompt you to correct any potential conflicts, or to supply any
missing information, while displaying help content in each Wizard screen.
The Wizard can be launched by right-clicking Recovery Director, selecting
All Tasks, then Workflow Wizard.
There are three major sections to the Wizard:
|
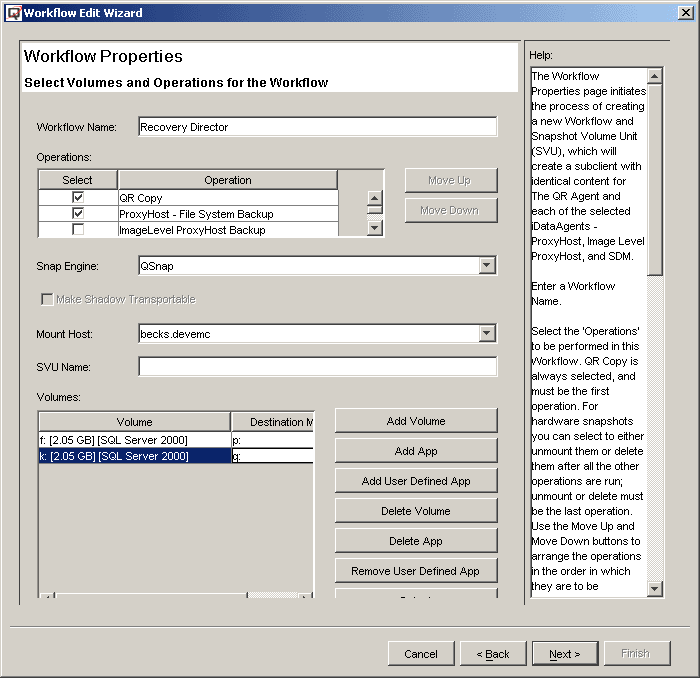
- Configure the volumes and Snapshot engine.
In this section,
the source volumes, the destination volumes, the Snapshot engine and
the destination host information are specified. The Add App feature
which extends the functionality of the QR Agent is available through
Recovery Director. In this case we will use SQL database volumes as
the example.
|
 |
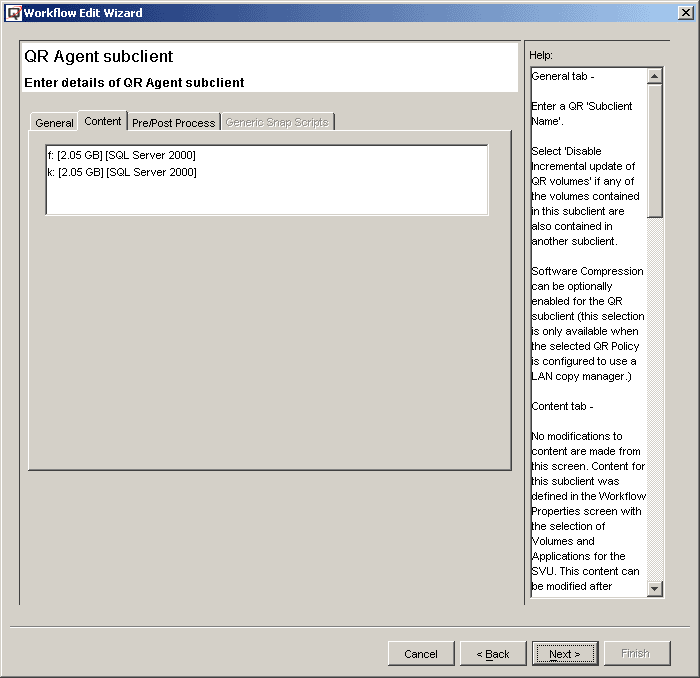
- Configure the associations.
In this section the information previously
specified is used to configure the subclients for the QR Agent and the
selected backup iDataAgent(s).
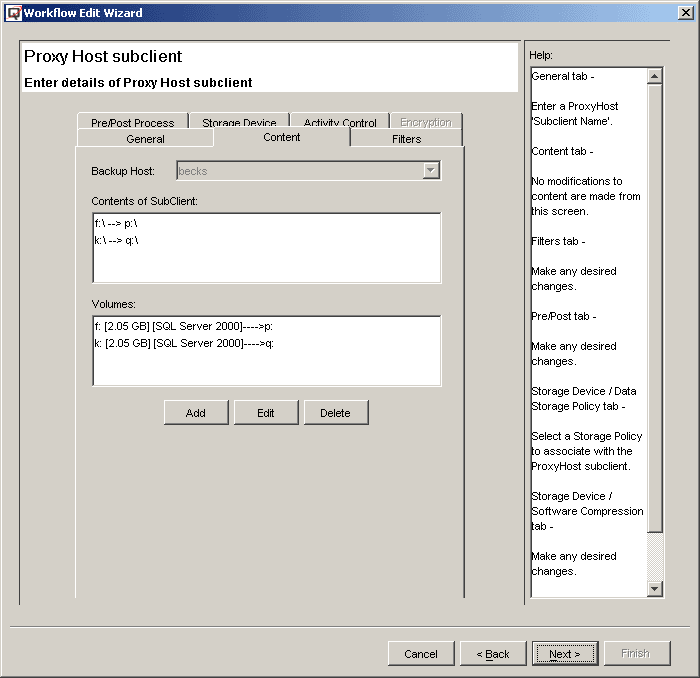
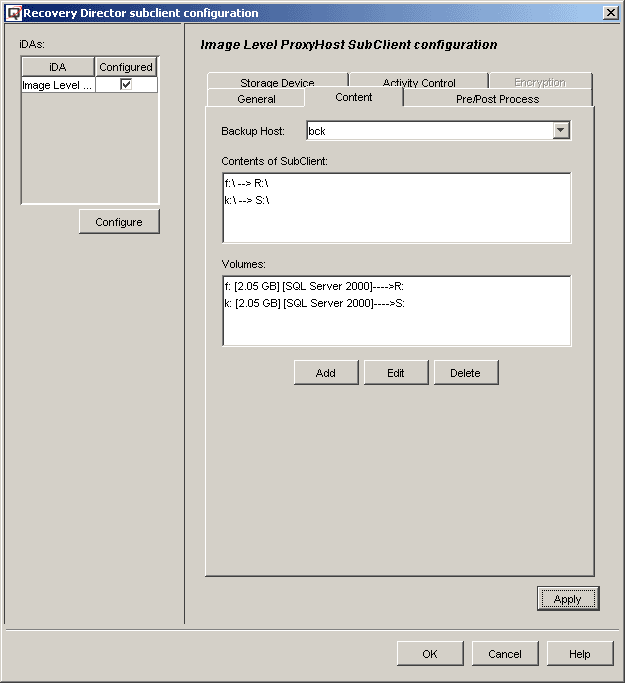
As you can see, the subclient content of the QR Agent and the ProxyHost
iDataAgent have been populated.
The specified QR volume will automatically be used as the BCV or Clone
for the ProxyHost iDataAgent.
Other subclient proprieties (Storage Policy, Pre/Post commands, compression,
etc.) can be configured in this section as well.
|
|
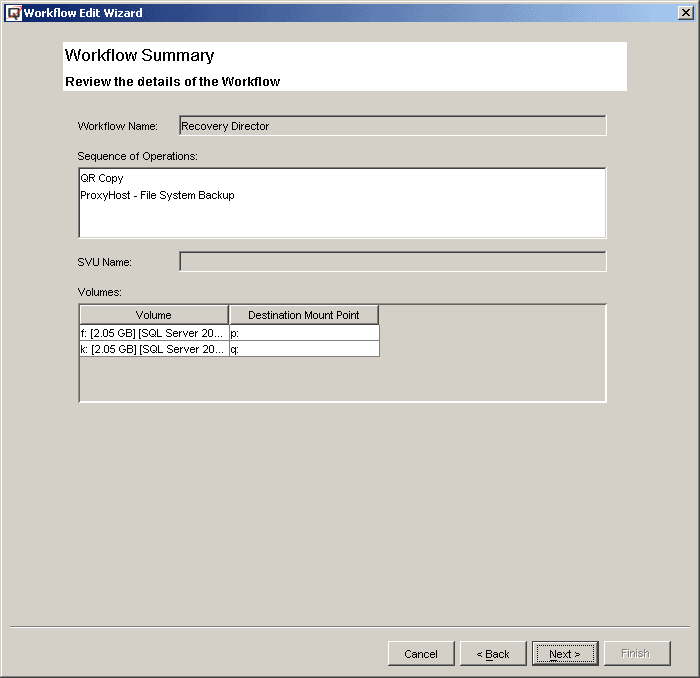
- Summary and schedule options for the Workflow.
In this section,
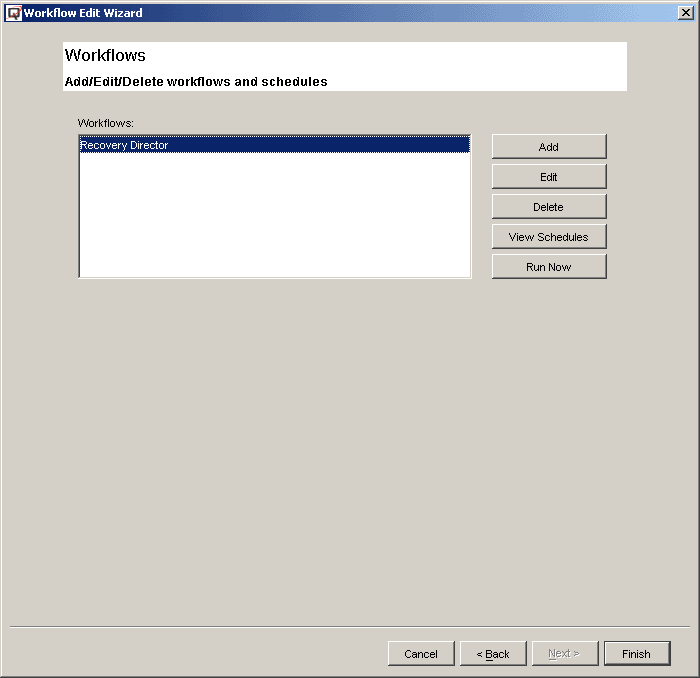
a summary of the configured Workflow is presented. You have the option
to create a new Workflow, edit/delete an existing Workflow or schedule
the Workflow. (The Workflow can also be scheduled after you exit the
Wizard.) Very rich scheduling options are provided for the Workflow,
as well as the data protection options of the associated Agents (QR
Agent and the ProxyHost iDataAgent
in this example.)
|


|
| 5. |
Schedule the Workflow or launch the Workflow immediately. Each Workflow
starts with a QR job. This job can consist of a snapshot only or include
QR Volume creation. With the Generic Enabler, this QR job merely launches
the customized hardware snapshot scripts and populates the CommServe database.
After the QR job is completed, Job Manager will launch any scheduled backup
job(s) automatically. After all the Workflow component phases are executed
(see Step 1) the entire Workflow is considered complete.
The Workflow can be scheduled to repeat. |
| 6. |
After each Workflow, the same version of data has been replicated to
disk and backed up to tape as well. Although the QR Agent does not save
the point-in-time data, the backup does. Therefore you now have the following
flexibility to recover the data:
- Run Quick Recovery. If the QR volume(s) reside on the local machine,
the data can be recovered in seconds in case of disk failure or data
corruption.
- Copy Back. The data on the QR volume(s) can be transferred back
to the source volume by using the Copy Back feature.
- Restore from tape. This is particularly useful if the point-in-time
data is needed. Another benefit of this type of recovery is that an
individual file or folder can be recovered quickly.
|
| 7. |
Data Aging (Archive Pruning) is still managed by each individual association
(through QR Policy for the QR Agent and Storage Policy for backup
iDataAgents). |
While a remote replication is maintained through remote QR Copy for the purpose
of disaster recovery, a local QR volume of the same source volume can be created
so that Quick Recovery can be accomplished within a few seconds in case of disk
error or data corruption. The QR Agent subclient content overlap feature manages
replicating the same source volume using two different subclients, each with its
own schedule. Integrating the tape backup together with the local QR volume creation
will allow a point-in-time recovery without interrupting the application.
The following steps briefly describe the configuration procedure for this implementation
scenario. For the purpose of introduction, the classic method will be used here
to create the Snap Volume Unit (SVU) and Workflow.
Requirements
|
|
Required Capability: See
Capabilities and Permitted Actions
|
To create a local and remote replication with tape backup for the same
volume
|
| 1. |
Create a Workflow to replicate the data to remote volumes. (This is the
same procedure described in
Use Recovery Director to create a replication and tape backup from the same
QSnap snapshot above.)
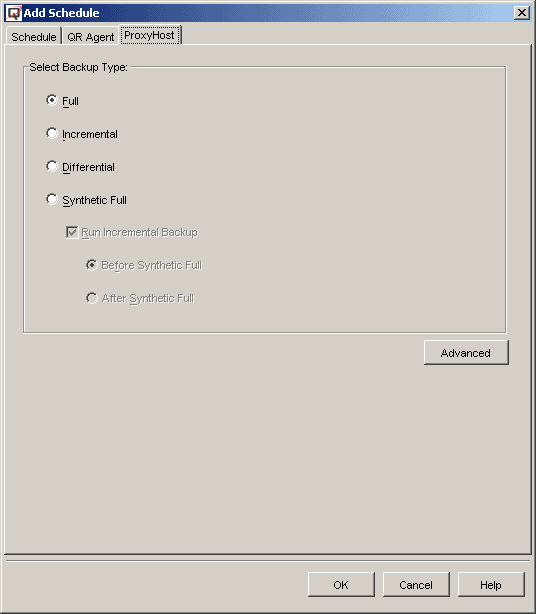
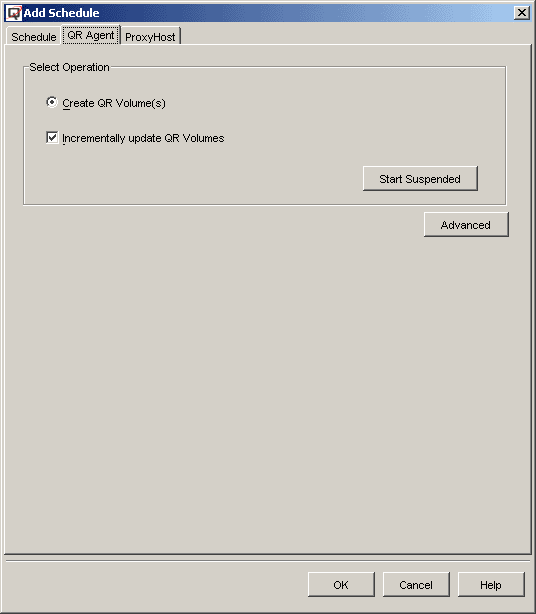
In the QR Agent tab of the Add Schedule screen, select Incrementally
update QR Volumes.
|
 |
| 2. |
Create another Workflow that will replicate the same data to local volumes.
If the classic method is used to create this Workflow, the following steps
are required:
|
- Create a
Scratch
Volume Pool.
|
- Create a QR Policy.
|
- Create the Snapshot Volume
Unit (SVU).
- Select Recovery Director, then right-click Snap Volume
Units, and select Create New Unit.
- Right-click the created SVU and select Manage Unit.
|
- Click Add Volume or Add App to configure the volume
pairs.
|
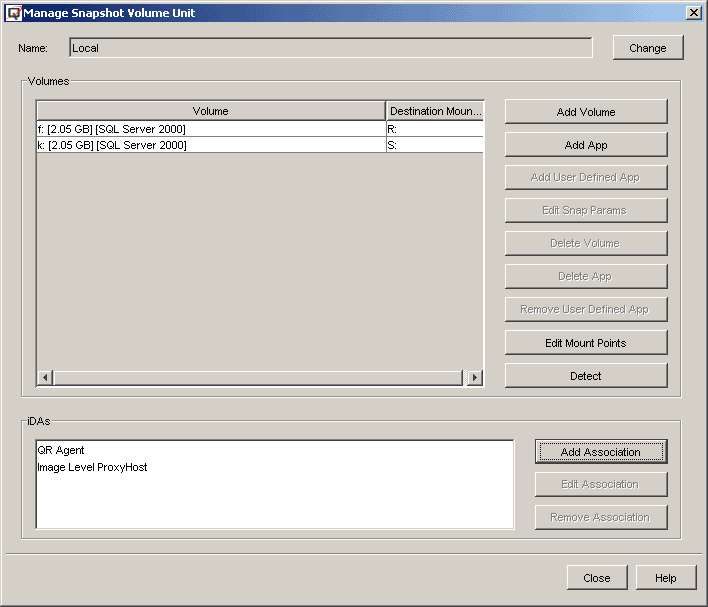 |
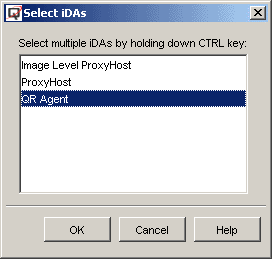
- Click Add Association to configure the subclients for the
QR Agent and backup iDataAgent(s).
In the selection window, click QR Agent and then OK.
|
 |
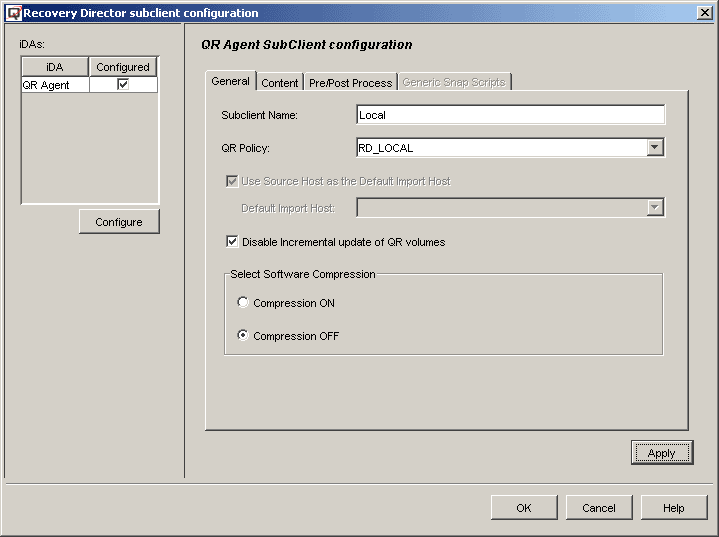
- In the QR Subclient General Properties window, select the Disable
Incremental Update of QR Volumes option. (This is to make sure the
full copy on the same source volume will not interrupt the incremental
change tracking of another Workflow that was created in the first step.)
After configuring other subclient properties, click Apply to
save the configuration.
|
 |
- Click Add Association again to configure the backup
iDataAgents. Since the same
volumes have been configured as ProxyHost
iDataAgent Subclient Content,
only a different backup iDataAgent
can be used here. We will use Image Level ProxyHost
iDataAgent for this example.
|
 |
- Create the Workflow and associate the created SVU.
- Select Recovery Director, then right-click Snapshot
Management Workflows, and select Create New Workflow.
- From the SVU drop-down list, select the newly created SVU.
- Select an Image Level ProxyHost backup, since it has
been added as an association.
|
 |
| 3. |
Both Workflows can be scheduled or launched immediately. It is important
to mention that QR copy from these two Workflows can be run simultaneously
because they attempt to copy from the same source volume. The job manager
will manage any schedule conflict.
|
| 4. |
After each Workflow, the same version of data has been replicated to
disk and backed up to tape as well. Although the QR Agent does not save
the point-in-time data, the backup does, providing the flexibility to recover
the data:
- Run Quick Recovery from the local QR volumes in case of disk failure
or data corruption.
- Copy Back: The data on the QR volume can be transferred back to
the source volume by using the Copy Back feature.
- Restore from tape: This is particularly useful if the point-in-time
data is needed. Another benefit of this type of recovery is that an
individual file or folder can be recovered quickly.
|