| Backup | Restore |
The following section provides information on troubleshooting restores.
| Point in time Table Browse Failures | When you have encryption enabled for the client,
point in time table browse operation fails with the following error
message: Pass-phrase protection is on for client [80], but pass-phrase was not specified. Make sure that the pass phrase is exported to the MediaAgent when encryption is enabled for the client.
|
| Table Restore Failures | Make sure that the Oracle Services are running as Local System. |
| Database Restore Failures | After performing an Oracle restore operation from the CommCell Console where options were selected for Redirect, Rename and Recover at the same time, you must click the Refresh button on the Subclient Properties (Content) tab or run a backup after the restore operation has completed before proceeding with another restore. This is necessary to ensure that the CommCell Console recognizes the changes that were made to the Oracle database and control file, so that it reflects the current structure of the database to be restored, otherwise the restore will fail. |
| Unable to create Duplicate Database |
|
| Increase in sbtio.log file size |
Sometimes, jobs fail due to increase in the size of sbtio.log file in the $UDUMP directory. To resolve this, set the size limit for thesbtio.log file using the sMAXORASBTIOLOGFILESIZE registry key. Once the specified size limit is reached, the sbtio.log file gets pruned automatically. |
| Table Level Restore Intermittent Failures | The table level restore operation may fail
intermittently due to an error in the Oracle's DataPump utility and the
following error message will be displayed: UDE-00008: operation generated ORACLE error 31623 ORA-31623: a job is not attached to this session via the specified handle In such cases, set the sNODATAPUMPEXPORT registry key to Y on the client and re-submit the job. |
| Control File Restores Failures | Ensure that the DBID is assigned for the instance. Make sure that the DBID value for the database you are restoring is automatically displayed in Instance Properties. |
| Command Line Restore Failures | Verify the availability of the required resource then rerun the RMAN command line operation |
| Sometimes, the third party command line jobs may hang
when you perform large backups and restores. This happens since ClOraControlAgent updates the job manager for every 100MB data transfer and this causes the thread failure for large backups/ restores after transferring some of the data. The following exception will be seen in the clOraControlAgent.log: 5710030 304 02/22
03:47:23 608119 OraAgentBase::NotifyCommServeJobContinue() - m_jobObject->setUnCompBytesToAdd(105119744)
... You can set
sBYTESDIFFMBS registry key <value> in MBs in OracleAgent/.properties. |
|
| Unable to create a Standby Database | Standby database fails with the following error
message: temporary file TEMP01.DBF conflicts with file used by target database Make sure that the Standby Role Initialization parameter, DB_FILE_NAME_CONVERT, is set to add all the temp datafiles from the primary database location to the standby database location, as follows: DB_FILE_NAME_CONVERT='<primary_database_temp_datafile_old_location>',' <standby_database_temp_datafile_new_location> |
When restoring Oracle database on Linux clients, if the Switch database mode for restore option is selected to keep database in correct mode during restore, the database may not restart after switching the database mode. Also, the restore operation may fail with the following error message.
RMAN Script execution failed with error [RMAN-04014: startup failed: ORA-27137: unable to allocate large pages to create a shared memory segment]. Please check the Logs for more details.
This issue occurs if the oracle user has a higher ulimit configuration than the root user. To resolve this issue, apply the ulimit value of Oracle user for the restore using the following steps:
The following procedure describes the steps involved in recovering data associated with the following entities:
This procedure can be performed when the following are available:
See License Administration for more details.
If you regularly run and have copies of the Data on Media and Aging Forecast report you can check them to see if the appropriate media is available.
| When you start the Command Line Interface to capture data, use the name of the standby CommServe in the -commcell argument. |
This will bring back the entity in the CommServe database and the entity will now be visible in the CommCell Browser. (Press F5 to refresh the CommCell Browser if the entity is not displayed after a successful merge.)
|
As a precaution, mark media (tape and optical media) associated with the source CommCell as READ ONLY before performing a data recovery operation in the destination CommCell. |
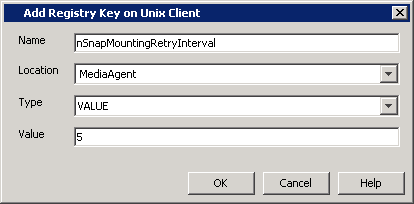
When restoring large tables, the restore operation may fail if there is insufficient memory allocation for creating the auxiliary instance.
Use the following steps to optimize the memory allocation for the auxiliary instance:
By default, 16MB pool size is allocated for the auxiliary instance. Use the following steps to increate this size limit:
|
|
By default, the system allocates 48 MB for the Oracle streams. You can modify this value using the following steps:
|
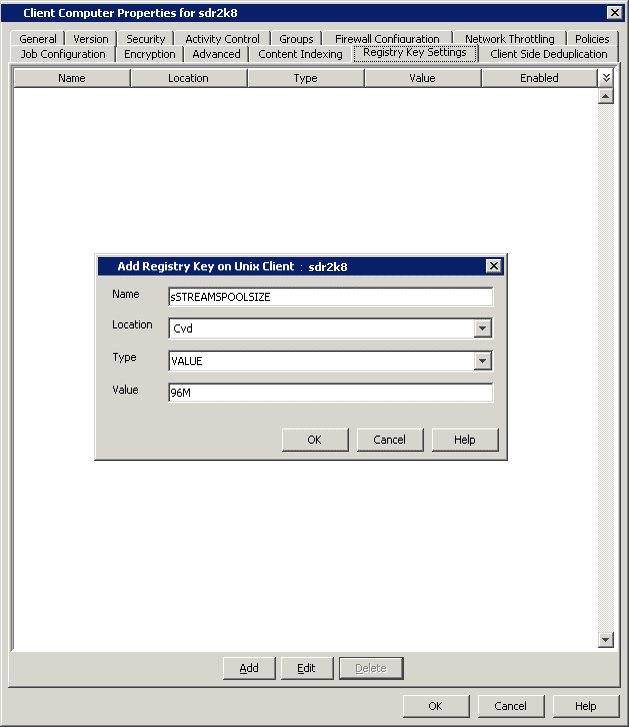
|
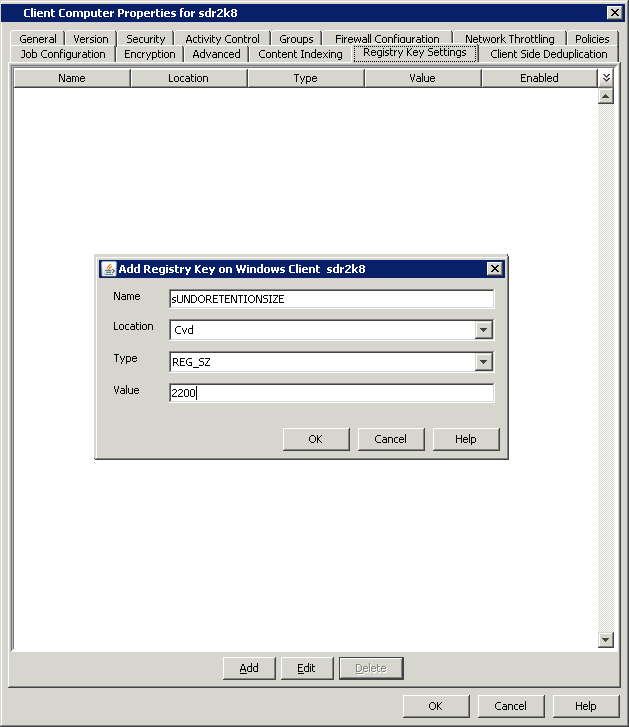
Whenever a transaction is committed, the old undo information, is retained by default for a period of 1800 secs. You can modify this value, using the following steps:
|
|
Once you have identified the specific RMAN error, consult one of the following publications from Oracle Corporation for information on resolving the specific error, in conjunction with your on-site Oracle database administrator:
Comment out the option "db_recovery_file_dest" from the PFile, then re-create the SPFile using the new PFile. Afterwards, restoring the SPFile from the CommCell Console should work.
Restore the SPFile manually using RMAN with the script below:
RMAN> run {
2> ALLOCATE CHANNEL c1 DEVICE TYPE DISK;
3> restore spfile from autobackup;
4> }
When you recover a database to a point in time, the RMAN command ALTER DATABASE OPEN RESETLOGS is executed which will reset the SCN (System Change Number) and time stamp on every object of the database (i.e., datafiles and control files). Also, only the archived redo logs that match the RESETLOGS SCN and timestamp value will be applied to the database, thus recovering the database to a time that is not current. This is a very useful operation if the point-in-time to which you are trying to recover is certain and known, but can be counterproductive if you are guessing at the point-in-time.
If you are not sure about the point-in-time for the recovery, it is recommended to restore the data and the control files to a point in time without recovery. This method will allow you to restore the database to a state that you can make the determination whether or not you have achieved the correct point-in-time, without invoking the"ALTER DATABASE OPEN RESETLOGS" statement that would reset SCNs and time stamps on the database objects.
After determining the correct point-in-time through this method, you can recover the database to the point in time to reset your Oracle database to the desired incarnation.
Sample scripts are provided below for your Oracle database administrator to use as reference for developing custom scripts that you can run from the RMAN command line, to perform special operations apart from the CommCell Console.
The following example resets a database after performing an incomplete media recovery:
run {
allocate channel dev1 type disk;
set until logseq 1234 thread 1;
restore database skip tablespace readonly;
recover database;
sql "ALTER DATABASE OPEN RESETLOGS";
release channel dev1;
}
reset database;
The following command makes an old incarnation of database PROD1 current again:
# obtain primary key of old incarnation
list incarnation of database prod1;
List of Database Incarnations
DB Key
------Inc Key
-------DB Name
-------DB ID
-----CUR
---Reset SCN
---------Reset Time
----------
1
2
PROD1
1224038686
NO
1
02-JUL-98
1
582
PROD1
1224038686
YES
59727
10-JUL-98
shutdown immediate;
# reset database to old incarnation
reset database to incarnation 2;
# recover it
run {
allocate channel dev1 type disk;
restore controlfile;
startup mount;
restore database;
recover database;
sql "ALTER DATABASE OPEN RESETLOGS";
release channel dev1;
}
Restore jobs from Oracle iDataAgent will be displayed as "Completed w/ one or more errors" in the Job History in the following cases:
If you receive an Oracle error during an Oracle restore operation, we recommend that you follow procedures published by Oracle Corporation on resolving the specific error. We also advise you to consult with your on-site Oracle database administrator, as needed.