Before You Begin
|
|
|
Configuration Procedure
|
| 1. |
Open the Firewall Configuration Wizard
from the following location: <software installation
path>/Base/FirewallConfig.exe
|
| 2. |
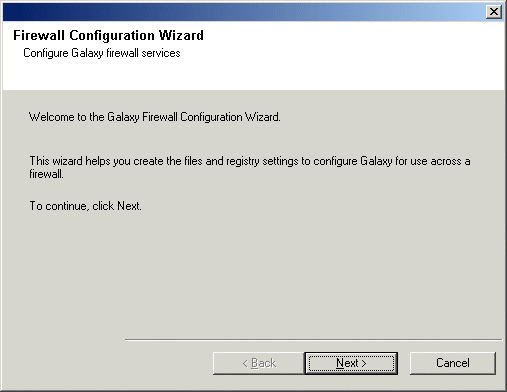
Click Next to continue. |
 |
| 3. |
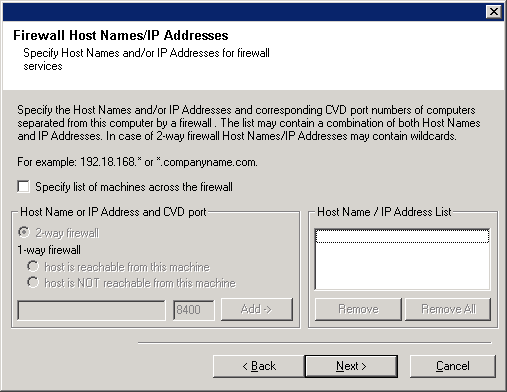
Click the Specify list of machine across the firewall option and then
specify the list of hosts separated from this computer by a firewall. Make sure
you correctly describe whether the firewall allows two-way communication (but on
a limited range of ports), or one-way communication (with either only remote
host being able to make connections to this computer, or vice versa).
For all one-way firewalls allowing incoming connections and those one-way
firewalls allowing outgoing connections without additional port filtering, skip
this step.
Click Next to continue.
NOTES
- Consider the following:
- On the CommServe Server, this list should include all the
MediaAgents and Clients that are on the other side of the
firewall.
- On the MediaAgents/Clients this should include the CommServe
computer, and any other Clients/MediaAgents on the
other side of the firewall with which communications will be
established.
- For each machine on the other side of the firewall that you want to
configure, choose the type of firewall configuration based on the firewall setup in
your environment. Choose from the following options:
- Click on 2-way firewall if you can open certain ports as
bi-directional ports.
- Click 1-way firewall; host is reachable from this machine
on the machine that is on the secure side of the firewall.
- Click 1-way firewall; host is NOT reachable from this machine
on the machine that is on the public / DMZ side of the firewall.
- If you wish to communicate with computers in a clustered
environment, ensure that you add the Host Name/IP Address of all
physical nodes in the cluster (even if no CommCell components are
installed) and all the virtual nodes in which CommCell components are
installed.
- Type the host name or the IP address and the GxCVD port number of the
host name, and
click Add to place it in the Host Name/IP Address List.
|
 |
| |
The following table lists the entries in the FwHosts.txt
and FwPeers.txt using sample scenarios:
| Description |
CommServe |
MediaAgent |
Agents |
| CommServe and MediaAgent on the friendly
side; Agents on the hostile side. |
Agents |
Agents |
CommServe and MediaAgent |
| CommServe on the friendly side; Agents and
MediaAgent on the hostile side |
MediaAgent and Agents |
CommServe |
CommServe |
|
| 4. |
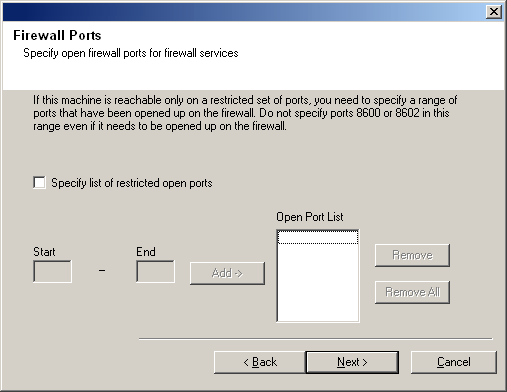
Click the Specify list of restricted open ports option and then
specify the port range. Add the starting and ending port range and then click
Add to place it in the Open Port List. Repeat as needed.
If firewall separating this computer from others allows incoming connections,
but these connections can be made only on a limited set of ports, then configure
the appropriate port range here. For all other scenarios, skip this step.
Note that if you do not specify hostname(s) as well as port number(s), then
the firewall services will not be configured.
NOTES
- Typically in a two-way firewall, the open ports must be indicated for
all computers. In a one-way firewall, the ports must be specified on
computers in the open side, if they are open in a restricted way. Note that
the port ranges are not required for computers that are fully closed in the
one-way firewall. For example, laptops which are configured as clients in
the Workstation Backup Agent.
- In a clustered environment, make sure the firewall ports specified here
are open for communication on all the physical nodes as well as the virtual
nodes.
Click Next to continue.
|
 |
| 5. |
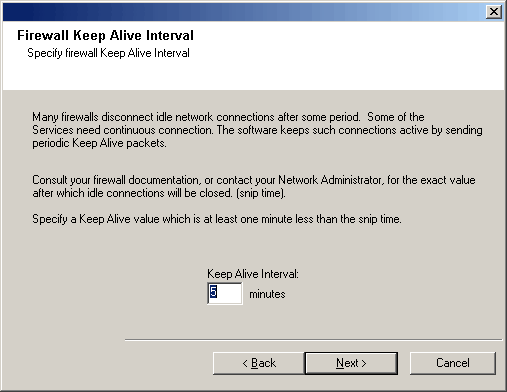
If desired, modify the Keep Alive interval.
Click Next to continue.
|
 |
| 6. |
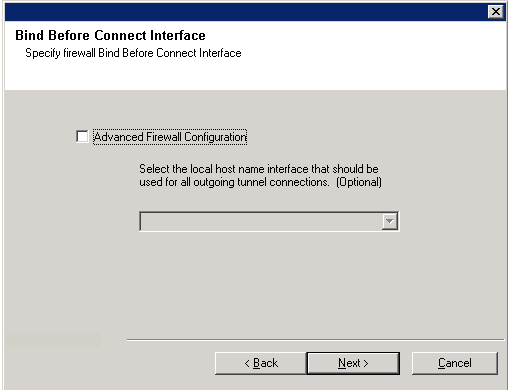
Optionally, select Advanced Firewall Configuration and specify a local
host name interface to use for outgoing tunnel connections through
the firewall. Otherwise, the interface and port is automatically selected for
you by the OS. Click Next to continue.
|
 |
| 7. |
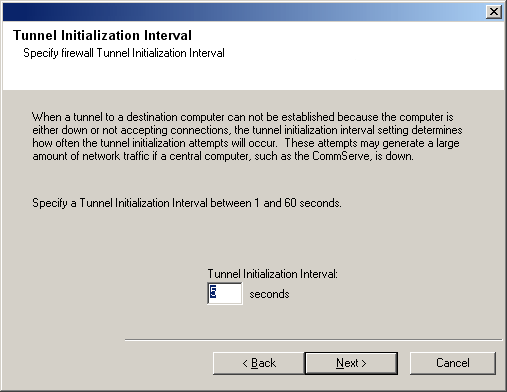
If desired, modify the Tunnel Initialization interval.
Click Next to continue.
|
 |
| 8. |
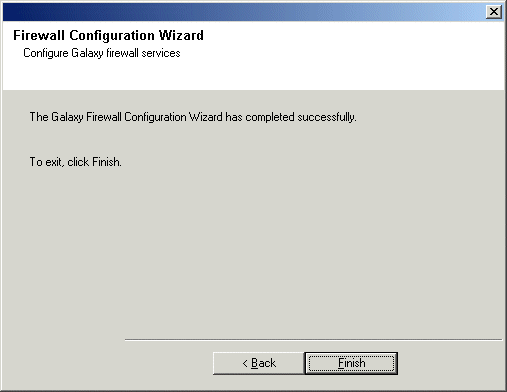
Click Finish to save the changes or click Back
to modify the settings. |
 |
Post-Configuration
|
| |
- Firewall Wizard will prompt to restart the services on the
computer, if you have stopped them at the beginning of this
procedure.
- If you are configuring the firewall communication on a client for
the first time, or if you are changing the range of ports, ensure that
the ports specified in Step 3 are allowed connections through the firewall.
|
Before You Begin
|
|
|
Configuration Procedure
|
| 1. |
Run the following program:
<software installation path>/Base/config_fw
|
| 2. |
Type 1 to continue. |
Firewall services are currently
NOT configured.
Please select one of the options below:
1) Config Firewall Services
2) Exit
Your selection: [2]
|
| 3. |
Enter the port range(s), and then press Enter to continue.
NOTES
|
Calypso needs to know which TCP ports of this machine are available for
connections initiated by machines on the other side of the firewall.
If this machine is not reachable from the other side of the firewall at all
(because the FW is one-way and allows only outgoing connections), enter any
unused port number here (e.g. 8600).
Otherwise please consult your FW configuration for the list of open incoming
ports and enter all of them here (with the exception of port 8400).
Currently there are no ports configured. Please enter a single port number or
a port range (like 8600-8620) to be added to the FW configuration:
Port range: [8600-8620]
|
| 4. |
Enter the number corresponding to the option you wish to perform. NOTES
- If you choose option 1, refer the previous step.
- If you choose option 3, proceed to the next step.
|
What would you like to do:
1) Add another open port or a range of ports
2) Delete an existing port or a range of ports
3) Continue with the firewalled host setup
Your choice: [3]
|
| 5. |
Enter the host name(s) of the computers that will need to be contacted
through a firewall, and then press Enter to continue.
|
We need to know which Calypso hosts are located on the other side of the
firewall, and whether the firewall will allow direct or reverse connections
to/from those hosts.
You can specify hosts by either entering their names, IP addresses or name/IP
wildcards. The wildcards are available only if the firewall is symmetrical,
i.e. allows to open connections to certain ports both ways.
Currently there are no firewall hosts configured.
Please enter the name or IP address of a host on the other side of the
firewall. If the firewall is symmetrical, you are allowed to use wildcards,
i.e. things like 192.168.* or *.firewall.company.com:
Firewalled Host: lavender.company.com
|
| |
The following table lists the entries in the FwHosts.txt
and FwPeers.txt using sample scenarios:
| Description |
CommServe |
MediaAgent |
Agents |
| CommServe and MediaAgent on the friendly
side; Agents on the hostile side. |
Agents |
Agents |
CommServe and MediaAgent |
| CommServe on the friendly side; Agents and
MediaAgent on the hostile side |
MediaAgent and Agents |
CommServe |
CommServe |
|
| 6. |
Choose the option associated with type of firewall configuration based on the
firewall setup in your environment.
NOTES
- Choose Two-way (symmetrical) firewall if you can open certain ports as
bi-directional ports.
- Choose One-way firewall; <port> is reachable from here if
this computer communicates with MediaAgent/Client on
the other side of the firewall.
- Choose One-way firewall; this machine is
reachable from <port> when the CommServe and any
Clients/MediaAgents) communicates with this computer.
|
Please specify the type of the firewall separating this machine from
172.19.61.89.
1) Two-way (symmetrical) firewall
2) One-way firewall, 172.19.61.89 is
reachable from here
3) One-way firewall, this machine is reachable from
172.19.61.89
Your choice: [1]
|
| 7. |
Enter the number corresponding to the option you wish to perform. NOTES
- If you choose option 1, refer the previous two steps.
- If you choose option 3, proceed to the next step.
|
What would you like to do: 1) Configure another host
2) Delete an existing host
3) Continue with the firewall keep-alive setup
Your choice: [3] 1
|
| 8. |
If desired, modify the Keep Alive interval, and then press Enter to
continue, or
Press Enter to accept the default.
|
Please specify Keep Alive interval for Calypso firewall services.
Many firewalls disconnect idle Network connections after some period of time.
Some of the Calypso Services need continuous connections. Calypso keeps such
connections active by sending periodic "keep-alive" packets.
Consult your firewall documentation, or contact your Network Administrator,
for the exact value after which idle connections will be closed (snip time).
Then enter a value, which is at least one minute less than the snip time.
Keep-alive interval, minutes [5]
|
| 9. |
To configure advanced
firewall settings, type Yes, and then press Enter. Proceed to
the next Step. If you do not want to configure advanced
firewall settings, type No, and then press Enter.
Proceed to the next section.
|
The Generic part of the Calypso Firewall Config has been completed
successfully. There are some additional advanced settings that you may want to
review now. All of them can be customized later by editing the .properties file
under /etc/CommVaultRegistry/Galaxy/Instance003/Firewall.
Would you like to review the advanced settings now? [no]
|
| 10. |
To bind the local end of tunnel connections to a specified interface, type Yes, and then press Enter. Proceed to
the next Step. If you do not want to bind the local end of tunnel connections
to a specified interface, type No, and then press Enter.
Skip the next Step.
|
Normally Calypso Firewall code doesn't bind
local end of TCP/IP sockets when establishing outgoing tunnel connections
relying on the OS to pick correct interface and arbitrary port automatically.
Usually this doesn't cause connectivity problems because we require that the
firewall must allow connections for as long as 1meither source or destination
socket end is bound to one of the ports in the open range.
Sometimes, however, on hosts with several
NICs it's important to force the OS to bind the local socket end to a specific
network interface. There is a Calypso setting called
1mnBIND_BEFORE_CONNECT_IFACEm, which enables this behavior. If present, Calypso
will bind the local end of tunnel connections to the specified interface.
Would you like to configure
nBIND_BEFORE_CONNECT_IFACE? [no]
|
| 11. |
Type a number corresponding to one of the listed network interfaces, to use for outgoing tunnel connections through
the firewall. Press Enter to continue.
|
Please select network interface that should
be used for all outgoing tunnel connections:
1) <ip_address>
Interface number: [1]
|
| 12. |
If desired, modify the Tunnel Initialization interval by typing a number.
Press Enter to continue.
|
When tunnel to a destination machine cannot be
established because the machine is down or is not accepting connections, Calypso
will retry the connection after some time. Tunnels piercing one-way firewalls are
1mPERSISTENTm meaning that Calypso will keep on trying to initialize them until
success. These attempts can generate a lot of network traffic if a central machine
(e.g. CommServe) suddenly goes down.
Here you can adjust the interval (called 1mnTUNNEL_INIT_INTERVALm
in registry) between tunnel init attempts.
Tunnel Init Interval, seconds, [5]
|
| 13. |
Type 6 to exit the
wizard. |
Firewall services are currently
CONFIGURED.
Please select one of the options below:
1) Deconfig Firewall Services
2) Change Keep-Alive setting
3) Enable client FW debug messages
4) Disable client FW debug messages
5) Re-create CVFWD firewall services
6) Exit
Your selection: [6]
|
Post-Configuration
|
| |
- Restart the services on the computer, if you have stopped them at
the beginning of this procedure.
- If you are configuring the firewall communication on a client for
the first time, or if you are changing the range of ports, ensure that
the specified ports are allowed connections through the firewall.
|
Before You Begin
|
- From a Novell client, log on as a user with Supervisor rights or
use an account that has Read/Write/Modify/Erase/Create/File Scan rights
to the SYS:SYSTEM directory.
|
Configuration Procedure
|
| 1. |
Place the
software
installation disc containing the NetWare packages into the Novell client's
disc drive or a mapped disc drive on another computer.
- Click Start on the Windows task bar, and then click Run.
- Browse the installation disc and right-click
NWFirewallConfigWizard.exe and then
click Open.
|
| 2. |
Click Next to continue. |
 |
| 3. |
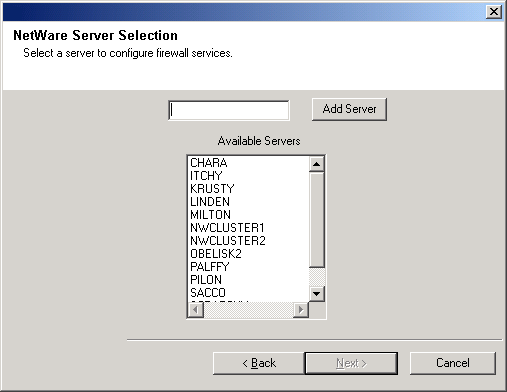
Select the name of a server to configure.
NOTES
- Later in this procedure you are offered the option to configure
another server.
|
 |
| 4. |
Click the Specify list of machine across the firewall option and then
specify the list of hosts separated from this computer by a firewall. Make sure
you correctly describe whether the firewall allows two-way communication (but on
a limited range of ports), or one-way communication (with either only remote
host being able to make connections to this computer, or vice versa).
For all one-way firewalls allowing incoming connections and those one-way
firewalls allowing outgoing connections without additional port filtering, skip
this step.
Click Next to continue.
NOTES
- Consider the following:
- On the CommServe Server, this list should include all the
MediaAgents and Clients that are on the other side of the
firewall.
- On the MediaAgents/Clients this should include the CommServe
computer, and any other Clients/MediaAgents on the
other side of the firewall with which communications will be
established.
- For each machine on the other side of the firewall that you want to
configure, choose the type of firewall configuration based on the firewall setup in
your environment. Choose from the following options:
- Click on 2-way firewall if you can open certain ports as
bi-directional ports.
- Click 1-way firewall; host is reachable from this machine
on the machine that is on the secure side of the firewall.
- Click 1-way firewall; host is NOT reachable from this machine
on the machine that is on the public / DMZ side of the firewall.
- If you wish to communicate with computers in a clustered
environment, ensure that you add the Host Name/IP Address of all
physical nodes in the cluster (even if no CommCell components are
installed) and all the virtual nodes in which CommCell components are
installed.
- Type the host name or the IP address and the GxCVD port number of the
host name, and
click Add to place it in the Host Name/IP Address List.
|
 |
| 5. |
Click the Specify list of restricted open ports option and then
specify the port range. Add the starting and ending port range and then click
Add to place it in the Open Port List. Repeat as needed.
If firewall separating this computer from others allows incoming connections,
but these connections can be made only on a limited set of ports, then configure
the appropriate port range here. For all other scenarios, skip this step.
Note that if you do not specify hostname(s) as well as port number(s), then
the firewall services will not be configured.
NOTES
- Typically in a two-way firewall, the open ports must be indicated for
all computers. In a one-way firewall, the ports must be specified on
computers in the open side, if they are open in a restricted way. Note that
the port ranges are not required for computers that are fully closed in the
one-way firewall. For example, laptops which are configured as clients in
the Workstation Backup Agent.
- In a clustered environment, make sure the firewall ports specified here
are open for communication on all the physical nodes as well as the virtual
nodes.
Click Next to continue.
|
 |
| |
The following table lists the entries in the FwHosts.txt
and FwPeers.txt using sample scenarios:
| Description |
CommServe |
MediaAgent |
Agents |
| CommServe and MediaAgent on the friendly
side; Agents on the hostile side. |
Agents |
Agents |
CommServe and MediaAgent |
| CommServe on the friendly side; Agents and
MediaAgent on the hostile side |
MediaAgent and Agents |
CommServe |
CommServe |
|
| 6. |
If desired, modify the Keep Alive interval.
Click Next to continue.
|
 |
| 7. |
Optionally, select Advanced Firewall Configuration and specify a local
host name interface to use for outgoing tunnel connections through
the firewall. Otherwise, the interface and port is automatically selected for
you by the OS. Click Next to continue.
|
 |
| 8. |
If desired, modify the Tunnel Initialization interval.
Click Next to continue.
|
 |
| 9. |
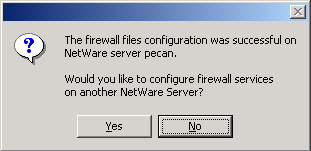
Click Yes if you want to configure another server
and repeat steps 3 to 8 to configure another server. or click
No to continue.
|
 |
| 10. |
Click Finish to save the changes or click Back
to modify the settings. |
 |
| 11. |
Click OK and then unload and load the software as
directed. |
 |
Post-Configuration
|
| |
If you are configuring the firewall communication
on a client for the first time, or if you are changing the range of ports,
ensure that the ports specified in step 3 are allowed connections through
the firewall. |


