Due to the unique nature of this library, the goal of this configuration is to eliminate the sharing of resources across LSMs. In order to do this, each LSM is configured as a logical library. The following procedure describes the steps involved in configuring a LSM as a virtual library. Repeat this procedure to configure all the LSMs in the library.
Before You Begin
Pre-configuration tasks in the ACSLS Server computer
Perform the following tasks in the ACSLS Server computer in which the library controller will be configured:
- Ensure that the hardware is configured according to the guidelines provided in Hardware Configuration Guidelines - STK Libraries Attached to ACSLS Server.
- Verify that the ACSLS server is online and the STK library is functioning.
NOTES
See the STK/ACSLS documentation for instructions on verifying the status of the ACSLS Server/STK library.
- In the ACSLS server, create a scratch pool for each LSM. Ensure
that all volumes moved into each scratch pool reside in their respective
LSMs.
NOTES
See the STK/ACSLS documentation for instructions on creating the scratch pool and moving the tapes to the scratch pool.
Pre-configuration tasks in the MediaAgent computer
- Ensure that the hardware is configured according to the guidelines provided in ACSLS Library Configuration.
- Install one of the following, depending on the MediaAgent�s Operating
System:
For a Windows MediaAgent, install an instance of StorageTek�s Library Attach for Windows on the computer in which the MediaAgent will be installed.
NOTES
See the STK/ACSLS documentation for instructions on installing the Library Attach for Windows.
- For a Solaris MediaAgent, install the ACSLS Client Service. This
service can be installed in one of the following ways:
- During the MediaAgent software installation on the Solaris computer. See Install the MediaAgent - Solaris for step-by-step instructions on installing the MediaAgent software on Solaris.
- If you have already installed the MediaAgent, you can run the config_acsls program on the Solaris MediaAgent computer. See Install ACSLS Client Service on Solaris for step-by-step instructions .
- As each LSM is configured as a library, verify that you have sufficient Library Control Module licenses available in the CommServe.
-
This feature requires a Feature License to be available in the CommServe® Server.
Review general license requirements included in License Administration. Also, View All Licenses provides step-by-step instructions on how to view the license information.
Required Capability: See Capabilities and Permitted Actions
To configure a StorageTek library using ACSLS server (Direct-attached library or SAN-DDS Configuration)
Do not perform an Exhaustive Detection now.
If the system detects the drives and displays them as a standalone library in the Library and Drive Configuration window, perform the steps described in Configuring Drives Displayed as Stand-Alone Drives.
From the Library Properties dialog box, you can change the following properties:
Alias: The user-defined name for the library. This name is displayed in the CommCell Console for the library. We recommend that you give each library a descriptive name as its Alias, for easier system administration.
Perform the following steps, if you are configuring the library with DDS
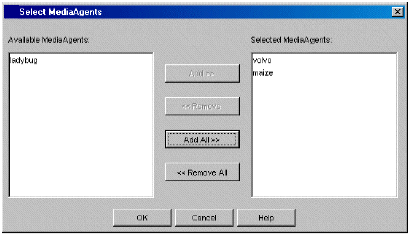
Select the following MediaAgents:
- The MediaAgent in which the library is already configured.
- Another MediaAgent in which you wish to configure the library using DDS.
Post-Configuration Considerations
Creating Storage Policies
Recommended Method
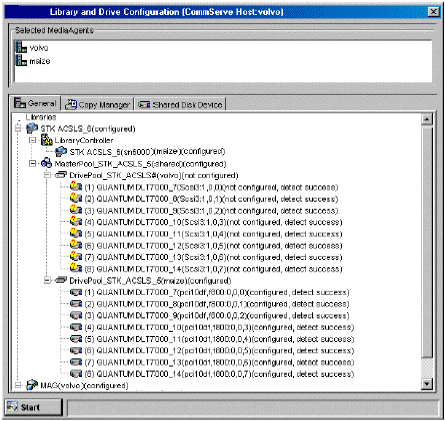
When a library is configured, the system automatically creates a storage policy. In the case of libraries with multiple LSMs, a storage policy will be created for each of the LSMs configured as a library.
- Use one of these storage policies and associate all the subclients using the library to this storage policy.
- Add the data paths for each LSM in the library as alternate data paths in this storage policy. A data path for each LSM implies all possible MediaAgents that have visibility to the drives in that LSM. (Review Alternate Data Paths (GridStor) for additional information. Also, Configure Multiple Data Paths for a Storage Policy Copy provides step-by-step instructions on how to configure alternate data paths.)
The advantages to this configuration method is that when there is failure in any one of the LSMs , data protection operations will automatically use the resources in the other LSM. Thus this configuration minimizes the impact of a robot failure in any one of the LSMs. In addition only one storage policy must be configured (and maintained) resulting in easier administration.
Note that data may get scattered across several tape cartridges within the library. However, the system can keep track of all the data and automatically restore data from the appropriate tape cartridge. In addition the MediaAgent software provides several methods to reconsolidate the data. This is discussed in the Best Practices section for Alternate Data Paths (GridStor).
Other Methods
- Configure all the storage policies associated with each of the LSMs
with alternate data paths in each of these storage policies. These alternate
data paths must point to all other MediaAgents that have visibility
to the drives in that LSM. Make sure to set the criteria for selecting
alternate data paths as
When resources are busy or offline. (Load balance (Spill
and fill) between Data Paths is applicable only in the case of load
balancing.) The advantage to this method is that data associated with
each storage policy will be limited to the LSM to which the storage
policy is associated. (Data is less scattered than in the previous method.)
However, keep in mind that you must configure and maintain multiple storage policies in this method.
- Configure all the storage policies associated with each of the LSMs with no alternate data paths. The disadvantage here is that when one LSM fails, all backups to that LSM would fail.
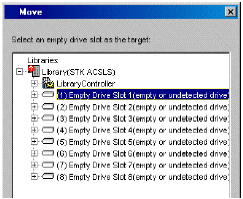
- If you have multiple mail slots in the library, you must specify the CAP ID associated with the mail slot that will be used for importing and exporting media. (See Specify the CAP ID for Importing and Exporting Media for step-by-step instructions.)
- If you have mixed drive types in a LSM, consider the guidelines provided for Libraries with Mixed Drive Types.
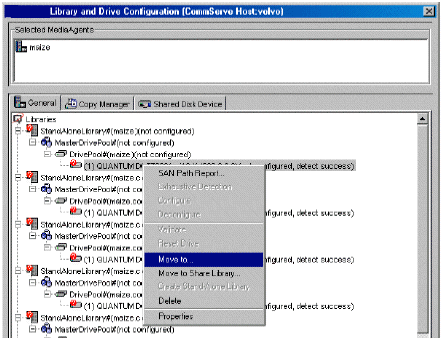
Configuring Drives Displayed as Stand-Alone Drives

MediaAgent: The name of the MediaAgent controlling the library.
Library Type: The IP library type. (ACSLS)Library Host Name: The host name of the ACSLS server. If you have SN6000 attached, the host name of SN6000.
Work Pool Number: The work pool number associated with the work pool created for the system in the ACSLS server.As we are configuring a library for each LSM, make sure to specify the appropriate work pool number associated with the LSM.
Volume Range: The ascending barcode range(s) of volumes available in the specified work pool. Use a dash to specify range and commas to delimit ranges. For example: 000065-000165,000167,000170-000199.
Vendor: The manufacturer of the library. (STK)
Model: The library model. (ACSLS)Description: An optional field into which you can enter a description for the library
Drive Count: The number of drives in the library.
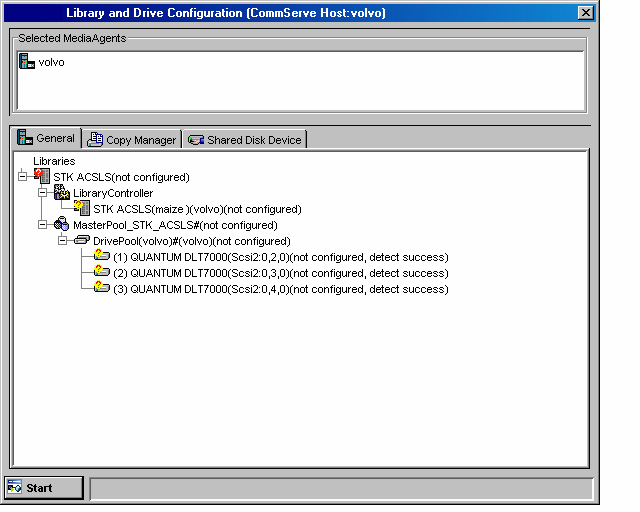
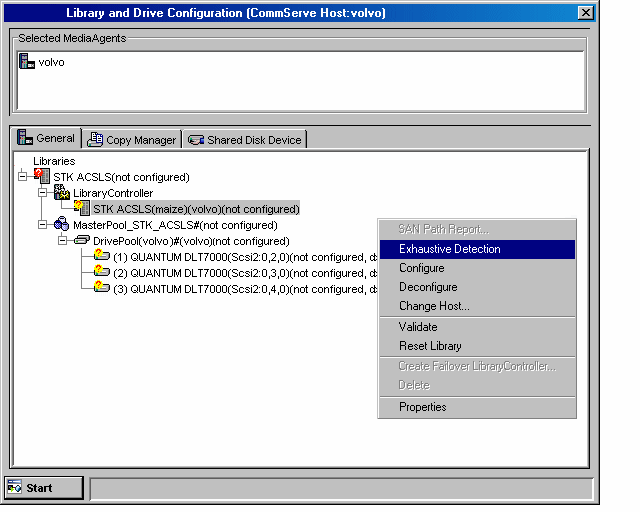
The system detects the library and displays the library information in the Library and Drive Configuration window.

Verify the drive serial number and obtain the corresponding drive ID, before selecting the drive ID in this dialog box.
To assist in this mapping operation, use the following ACSLS command on the ACSLS server to map the Serial Number to the ACSLS Drive ID:
To obtain the serial number of a specific drive:
display drive <ACSLS Drive ID> -f serial_num
To obtain the serial number of all drives:
display drive * -f serial_num

This will ensure that the drives are mapped to the appropriate serial number.
NOTES
As this process attempts to mount a media in each of the selected drives to determine the drive numbers to its correct serial number, depending on the number of drives selected, this operation may take several minutes to complete.
