

| Deployment | Configuration | Recovery | Troubleshooting | FAQs |
  |
The DVD4.iso will be available in the Linux Live CD directory of the Calypso Installer package. You can also download the DVD4.iso.
Log on to the Maintenance Advantage web site.
If you are restoring to a computer which has the same hard disk configuration as that of the backed up computer, perform a Similar System Restore using one of the following methods:
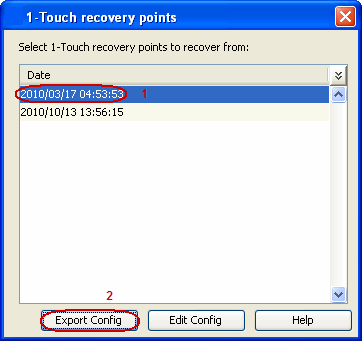
A recovery point is a point-in-time configuration of the client containing the network configuration, mountpoint details and information about the client itself. A new client configuration (recovery point) is generated on subsequent backups if the client's hardware has changed, or changes have been made to the network, storage or mountpoint configuration.
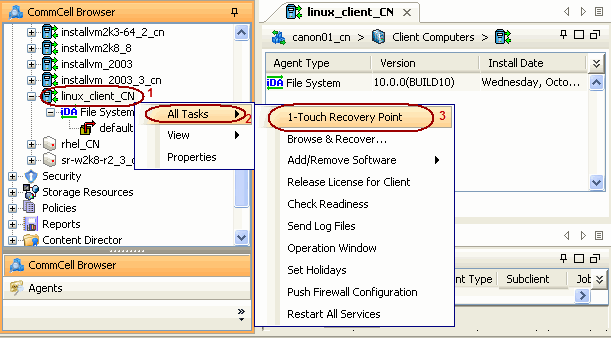
Use the client configuration stored on the CommServe to create a recovery response file needed to perform a non-interactive recovery.
| 13. | Press Enter. |
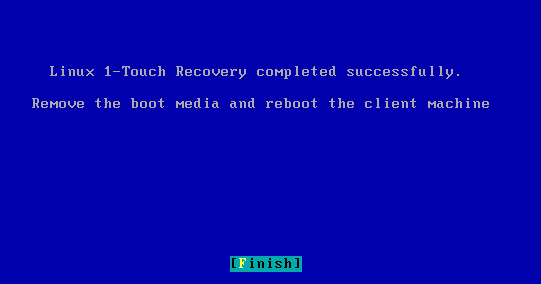 |
| 14. | Remove the 1-Touch Linux Live CD and reboot the system. |
Perform the interactive restore when you don't want to use the recovery response file.
| 1. | Keep the Client Information Checklist ready. | |||
| 2. | Boot the client using the ISO image. | |||
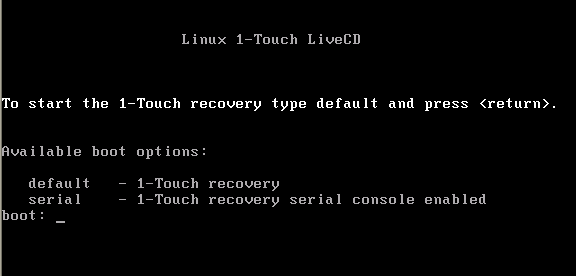
| 3. | Type Default and press Enter to start the default recovery. |
 |
||
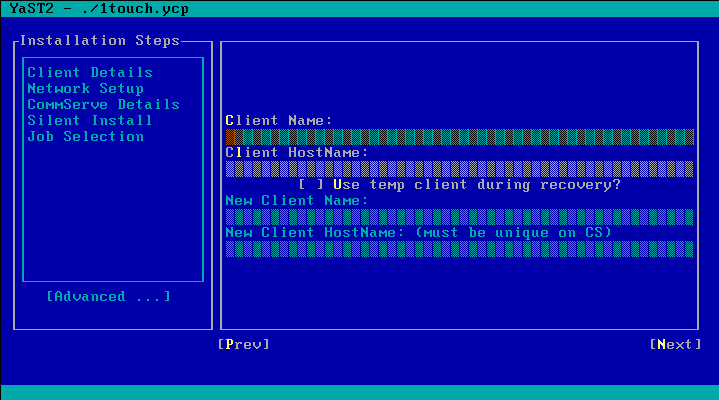
| 4. | Enter the short name or the fully qualified
client hostname specified in the client information checklist.
Select Next and press Enter. |
 |
||
| 5. |
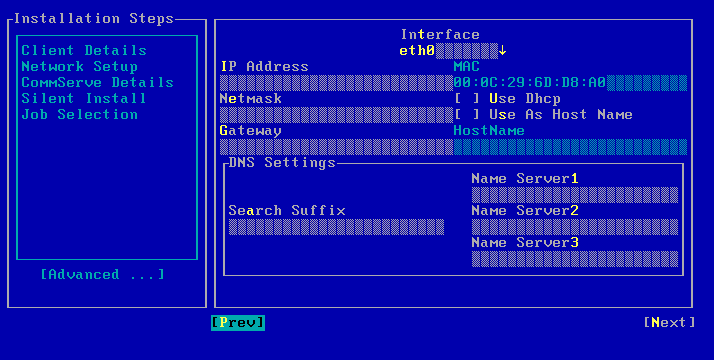
Enter the IP address, network and name server details of the network
specified in the client
information checklist. Select Next and press Enter. |
 |
||
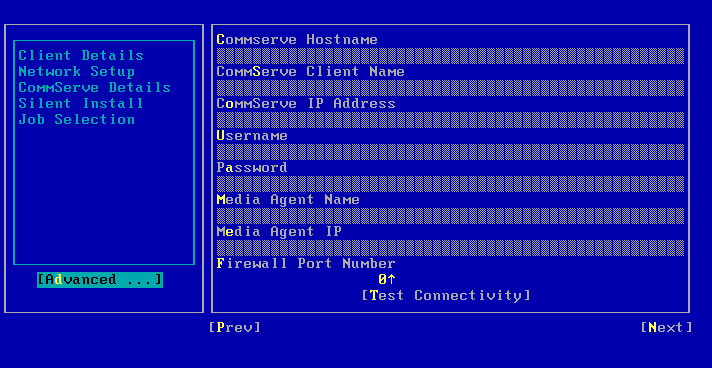
| 6. | Enter the details of the CommServe and
MediaAgent specified in the client
information checklist. Select Next and press Enter. |
 |
||
| 7. |
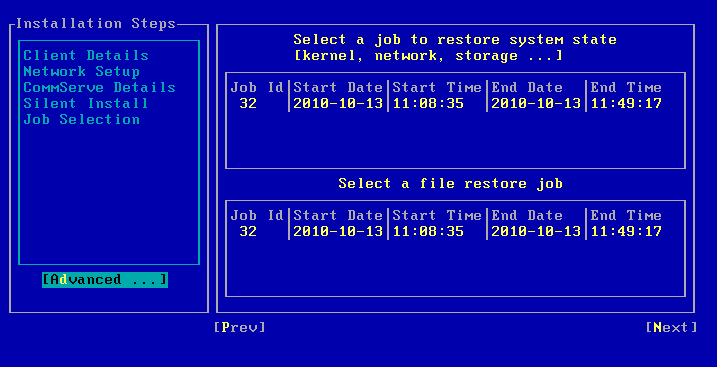
Select Next and press Enter. By default the system state and the file system data, backed up during the most recent backup will be restored. You can select a backup job to restore the system state data and a backup job to restore the file system data. |
 |
||
| 8. |
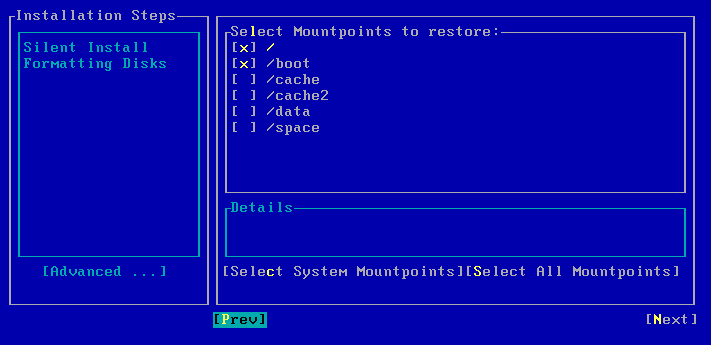
Select Next and press Enter. By default the system mountpoints will be selected for restore. You can select the mountpoints that you want to recover. |
 |
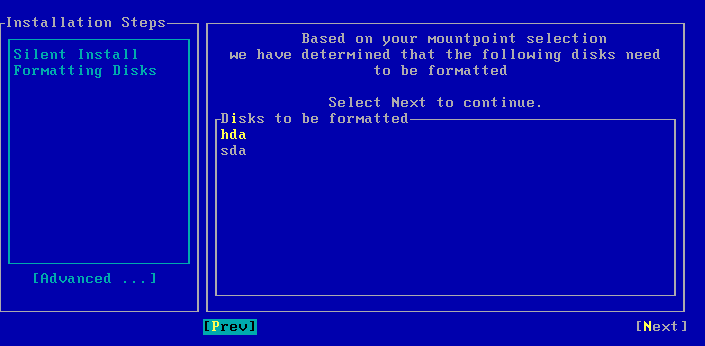
| 9. | Select Next and press Enter. |
 |
| 10. | Select Yes and press Enter. |
 |
| 11. |
Press Enter.
|
 |
| 12. | Remove the 1-Touch Linux Live CD and reboot the system. |
If you are restoring to a computer which has the different hard disk configuration than that of the backed up computer, perform a Dissimilar System Restore using one of the following methods:
A recovery point is a point-in-time configuration of the client containing the network configuration, mountpoint details and information about the client itself. A new client configuration (recovery point) is generated on subsequent backups if the client's hardware has changed, or changes have been made to the network, storage or mountpoint configuration.
Use the client configuration stored on the CommServe to create a recovery response file needed to perform a non-interactive recovery.
| 1. |
Connect a USB drive to a Linux computer and use the following command to
format the USB drive: mkfs.vfat -I /dev/<drive_name> For example: mkfs.vfat -I /dev/sdb
|
|||
| 2. |
|
 |
||
| 3. |
|
 |
||
| 4. |
|
 |
||
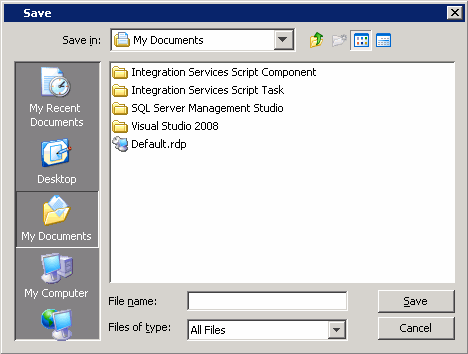
| 5. | Save the recovery response file as onetouchresponse.xml. |
 |
||
| 6. | Connect the formatted USB drive to the computer where recovery response file is stored. | |||
| 7. | Copy the recovery response file to the formatted drive. | |||
| 8. | Connect the USB drive to the client. | |||
| 9. | Boot the client using the ISO image. | |||
| 10. | Type Default and press Enter to start the default recovery. |
 |
||
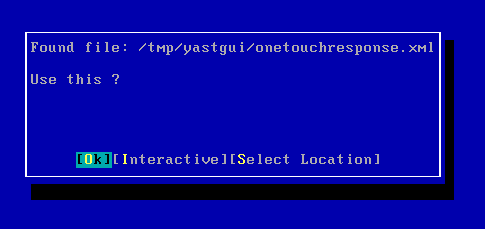
| 11. |
Select OK and press Enter to start the system state and
file system restore. The system state and the file system data backed up during the most recent backup will be restored. |
 |
| 13. |
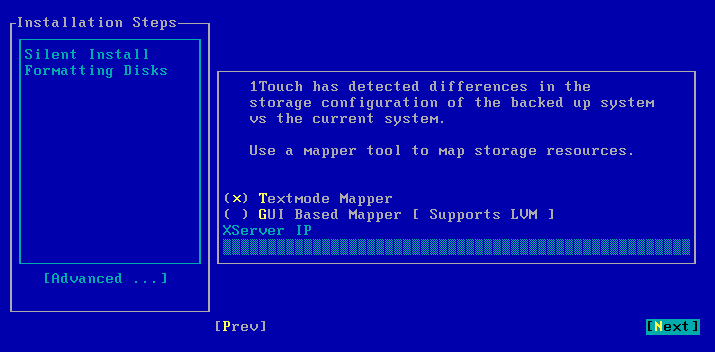
Select Next and press Enter. You can also use GUI Based Mapper to map disk. |
 |
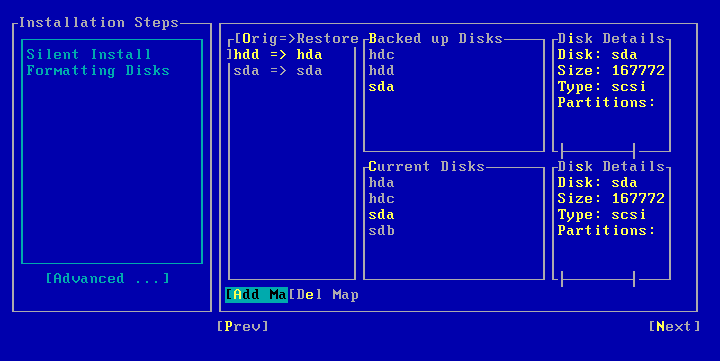
| 14. |
|
 |
| 15. | Select Next and press Enter. |
 |
| 16. | Select Yes and press Enter. |
 |
| 17. | Press Enter. |
 |
| 18. | Remove the 1-Touch Linux Live CD and reboot the system. |
Perform the interactive restore when you don't want to use the recovery response file.
| 1. | Keep the Client Information Checklist ready. | |||
| 2. | Boot the client using the ISO image. | |||
| 3. | Type Default and press Enter to start the default recovery. |
 |
||
| 4. | Enter the short name or the fully qualified
client hostname specified in the client information checklist.
Select Next and press Enter. |
 |
||
| 5. |
Enter the IP address, network and name server details of the network
specified in the client
information checklist. Select Next and press Enter. |
 |
||
| 6. | Enter the details of the CommServe and
MediaAgent specified in the client
information checklist. Select Next and press Enter. |
 |
||
| 7. |
Select Next and press Enter. By default the system state and the file system data, backed up during the most recent backup will be restored. You can select a backup job to restore the system state data and a backup job to restore the file system data. |
 |
||
| 8. |
Select Next and press Enter. By default the system mountpoints will be selected for restore. You can select the mountpoints that you want to recover. |
 |
| 9. |
Select Next and press Enter. You can also use GUI Based Mapper to map disks. |
 |
| 10. |
|
 |
| 11. | Select Next and press Enter. |
 |
| 12. | Select Yes and press Enter. |
 |
| 13. | Press Enter. |
 |
| 14. | Remove the 1-Touch Linux Live CD and reboot the system. |
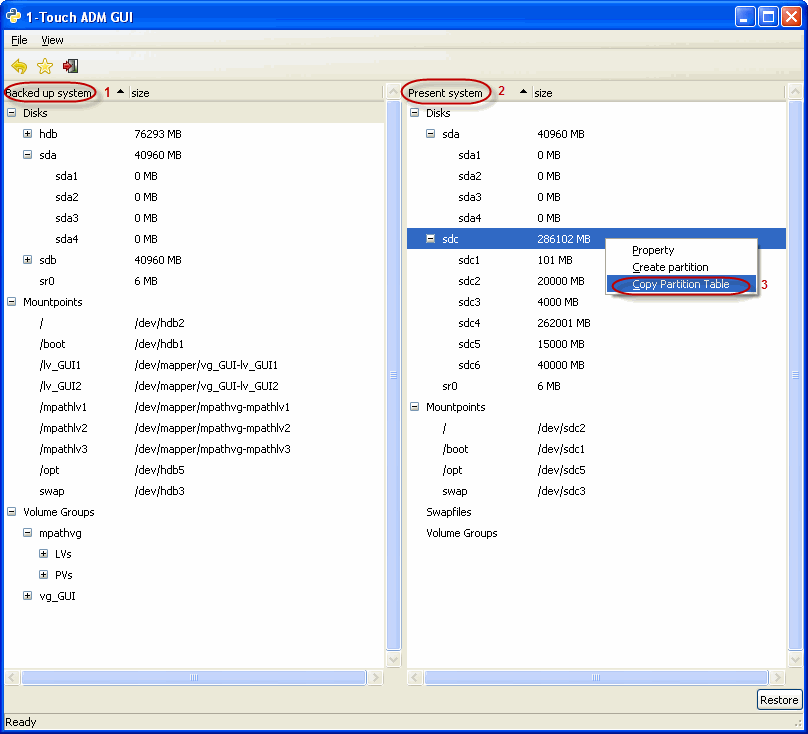
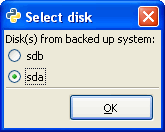
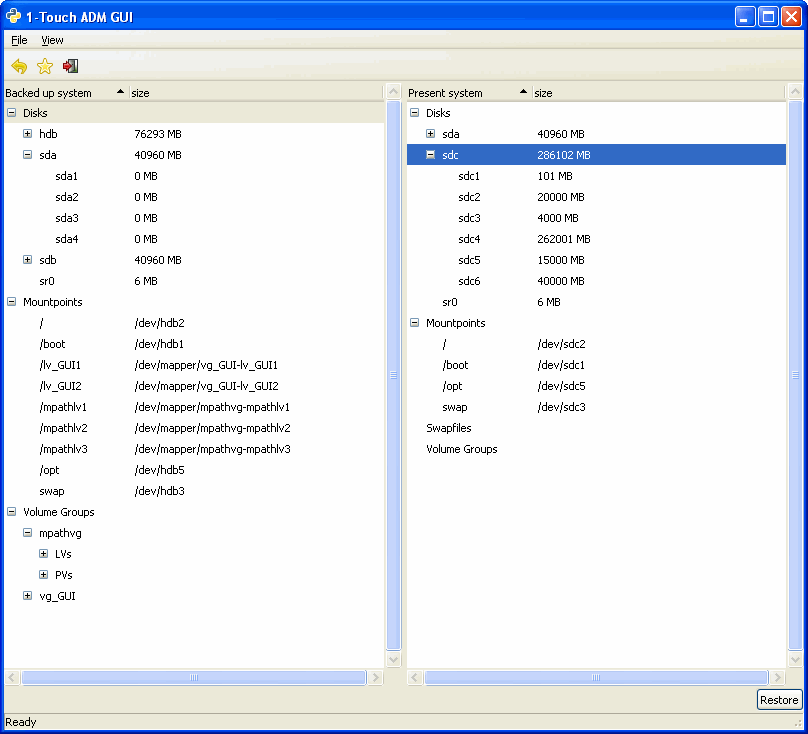
During the Interactive Dissimilar System Restore you can select GUI Based Mapper tool to map disks.
| 1. |
|
 |
| 2. |
|
|
| 3. |
|
 |
| 4. |
|
 |
| 5. |
|
 |
| 6. | On the client computer and press Enter. |
 |
| 7. | Remove the 1-Touch Linux Live CD and reboot the system. |
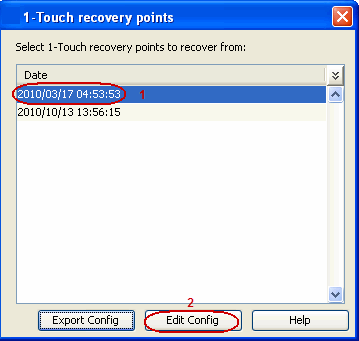
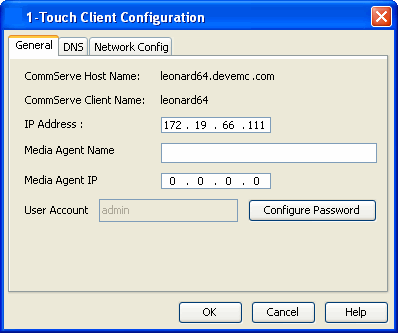
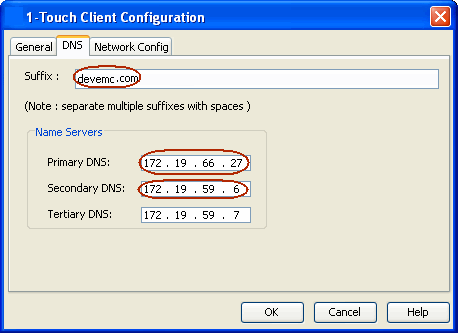
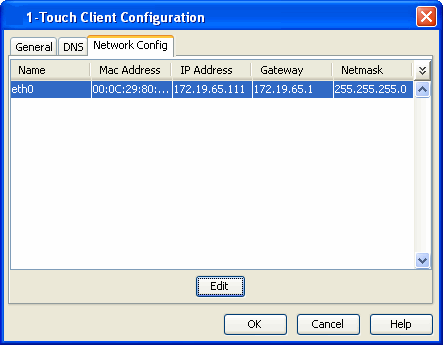
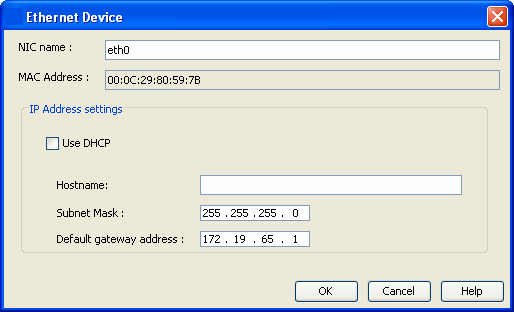
During a non-interactive restore, follow the steps given below to change the client configuration:
| 1. |
|
 |
| 2. |
|
 |
| 3. |
|
 |
| 4. |
|
 |
| 5. |
|
 |
| 6. |
|
 |
| 7. |
|
 |
| 8. | Click OK to save the updated client configuration. |
If you want to change the firewall configuration of the client before recovering it, follow the steps given below:
| 1. |
|
 |
| 2. |
|
 |
| 3. |
|
 |
| 4. | Save the recovery response file as onetouchresponse.xml. |
 |
| 5. |
|
During interactive restore, follow the steps given below to change the client configuration:
| 1. | Boot the client using the ISO image. | |||
| 2. | Type Default and press Enter to start the default recovery. |
 |
||
| 3. | Enter the short name or the fully qualified
client hostname. You cannot change the client name during the restore.
Select Next and press Enter. |
 |
||
| 4. |
Enter the IP address, network and name server details of the network
where client will be recovered. Select Next and press Enter. |
 |
||
| 5. | Enter the details of the CommServe and
MediaAgent that are used to backup the client. Select Next and press Enter. |
 |
||
| 6. | Continue the Similar or Dissimilar System Restore |
You can change the client name and the host name temporarily during the restore process. This will be useful if the source computer and the computer being recovered are different and you do not want to turn off the source client until the restore completes successfully. You can also use this option when the source machine and the machine being recovered are same, to prevent corruption of the source client if the recovery process fails for any reason.
During the restore, the Linux File System iDataAgent will be installed in the restore only mode with the new client name and host name. The CommServe and MediaAgent should be able to connect to the computer being recovered with the new host name. After the restore completes successfully, the temporary client will be deleted. The original client name and hostname and network settings, which were backed up will be restored. You must turn off the source client before rebooting the restored client. |
 |
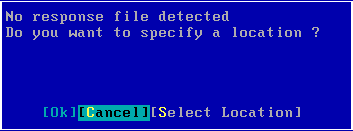
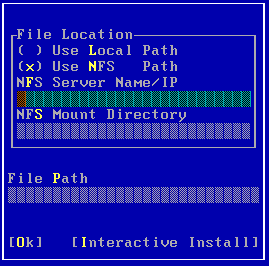
Instead of using the USB drive, use a NFS location to access the recovery response file during the similar or dissimilar system restore. Follow the steps give below to perform the non-interactive restore when the recovery response file is stored in a NFS location:
| 1. | Boot the client using the ISO image. | |
| 1. | Type Default and press Enter to start the default recovery. |
 |
| 2. | Select Select Location to specify the NFS location of the response file. |
 |
| 3. |
|
 |
| 4. |
The system state and the file system data backed up during the most recent backup is restored. |
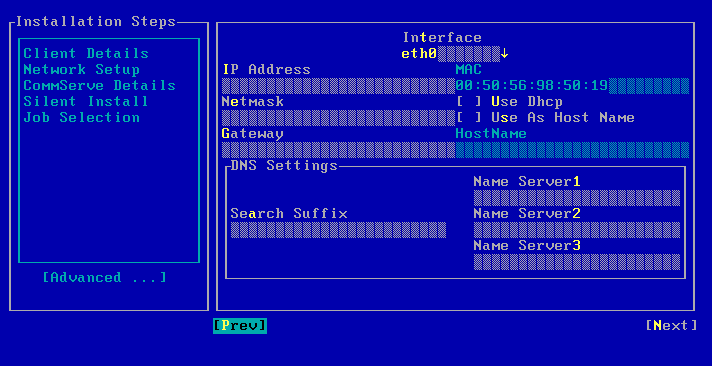 |
| 5. | Follow the steps described in the Similar System Restore or Dissimilar System Restore depending upon the hard disk configuration of the client. |
Use the ADM Interface to create new partitions
| 1. |
|
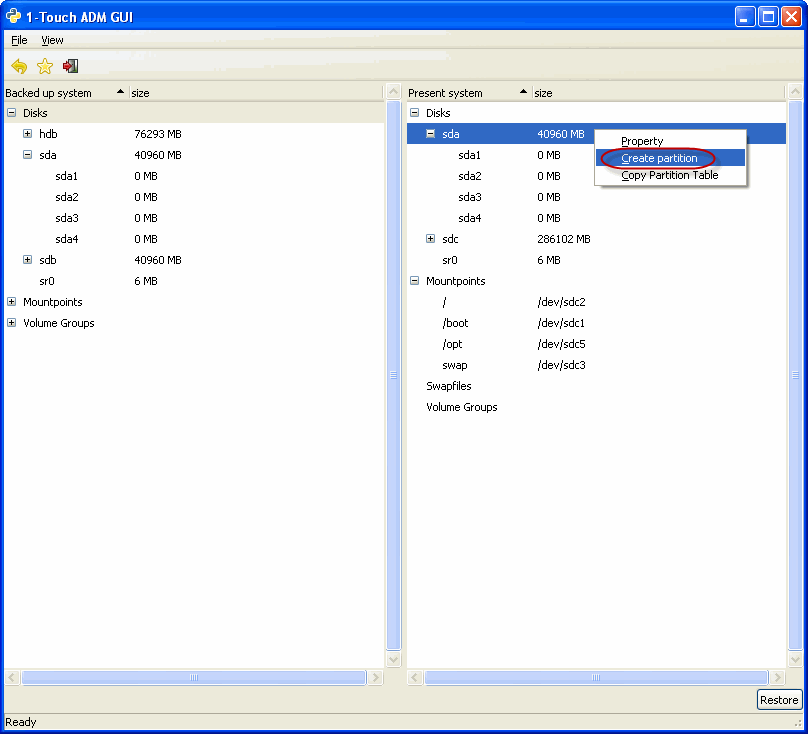 |
| 2. |
|
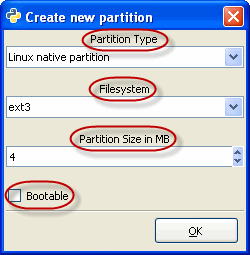 |
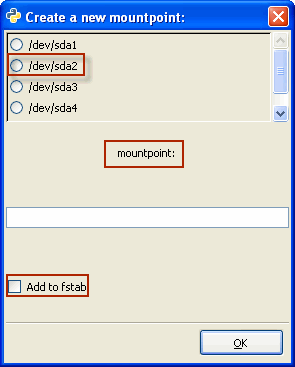
Use the ADM Interface to create new mountpoints
| 1. |
|
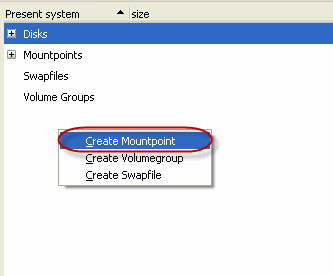 |
| 2. |
|
 |
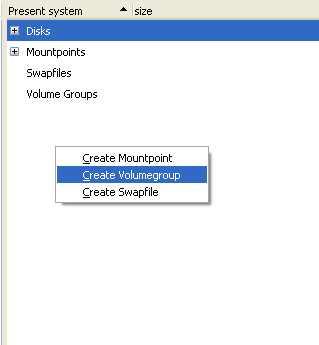
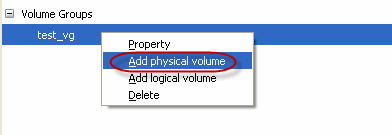
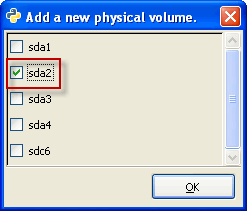
Use the ADM Interface to add a new volume.
| 1. |
|
 |
| 2. |
|
 |
| 3. |
|
 |
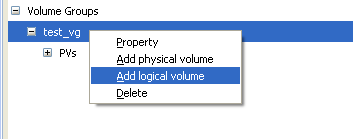
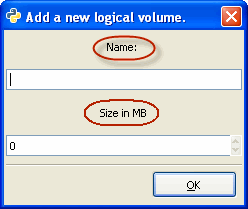
| Make sure that you have created at least one physical volume before adding a logical volume. |
| 1. |
|
 |
| 2. |
|
 |
| 1. |
|
 |
| 2. |
|
 |
  |