|
|
A silent install consists of two distinct phases. In the
recording phase, an install is recorded, saving your install options to
an .xml file. In the playback phase, the
.xml file is played back by the install
program, which installs the software with the recorded options without any
prompting. Through this method, the deployment of the software can be automated.
Record Requirements
To record an install, follow the steps described below.
When recording an install, note the following:
-
The install program only records your choices, it does
not execute the install.
-
No license is consumed when recording an install.
-
All Agents are selectable when recording an install.
-
Review the
System Requirements and the Installation procedures for each component
you are installing.
-
Close all applications and disable any programs that
run automatically, including antivirus, screen savers and system utilities.
Some of the programs, including antivirus software, may be running as
a service. Stop and disable such services before you begin. You can
re-enable them after recording the install.
-
If you intend to play back this recorded install on
multiple computers, choose options that are applicable to all those
computers. For example when specifying an installation folder, be sure
it exists on all target computers.
- If your network does not have DNS lookup or some other name resolution
facility, you may be asked to enter the IP address of the server computer.
Playback Requirements
Playing back a recorded installation installs the software with the options
saved in the .xml file you created during
the record procedures. Note the following when playing back a recorded install:
- A license is consumed on the server for each licensed component
you install.
- You will not be prompted for any information, but note that the
install program (QInstaller.exe) will
appear in the Windows Task Manager.
- Review the
System Requirements and the Installation procedures for each component
you are installing.
- If your network does not have DNS lookup or some other name resolution
facility, you may be asked to enter the IP address of the server computer.
- Log on to the client as local Administrator or as a member of the
Administrators group on that computer.
|
| 1. |
Place the software
installation disc for the Windows platform into the disc drive. After
a few seconds, the installation program is launched.
Click Exit to close the install program.
|
|
| 2. |
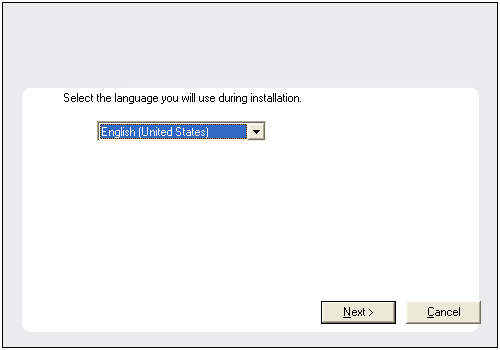
Choose the language you want to use during installation.
Click the down arrow and select the desired language from the drop-down list, and click Next to continue.
|
 |
| 3. |
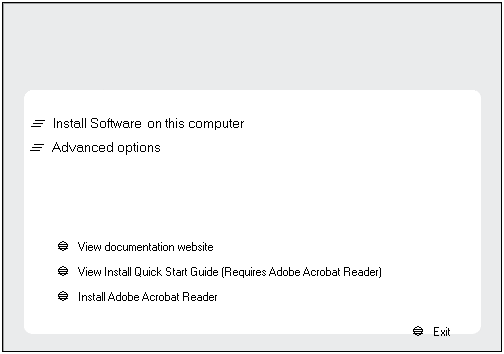
Select the Advanced options to install software.
NOTES
The options in the installation menu depends on the computer in which
the software is being installed, and may look different from the example
shown.
|
 |
| 4. |
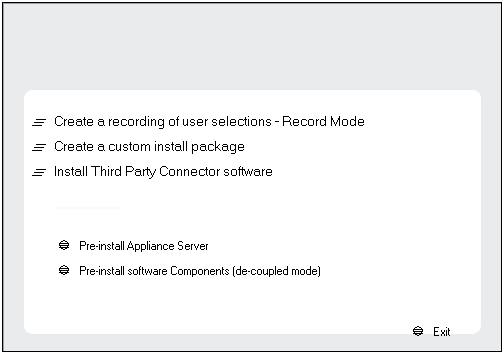
Select Create a recording of user selections - Record
Mode option to start the recording of the install. |
 |
| 5. |
The install options will be recorded to a file called
UserInput.xml which will be located in the
C:\Documents and Settings\Company\LogFiles\
folder. Click Browse to change directories.
Click Next to continue.
|
 |
| 6. |
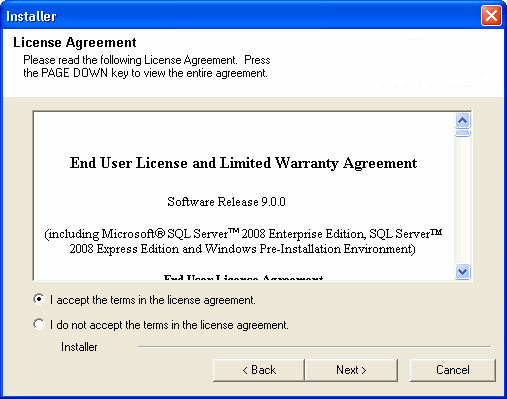
Read the license agreement, then select I accept the terms
in the license agreement. Click Next to continue.
|
 |
|
|
| 7. |
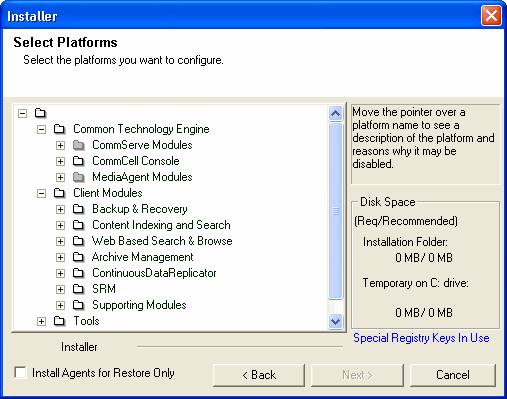
Select the component(s) to install. NOTES
- Your screen may look different from the example shown.
- Components that either have already been installed, or which cannot be installed, will be dimmed.
Hover over the component for additional details.
- If you wish to install the agent software for restore only, select
Install Agents for Restore Only checkbox. See
Installing Restore Only Agents for
more information.
- The Special Registry Keys In Use field will be highlighted when GalaxyInstallerFlags
registry key is enabled. Move the mouse pointer over this field to
see a list of registry keys that have been created in this computer.
Click Next to continue.
|
 |
| 8. |
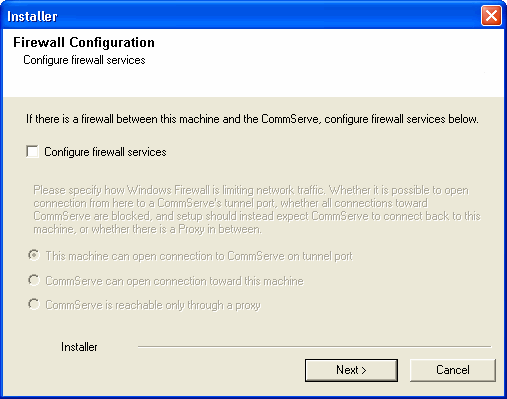
If this computer and the CommServe is separated by a firewall, select the Configure
firewall services option and then click Next.
For firewall options and configuration instructions, see
Firewall
Configuration and continue with the installation.
If firewall configuration is not required, click Next.
|
 |
| 9. |
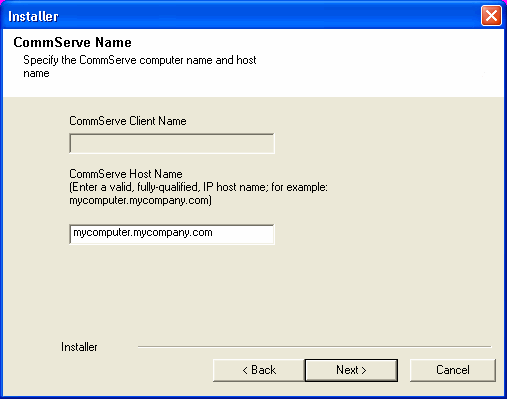
Enter the fully qualified domain name of the CommServe Host Name. This should be
TCP/IP network name. e.g., computer.company.com. NOTES
Click Next to continue.
|
 |
| 10. |
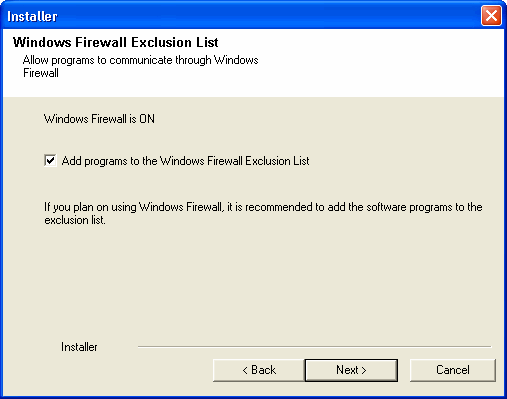
Select Add programs to the Windows Firewall Exclusion List, if
you wish to add CommCell programs and services to the Windows Firewall
Exclusion List.
NOTES:
Click Next to continue.
|
 |
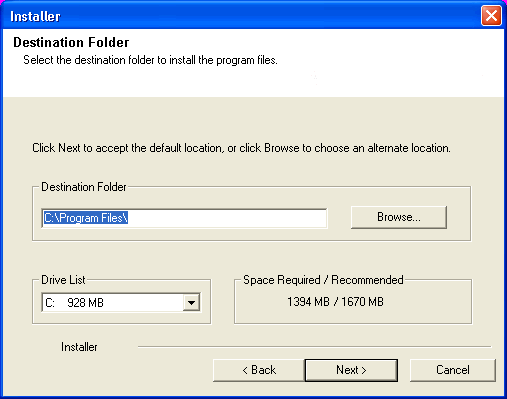
| 11. |
Specify the location where you want to install the software. NOTES
- Do not install the software to a mapped network drive.
- Do not use the following characters when specifying the destination path:
/ : * ? " < > | #
It is recommended that you use alphanumeric characters only.
- If you intend to install other components on this computer, the selected installation directory will be automatically used for that software as well.
- If a component is already installed in this computer, this screen may not be displayed.
The software will be automatically installed in the same location that was
previously specified.
Click Browse to change directories.
Click Next to continue.
|
 |
|
|
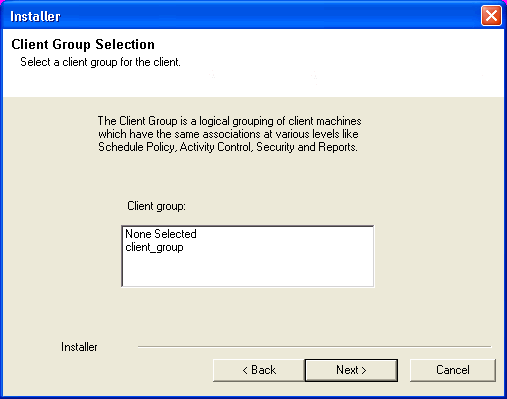
| 12. |
Select a Client Group from the list. Click Next to continue.
NOTES
- This screen will be displayed if Client Groups are configured in
the CommCell Console. For more information, see
Client
Computer Groups.
|
 |
|
|
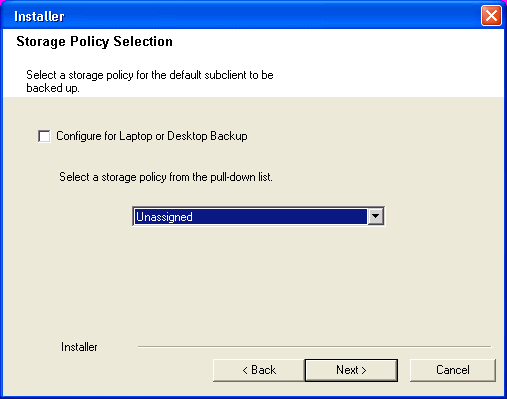
| 13. |
Select the storage policy through which you want to back up/archive the agent. NOTES
- A storage policy directs backup data to a media library.
- If desired, you can change your storage policy selection at any time
after you have installed the client software.
- This screen may appear more than once, if you have selected multiple
agents for installation. You will be prompted to configure the storage
policy association for each of the selected agents.
Click Next to continue.
|
 |
|
|
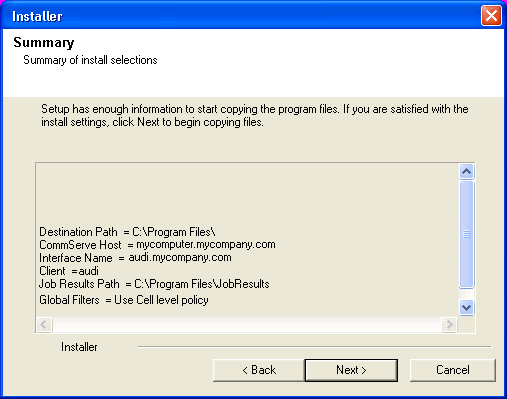
| 14. |
Verify the summary of selected options.
NOTES
- The Summary on your screen should
reflect the components you selected for install, and may look different from
the example shown.
Click Next to continue or
Back to change any of the options.
The install program now starts copying the software to the computer.
This step may take several minutes to complete.
|
 |
|
|
| 15. |
Click OK. This completes the recording.
|
 |
 |
The remote interface is identified automatically
during Qinstaller.exe playback. However,
you can edit the xml file created by the record operation to add your own
parameters and values for the remote interface.
See XML Input File for Windows
Silent Install for the example of the contents of a default xml input
file generated during the record mode of a Windows File System
iDataAgent and for the list of
parameters, the default values and description.
|
|
|
| 1. |
Log on to the client as local Administrator or as a member
of the Administrators group on that computer. |
|
| 2. |
Place the software
software installation disc
for the Windows platform into the disc drive. After a few seconds, the installation
program is launched.
Click Exit to close the install program.
|
|
| 3. |
Click the Windows Start button, point to
Programs, point to Accessories and then click Command
Prompt. |
|
| |
To start the installation, type the following command:
C:\WinX64>start /wait QInstaller.exe /play "path\filename.xml"
For example, if you type start
/wait /QInstaller.exe /play "C:\myfolder\install.xml",
the file install.xml located under the
C:\Documents and Settings\Company\LogFiles\
folder will be played back, installing the software with all the recorded
options to the local computer.
NOTES
Your screen may look different from the example shown.
|
 |
| 4. |
The installation proceeds silently, with no indication
on the screen. Any errors generated are written to the
GalaxyInstallerErrors.txt file. For more
information on the installation, see GalaxyInstallerLog.txt.
When the QInstaller.exe application is no
longer shown in the Windows Task Manager, the install is complete.
|
|
All Agents
Review the Post-Install Considerations specific to the components
that were installed using this procedure. (See
Installation Considerations for a list of
all Install procedures.)
|


